Overcast loop.
Hi all!
Coats, jackets, jackets, vests, blazers and other outerwear are the usual “habitat” of sewing buttonholes.
The loops carry not only a functional load - they are part of the fastener, but also a decorative one. Therefore, stitching loops must be made on the product so that when finished, they are flat, the sides of the loop are even, and the corners are straight.
Overcast buttonholes are extremely small pieces of clothing, and they need to be done very carefully. Therefore, it is better to work with stitched loops with a fresh mind and in a calm state. When performing such delicate work, it would be a good idea to first practice on a separate piece of fabric.
(The article will show the classic shapes of the facing loops. Nowadays, the shape of the facing loop can be anything - according to the model, as desired. And the facing loop can be located on the product horizontally, vertically and at different angles of inclination to these lines).
There are several more requirements put forward for correctly processed overstitched loops.
- The stitching loop cannot be smaller than 2.5 cm.
- And cannot be wider than 6 mm. (Exception! Only on silk blouses can stitch stitches be less than 2.5 cm long and 3 mm wide).
- The facing loop for a flat button should be 0.2 cm larger than the diameter of the button, and 0.5 cm for a spherical button.
Like overlock buttonholes, overcast buttonholes are located on the right side on women's clothing, and on the left side on men's clothing.
In today's article we will look at making a stitching loop, which will be located on the product along a horizontal line. This line for the location of the facing loop should pass strictly at an angle of 90⁰ to the line of the middle of the shelf.
All loops should be the same size, located at equal distances from each other and protrude beyond the line of the middle of the shelf (half-skid line) by 4 - 5 mm. All facing loops of one product must be made in the same way (see methods later in the article).
The first (upper loop) is located below the ledge line at a distance of 2.5 - 3 cm.
The last (bottom) loop is performed at pocket level.
Unlike overstitched stitches, overstitched loops are made before sewing hems on the left and right sides of the hem. Any - one-piece and individual parts. Without a completed selection, it is much easier to make a facing loop, since access to the desired place on the product is not yet limited by anything.
Stitched loops can be processed in several ways. You, dear sewing lovers, will get to know all of them in today’s publication.
Stitched loop in edging with one facing.
Note. “...A facing loop with one facing,...with two,” meaning that there are not one or two facings (sides of the frame) on the finished loop, there are always two of them. And the fact that to make these two parts (loop frame, two facings) one or two facings are used - one or two parts - blanks.
The facing can be made from the main fabric or from additional (decorative) fabric (according to the model, if desired).
The facing for making facing loops (method 1) is a rectangle.
- Facing length L = (loop length + (button diameter + 0.3 - 0.5 cm) + 3 - 4 cm (1.5 - 2 on each side))
- Width K = 5 - 6 cm.
- The warp thread should run along the facing.
In the vast majority of cases, to stiffen the lines in the area of the shoulder, chest, chin, etc. clothing models belonging to the outerwear group are reinforced with special pads. So by the time it’s time to make stitches, the edge of the bead will already be reinforced.
However, in cases, for example, on light summer jackets, where, as a rule, the front of the product is not reinforced (only the hem), you can stiffen the future location of the loop using a small piece of a suitable adhesive pad. And so that it is as less noticeable as possible on the finished product and does not appear on the face, it should be cut along the contour with teeth. Initially, the dimensions of the adhesive pad are the same as the facings (see above in the article).
According to the rules set out above in the article, we mark the location of the stitching loop. For this method of making overcast stitches, markings are not made from the face
and from the inside out.
The location of the loop is indicated by three lines. The horizontal line is the direction of the loop, and the two vertical lines limit the length of the loop.
The lines must be copied onto the front side. This can be done more conveniently and quickly using a manual or machine marking line.
With the front side, exactly in the middle of the marked place, the facing is applied to the front side of the product.
To prevent it from “fidgeting” back and forth, it is better to baste the facing to the product.
The facing is already in place, and now it is better to remove the auxiliary stitch threads. (If not removed, they are then extremely difficult to “get out” from under the small stitches of the machine stitch).
To make it more convenient to machine stitch around the perimeter of the loop, it should be clearly marked. We already have the line for the middle of the loop, the short transverse sides too, all that remains is to draw its long longitudinal sides. They are laid up and down from the line of the middle of the loop at a distance of ½ its width.
The fabric of the product in this area is reinforced with spacers, so markings can be done well with special marking tools and the most ordinary pens and pencils. If you are not too zealous, the lines will not be reprinted on the front side.
There are two ways to grind a loop.
First option.
We lay a stitch along the entire outlined contour of the loop. Closer to the corners, in the corners and along the short transverse sides of the loop, the stitches are set to very small 0.5 mm. In other areas, you can sew with a line with stitches 1.5 mm long.
To make it easier to form folds from the facing later, through the entire facing, and only along it!, at a distance of ½ the width of the loop, from both long longitudinal sides of the loop, we lay auxiliary hand stitches with straight stitches.
We cut the material inside the loop. This is done in exactly the same way as on welt pockets. The loop is cut in the middle, and, not reaching the short sides of the loop at a distance of 0.5 - 0.7 cm, to the sides towards the tops of the corners.
We cut both the facing and the main product.
Threading the edges of the facing into the resulting hole, we turn it over to the wrong side of the product.
To ensure that the finished stitching loop is located below the level of the surface of the main product (does not stick out), we iron the seams along the long longitudinal sides of the frame towards the product.
At the same time, we also iron the folds on the facings, which run along the line of the long longitudinal sides of the frame and which inevitably form when ironing the seams.
We baste the straightened facing on both short transverse sides of the facing hole. The width and length of the stitches should not exceed the width of the frame.
We already have the inner folds of the counter fold that we need to form. Now we bend the facing along the auxiliary lines previously applied to it (hand stitches) and form the outer folds of the fold.
At this stage it becomes clear (clearly visible) why this method of making a stitching loop is called that way. Because this is the real edging seam - an edging seam.
If the width of the facing, from the edge of the loop to the auxiliary lines applied to it, is not enough, the lines on the facing can be shifted slightly (increase the width) so that the facing hole can be completely covered with material. This rule is also valid for other methods of sewing stitches.
We sweep away all the folds of material made on the facing.
The line along which the outer folds of the counter fold (loop frame) converge should run from the front side exactly along the line of the middle of the frame.
Iron everything (from the inside out).
The loop itself is basically ready, but the work around it is not finished yet. So that on the finished product the edges of the facing, when folded over time, do not create unsightly thickenings along the edge of the bead, they should be sewn to the spacers on the shelf.
The corners of the facing are cut off and, using a needle to pry up 2-3 threads of fiber on the product, the facing is basted by hand using oblique stitches around the perimeter.
The facing can be shaped into an oval, carved with teeth, etc.
In order to hold the loop parts in the folds we need, they should be sewn together. To do this, a line is laid along the contour of the loop. Either hand stitching “back needle” (small stitches) or machine stitching.
All ends of the stitch threads are brought out to the wrong side, tied there,
and hide in layers of material.
The backstitch is done!
But she has yet to connect with the selection. How to process a stitched stitch on a pick-up, see below in the article.
Second option.
So, for the second option of making a stitched loop in an edging with one facing, we must have exactly the same facing as in the first case. The place for the loop is marked in the same way. ... In general, everything is done in exactly the same way (see above in the article), but only before the delay is performed along the loop contour.
In the second option, the stitching is also done from the inside of the product, but the stitches are laid only along the long longitudinal sides of the frame and exactly between the “loop length” marks. At the ends of the lines, tacks must be made.
Only along the facing, at a distance of ½ the width of the loop from both long longitudinal sides of the loop, we perform two temporary auxiliary hand stitches using straight stitches.
Along the longitudinal line of the middle of the facing, this is also the line of the middle of the loop, we cut the facing in half. Just the facing!
Exactly the same as in the first option, cut the loop in the middle and towards the corners.
This part of the work must be done very carefully. The seam allowances should not be touched.
We wrap the flap sides of the facing on the wrong side into the resulting hole.
The allowances of the completed seams (along the long longitudinal sides of the facing) are ironed onto the product.
Having folded both flying free sides of the facing along the auxiliary lines, we lay them with an opposite fold and sweep them away. But we sew the folds only inside the loop outline.
The facing on the short transverse sides of the loop must remain free so that the corners of the loop can be stitched onto the facing.
After this, the facing can be ironed on the wrong side, finally fixing the folds of the facing material.
The short transverse sides of the loop are already secured. All that remains is to sew on the long longitudinal sides. This can be done by hand stitching or machine stitching (see above in the article). The ends of the stitch threads are hidden in the material.
The loop is ready.
How to sew the edges of the facing, see above in the article.
See below in the article for how the stitching loop is connected to the stitching.
Overstitched loop with two facings.
For this method, we will need a facing that is exactly the same size as in the two previous cases, but divided in half lengthwise.
With this method, the loop marking is done from the face of the product.
Two (half) facings are laid with long longitudinal sections of both parts butt to each other, and the front side to the front side of the product. We attach the facings to the product.
On both sides of the middle line of the loop, at a distance of ½ the width of the loop, we lay machine stitching lines with bartacks at the ends.
Further processing of the facing loop occurs according to the same scheme as the “Edging loop with one facing. The second method" (see the previous section above in the article).
Stitched loop in frame with one facing.
To make a facing loop in a frame with one facing, we will need exactly the same facing (dimensions are shown) as for the method “Operating loop in a frame with one facing. The first method" (see above in the article).
Along the facing, exactly in the middle, we lay an auxiliary stitch (manual or machine).
And then at distances from it equal to ½ the width of the loop, one more line.
Having folded the longitudinal sides of the facing along these outermost drawn lines, we iron them inward, back to back.
For this option for making overstitched loops, we mark the frame for the loop on the front side of the product.
And this time we designate not only the middle of the frame and the sides, but also auxiliary lines showing the double-wide hole for the hinge.
We need to stitch the facing with folds onto the product exactly into the drawn frame.
Therefore, we combine one of the folds on the facing with the longest longitudinal marked line.
We fix the facing in this place with a hand stitch.
And then we apply machine stitching to the product. The seam width is ½ the width of the loop (if the fabric is thick, then another plus 0.5 mm).
The stitch is laid exactly between the “loop length” marks and is done with bartacks at the ends.
We secure the stitched edge of the facing with a pin so that it does not interfere with further work.
And just like the first side, we baste and adjust the second.
A correctly stitched facing should stand evenly and straight with its ironed “bottom” in the loop contour applied to the product.
Along the contour of the loop we cut both the facing and the main product.
We secure both short sides of the loop by sewing triangles onto the facing from the reverse side.
The long longitudinal sides of the loop are basted and the folds are sewn together. The entire area is ironed from the inside out.
From the inside you can see that the loop frame is already securely secured with stitches.
So the facing loop into the frame with one facing can be considered already completed.
See below in the article for how the stitching loop is connected to the stitching.
Stitched loop in frame with two facings.
For this method of making a stitch, you will need two identical stitches. (For the dimensions of one, see the section “Embedded loop in edging with one facing. First method”).
We fold the facings in half, with the wrong side inward.
The location for the loop is marked on the front side of the product. A loop twice as wide is marked.
Using folds, each of the facings must be stitched end-to-end to the lines along the long longitudinal sides of the loop. The seam width is ½ the width of the loop (if the fabric is thick, then another plus 0.5 mm).
Further processing of the loop is carried out according to the scheme outlined in the section “Stitching a loop into a frame with one facing” (see above in the article).
Processing the overcast loop on the pick-up.
After selecting the product,
The question arises, what to do with the stitching loop.
After basting the edge of the hem, the section of the main product with the stitching stitch made on it is basted with the hem using hand stitching.
After this, with the help of pins, the dimensions of the loop, along with the line of its middle, are transferred to the hem.
Having freed this area of the product from manual auxiliary stitches, we use marking tools to draw the outline of the facing hole on the hem (the dimensions of the buttonhole from the face).
We cut the edging in the same way as the loop was cut before.
We sweep the edges of the hole and iron them inside out.
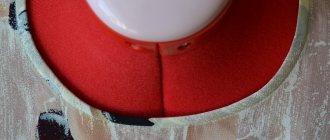
This is the most difficult part of the entire process of making a stitch. To end up with a neat hole in the hem, you can trim it with a facing made of thin lining fabric.
The hole can be of this shape (according to the model, if desired).
Using small blind stitches, sew the edges of the opening on the hem to the loop facing.
This is how a finished overstitch looks and works paired with a button.
Which method of sewing a stitch to choose depends on personal preferences, the tools and materials available, as well as the thickness of the material from which the product is sewn.
Good luck to all! Sincerely, Milla Sidelnikova!
Slit loops.
And again we are in touch with you, dear sewing lovers, blog milla-sidelnikova.com. Hello!
The clasp is the most important element of any model. I personally treat the clasp with special trepidation. And when the time comes to make welt loops, I always tense up internally. Will it work this time? And, despite the fact that during my life I have made a countless number of such loops, and every time I still doubt whether they will turn out neat, whether they will not be crooked, as in that proverb “One eye on the Caucasus, and the other on Arzamas”...
Today's post will be about how to make a slotted buttonhole on a machine.
It’s good in sewing factories, I inserted it into the machine and “zhik zhik zhik – take away what’s ready”...
Manufacturers of modern sewing machines have made an amazing gift to sewing lovers by giving us the ability to make cut-out buttonholes on their sewing machines.
It is very good when your household sewing machine has among the working stitches the function of making loops in automatic or semi-automatic mode. This will give your product a completely professional finish.
Types of slotted loops.
You can make different loops on different machines, from different manufacturers. For example, these are: 1) a loop made with a cross (a loop for beautiful elastic fabrics (decorative loop)); 2) a rounded loop with a longitudinal fastening (a loop for shirts, blouses and any other clothing; 3) an ornamental loop (a decorative loop for shirts, blouses and any other clothing).
The more types of buttonholes your sewing machine can make, the more creative options you have.
The most common ones performed by modern sewing machines are: 1) a linen buttonhole for blouses, shirts, bed linen, and 2) a buttonhole with an eye for jackets, outerwear or trousers.
There will be no problems with making these types of loops if you have instructions for the machine.
But even if your sewing machine is not replete with such functions, having only a zigzag stitch at your disposal, you can also make a slotted loop.
How to make buttonholes on a household machine manually?
To find a place where the slotted loop will “settle”, you need to follow a number of very simple rules.
- On women's models, the loops should be on the right shelf (if the clasp is on the front).
- Vertical slotted loops are placed strictly along the grain thread. Horizontal along the weft thread (perpendicular to the line of the middle of the front). 1/3 of the loop length extends beyond the line of the middle front to the edge of the fastener, 2/3 beyond the line of the middle front to the side seam.
- The first (top) loop is placed at a distance equal to the diameter of the button from the neck line.
- You definitely need to calculate it so that there is a loop + button on the chest line.
- The distance between the loops depends on the size and number of buttons (according to the model).
- We decide what the loops will be:
- Loop length.
- Loop width.
- Loop stitch density.
All these values depend on the size and shape of the buttons, as well as the texture of the fabric we are working with. The length, width of the loops and stitch density are determined experimentally.
Well, we’ve taken everything into account, marked it out, decided on the permanent residence of the loop, now we proceed directly to making a slotted loop for the button.
Along the line between the two marks (loop length), there will be a cut (entry for the button). Leaving a strip 1 - 1.5 mm wide along the cut line, we place the needle in the corner between the line of the middle of the loop (shelf) and the intended segment (on the right side).
We sew a line with a zigzag seam. We lay the line close to the next transverse mark and stop in the far right corner.
We turn 180 degrees.
We increase the width of the zigzag stitch without changing the density of the stitches, and make the first loop tack. The width of the tack is equal to the width of the 2 sides of the loop + 1-1.5 mm allocated for the cut.
When finishing the fastening, leave the needle in the lower left corner (remember, we turned 180⁰). We stop and again change the width of the zigzag seam to the previous one, without changing its density. Sew the left side of the loop and leave the needle in the material at the far left point.
We turn 180 degrees.
Again we change the width of the zigzag seam, without changing its density, and make the loop tack similar to the previous one. We stop at the far bottom right corner.
You can fasten the loop stitches by bringing the ends of the stitch threads to the wrong side, and then knit them and cut off the excess, or by zeroing out all the dimensions, “dance” in place with a needle.
Voila! The loop is ready!
All that remains is to open the “door” for the button and cut the loop. Of course, if you have a special knife - a ripper for such cases, then there is nothing to talk about. And if not, then cut the loop with small sharp scissors, a blade, a scalpel (yes, you can use a scalpel for such a thing), placing something hard under the material - cardboard, a ruler, a board, etc., so as not to damage the table. And in order not to damage the loop fastenings, pins are stuck in front of them.
And in conclusion, a few words about which side is better or more correct to start making a loop from the right or left (for vertical loops).
It is better to start from top to bottom (along the part on which the fastener is made), no matter to the left or right of the future entrance (cut) to the loop. Because this way, you start going along the edge of the fastener down and the entire product, sleeves, back, left front, collar, etc. is located to the left of the machine, and you can control the situation. Nothing bothers you. The zigzag seam, that is, the side of the loop, should be smoother.
And having turned 180 degrees, you will already have a landmark, a path along which you should go back up. And the entire product, which is now located to the right of the machine, will no longer interfere with the stitching (making loops).
Buttons are sewn along the middle line of the front, “with an eye” on the completed loops.
It would seem that there is nothing difficult about making a slotted loop. Moreover, an entire article is dedicated to its production. But depending on how we approach their implementation, slotted loops can either decorate the product or hopelessly disfigure it. I think such a publication will not be superfluous to replenish the knowledge base of sewing lovers.
All the best to everyone! Sincerely, Milla Sidelnikova!
