Simple patterns
To create a picture with flowers from satin ribbons you need:
- canvas for arranging the composition;
- several needles;
- lilac thread;
- satin ribbon in green, yellow, purple and lilac;
- comfortable hoop;
- graphite.
The design of the selected flower must be transferred to the canvas blank. The first time it is better to use a simpler drawing. For example:
For craftsmen who have little experience behind them, the image shows the stitches that are used in embroidering a picture with patterns of flowers using threads of satin ribbons. When the drawing is transferred to the canvas, it must be secured in a hoop.
The feelings when embroidering with ribbons should resemble the feelings that prevail when writing text, that is, lightness and ease.
The tape must be secured. The three petals located at the top are embroidered with a straight stitch. It is necessary to pull the needle with the main material to the front side. The length of the petal is controlled by the pattern and during the contact process the needle comes out to the wrong side.
After completing the embroidery of the upper petals, the embroidery of the petals on the sides and bottom continues. Their implementation is similar to the upper petals.
When the flower petals are ready, it is necessary to embroider the core of the plant. This means that it is necessary to use a loop stitch. A seam is made with a needle pointed to the side; you should remain on the wrong side and sew the seam again. The loop is tightened and the needle returns to the wrong side. The petals located at the bottom are decorated with floss thread.
Article on the topic: Bamboo - what kind of fabric, properties and composition
Stem embroidery is done by twisting the stitches. The needle must be on the front area, turning, forming a ribbon. You must remember to secure the seam with a knot.
The leaves are sewn using a ribbon stitch. The tape is straightened and pierced with a needle. After which the tension level of the satin ribbons is adjusted. Actions continue until the composition is completed.
Features of embroidery with ribbons
The peculiarity of embroidery with ribbons is that the result is significantly different from embroidery with satin stitch or cross stitch threads. The picture turns out voluminous and bright. It is impossible to create two identical images. In any case, the work will differ from the example from which the needlewoman embroidered. Often the type of finished work even depends on the mood of the embroiderer. The second feature and advantage is the ease of the process. Even a child can master satin embroidery. And you can create a complex image already in the first stages of training.
During embroidery
Embroidery with satin ribbons
It is cheaper to embroider pictures with satin ribbons than with silk ones. Satin is a budget material, but has a number of features that make it inferior to silk. These are thicker ribbons that may be difficult to pass through fabric, but can be used to create denser patterns. It is recommended to take material specifically for embroidery. Regular ribbons are wide for creating pictures.
You might be interested in this All about Turkish tulle with embroidery on mesh
The advantage of the atlas is its affordable price. Therefore, novice needlewomen are recommended to choose an atlas for their first projects.
Satin ribbons
Embroidery with silk ribbons
Silk embroidery is popular, despite the high price of natural material. Ribbons made of this material are softer, they do not visually touch the fabric, and the picture looks airy. They are also convenient to work with due to their structure. The shine of silk ribbons beats satin; it is more natural and lighter. There are no problems with choosing a color. Another advantage of silk is that it passes through the fabric quite easily. The natural material contains no substances hazardous to health.
Silk ribbons
Embroidering roses
Necessary materials:
- high density fabric base;
- floss threads;
- white beads;
- needles with wide and narrow ears;
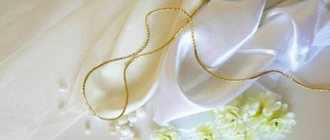
- satin ribbons of pink (5 cm wide and 4 m long) and green (2.5 cm wide and 5 m long).
The first step is to make roses of different sizes. To do this, use a pink ribbon, the edge of which is folded and fixed with a needle. The unoccupied edge of the ribbon is bent back, then the ribbon is twisted into a roll, this will be the core of the rose.
When creating the rose itself with your own hands, you need to bend the ribbon to the base each time the flower is twisted, you need to fix it with threads and carefully sew it on, as shown in the photo.
A dark green tape is inserted. The twisted tape is secured from the inside with hidden stitches.
The same tape will be used to create leaves. Leaves are cut out from ribbons and singed with a lighter, attached to the embroidery using hot silicone glue.
Rose is ready!
For an unusual feeling of shimmer and heterogeneity of the composition, it is necessary to tint the flower with liquid acrylic paint. The same acrylic paint is used to paint the veins on the sheets and the background.
Learning to embroider with ribbons like a pro, tricks small and large
Any type of needlework has its own tricks that allow you to quickly get the job done or correct minor flaws. Experienced craftsmen are well acquainted with all the intricacies of the work, but it will be very useful for beginners to learn advice from specialists.
- When embroidering leaves, you need to twist them around the needle once and make a straight stitch.
- if you need to make a large element with the needle twisting, then it needs to be securely secured with threads, and it will not subsequently unravel.
- It is recommended to iron from the wrong side. The same applies to the finished work.
- Don’t forget to burn the ends with a lighter; if you don’t do this, the weaving may unravel and instead of a beautiful flower, you will have a scrap of thread.
- If you frame it, it is recommended to insert glass from the front side so that dust does not settle on the ribbon. If you do not have glass available, replace it with plastic film.
- If you use a white canvas or light-colored fabric as a basis, you need to check the ribbons before work; they should be soaked a little. There is a risk that they will turn out to be of poor quality and will leak paint, thus ruining the material.
By adhering to these rules, you will be able to keep yours in good shape for a long time. Don’t worry if something doesn’t work out, even experienced needlewomen once started with straight stitches and extraordinary knots. Over time, you will master the basics of needlework and will be able to give advice to beginners.
If you want to keep up with the times, but at the same time appreciate old traditions and entertainment, it is a good idea to learn satin embroidery yourself. Everything is quite simple - you need ribbons of several color options, scissors, fabric and a needle with a wide eye. When mastering the basics, you need to become familiar with three types of seams; in the world of needlework, they are usually called stitches. There are 21 types of stitches in total, although skilled needlewomen are coming up with their own methods every day and creating unique masterpieces. To create a simple pattern, simply use a straight stitch, pulling a needle and ribbon through the canvas. Be sure to burn them at the end with fire, as a result they will not unravel. It would be very sad if you spend two days and everything collapses at the slightest touch.
Read more: stitches or embroidery stitches
Fabric (linen, cotton, double-thread, silk, satin, gabardine) for the base
For beginners, it is better to first start needlework using a ready-made drawing-scheme. The fabric can be any. This way you will understand later what density of fabric you need to take for a particular painting. For example, gabardine is very convenient because it is a pleasant synthetic material, it has a very good weave of threads, holds the ribbon, and the needle passes through the fabric easily. Also use silk fabric, cotton, satin, linen, and woolen fabric. It is necessary to take into account the size and weight of the painting; the density of the material is important; reliable fixation of the stitches depends on it. At the beginning we will work on a tight basis. If you are a beginner, then to get an even and smooth drawing it is better to use a canvas.
Hoops (round, square - from small to large)
The peculiarity is that the entire area of work must be in a hoop, the fabric must be well stretched. There should be no pinches or bends. Such an accessory for needlework must be selected in relation to the size of the painting. Hoops can have different shapes, such as round, rectangular, square. It is advisable to make three-dimensional paintings with a wooden hoop, and for small still lifes round plastic hoops are suitable. When choosing them, give preference to larger sizes so that the entire design fits into them. When the canvas is tightly stretched, then it will be easier to sew.
Different types of needles (tapestry, embroidery and beading)
The main tool is needles. There are tapestry needles that have a wide, elongated eye with a sharp end. It is important that the ribbon can be easily pulled through the eyelet, so select the number of needles according to the width of each. If the width is from 2 to 3 mm, then a needle with number 24 is selected. For from 7 mm to 12 mm, a needle with number 18-22 is suitable.
Long and thin bead needles are also used simultaneously in needlework. After all, not a single craftswoman can resist adding all the beauty of the product and expressing the idea with beads and seed beads. Embroidery needles are also suitable; you can use them to manually embroider certain areas of the picture (petals, stem or pattern). A useful accessory are sewing pins for securing fabric, or for fixing ribbons or petals.
Thimble, scissors, marker, lighter and awl
A thimble is simply irreplaceable when working with thick fabric. For safety, so as not to injure your hands when pushing a needle, always use this little thing; it should be present in all manual work. An awl is a necessary accessory. When creating a unique masterpiece on thick material, sometimes you need to stretch a wide ribbon through the fabric. And here an awl will be an assistant, with the help of which you can carefully push apart the interlacing of threads, without any damage to the structure of the fabric. To ensure that your work looks at the highest level, purchase sharp, comfortable scissors.
You need to cut on both sides. One tip is cut straight, which will be pulled into the eye of the tapestry needle, and the second - at an angle of 45 degrees. It needs to be burned with a lighter. Such tools should always be with you. It is also worth purchasing special markers if the work will be done in your own design. They are very diverse - some disappear in the air after two days, others disappear in water. They are very convenient for carrying out the ideas of your creativity.
Ribbons (satin and silk)
If you want to make your dream masterpiece come true in the form of a painting or interior decoration, you need to stock up on many different ribbons. A wide variety of handicraft items can be easily purchased in specialized stores. They come in different widths - from 2mm-13mm and of course have a variety of colors. It is better to start trying to work with satin ones, which have the peculiarity that they are dense in structure, do not wrinkle, matte on one side and shiny on the other, which later gives a zest. If you want to convey a more natural texture of a flower, it is better to use silk, because they are neither softer nor more manageable. There are also organza, nylon, transparent voile, and corrugated. This type of accessory is used on a wider scale. Any composition and your imagination will enrich the composition of the bouquet, creating the effect of airiness and liveliness.
Threads (floss, wool, iris, grass)
Threads are needed to secure the stitches on the front side, and on the back side to secure the ends of the ribbons. They also complement the decor in the design, or combine with cross stitch. The most common type is silk threads. The next one is floss and iris threads, in a variety of shades of color. They are used in the form of petals, grass, and inflorescences. There are well-known threads - grass (very similar in appearance to natural grass), with its help it is possible to create entire bouquets. Also used in embroidery are wool, thin or thicker yarn, it all depends on the composition you are creating. This type of thread gives volume to the painting, fills voids, and is an additional decoration for the craftswoman’s improvisation.
Beads and beads
The use of beads and seed beads is not superfluous. They decorate the creation; you just need to use your imagination and you can get a unique illustration of the work. They have different shapes and colors. Everything is selected individually to the type of drawing. It is these handicraft accessories that will reveal and add zest to your inimitable masterpiece. Many craftswomen really like to use beads in embroidery.
Nowadays, this type of needlework is a popular and exciting activity. It brings benefits and pleasure at the same time. This activity provides an opportunity to relax psychologically and switch from external problems to pacification of the internal state. After all, DIY creations inspire us to be kind, gentle and loving towards our family and friends. Don't be afraid to take on different new hobbies.
Fire red rooster
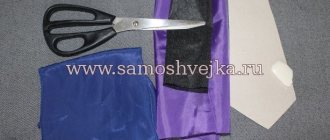
Required equipment:
- satin ribbons of different colors;
- sackcloth;
- floss thread;
- comfortable hoop;
- needles and scissors;
- tracing paper and pencil.
It is necessary to find the center of work. To determine the center of the burlap, it is folded in half and then in half again. Along the fold lines, the fabrics are separated with a “back needle” seam. When the canvas for work is prepared, it is necessary to redraw the image of the bird on tracing paper. After which the pet is transferred onto the burlap on tracing paper.
Related article: Knitting from scraps of fabric
Having a finished sketch on the canvas, it can be inserted into the hoop, stretching the fabric. The work with ribbons begins with the embroidery of the largest details; in this exhibition, these are the breast and neck of the bird. It’s easier to start with four stitches on the neck of the rooster with a gold-colored satin ribbon. The thread length of each line is about 15 mm. After that, four more similar lines are made on the chest. But their length is shorter and equal to 10 mm.
According to the diagram outlined above, the entire body of the pet is filled in turn. The stitch angle for the bottom part should be changed. To give volume to the embroidery, some stitches are duplicated. More often, a double layer is used on the neck and chest, in our case it is a yellow satin ribbon. When embroidering the second layer, the stitches are placed in the required direction. Straight ribbon stitches are used to fill out the pet's lower torso. For work, satin ribbons of blue and deep blue colors are used. The cockerel's wing is embroidered with ribbons of the following colors: blue, yellow, deep blue. The bird's head and beak will be golden yellow.
In order to achieve a natural beak, straight ribbon stitches are passed along it. The cockerel's head is also embroidered using curved stitches. In this case, the shortest stitch is applied first, and then subsequent lines are made. In conclusion, it turns out that each subsequent stitch slightly overlaps the previous one. The beard and comb are “drawn” with a scarlet ribbon using a straight stitch. French knots are embroidered in place of the eyes.
Curved stitches are used for the cockerel's tail. To create it, various shades of blue are used. A twisted stem stitch is used to create the long claws and paws of poultry. Short claws are highlighted with straight twisted stitches. When embroidering flower stems, a “back needle” stitch is used.
Straight stitches are also used when embroidering petals, and French knots are used for the core. To embroider grass, regular stitches of different lengths are sufficient.
Related article: Delicious lecho: recipe with carrots
The embroidery is ready, you can seal it, insert the embroidery into a frame and hang it on the wall or give it to someone as a gift!
It is also possible to embroider a formidable warrior rooster, as in the photo.
Instructions for embroidering a picture with flowers using ribbons
Ideas for paintings embroidered with ribbons yourself can be taken from master classes. They explain the step-by-step process. Instructions for beginners:
- Prepare materials by color.
- Draw the diagram so that it can be removed later.
- Thread the canvas into the hoop.
- Start embroidering according to the example.
You may be interested in: Making a paper rabbit mask yourself
You need to make sure that the ribbons do not show through from the inside where they should not be.
Ribbon threaded into a needle
Landscapes and houses
Ribbon embroidery on the theme “landscapes” or “houses” is an option for experienced needlewomen. Basically, such pictures have a lot of small elements and color combinations. Therefore, you should first master all the stitches. When embroidering nature, they use a ready-made image or picture with the sky and a green base, and then make flowers themselves. It’s easier to work from a finished picture. This way you can create volume.
When embroidering a house, the needlewoman does not necessarily have to make the building into satin. It is mostly in the background, with flowers and other plants in front. They are the ones that are embroidered with ribbons.
House on embroidery
How to embroider flowers
Embroidering a bouquet of flowers can decorate your kitchen. Beginning embroiderers learn to work with satin most often on flowers. For paintings, different stitches are used depending on the colors. Lily of the valley or rose are created using different technologies. For large flowers, use “Loops in a circle” or “Twisted loop”. And for miniature plants, the stitches “loop with an attachment” and “loop with an eye” are suitable. It is recommended to start work with large details, and then move on to small nuances.
Large bouquet with ribbons
Embroider a butterfly using ribbons
It is easy to embroider a butterfly with ribbons; this can be the first work of a needlewoman. Instructions:
- Transfer the butterfly design to the fabric.
- Start embroidering from the antennae and head.
- Sew with black thread along the outline of the butterfly.
- Fill the body with green satin using regular stitches.
- Hem the edges of the butterfly wings.
- Fill in the wing edges and circle patterns with purple ribbon using regular stitches.
- Then embroider everything in shades of yellow.
Important! The ribbons must be burned from the inside out with a lighter so that they do not unravel.
An example of an embroidered butterfly
Field daisies
In painting, daisies are often used as wildflowers. They can also be created with silk:
- Apply a schematic drawing to the fabric.
- Pass the needle from the back to the front, stretch the ribbon and straighten it.
- Make a ribbon stitch the length you want the petals to be. Bring the needle to the inside. It is important not to tighten satin or silk.
- Bring the needle to the front side.
- Create the next petal using a straight stitch. It is recommended to make different lengths.
- Fill the gray hair with yellow satin using small stitches.
You might be interested in this Description of the Japanese sashiko embroidery technique
Daisies with ribbons
Embroidery for Valentine's Day “Bear with flowers”
Embroidery can be a good DIY gift for a guy from a girl. One of the most romantic holidays is Valentine's Day. For this occasion, you can make a bear with flowers from silk or linen fabric. If the skill level is low, it is recommended to leave the bear as a simple image, and make the flowers voluminous, made of silk or satin. The diagram can be used for cross stitch work.
Important! Suzanne Mustafa has many ideas for paintings made of satin and silk.
Scheme of a bear with flowers
Strawberries, berries, fruits and new ideas for creativity
Bouquets most often deserve attention, but you can depict whatever you want with satin or silk. The main thing is to choose the right stitches. The object can be fruit, berries, animals, insects and cartoon characters. If the scheme is chosen taking into account the skills, the result will please you.
Bird image
Ribbon embroidery is a simple type of work that even children can easily learn. At the initial stages, it is recommended to depict flowers, then move on to landscapes and animals. You should gradually master all types of stitches in order to improve the quality of your work.
Petal embroidery technique
Embroidering sunflowers begins with the first thing you do is draw a diagram if you don’t have one ready. Place the flower on the canvas as you wish, but it is important to place large sunflower heads in the center of the picture, and smaller ones on the sides. A template like this:
For most beginners, the problem occurs already at the beginning - they are not able to properly secure the ribbon in the needle. To make the threading process less time-consuming, cut the edge diagonally. Next, insert it into the needle and pull it about five centimeters. Using the sharp end of a needle, pierce it at this distance and stretch along its entire length. This way you will have a well-fixed ribbon. Be sure to make a knot at the other end and burn it with a lighter, it will not come undone and your creation will not fall apart.
fixation
Embroider the petals with a “ straight stitch” in the direction from the center to the edge:
The technique is practically no different from daisies, only the middle is left larger. Wide ones tend to twist, so make sure that each stitch is placed evenly. You should not tighten the stitches too much, because the composition will bulge forward, and the canvas itself under the flower may unravel. It's sad if you spend a lot of effort and time, and it gets ruined by such stupidity. Remember that satin ones have a reverse side, which differs in texture from the smooth outside.
“Straight” they go around the flower in a circle and move to the middle. It will be done in black and a French knot, or rather knots, since there will be a lot of them. These nodules should resemble seeds that are already ripe.
french knot
On the finished sunflower, everything looks quite realistic and three-dimensional. Sometimes, needlewomen replace the black center with two shades of brown ribbons, making the same knots, but in two colors. There is a dark color along the edge, and a light shade closer to the middle. This choice is the author’s personal preference, so experiment as you please. Many argue that the more shades there are, the more spectacular the result.
We recommend craftswomen with extensive experience to make petals using Japanese stitches. This type of embroidery involves piercing not only the canvas, but also the base of the ribbon. When the puncture moves to the edge, quite spectacular images are obtained. If you want a uniquely shaped petal, you can also experiment with the amount of tension you use, just be careful not to overdo it.
Video: master classes
Easy-to-read video tutorials on ribbon embroidery can be found on websites for needlewomen. It demonstrates step by step how to embroider with ribbons. Many things can work out the first time. This is great motivation for beginners to continue the fun of ribbon embroidery.
You can also learn from the video that embroidery with ribbons is not a newfangled activity. This art has been known in France for several centuries, and it was mostly used not to create paintings, but to decorate the clothes and hats of noble ladies.