Types of men's sweaters: review, patterns, photos
Before you start knitting, you should decide on the model of the sweater and how you will knit it. We will give the most popular types and some explanations for them.
- Men's raglan sweater knitted from top to bottom. Most often knitted seamlessly, depending on the wishes of the man, the model is equipped with a high turn-down collar or a round neck;
- Men's raglan sweater knitted from bottom to top. It is also most often knitted in the round in a seamless manner, but sometimes knitters prefer to knit the back and face separately;
- A men's sweater with set-in sleeves is one of the most popular models among men, and therefore knitters. Knitted from the bottom up, either whole or divided into a back and front part;
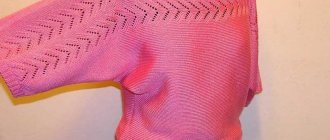
- Men's sweater with dropped armhole. A popular baggy model, which is chosen not only by young people, but also by respectable men. Unlike previous options, it is ideal for beginners, as it does not require complex manipulations.
Having decided on the model, we recommend, although not in full size, to draw yourself a schematic pattern so that you visually understand what you are knitting. It is especially important for beginners who knit from a video, since there is a risk of simply repeating the manipulations after the video lesson and not understanding what you are doing, and therefore, if an error occurs, you will never find it. And it will appear at the time of assembly or fitting, which will definitely upset you.
- Schematic pattern of a men's raglan sweater. Please note that the back and front of the product match completely, except for the neck. Raglan sleeves are always knitted the same way.
Schematic pattern of a men's raglan sweater
- Schematic pattern of a men's sweater with set-in sleeves. Don’t be intimidated by the complexity of the pattern, since for the first time you will probably knit according to the master class, and accordingly all the increases will be given, but you will already be doing them consciously.
Schematic pattern of a men's sweater with set-in sleeves
- Schematic pattern of a men's sweater with a dropped armhole . This pattern tends to look baggy and cozy, ideal for chunky knits and fluffy yarns like angora and mohair. As you can see from the diagram, this is an excellent solution for a beginner, since there are no complex additions or reductions, calculations or any difficulties in general.
Schematic pattern of a men's sweater with a dropped armhole
LiveInternetLiveInternet
A raglan line is a loop or loops (there can be any number of them), on both sides of which yarn overs are made to expand the fabric. It may look different, depending on the pattern you are knitting and the method of knitting the yarn overs.
If you knit the yarn overs simply purl or knit, you get an accented raglan line consisting of small holes; if you knit the yarn overs purl or knit crossed, the raglan line is barely visible (this is necessary if you knit the raglan line with a pattern, for example with braids), in the next row the loops of the yarn overs are included in the pattern with which the product is made. It is best to do your first work using stockinette stitch and a raglan line using 1 purl stitch.
Calculation and distribution of loops
Let's assume that our knitting density is 2.5 loops per 1 cm, and the neck circumference is 18 cm, multiplying these numbers (2.5 × 18 = 45) we get the total number of loops to work with. Next, we distribute the loops into parts: for the back, front, sleeves and raglan line.
To do this, divide the total number of loops into 3 equal parts: one part for the front, one part for the back, one part for the sleeves - half for each: 45: 3 = 15 loops each (in our example, the loops are divided without a remainder, if there is a remainder we add it to the front loops), then from the part for the sleeves we subtract 4 loops for the raglan line and divide the remainder (= 11 loops) into 2 parts, the loops for the sleeves are not divided without remainder (there is 1 loop left) add the remainder to the front loops = 15 loops for the back, 16 (15 + 1 loop left over from the sleeves) loops for the front, 5 loops for the sleeves and 4 loops for the raglan line (one for each). When calculating loops for all sizes: divide the total number of loops into 3 parts, then the part for the sleeves into another 2, add all the remainder to the front loops, always take raglan loops from the sleeve loops. We collect loops for the pullover in the following sequence: one loop for the right part of the front, one loop for the raglan line, 5 loops for the right sleeve, one loop for the raglan line, 15 loops for the back, one loop for the raglan line, 5 loops for the left sleeve, one loop for the line raglan, one loop on the left side of the front. For all sizes: one loop for the front parts, do not cast on the edge loops. Why only one loop for the front parts? In the process of knitting, we will gradually add loops for the front using air loops, due to this we will get a neckline cut deeper at the front than at the back.
(You must log in to view)
Knitting
The loops have been cast on, now we knit in the following sequence (provided that we knit the pullover with the front stitch, and the raglan line is one purl loop): 1 - 9 front row - one air loop, one front loop of the right front (in the first row, in subsequent rows of loops for parts of the front, back and sleeves 2 more), one yarn over, one purl loop of the raglan line, one yarn over, 5 knit stitches of the right sleeve, one yarn over, one purl loop of the raglan line, one yarn over, 15 knit stitches of the back, one yarn over, one purl loop of the raglan line, one yarn over, 5 knit stitches of the right sleeve, one yarn over, one purl loop of the raglan line, one yarn over, one knit stitch of the left front and pick up another chain loop.
2nd row and all purl stitches - we perform air loops as edge loops, knit yarn overs purl or purl crossed, sleeve loops, front and back purl. Row 11: pick up two air loops on both sides and close the knitting in a circle. On knitting needles, the total number of front stitches is 1 more stitches than the back stitch. If you knit a pullover of a different size, you will have more or less than the number of stitches in the front, sleeves and the number of rows in which chain stitches are added. We collect air loops until the total number of front and back loops is equal. We continue to knit the loops of the front, back and sleeves in a circle - knit stitches, knit yarn overs or knit stitches crossed, raglan line loops purl, yarn overs until we have completed the loops for the sleeves. As soon as the sleeve loops have been picked up, we remove them with a thread of a contrasting color and leave them temporarily; we combine the front and back loops and continue to knit in the round until they reach the required length (we don’t make yarn overs anymore). Switch to full-size knitting needles that are thinner and knit an elastic band, bind off the loops, and leave the tail of the thread long.
Next, we continue knitting the sleeves : attach the thread and distribute the loops onto a set of 5 knitting needles, close the knitting in a circle, mark the junction of the loops with a special marker or pin and knit, making decreases to form a sleeve bevel, 2 loops at the place where the loops were marked in every sixth row as follows: knit 2 stitches together, knit the next stitch with a broach. Having knitted the required length, close the loops, leaving the tail of the thread longer.
All that remains is to design the neck . We collect loops along the neck line and knit an elastic band of 2 - 3 cm (or as needed), close the loops. The pullover without seams is ready.
Finish the work, mask the ends of the threads, steam. After closing the loops, we are left with long tails of threads; they need to be brought out with a hook or a knitting needle to the wrong side and masked along the front loops of the elastic band. Pull the thread 1/3 in one direction, then turn and pull all the way to the other, this will secure the thread and prevent it from unraveling. From the front side the thread is completely invisible. Source: Olga Afanasyeva. All about raglan https://club-rukodelie.com/needls/reglan/ - there is a photo
Calculation method according to Maximova
Knitting raglan in short rows
Measure the neck circumference - let's assume it is 36 cm. Multiplying the knitting density by 36, you will get the number of loops to start working with: 2.5 × 36 = 90 loops. From the resulting number of loops, subtract the loops of the raglan lines. There are 4 connecting lines in the raglan. If each consists of one loop, then for 4 you need to subtract 4 loops, 90-4 = 86 loops. Divide the remaining number - 86 - into 3 parts: 86/3=28 and 2 as a remainder. Distribute the resulting number of loops as follows: 1st part - 28 loops - back loops; 2nd part - 28 loops - loops of 2 sleeves (14 loops each); 3rd part - 28 loops - front loops.
If there is a remainder, then attach it to the front loops. In this case, define 30 loops (28+2) on the front. In addition, you should add a few more loops to the front, subtracting them from the sleeves. Each sleeve needs to be narrowed by 1.5 cm. At a given knitting density of 1.5 cm, 4 loops are laid.
Therefore, you need to subtract 4 loops from each sleeve: 14-4 = 10 pegels. Add loops taken from the sleeves to the front: 30+8=38 loops. If the model has a clasp on the front, then the number of clasp loops must be added to the original calculation figure. For example, a fastener bar consists of 10 loops: 90 + 10 = 100 loops. Therefore, to start working you need to cast on 100 loops.
Cast on 100 stitches using cotton thread and knit 2 rows with knit stitches. Using a colored thread, divide the knitting (according to the calculation given earlier) into parts, that is, mark the loops of the raglan lines and strips. After this, knit 1 row with wool thread. Next, begin to perform the main pattern using partial knitting, that is, do not knit all the loops on the knitting needle, but only a certain part. This must be done so that the neckline on the back is higher. Divide the sleeve loops into 4 parts, and the front neck loops into 6-8 parts, not including the fastener loops.
Then perform the 1st row of the main pattern with partial knitting, that is, knit the left fastener with a 1×1 elastic band, then knit the left front, sleeve, then the back and 1/4 of the right sleeve with a pattern (up to the 1st mark on the sleeve, in this example 3 loops closest to the back). Then turn the knitting and knit a purl row to the 1st mark on the left sleeve (1st quarter). Turn the knitting and knit the 3rd row up to the 2nd mark on the right sleeve), that is, knit only the back loops completely, gradually attaching to them first parts of the sleeves and then the fronts. At the same time, make additions before and after the raglan lines. Having gradually included all the loops of the sleeves and fronts in the work, continue knitting in the usual way until the raglan lines reach a size of 30-32 cm on the back and 30-28 on the fronts - this corresponds to size 48.
After this, knit all the parts separately to the desired length. Knit the shelves 2 cm longer than the back. Iron the knitting, sew the sleeves and side seams, placing the shelves. Weave the cotton thread at the beginning of the work and put the opened loops on a knitting needle (preferably with a fishing line), knit a placket or collar as intended for the style.
Advice from Larisa Ignatova
source Classic raglan.
The divergence of the shelves is a narrow canvas for them. Our grandmothers also calculated raglan in the following proportion: 2/6 for the back and front, and 1/6 of the total number of loops for each sleeve. I usually do this: I divide it into 13 parts (often these are 13 repeats) and take 5/13 for the front, 4/13 for the back and 2/13 for each sleeve. This means that on the front (especially for a woman’s bust) we take more loops. Extended raglan. It is necessary to divide the initial row into 4 equal parts, and increase unevenly: from the sleeve side, 1 stitch in every 2nd row, and from the back and front - in every 4th row.
Comment
Source Traditionally, loops along raglan lines are added to each face. row or across the circle in circular knitting. In this case, it is assumed that the required length of the raglan line and the desired width of the product will be miraculously achieved at the same time. But it doesn’t always work out that way! More often it turns out that the width of the part is already there, but the required length of the raglan line is not yet available. This largely depends on the proportion of horizontal and vertical densities. When knitting on top, increases along raglan lines must be calculated according to the knitting density. Exactly the same as we do when knitting from below.
Calculation of sprout tying
Sprout in simple words Calculation of tying a sprout in a seamless raglan
Undercuts
It is advisable, when knitting raglan, to add 3 loops along the edges with air loops on the sides of the front, back and sleeves. Then sew the cast-on loops with a knitted seam (front loops with sleeve loops). Then the seam under the armpits will not fray when you raise your arm. These are the so-called undercuts. They expand the fabric of the shelves, back and sleeves. Performed only under the armpit. There are 8 cuts in total. Then we sew these undercuts with a knitted seam: we sew one loop of the sleeve with two loops of the undercut of the front or back, etc. It is better to start stitching from the raglan line towards the side seam. Raglan with undercuts fits better on the figure and does not pull under the sleeve. When knitting from below, the loops must be closed accordingly. According to Zimmermann's book, 8% of the loops from the total coverage of the body are closed for undercuts.
Related links
A very detailed master class on raglan top, including a description of knitting a sprout and cutting (author kalinushka). Part 1 Theory Part 2 Practice according to Maximova, Puchkova, Martynenko
Choosing a pattern for a men's sweater with knitting needles: diagram with description
For beginners, it is best to choose simple patterns, but more experienced craftswomen will most likely want complex patterns, braids and fashionable arans. It is worth remembering that different patterns lie differently depending on the chosen yarn, and also the golden rule - the fluffier the yarn, the simpler the pattern, since complex patterns will simply be lost in the fibers.
Next, we cast on 20-25 loops and knit a pattern; if the pattern is larger, we cast on more loops; if there are several patterns, we cast on so that all the patterns are on the sample. We knit 10 cm, close the loops, wash and dry the sample, and only after that we measure and calculate the number of loops for the product.
Important: in addition to the volume of the chest, arms and waist, it is necessary to add an allowance for a loose fit:
- Tight-fitting sweater - 0 cm;
- Sweater according to the figure - 1-3 cm;
- Loose sweater - 4-5 cm.
And in conclusion to this point, we present a fashionable pattern of arans for men's sweaters.
Fashionable aranami pattern in Scandinavian style
Arana knitting for men's sweaters - diagram
Intricate diamond patterns for men's sweaters: pattern and diagram
With a zipper
Men's zip-up sweater is made using various patterns. An important aspect of these models is knitting, taking into account the future sewing of a metal fastener. The back and sleeves should be knitted according to the chosen pattern.
With a back width of 107 loops, to knit the left front you need:
- Knit 16 rows, having previously cast on 62 loops.
- Then continue working according to the chosen scheme and patterns.
- At a height of 42 cm from the armhole in each 2nd row, remove 1 loop 9 times.
- After 4 rows, remove the loop again.
- When 63 cm of fabric is knitted, bind off 6 loops in every second row, then 4, then 3 loops twice, 2 loops once and 2 more times one.
- 5 cm from the beginning of the neck to form a shoulder bevel, close in each 2nd row three times 7 loops and twice 8.
The right shelf is made as a mirror. For the collar, cast on 77 loops and knit with an elastic band until you get a fabric 8 cm high. Assemble the details of the jacket and sew in a zipper.
The best elastic band for knitting a men's sweater: diagram with description
A men's sweater is a very voluminous product, knitting it will take from 5 days to several months, depending on the complexity of the product and your speed. Therefore, it is worth choosing high-quality yarn, making loop calculations only after WHT (wet heat treatment), and also paying due attention to detail so that the product can be worn for a long time and with pleasure.
As you know, the elastic is the place that stretches and thereby spoils the appearance of the product in the first place. We suggest abandoning regular or English elastic bands for cuffs in favor of a non-stretchable elastic band that can be knitted either 1x1 or 2x2. For experienced knitters, we provide a diagram and a simple description, and for beginners, video tutorials.
Scheme of double non-stretch elastic band
So, everything is simple, knit a 1x1 elastic band in the first two rows as usual (front and back), from the 3rd row: the front loop is removed, the thread behind the knitting, the wrong one is knitted, and so on until the end of the row, repeat the report. Wrong side - the elastic band is knitted as usual.
In the same way you can knit: the first row is 1x1, from the second row: the front loop is knitted as usual, the wrong side is removed, thread before knitting. Both methods are correct, knitting is equally simple, but the yarn consumption increases by 30%, due to broaches that prevent the cuff from stretching.
Men's sweater knitted from top to bottom
A less common, but still popular way of knitting. It is convenient because there are no seams on the finished product, and the jumper itself can be decorated with a variety of patterns.
- The first step for knitting such products is to select yarn.
- If you are knitting for an adult, then 100% wool or acrylic, a fairly common and convenient thread material, is suitable.
- Once the yarn has been selected, the number of stitches needs to be calculated. They are cast on circular knitting needles and knitting occurs from top to bottom in the circle.
- You need to knit until the pullover fits snugly to the body.
- The secret of knitting this way is to add two loops near the raglan line. This makes the product wider.
- When the process reaches the sleeves, the yarn is removed from the loops onto the thread so that it does not interfere. Only the sleeves remain on the knitting needle.
- The sleeves must be knitted at the same time. There is an elastic band at the ends, the size depends on personal wishes.
- Having knitted the elastic, you need to close the sleeves and transfer the remaining loops to the knitting needle. You must continue knitting until you acquire the desired length.
- At the end of working on the pullover, you need to make an elastic band again.
Closing the loops on a men's sweater - elastic edge
Another secret to the perfect men's sweater is the elastic closure of the loops. A really important factor, which, on the one hand, makes it possible to produce uniquely designed items; on the other hand, for fans of factory-made products (largely due to the experience of wearing low-quality products), an elastic product quickly returns to its original shape.
To elastically close the elastic (we are only disassembling the elastic, since this is what is on the cuffs of men's sweaters) you will need a needle with a wide eye and a blunt point. They come in metal and plastic and are sold in craft stores, fabric stores, etc.
Second option
For a circular raglan, just as in the first method, a chain of air loops is collected and put on over the head. The pattern goes, as in the diagrams, in a circle.
We cast on the loops according to the diagram, if 146 loops are needed, and this corresponds to the size of the neck, then 25 loops are needed to repeat the pattern. How do you know how many rapports there should be? You need to divide the total number of loops by the number of loops in 1 repeat (for example, divide 146 by 25 exactly 5 and the remainder is 21 loops). For even division, it is better to find the required number of loops. We add 4 to 146 and get a number that will divide evenly. 150 loops can be closed and knitted according to the pattern.
You can knit a children's jumper with raglan on top. The description of the jumper decoration is below.
To create such a model you will need: baby yarn, a 3.5 crochet hook and desire.
The neck of the product is knitted by adding single crochets in subsequent rows. We knit using the second method. As we knit, we dress and apply the product to the child. Thread your head through the first rows.
The finished product can be decorated with various applications, ribbons and buttons. The hem of the product is decorated with lace. You can crochet the lace directly over the product or knit it and join it to it.
We knit lace directly on the product using the same threads. If you need to add contrast to the product, use threads of a different color.
For the first row, we cast on 5 air loops, make 1 single crochet, then 5 air loops, 1 single crochet, and so on, repeating along the length. In the second row, in each arch of 5 chain stitches, knit: 1 single crochet, 1 double crochet, 3 double crochets, 1 double crochet and 1 single crochet. The bottom will be lacy and girly.
Related article: Fashion Magazine No. 606 - 2021. New issue
https://www.blog-klubok.ru/wp-content/uploads/2019/179262715313_F4E3/koftochka_dlya_malysha_kryuchkom_thumb.jpg
The considered methods of crocheting raglan on top are quite simple and are suitable for both experienced and beginner needlewomen. To obtain a more delicate and textured product, it is better to use openwork patterns and non-fitted models. Dense patterns are not suitable for creating a stretchy fabric. Rare patterns will add elasticity to the model.
Assembling a men's sweater
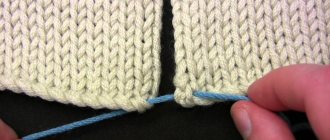
The ideal solution, of course, is seamless models. In other cases, assembly of the product is required. And here lies another secret. Many craftswomen recommend initially carrying out a WTO of parts, and only then assembling them. Please note that knitwear, even when hand washed, drained in a net (instead of wrung out) and dried horizontally, may change slightly in size. And if this is really insignificant when worn, but when sewing it can become a very big problem. Therefore, we recommend that you first assemble the product, and only then wash and dry it as described above.
First way
For raglan, a chain of air loops of the appropriate length is assembled in a rectangle. It should be taken into account that sweaters without fasteners are put on over the head, therefore, the chain should be put on unhindered over the head. Next, close the circle and knit a row of double crochets into each chain stitch. Before distributing the loops, you need to calculate the number of columns. Since it was knitted into each loop, then if there were 92 loops, it turned out to be 92 stitches. We divide the loops: 4 to create raglan lines, the remaining is divided into three. As a result, there will be a front and back - 29 loops, and 15 loops for two sleeves. Then we add double crochets in four raglan lines. How to add loops correctly? You just need to knit several double crochets from one.
Article on the topic: How to sew a dress for autumn with one-piece sleeves: a pattern with a description of sewing
For a jacket with a fastener, the loops are divided in the same way, only the front or back are divided into two. In case of unequal division, a residual loop is added where the fastener is missing.
Please note that on the back, the first rows should be higher than the front. So we knit a few turning rows.
Several patterns for knitting raglan in a rectangle plus patterns for beginners:
How to knit a men's sweater with a set-in sleeve: diagram with description
As we said earlier, a men's sweater with set-in sleeves is one of the most popular models and does not go out of fashion from season to season. For the first time, we recommend knitting a sweater according to the master class, and after you understand the nuances in constructing the details, you can knit any sweater of your choice according to your sketches.
Scheme of a men's sweater with a set-in lowered sleeve
Knitting a men's sweater with a dropped armhole is quite simple:
- We knit a sample, perform a WTO, calculate the loops;
- We collect an elastic band from below (can be on the back and front, or by circular knitting);
- We knit an elastic band of 5-7 cm as desired and move on to the main pattern;
- We knit exactly to the beginning of the neckline and begin to close from the middle according to the pattern, closing the shoulders evenly. If you are knitting in the round, go to the armhole (17-24 cm depending on the size and fullness of the sweater) and bind off 3 loops under your arms and then knit the front and back separately from each other;
Round neck pattern for a men's sweater
- Sew the shoulders and knit the neckline;
- We knit the sleeves from the bottom up, close them evenly and sew them on; you can also pick up the sleeves at the armhole and knit down to the cuff.
Wool blend model
For the wool mixture model you will need:
- knitting needles No. 4 regular;
- circular also No. 4;
- 900 g of yarn.
In the process of work, 2 types of patterns are used:
- Front stitch - loops of the same name are used for the front side, and similarly for the back side.
- “Long rice”, performed in 4 rows: Alternating 2 types of loops, starting with the front ones.
- According to the pattern of the canvas.
- Almost like the first one, but you need to start with the wrong side of the loops.
- Like the second one.
The first 5 cm of the back are knitted with an elastic band, 115 loops are cast on.
The next row is distributed as follows:
- The first and last loop is always an edge loop.
- 10 loops of the “long rice” pattern before and after the edge loop, 17 in the center.
- 41 stitches in stockinette stitch between grains.
After the 68 cm long fabric is ready, close the 31 central loops. In every second row, decrease 3 loops once and 1 loop once. The next second row is to bind off the shoulder loops. The front part of the product should be knitted in the same way, but start preparing the collar 20 mm lower than on the back of the sweater. To knit a sleeve you need 45 stitches.
7 cm - elastic band, 13 loops are added to the final row. Next, you need to repeat 10 loops in the “rice pattern” and 20 in the “knit stitch” technique. In every 6th row a loop is added along the edges. Repeat 20 times. The loops are closed after 55 cm of fabric is knitted. The neckline is knitted with an elastic band, height 12 cm. All parts of the sweater are sewn together.
Knitting patterns for stylish and fashionable men's sweaters with descriptions
- Men's sweater with raglan sleeves.
Men's sweater with raglan sleeves
- Men's sweater with thick threads.
Men's sweater with thick threads
- Men's sweater with rhombuses.
Men's diamond sweater
- Men's sweater with a plait pattern.
Men's sweater with a plait pattern.
Men's sweater with one-piece sleeves.
Men's full sleeve sweater
- Men's sweater with raised stripes.
Men's sweater with embossed stripes
- Men's sweater with aran pattern.
Men's Aran Sweater
- Men's sweater with hood.
Men's sweater with hood
- Men's Diamond Sweater.
Men's Diamond Sweater
- Men's sweater with longitudinal stripes.
Men's sweater with longitudinal stripes
- Men's sweater for dad and son.
Men's sweater for dad and son
Men's sweater with a relief pattern .
Men's sweater with embossed pattern
- Beautiful men's sweater with braids.
Beautiful men's sweater with braids
- Men's sweater with shawl collar.
Men's sweater with shawl collar
- Men's sweater with diamond pattern.
Men's sweater with diamond pattern
- Men's one-piece knitted sweater.