Many who are interested in sewing very often have to work with natural and artificial leather. Handmade bags, leather jewelry, various crafts and even leather paintings look very original and stylish. But most often, working with leather involves repairing leather clothing, replacing zippers, restoring torn areas, etc.
See how to repair a cut or tear in leather clothing. This is the easiest and most accessible way for everyone to repair leather clothing.
There are many books on teaching the technique of sewing natural leather by hand or using a sewing machine, which tell in detail about the purpose of certain tools for working with leather. I offer only a few basic recommendations that will be useful to anyone who decides to repair a bag, jacket, etc.
In this video you will see how easy it is to sew leather on an industrial sewing machine (or Podolsk type) by installing a Teflon foot on it.
Tools for working with leather
Working with leather has many of its “secrets” and little details that need to be known and taken into account. For example, when cutting out paired parts, you need to remember that leather stretches more in the transverse direction than in the longitudinal direction, so paired parts need to be cut in any direction, but only in the same direction.
Do not chip the skin with pins. Punctures leave marks on the leather, and if you change the zipper on a leather jacket or bag or jacket, you can easily see this.
Soft leather can be sewn on a sewing machine using a regular #80 or #90 needle. But for sewing rough leather or thickened areas, a special needle for working with leather is required. Even for hand sewing leather, the leather needle looks special, instead of a point it has a triangular tip. When sewing leather, the stitch length of a sewing machine should not be too small, since frequent punctures will cause the leather to tear at the joints.
You need to cut the leather with a special shoe knife on a plastic board or plexiglass. You can also use a wooden surface, but then the tip of the knife will cut into the wood. A shoe knife, rubber glue, adhesive seam enhancers, a thimble, strong synthetic threads and a small hammer with an awl - this is a must-have kit for any home furrier who decides to replace a zipper in a bag or repair a torn section of a leather jacket.
Features of eco-leather tailoring
Having at least one eco-leather item in your wardrobe is simply a must have. How to sew from it? Read on! Here are the features of eco-leather tailoring:
1. A regular presser foot slips on the leather and does not produce a uniform, beautiful stitch. The stitches are of different lengths and smaller in size than those set on the machine. Therefore, special ones will be required. feet - walking or Teflon (see photo). Walking is better. It has wider functionality, but also costs more. Sometimes, in order to save money, an ordinary foot is lubricated with baby cream so that it slides, and sewn. In places where thickness is formed, be sure to cut out allowances and corners.
2. All sections that may become deformed or stretched during wear must be stabilized with an adhesive edge or low-temperature interlining along the lobe. These are cuts of the neckline, sides of the product, pockets, zipper stitching, collar flaps, top section of the belt, etc. (look at the article “Duplicating parts made of eco-leather”).
3. If there are folds, it is better to stitch them, but first lay an edge along the fold line on the wrong side so that the fold does not stretch. For fixation, you can put an adhesive web into the fold.
4. Eco-leather does not require overlock processing of cuts. The main thing is to trim the allowances evenly and beautifully. You can use zigzag scissors.
5. After stitching, iron the seam allowances and glue them to the product using adhesive web and an iron without steam or a leather transfer (double-sided adhesive tape). The dart can be cut in the middle and its sides can be glued using a web.
Important : when working with it, use disposable strips of dense calico 5-6 cm wide to avoid damage to the polyurethane layer. Otherwise, excess glue may then get on it and damage it.
1. You can mark the markings with a white gel pen, and then wipe them off with a soft damp cloth. But check it on a piece of paper anyway.
2. You can pin pieces together, not reaching the seam line 0.2-0.3 cm. Baste with a thin bead needle and silk thread.
3. If there are buttons, be sure to sew button closures on the back side.
4. Loops on eco-leather can be sewn (for details, see the article “Loops on leather”) or, for example, buttons can be installed.
5. You can lay finishing stitches with special threads along the front side. To determine quality and aesthetics, try on a sample. If the stitching is on one side of eco-leather (for example, belt loops), the bottom thread can be left thin, the top thread - finishing. If there are two (a belt part or a pocket flap), both the shuttle and the top threads must be finishing threads so that the stitching is the same on both sides.
6. Iron only with an iron without steam through an iron, without stretching the material.
What kind of sewing machine can you use to sew leather?
Not every sewing machine can sew leather; treat your sewing machine with care and do not try to sew thick and rough fabrics, leather products, especially bags. As a last resort, you can use a Podolsk or Singer manual sewing machine, but not modern “seamstresses”, which cost 5 thousand rubles. To work with leather, special industrial sewing machines are provided or, as a last resort, the instructions should indicate that this machine can be used to sew leather clothes.
If you sew leather on a household sewing machine, be sure to buy special needles and a foot, with a wheel (as in the photo) or a roller. Then the skin under the foot will not “slip” and the machine will easily advance the product without forming a seat on the top layer of leather.
If you don’t have a foot or it doesn’t fit (Podolsk sewing machine), then in order to make the leather move easier under the foot, you can sew it through thin paper, which can then be easily removed.
Sewing machine threads need to be strong and elastic. But only nylon threads (as in this photo) are not intended for machine sewing. They are only used for manual leather work or industrial sewing machines.
How to sew a women's bag from genuine leather. Bag with lining and zip fastening. You will learn many useful tips on how to work with natural leather.
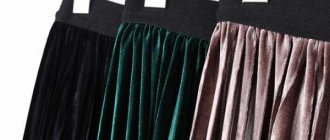
We sew a leatherette skirt
The simplest skirt model to sew is a pencil shape. It does not require a lot of time and effort; it is ideal for getting acquainted with the material and getting better at it.
Pattern
You need to accurately measure your waist and hips.
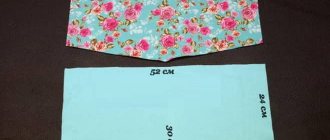
- Next, divide the waist circumference by 3 , since the skirt will consist of 3 parts.
- Draw the top line, adding 1 cm to the seam.
- We retreat the desired height and outline the line of the hips . We do the calculations according to the same scheme: divide the hip volume by 3 and add 1 cm.
- On the sides we draw lines responsible for the length of the skirt.
- We will not process the bottom edge, only the top. So also add 1 cm on the fold.
Uncover
We transfer the drawing from the patterns to the skin.
We cut out the details.
The main thing is that the scissors are quite sharp and do not “chew” the material.
Sewing
- We fold the two halves of the future skirt with the front sides inward. Attach the zipper at the top using pins, and then secure the seam with a sewing machine.
Important! One of the most difficult parts of the job is sewing in the zipper. Make sure that folds of fabric and thread do not interfere with the movement of the slider along the sewn zipper.
- Sew the length to the end, retreating 0.5 cm from the edge.
- We sew the remaining part to each edge one by one, closing the skirt.
- Apply 5-6 cm of thermal tape to the upper edge of the skirt from the inside, leaving 1 cm at the top for a fold. Treat with steam and press on top with the second part. And repeat this along the entire length until the entire edge is beautifully bent inward.
Advice! Before gluing the area around the zipper, lower the slider a couple of centimeters so as not to interfere with the work.
- The corners can be sewn to the zipper with 2-3 stitches by hand for security. Work with the iron very carefully so as not to spoil the almost finished product.
- Gently press the seams of the skirt through the thick layer of fabric. Use medium temperature, do not turn on steam mode.
That's all! You can put on a skirt, choose a top that suits your mood and go for admiring glances in a group or for a walk.
Technology of sewing genuine leather and suede
When sewing suede products, you need to take into account the direction of the pile, otherwise the parts will have a different shade. The leather is ironed from the wrong side with a low-heat iron without steam through a dry cloth. To prevent the top part from stretching relative to the other, purchase a special foot with a Teflon-coated sole, as in this photo. Teflon feet cost much less than special leather feet. The ends of the seam threads must be securely fixed with several knots, since machine stitches on leather products do not secure them and therefore they tend to unravel easily.
Working with leather is impossible without glue. The glue is applied with a brush onto a cleaned and degreased surface. Universal adhesives such as PVA and Moment, as well as rubber glue, are very effective. Repeat the procedure of applying glue several times to thoroughly saturate the skin. At the same time, make sure in advance that the glue is not too liquid, otherwise the skin will get wet. Set the parts treated with glue aside until the adhesive has dried “before casting”. After some time, connect the parts together. Place the glued parts under the press. You can even lightly tap these areas with a hammer. Using a cotton swab or rag, immediately remove excess adhesive solution so that it does not damage the front surface of the leather.
In this video you will see the technology of sewing a zipper into leather clothing. If you are interested in sewing leather goods, subscribe to our channel and you will learn a lot of useful tips.
So that the sewing result pleases
If you have never sewn from eco-leather, are sewing from a new pattern, or are very afraid of ruining the material, before starting the process, follow the recommendations below.
- Conduct research on the properties of the selected material: Make a few lines from the back and “face”;
- Select threads that match the color, thickness and properties;
- Try ironing a piece;
- Apply glue and evaluate the change in the properties of the material - it has become rigid, remains the same, etc.;
- Try basting the parts or pinning them with pins, evaluate how much the needles leave a mark;
- Draw a few chalk/soap lines along the back and front sides;
- Stretch a piece of eco-leather in different directions.
- Check and refine the pattern, make changes. Only then cut from the base material.
So, you will save a lot of time, effort, and possibly an expensive piece of eco-leather.
How to install fittings on leather products
Any handmade leather item must be decorated with fittings. Large metal rivets and buttons, buttons, blocks, locks greatly decorate leather goods. Buttons are sewn to the skin only if there are buttons on the wrong side. Before punching holes for the buttons, they are strengthened either with pieces of leather or with thick adhesive fabric. Installing buttons requires a special tool. You can get by with homemade devices, but this installation method produces a lot of waste, then purchase more buttons than required. Before installing a zipper into a leather product, you should secure it. Instead of basting with thread, adhesive tapes or glue are used. Sometimes even ordinary paper clips can “help”. The edges of the cut skin areas are glued with special skin enhancers (tapes). On one side, a weak adhesive is applied to such a tape. The puncture with a needle leaves holes, so the seam is done only once. As a last resort, a seam is laid along the old holes.
In this video you will see how to install a denim metal button on leather items.
How to refresh the appearance of your skin
After finishing working with leather, the appearance of the product can be refreshed. You can remove marking lines with soap and water and ammonia, then wipe with a cloth moistened with petroleum jelly or glycerin. Heavily contaminated areas on the skin can be washed with warm, unboiled milk, rubbed with whipped egg white or half an onion. White skin is cleaned with a mixture of milk and beaten egg white. Patent leather should be wiped with a cloth soaked in glycerin or cleaned with a swab dipped in milk. Suede can be cleaned with sawdust soaked in gasoline (the remaining sawdust is cleaned off with a brush), or an ink eraser, as well as fine-grained abrasive paper. Stains from household grease are removed with gasoline or talc and a solution of oxalic acid. But be careful, you can remove the paint along with the stain.
Leather paint in aerosol packaging is very easy to use: it is sprayed by holding the can at a distance of about 20 cm from the skin and quickly moving it along the surface to be painted. After a ten-minute break, the next layer of paint is applied. This operation continues until the surface of the skin acquires an even and durable color.
How to join layers of leather using a zig-zag stitch.
Tips for sewing genuine leather products
Some tips on how to sew and cut clothing items made of leather or suede. 1. Select patterns that do not require planting. Complex shapes in this case are easier to create using construction seams than using darts. In the past, tailors tried to use as few stitch lines as possible on leather goods. Currently, leather production has become thinner and softer and leather products have more seams; often even leather clothing or accessories are sewn from small scraps of leather.
2. Kimono and raglan sleeves are easier to make when sewing leather clothes than set-in sleeves. If you are making a set-in sleeve, measure the increase in fit. It should be no more than 1.5 cm. It is better to make a sleeve cut like a shirt, as it has a looser armhole.
3. You must be sure that your patterns are correct. Therefore, it is good to use the pattern that you have already worked with. Or the prepared pattern should be checked on a mock-up made of non-woven material (non-woven fabric without glue) or inexpensive fabric, and only after that it should be marked on the skin and cut.
4. Before cutting the leather, mark holes and thin places on the wrong side of the leather so that you can avoid them when cutting. Carefully lay out the patterns, make sure that the paired parts (right and left shelves, right and left sleeves, etc.) are cut out in a mirror image. Mark contours, lines and marks on the underside of the skin with a ballpoint pen or soft pencil, or a special marking pen. Mark seam and hem allowances. Some marks can be made using notches or adhesive tape. The seam allowances should be the same width, which makes it easier to sew together the cut pieces.
5. Leather stretches in different directions in different ways, so when cutting it is necessary to maintain the same direction of paired and mating parts. When cutting suede, you must follow the direction of the pile. The pile should be directed from top to bottom.
6. The needle leaves puncture marks on the leather, so leather parts are not swept away and stitching seams are not ripped out. To pre-connect the parts, use adhesive tape or paper clips. There is also a special pencil for fixing seams. The pencil does not leave a mark on the sewing machine needle. By the way, glue is a certain problem when sewing. It clogs the eye of the needle, causing gaps in stitches and even thread breaks.
7. Use overstitched, overstitched or covered stitches. You cannot press or press seam allowances like you would on fabric. Instead, they can be glued with rubber glue or another, which remains elastic even after polymerization (drying). There are special adhesives, as well as NT 2 glue. If you don't have glue, machine stitch the seam allowances in position.
8. It is recommended to use a special interlining for leather LE 420 as a gasket, which is glued with an iron.
9. The fastener is made with a zipper, loops (stitched, overcast and hinged) and buttons. The buttons must be riveted. They are installed in hardware installation workshops.
10. If you do not have such a convenient tool as in this photo, then smooth the seams with the handles of scissors. First, place the seam allowances from the inside out using short taps and smooth them out. Then do the same on the front side with the seam groove.
11. Working with leather involves ironing the leather with a non-hot iron without steam through a dry cloth from the inside of the product. Before ironing the item, try it on a small piece of leather. Ironing leather is not recommended because the hot sole of the iron can cause the leather to change its properties, become stiff and shrink in size. But sometimes when working with leather it is necessary to put an adhesive pad. Then you need to iron very carefully and always only on the wrong side, placing an iron pad under the sole of the iron.
Sometimes genuine leather needs to be stitched using a furrier's machine. In this video you will see how the 10B furrier machine works.
How to sew faux leather
Modern stores offer a wide variety of artificial leather. With all the advantages of this material - ease of care and sewing, beautiful appearance, very similar to natural leather - it continues to attract lovers of needlework with its relatively low price.
However, in order for faux leather products to please the eye, you need to become familiar with some of the nuances of sewing this material. There are not very many of them - much less than when it comes to real leather. Still, knowing these rules will make your work much easier.
There are only three problems:
- The skin sticks to the foot, slowing down the sewing machine. The machine seems to be “stomping around” in one place.
- Punctures from a sewing needle are clearly visible on the surface of the material.
- The skin often tears under the stitches.
In accordance with these features, we can give some tips for working with artificial leather.
At the stage of cutting out, fitting and preliminary basting, you should remember that the use of pins and a hand needle is strictly prohibited, since punctures in this case cannot be avoided. Instead, you can, for example, put some kind of weight on the pattern, which should be traced onto the fabric.
It is advisable to cut out the cut details not with scissors, but with a special circular knife. In this case, you need to place a flat board or glass underneath, which you won’t mind cutting. If you need an even cut, you can use a plastic ruler.
To use a sewing machine, you need to purchase a special foot made of Teflon or equipped with rollers. This ensures that the artificial leather does not slow down and moves freely. If you couldn’t find such a foot, you can place a strip of wax paper on top of the leather while sewing - this will make it easier to move a regular foot. When the stitching is done, you need to carefully tear off the paper on the sides of the seam, and then remove the remainder.
Another way is to simply lubricate the skin with oil (machine or vegetable).
The sharpest needles should be chosen, as this will make the puncture less noticeable. For example, needles for jeans are suitable. There are, of course, special needles for sewing natural leather, but they are not very suitable for artificial leather. You also need to remember that leatherette dulls them much faster than other fabrics, so the needle needs to be changed as often as possible.
The stitches should be quite long. If the stitch is short, the thread is very tight and can damage the material. That is why skin tears can often be observed between needle punctures. To avoid this, you can use a zigzag stitch instead of a simple straight stitch.
When sewing, it is convenient to use small hair clips or even bobby pins to pre-connect parts. In this way, you can align the edges of the parts being sewn, and when the foot approaches the clamping point, you simply need to remove the invisible one.
To prevent the stitching from wobbling and to look neat, it is better not to set the speed too fast. The slower you sew , the better the result will be. Especially for the site Handicraft Lessons sabbinochka.