Hand stitches and stitches: types and patterns
There are different types of stitches for hand sewing with a needle. They can be decorative or ordinary - this is a general classification. The first group includes species that are used only for decorating clothes. The latter perform a practical function.
Simple hand stitches
- "back the needle";
- marking stitch;
- forward the needle;
- edging with open cut;
- connecting seam;
- secret hem;
- edging with braid;
- hand furrier stitch;
- grinding and marking;
- padding seam;
- "crosses";
- running seam;
- hem;
- double or French seam;
- "check mark";
- sewing
Important! It is recommended to take a thread length from wrist to elbow.
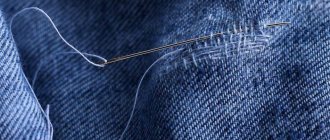
Back stitch
At the very beginning of learning to sew, it is recommended to use a seam, the stitching of which will be strong and simple. “Back needle” is a basic stitch, it is used for fastening in difficult places on fabric products. How to do:
- Bring the needle up.
- Make a backward stitch. About 2 millimeters.
- Bring the needle up. Back off a few millimeters along the seam.
- Insert the needle into the end of the stitch and bring it out to the stitch in front.
When sewing a stitch, 3 mm are retreated from the edge of the fabric.
Important! There is also a version with skips.
Hand stitch “by the needle” (marking)
Linen can be sewn and even embroidered with stitches using the needle. They look like machine-made ones, look neat, and are simple to make.
How to machine stitch by hand:
- Bring the needle to the front of the fabric.
- Move a few millimeters to the right. Pull the thread.
- Bring the needle to the front side at the starting point, it will be to the left.
- Bring to the wrong side at the end of the stitch. Print on the front side to the left.
There is also an option with interrupted stitches, but when bringing the needle to the back side, the stitch is made wider than on the front side.
"For a needle"
Seam "forward needle"
A simple toy can be sewn using the “forward needle” stitch. It consists of gaps and seams and is used for lightweight products.
How to make a hand stitch:
- Fasten the thread from the edge of the material.
- Make a stitch of 5 millimeters.
- Bring the needle inside out.
- Skip the same number of millimeters.
- Bring the needle to the front.
- Make the next stitch.
It is recommended to maintain the stitch size when sewing. But the length may vary slightly; this type is often used for outlining a pattern.
"Forward the needle"
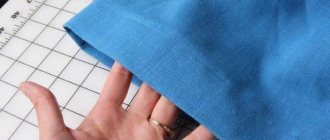
Open cut edge stitch
There is an option with an open and closed cut; it is used with different fabrics. They look identical from the front side, but from the back they can be distinguished.
- Align the binding and the edge of the material. Sew 5 mm from the edges.
- Unscrew the trim. Work with an iron.
- Fold it inside out and wrap the cut. Baste to the base.
- Sew a stitch along the front of the binding.
A sewing machine is most convenient for this method of sewing. This option is notable for the fact that it can be used to process even thick fabrics.
Open cut edging option
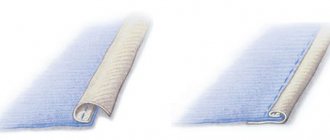
Reinforced connecting seam
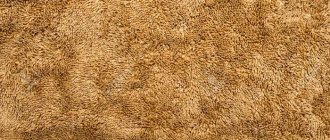
This is an option for joining thick fabric, such as felt. If you have a suitable needle, you can process a “suit”, jeans, even coat materials.
- Make several stitches that go through all the layers.
- Take the next steps through 2 layers (if the previous ones were through 3). Retreat 15 millimeters.
- Leave the thread loose, do not tighten.
Recommended for use with strong thread and needle. The fabric is folded in three layers.
Types of connecting hand seams
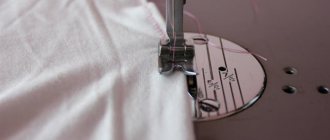
Connecting seam
The sewing seam is also performed in two steps.
You can see the width of the seams, stitch length and purpose in the figure below.
The width of the allowance for making a double seam is from 1.4 to 1.8 cm. The choice of the width of the allowance depends on:
- on the thickness of the fabric,
- purpose of the seam
The seam is used when sewing bulk materials when sewing bedding and sportswear, where special strength of the seams is required, for example in jeans.
AND THAT'S NOT ALL - GET A GIFT!
Start assembling a mini encyclopedia at the seams. Click on the picture to download the PDF file “Connecting underwear - double and closed seams”
Click on the picture to download the page of the mini-encyclopedia of seams
TO TEST YOUR KNOWLEDGE, ANSWER THREE QUESTIONS:
- In what cases is double stitching used?
- Which of the seams studied today is performed in two steps?
- Which seam would you use when sewing a blouse made of thin transparent material, and which one would you use on jeans?
- Sew seam samples and attach them to the file along with the printed design. This will help you quickly navigate when you need to perform a seam until you learn it and can perform it almost with your eyes closed.
- Related Posts
- Vintage skirts/dresses sun/half sun
- Valentines on a T-shirt
- How to cut and sew knitwear
- Is it worth making a pattern? A simple body type test
- Types and purpose of table linen
- Fabric defects
Add a comment Cancel reply
Hand stitches for working with beads
Types of beading differ in the method of attaching the beads and their location. The most common option is the monastery stitch.
How to perform monastic:
- Fasten the thread from the wrong side. Define a square.
- Insert the needle from below into the lower left part, pull it out in the upper right corner.
- Pull up the thread with the bead and repeat the stitches.
- The beads will be secured with the same tilt to the side.
- The last and first bead are reinforced twice.
Important! The thread should always be taut.
When working with beads, needlewomen also use the stem-shaped, arched, circular, “attached”, forward needle, and lowercase.
Convenient option for working with beads
Almost no garment is created without the use of machine stitches. Hand stitches mainly perform a temporary function of connecting parts, etc., but the final stage in the work is often the laying of machine stitches, which can also have a decorative and finishing purpose.
Machine seams are divided into groups depending on the amount of seam allowance, the number of machine stitches, as well as the bonded layers of materials being joined - that is, on the overall design. There is no clear boundary between groups of machine seams. For example, a connecting seam can also be a finishing seam, etc. In addition, a combination of various seams is not excluded. The classification of stitches, lines and seams can be considered in more detail in “GOST 12807-2003 - Sewing products. Classification of stitches, lines and seams." Below are the most popular and frequently used machine stitches and stitches, depending on their purpose.
Connecting machine seams
- Ironed connecting seam
- ironing
- setting open cuts
- open cut label
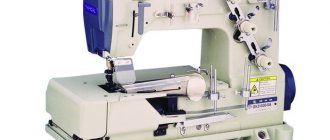
- linen sewing machine
Edge machine seams
- Hem-to-hem edge seam with open cut
- hem with closed cut
- hem with edged cut
- overturned in frame
- edging with open cut
Connecting machine seams (for fastening parts)
Connecting seam
Connecting stitch seam - for stitching sections, attaching small parts to larger ones, grinding strips, etc. There is a difference between a stitched ironing and a stitched ironing. With a backstitching, the seam allowances (cuts) are ironed in one direction, and with a backstitching - in different directions. They come with or without overcast edges.
Stitch ironing
Stachny ironing
Connecting seam
Connecting stitch - for connecting parts overlapping one another, connecting and securing seam allowances and folds directed in one direction. It is also often used to join parts of a product made of dense fabrics in order to obtain a thinner seam thickness. There are adjustment seams with open cuts and adjustment seams with closed cuts.
Set-up with open cuts
Adjustment with closed cut
Connecting overlay seam
Connecting patch seam - for connecting interlining parts when sewing yokes and patch pockets. There are overlay seams with open cuts and overlays with closed cuts.
Open cut label
Closed cut invoice
Connecting topstitch
Connecting topstitch - for finishing, as well as connecting parts of the product without allowing the seams to be ironed (specific materials - leather, etc.).
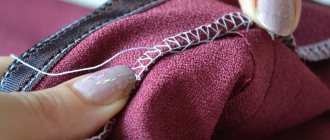
Connecting linen seam
Connecting linen seam - to ensure the strength and aesthetics of bedding, shirts, blouses, as well as sports equipment, industrial clothing, linen, products made from fine fabrics. There are three types of linen seams: linen closed, linen lock and double linen (French).
Linen sewing
Linen castle
Linen double (French)
Edge machine seams (for processing edges and cuts from fraying)
Hem edge seam
Hem edge seam - for processing the bottom of products, sleeves and other parts made of easily fraying fabrics (when sewing linen, outerwear, etc.). There are edge hems with an open cut, hems with a closed cuts, and hems with an edged cut.
Hem with open cut
Hem with closed cut
Hem with edged edge
Edge overstitch
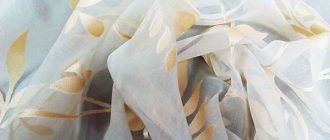
Edge facing seam - for processing facing parts from thin fabrics - collars, cuffs, etc., to prevent displacement of the connection and increase the stability of the contour of the parts during clothing wear. They mainly use edge edging into a frame, edging into a complex frame, and edging overturning.
Overstitched in frame
Stitched into a complex frame
Welt in edging
Edge edging seam
Edge edging seam - for processing the edges of products, for decorating collars, side edges, etc. There are edge edging with an open cut, edging with a closed cut and edging with braid.