What you need for work
Before you begin the main work, you should start with the preparatory stage:
- Prepare the product. The item of clothing must be processed and ironed. In particular, this applies to fabric crocheted:
- Next, you need to secure the fasteners using regular pins or other devices;
- The next steps to be performed directly depend on the fixation method, namely: creating a strip, knitting a strip, etc.
Knitted sweaters with a zipper look as if they are seamlessly knitted and do not require additional decorations
. Important! It is worth paying extra attention to the peculiar allowances; their size is 5 mm with the basic version of the fastener.
It is also necessary to prepare materials and tools. Among them:
- Knitting needles and devices for fixation;
- Needle and thread to match the color of the product;
- Paper and a simple pencil.
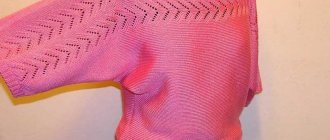
Children's knitted vest with clasp
Stage two: attaching the zipper
At this stage of the work you will need threads and needles. You don't have to sew much, you just need to secure the outer edges of the zipper with short, invisible stitches.
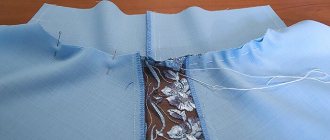
If the fastener was shortened, then in its lower part you need to make a “pocket” - fold the fabric strips so that they completely cover the new base of the zipper.
“We are still friends”: Derevianko commented on the breakup with his wife
If there is little snow, there will be no harvest: December 16 is Ivan the Silent Day
The money tree pleases with lush flowering: my secret is in caring for the leaves
As soon as the zipper is sewn, you need to take out the web, heat up the iron and start fusing.
The use of adhesive backing tape is necessary in this case, as it will prevent the threads from unraveling where the sweater is cut.
You need to do the following:
- carefully cut the jumper, gradually following the progress of the unzipping zipper;
- cut strips of adhesive tape to the required length;
- place strips of fusible web under the zipper, on the fabric of the jumper;
- iron thoroughly;
- trim the edges.
An important point: do not run the iron along the fastener links. If you do this, the zipper will stick to the tape. And it is almost impossible to clean the fusible web from the fastener links.
How to sew a zipper into a crocheted item
If the product is crocheted, you can use the crochet method. The process consists of several stages:
- Perform processing along the edge line of the fastener in the form of an overlock seam;
- After which you should knit the side that has already been tied in advance, near the single crochets;
- The final stage is sewing the zipper to the main fabric.
Correctly sewing the fastener into the loops of the product
How to manually sew a zipper into a knitted sweater
Literally the most common method of sewing a zipper is to use a placket to insert the zipper into the knitted garment. This method is often used in practice thanks to its simple technology. To sew a zipper into a knitted sweater you need to:
- Along the edges of the product, cast on the required number of loops in order to knit the sticks from the front side;
- In a similar way, make part of the stick from the wrong side;
- Place a zipper in the central part of the prepared item and secure it with needles, pins or a basting seam;
- Make a connecting seam and the work can be considered complete.
You might be interested in this: Simple patterns and instructions for sewing high-waisted shorts
In order to sew in a fastener, you can knit additional strips for fastening
There are fixed size zippers available in specialized stores. For the required size, you should purchase a sufficiently large length, and then cut off the excess.
A beautiful option for knitting and sewing a fastener into a children's sweater
My Master Classes: sewing a lock into a knitted blouse
After bragging about filming in the program "Affairs" of the country, mom rimston1 Rimma placed an order for us to knit a blouse with a hood for her son in a very cheerful color. Kofteika contacted, went to the owner, and even the report has already been received and published here. I won’t describe the knitting (in this new interface, the first version of the message was lost somewhere... so I’m writing the second time quickly, to the point and without preamble. For anyone interested in the basic parameters of the blouse, they are here)
I have been asked many times how I sew a lock into a knitted item. Based on this blouse, I decided to share some wisdom with you.
In general, when knitting a sweater, into which, according to the idea, a lock should be sewn, along the edge (at a distance of about 1.5-2 cm) I knit a path of purl loops on the front side of the product (i.e. in the purl row we knit one knit stitch, and in the front row we always knit the same loop purl).
If you already knitted a blouse at the time of viewing this MK, do not be upset. You can unravel one loop along the length of the entire product and lift it with a crochet hook.
If at the bottom of the product there is a 1x1 elastic band like mine, then just the fifth loop from the beginning of the row will be needed (edge, knit, purl, knit, purl,
facial, etc...)
What is good about this method (by the way, I came up with it myself and please do not accuse me of plagiarism) is that on the front side (thanks to the recessed purl loop) the cast-on row for the edge is not visible, but on the reverse side a very convenient chain of cast-on stitches
Now we take a circular knitting needle 1-1.5 sizes larger than we knitted the main fabric (in my case, I knitted with a 3-knit, but I cast on 4.5 knitting needles, 80 cm fishing line, ADDI-click). This is done so that the canvas does not tighten and looks neat. Next, we put on the knitting needle the half-loop of the knit chain closest to the edge. Like this:
We attach the thread and knit with front and back rows to the desired height (i.e. when the knitted strip is equal in height to the edge of the product):
Without breaking the thread, we lift the chain from the front side of the product by the outer loops along the entire height of the product and close it in a circle.
We knit another 4-5 circular front rows (about 1-1.5 cm) necessary for sewing in the lock and close the loops with a crochet hook. Use a larger hook to avoid pulling the edge again.
We perform the same actions with the other shelf at the front of the product. By the way, if you are not too lazy, you can knit a protection against the lock, so that the child does not pinch the skin with the lock, in rotating rows at the top on one of the shelves. like this:
We steam it (if the product is made of cotton) and take it to a specialist to sew in the lock. Or we do it ourselves.
I hope my MK was useful to you. Thank you for your attention!
By the way, if you are not lazy and want to sew a lock in a very, very difficult way, then there is an excellent MK from the craftswoman bobignu. I liked the quality of the photo and the thoroughness, as well as the text...
Source: https://mamaasja.blogspot.com/2012/04/blog-post_10.html
Using air loops
Another useful method is to sew a zipper into a knitted item using a chain stitch. In order to perform the work efficiently, certain steps must be followed, namely:
- First you need to sew the stitches on the fastener using a thread that matches the color;
- After which a series of stitches are developed using single crochet technology, capturing the edge of the fabric and zipper stitches;
- This type of procedure should be performed on the front side of the product.
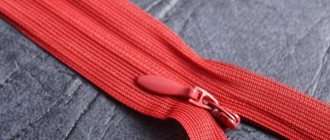
The zipper can also be sewn in with simple threads
Useful tips
In order to avoid difficulties during work and do it better, you should pay attention to some tips that will help you avoid mistakes and contribute to high-quality work, namely:
- The zipper lock should be chosen exactly to match the color of the desired product. This way the zipper will not stand out from the general appearance and will look attractive even if it is sewn along the entire length of the knitted product;
- The upper border of the zipper must be at the level of the collar, and in case of a mismatch in size, the excess must be cut off;
Fastener after completing the entire sewing procedure
- It is advisable to secure the fastener to clothing using hand stitches. It should be sewn on with two lines on a machine, one of them should be at a distance of about three millimeters from the edge, and the second about six;
- In cases where additional fixation is needed, you can use safety pins, which should not be removed when using a sewing machine;
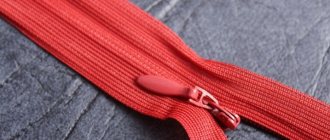
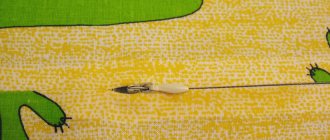
Pulling yarn through the clasp strip using a crochet hook
- To ensure that the dog does not interfere during work, you should remove the foot and return it back after completing the work;
- After completing the work done, it is necessary to remove the remaining threads from hand stitches, and to consolidate the result, go over the seams with an iron;
- It is also important not to forget to leave small pieces of the zipper to decorate its edges.
You might be interested in this: Creating a pattern and sewing a women's lace bodysuit
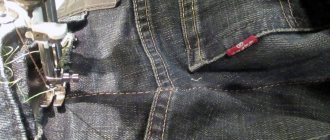
Working with a small fastener
It is not at all necessary to go to a studio and spend money to sew in a zipper, but to do this procedure yourself at home. Such an activity may at first seem difficult and time-consuming, but each time the experience will increase, and thereby the work will become easier. You just need to stick to technology and have a little free time.
Sewn-in clasp on the inside
Now it’s clear how to sew a zipper to a knitted product and what you will need for this. The process, contrary to what many people expect, is simple and will not spoil the appearance of the knitted material. On the Internet you can find a large number of master classes on this lesson.
How to make original fasteners for knitted items?
The name of such an original fastener - brakes - came into fashion from marine terminology. In the Marine Dictionary we read:
Indeed, it makes sense. Yes, and in appearance too.
To make such a fastener, you can use various cords, braid, soutache, yarn, pieces of fabric, leather, suede, felt, and, in fact, buttons. As a rule, cone-shaped buttons are chosen for braking. But this rule is purely advisory.
There may be several buttons or even one. And to support the overall stylistic decision, it can be made from the same material as the brake itself. For example, make a knitted button.
- Such a fastener will decorate outerwear in an original way not only for the fair sex, but will also look stylish in men's sets.
In addition, wicker decorative details can make women's accessories unique: cosmetic bags , handbags , clutches .
The brake clasp can be from the simplest minimalist form to sophisticated “intricacies”. Therefore, if you set out with your own hands , then follow the proven principle: from simple to complex. Start with the simplest brake forms. For example, from these:
Ornate brakes aren't that hard to do either. The main thing here is attentiveness and perseverance.
- Now you know how to make a stylish brake clasp with your own hands.
- Charge yourself with positivity, and you will succeed!
Source: https://www.bolshoyvopros.ru/questions/1656450-kak-sdelat-originalnye-zastezhki-dlja-vjazanoj-veschi.html