Material
To make an exclusive snood, any material is suitable, it all depends on what its role is in the wardrobe ensemble.
Linen, cotton - the texture of the fabric is light, the product is intended for warm weather or indoors. For sophistication, summer snoods are tied or trimmed with lace.
When combined with retail variations and fabric textures, you get a scarf with a twist.
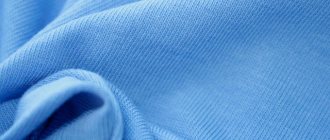
The item is made from knitted fabric to be worn in the off-season or on cool summer days.
How to sew a snood and a hat from knitwear for a child
For little fashionistas who love to dress up beautifully and fashionably, we suggest sewing a hat + scarf-snood set. The kit consists of two parts: external and internal.
The upper part needs to be made more colorful and bright; a fleece footer is suitable for it.
We will make the lining from a plain fabric that stretches well, ribana is suitable here. The fabric has a dense structure and stretches well in all directions, ideal for an inner cap. When cutting a product, you must keep in mind that the properties of the fabrics are different and the approach to cutting it must be individual.
How to sew a hat and snood for a child 1-3 years old
Take measurements from the child's head. Calculate and make a pattern as shown in the photo. If the sizes do not match, then do according to your calculations. We cut out one solid piece from each type of prepared fabric.
Fold each piece in half so that the right side is on the inside. We sewed it on both sides, top and bottom. See photo.
Sew the snood along the sides to make a ring. Leave 5-6 cm unexpired on the side to turn the finished product inside out.
Turn the finished product right side out and sew up the hole with a hidden seam.
The double-sided snood for the baby is ready. See also how to knit a children's snood.
Warm scarves and snoods without yarn, knitting needles or hooks: 5 master classes
Fleece snoods: master class
Soft and pleasant to the touch, fleece is a good material for a sports-style snood. By the way, for the outer part of the snood you can take a more elegant and impressive material, which is also elastic, for example, warm knitwear, and use fleece for the inner part. This master class contains 3 patterns for one-turn snoods of different sizes: for babies, older children and adults.
You will need:
— fleece in two colors (option — fleece + other material);
- sewing machine and threads;
- needle for hand sewing.
Knitted beanie: how to sew a hat with your own hands
Step 1
Make the pattern (allowances are already included). Cut out two identical parts from different materials.
Step 2
Place the pieces right sides together and sew along the long sides.
Step 3
Turn the snood inside out halfway, as shown in the photo, and sew the short sides, leaving an opening for turning.
Step 4
Turn the snood inside out and sew the hole by hand using a blind stitch. Ready!
Let's start making the hat
From the same fabric, we cut out two parts of the future hat according to our measurements. The photo shows approximate sizes for a child 1-3 years old
We sew the finished cut parts on the wrong side. After stitching, the cap must be ironed along the seams, while slightly stretching it.
On two parts along the top of the cap, you need to sew up the undercuts. To do this, mark with chalk a depth of 5 cm, a width of 3 cm (see photo). Leaving 1.5 cm from the fold.
Sew both parts together along the wrong side. At the same time, leave 5-6 cm on the seam to turn the finished product inside out.
Turn the cap inside out through the hole.
Carefully close the hole with a hidden stitch. The hat from the kit is ready.
Use the pieces of fabric that remain after making the set to sew doll clothes, and the baby will be happy.
How to sew a snood from knitwear with your own hands
Making a snood with your own hands is not difficult. You need to use the pattern given below. To make it you will need knitted fabric: its length is 1 meter, width is at least 50 cm.
Fold the prepared fabric in half with the front part facing inward and stitch it on a machine. Leave a 5cm hole in the seam to turn the snood right side out.
Make a figure eight out of the finished product and carefully sew the edges with a hidden seam.
Decorate the finished snood scarf as you wish. For plain fabrics, pompom ribbon works well.
How to sew a snood
If you have at least minimal sewing skills, this model will not cause you any difficulties.
What measurements are needed for work?
The only measurement you really need is the circumference of your head. After all, the scarf should be easy to put on and take off even when folded in half.
Important! Be aware of the seam allowances: they will take up about a centimeter on each side.
The width is calculated according to your taste, but should not be less than the width of the neck - this is a scarf after all! You can “try on” the fabric in front of a mirror and determine which width will fit best into your wardrobe. Both as a hat and as a scarf.
Work order
You will need fabric: a little more than two circumferences of your head in length .
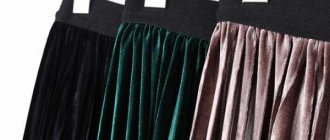
You can choose the width to suit your taste. Just don't make the scarf too narrow, it should drape. The snood can be made either one-sided or two-sided.
- For single-sided fabric, the width of the fabric will be twice the intended width of the finished product. It will be folded in half during sewing.
- For double-sided, you will need to choose fabrics of matching colors.
The fabric is simply folded in half. In the case of a double-sided product - two pieces of fabric next to each other. And then it is stitched from the wrong side . Don't forget to leave a small hole in the seam. Through it you will then turn the scarf right side out.
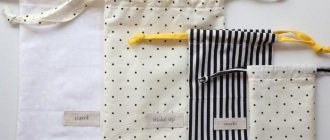
How to sew a fleece snood for a child
A fleece snood is a tube that has a rectangular shape. In this case, all seams are completed and sealed inside the product.
The finished product is put on over the head. The length is calculated so that it is comfortable to wear.
Fleece fabric does not fray or fray, so it does not require special treatment.
Sew all edges together using a sewing machine. Along the seam on one side, leave 5-7 cm for turning the finished product inside out. Then it must be sewn up with a hidden seam.
If you insert a cord with a lock into a fleece snood model, using a pre-designed stitch, it can easily be transformed into a hat. See photo
Double-sided fleece snood scarf, cozy, soft and very warm.
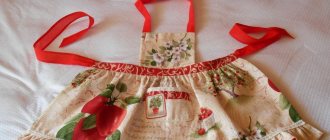
How to sew a hat and scarf from fleece?
Health and prosperity to you!
Wishes for health are not accidental - this topic is very relevant for me in winter. The rest of the year, health problems somehow don’t bother me