You can learn how to embroider with satin ribbons on a variety of Internet resources, so there is plenty of information to easily learn the basics. In addition, modern society strongly encourages such types of needlework, offering a wide range of ready-made compositions with a full set of ribbons, needles, fabric and even designs. Every year more and more materials appear. Silk, satin, lace and synthetic are used. By weaving them together, we can create amazing compositions that are distinguished by their realism. Modern ribbons are used to embroider on all types of fabric through which a needle can be pushed.
The quality of the satin allows you to work on leather if you make holes in it in advance. Unlike cross stitch, the stitches create a three-dimensional image that will certainly attract the attention of true admirers of beauty. Of course, at first it doesn’t always work out the way you would like, but be patient, every masterpiece begins with confusion. You will certainly be rewarded for your efforts and time spent with enthusiastic exclamations from your friends when they see your skill. Get creative by creating new stitches and inventing patterns. Having mastered the embroidery technique, you can easily turn your favorite hobby into a profitable business.
Handicrafts as an aid to development
This type of creativity is in demand not only among girls. It is perfect for both their modern mothers and advanced grandmothers. Each generation will find its positive sides in this hobby:
- development of fine motor skills and, as a consequence, mental formation
- spatial thinking
- imagination
- sense of taste and style
- diligence and hard work
- accuracy and attention
- perseverance
From a psychological point of view, it helps
- finding a way to assert yourself
- release of energy through the hands
- finding inner harmony
- making friends with similar interests
Such skills develop the child and fill the hearts of the older generation with joy. And working together unites all family members.
Ribbon embroidery for beginners step by step
Any beginner girl can decorate her home and make it cozy. Step-by-step lessons of this art will help you master this technique. The result of the training will delight you and your loved ones. Beginning needlewomen need to adjust the stitches when embroidering a picture. The technique of making amazing paintings amazes many and they eagerly want to try to make a hand-made masterpiece themselves.
You need to purchase beginner's kits from a craft store. It includes the training sequence, diagram and all necessary accessories. To get started as a beginner, you first need good light in the room where you are going to practice this art. Also a chair and accessories where everything will be at hand. So, you need to purchase the necessary accessories for needlework.
Materials and tools for beginners, prints and patterns
Detailed videos about embroidery are available on many Internet sites. They can be very different; they are chosen not only by color, but also by density. Silk, for example, is comparable to all types of fabrics; embroidery can be done with them even on leather, if, of course, you pierce holes in it with an awl in advance. The disadvantage of this type of linen is its high cost and the shedding to which it is subject after washing. Satin ones are considered the best option. They are washable, do not fade or fade in the sun. They can also be ironed at any temperature. The peculiarity of satin ones is their versatility; they are universal and suitable for making floral motifs and plots.
Features and varieties of satin ribbons
In order for a craftswoman to create her own little masterpiece, she needs to choose the right working material. Satin ones are offered in polyethylene packages, which indicate the thickness, its color, length and number. The beauty of them is that they have a huge number of color shades. There are so many of them that sometimes it is impossible to find out the desired shade without a number. Satin ones are very smooth to the touch and have a pleasant shine; due to their softness and pliability, they can be used anywhere.
When working, it is important to remember about the needle, because if the eye is too small and the tape is too wide, you will not only wear out your product, but also risk damaging its integrity. The material is very delicate and the slightest snag can cause the tape to begin to bristle. Among other advantages we can note:
- high strength
- durability of use, shine lasts for several years
- perfectly absorbs moisture
- not electrified
- drapes well
There are a huge number of positive aspects; satin ribbons are very affordable, which makes them popular among embroiderers. Your hobby will allow you to save money, because by creating a painting, you update your interior without significant costs. Many needlewomen insist that silk is better to use, but their cost is prohibitive for beginning craftswomen. In addition, it is better to study using the economical option, because you risk ruining expensive material without finishing the picture.
Choose silk or satin, the difference between these types of fabric
Silk is a natural material, and satin is synthetic. It wrinkles very much, so it should be stored in neat skeins; as for satin, it is less sensitive to bends. In addition, silk is prone to shedding and fades in the sun, unlike satin. General information combination of fabrics with satin: Satin (satin) is combined with lace fabric, velvet, chiffon, organza. Silk is combined with openwork fabric, velvet, jersey, organza, panne velvet, satin, chiffon.
Summing up the advantages of satin ribbons
If you decide to choose this particular type for your work, rest assured that this type of needlework will bring you an extremely pleasant experience and will take a minimum of time. The fact is that this type easily lays on the fabric, but if you encounter a problem with the rigidity of the tape, then simply wash it with conditioner.
For beginners, embroidery can be done with material of different widths, it all depends on what kind of pattern you want to depict. Embroider with thin satin strips; they pass through the canvas more easily and do not distort the design. Also, from wide diameters, overhead components of the picture are made - flowers, stems, leaves, bows. It is important to sew them on with hidden stitches, giving your work even more sophistication and originality. Add variety by making the composition three-dimensional by winding a thick ribbon onto a needle and forming French knots. This embroidery method is one of the key ones in the work. Satin ones are made from polyester fibers, which is why they hold their shape so well in compositions.
If you are interested in embroidery, you will find patterns on many online resources or download them from us. As most people say, roses are the best; with their brightness and even petals they will add elegance to any picture, and in addition, they look quite realistic. It is very easy to make roses from satin ones. You will see this for yourself by making several loops through which the tape is passed. This must be done in such a way that it passes either under the loop or above. The result is a bud that looks like a spiral.
Read more: rose and other flowers master class
A vine made of dark purple ribbons looks no less impressive; it is also simple to perform - when the needle enters through the outline, the needle is wrapped around the ribbon and pulled along the entire length through the resulting curl. Make several knots and add straight stitches in green, so you get a grapevine. There are many more embroidery options, which you can familiarize yourself with on the website, where stitching techniques are laid out in a simple form.
Step-by-step instructions for ribbon embroidery for beginners
There are many types of needlework, but recently embroidery has become very popular. The step-by-step instructions for ribbon embroidery for beginners describe the technique of making stitches, and there are diagrams. Having learned how to create simple drawings, you can try to make a more complex product.
Materials and tools
Before you start learning ribbon embroidery techniques for beginners, it is worth preparing the materials and tools that you will need for needlework. You also need to learn about several secrets of beautiful and neat sewing:
- Ribbons used for needlework can be of any length and width. But for convenience, it is recommended to purchase strips, the width of which varies from 7 to 25 cm. The most beautiful pictures are obtained from satin, satin and silk.
- When choosing canvas, you should give preference to materials with increased density. In this case, the stitches will lie smoothly and securely. Inexperienced craftswomen are better off starting with a special canvas that already has a diagram or drawing on it.
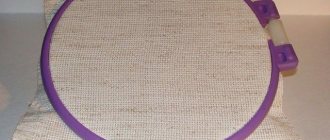
- It is best to choose wooden or plastic hoops. These devices are used to stretch the fabric; it is much more convenient to embroider on a smooth and dense fabric.
- Needlewomen with little experience are better off using special needles. They are slightly different from classic products, as they have a large eyelet into which ribbons can easily pass. Tools should be smooth, without signs of rust. It is also worth paying attention to the fact that embroidery needles should not be sharp so that the fabric does not tear, but moves apart.
This is a list of the basic devices that are required for embroidery; there are also additional ones - these are scissors, a tailor's awl, pliers and matches. In addition, during the process you may need special markers with which to apply a design to the fabric. Their peculiarity is that they disappear on their own after two days.
Basic elements
After you have purchased everything you need for handicrafts, you can begin the process. First you need to take one strip and cut off the ends, moreover, on one side the cut should be straight, and on the other - at an angle.
The first end must be cauterized, and the second end must be inserted into the eye and pulled through a little. After this, you need to insert a needle into the pulled out part of the ribbon and pull. As a result, a nodule should form.
Now you can start learning ribbon embroidery techniques for beginners.
Top 10 interesting facts about the symbolism of embroidery in Rus'
The process for performing basic stitches is as follows:
- straight - take a needle tucked with a ribbon, thread it from the wrong side and insert it back, holding the strip so that it does not twist;
- Japanese - the needle is brought to the front side, after which you should straighten the tape on the fabric, and then insert the needle first into the center of the strip, and then into its corner;
- twisted - the needle is taken out from the inside out, turned over so that the ribbon is twisted, and then the needle is returned inside out;
- French knot - bring the needle to the front side, wrap the ribbon around it and return the instrument to its original position, the puncture is made near the exit site;
- air loop - bring the needle out from the wrong side, place a pencil or pen under the tape, wrap it around the element and return the needle back;
- loop with attachment - done according to the same pattern as the air stitch, but an additional element in the form of a bead, beads or French knot is placed in the center.
To begin with, craftswomen are recommended to practice on simple cable ties. As soon as the technique is mastered, the steps become even and neat, you can begin making complete paintings, but it is worth choosing a simpler scheme at this stage.
Simple scheme
For needlewomen without experience, it is better to start with the simplest patterns, for example, try to embroider a simple daisy flower. To make a beautiful voluminous bud, you will need:
- white, yellow satin ribbons, the width of the strips should be no more than 10 mm; blue canvas;
- needle with a wide eye;
- scissors;
- hoop;
- marker for drawing, it can be replaced with a simple pencil.
Learning to embroider with ribbons like a pro, tricks small and large
Any type of needlework has its own tricks that allow you to quickly get the job done or correct minor flaws. Experienced craftsmen are well acquainted with all the intricacies of the work, but it will be very useful for beginners to learn advice from specialists.
- When embroidering leaves, you need to twist them around the needle once and make a straight stitch.
- if you need to make a large element with the needle twisting, then it needs to be securely secured with threads, and it will not subsequently unravel.
- It is recommended to iron from the wrong side. The same applies to the finished work.
- Don’t forget to burn the ends with a lighter; if you don’t do this, the weaving may unravel and instead of a beautiful flower, you will have a scrap of thread.
- If you frame it, it is recommended to insert glass from the front side so that dust does not settle on the ribbon. If you do not have glass available, replace it with plastic film.
- If you use a white canvas or light-colored fabric as a basis, you need to check the ribbons before work; they should be soaked a little. There is a risk that they will turn out to be of poor quality and will leak paint, thus ruining the material.
By adhering to these rules, you will be able to keep yours in good shape for a long time. Don’t worry if something doesn’t work out, even experienced needlewomen once started with straight stitches and extraordinary knots. Over time, you will master the basics of needlework and will be able to give advice to beginners.
If you want to keep up with the times, but at the same time appreciate old traditions and entertainment, it is a good idea to learn satin embroidery yourself. Everything is quite simple - you need ribbons of several color options, scissors, fabric and a needle with a wide eye. When mastering the basics, you need to become familiar with three types of seams; in the world of needlework, they are usually called stitches. There are 21 types of stitches in total, although skilled needlewomen are coming up with their own methods every day and creating unique masterpieces. To create a simple pattern, simply use a straight stitch, pulling a needle and ribbon through the canvas. Be sure to burn them at the end with fire, as a result they will not unravel. It would be very sad if you spend two days and everything collapses at the slightest touch.
Read more: stitches or embroidery stitches
Fabric (linen, cotton, double-thread, silk, satin, gabardine) for the base
For beginners, it is better to first start needlework using a ready-made drawing-scheme. The fabric can be any. This way you will understand later what density of fabric you need to take for a particular painting. For example, gabardine is very convenient because it is a pleasant synthetic material, it has a very good weave of threads, holds the ribbon, and the needle passes through the fabric easily. Also use silk fabric, cotton, satin, linen, and woolen fabric. It is necessary to take into account the size and weight of the painting; the density of the material is important; reliable fixation of the stitches depends on it. At the beginning we will work on a tight basis. If you are a beginner, then to get an even and smooth drawing it is better to use a canvas.
Hoops (round, square - from small to large)
The peculiarity is that the entire area of work must be in a hoop, the fabric must be well stretched. There should be no pinches or bends. Such an accessory for needlework must be selected in relation to the size of the painting. Hoops can have different shapes, such as round, rectangular, square. It is advisable to make three-dimensional paintings with a wooden hoop, and for small still lifes round plastic hoops are suitable. When choosing them, give preference to larger sizes so that the entire design fits into them. When the canvas is tightly stretched, then it will be easier to sew.
Different types of needles (tapestry, embroidery and beading)
The main tool is needles. There are tapestry needles that have a wide, elongated eye with a sharp end. It is important that the ribbon can be easily pulled through the eyelet, so select the number of needles according to the width of each. If the width is from 2 to 3 mm, then a needle with number 24 is selected. For from 7 mm to 12 mm, a needle with number 18-22 is suitable.
Long and thin bead needles are also used simultaneously in needlework. After all, not a single craftswoman can resist adding all the beauty of the product and expressing the idea with beads and seed beads. Embroidery needles are also suitable; you can use them to manually embroider certain areas of the picture (petals, stem or pattern). A useful accessory are sewing pins for securing fabric, or for fixing ribbons or petals.
Thimble, scissors, marker, lighter and awl
A thimble is simply irreplaceable when working with thick fabric. For safety, so as not to injure your hands when pushing a needle, always use this little thing; it should be present in all manual work. An awl is a necessary accessory. When creating a unique masterpiece on thick material, sometimes you need to stretch a wide ribbon through the fabric. And here an awl will be an assistant, with the help of which you can carefully push apart the interlacing of threads, without any damage to the structure of the fabric. To ensure that your work looks at the highest level, purchase sharp, comfortable scissors.
You need to cut on both sides. One tip is cut straight, which will be pulled into the eye of the tapestry needle, and the second - at an angle of 45 degrees. It needs to be burned with a lighter. Such tools should always be with you. It is also worth purchasing special markers if the work will be done in your own design. They are very diverse - some disappear in the air after two days, others disappear in water. They are very convenient for carrying out the ideas of your creativity.
Ribbons (satin and silk)
If you want to make your dream masterpiece come true in the form of a painting or interior decoration, you need to stock up on many different ribbons. A wide variety of handicraft items can be easily purchased in specialized stores. They come in different widths - from 2mm-13mm and of course have a variety of colors. It is better to start trying to work with satin ones, which have the peculiarity that they are dense in structure, do not wrinkle, matte on one side and shiny on the other, which later gives a zest. If you want to convey a more natural texture of a flower, it is better to use silk, because they are neither softer nor more manageable. There are also organza, nylon, transparent voile, and corrugated. This type of accessory is used on a wider scale. Any composition and your imagination will enrich the composition of the bouquet, creating the effect of airiness and liveliness.
Threads (floss, wool, iris, grass)
Threads are needed to secure the stitches on the front side, and on the back side to secure the ends of the ribbons. They also complement the decor in the design, or combine with cross stitch. The most common type is silk threads. The next one is floss and iris threads, in a variety of shades of color. They are used in the form of petals, grass, and inflorescences. There are well-known threads - grass (very similar in appearance to natural grass), with its help it is possible to create entire bouquets. Also used in embroidery are wool, thin or thicker yarn, it all depends on the composition you are creating. This type of thread gives volume to the painting, fills voids, and is an additional decoration for the craftswoman’s improvisation.
Beads and beads
The use of beads and seed beads is not superfluous. They decorate the creation; you just need to use your imagination and you can get a unique illustration of the work. They have different shapes and colors. Everything is selected individually to the type of drawing. It is these handicraft accessories that will reveal and add zest to your inimitable masterpiece. Many craftswomen really like to use beads in embroidery.
Nowadays, this type of needlework is a popular and exciting activity. It brings benefits and pleasure at the same time. This activity provides an opportunity to relax psychologically and switch from external problems to pacification of the internal state. After all, DIY creations inspire us to be kind, gentle and loving towards our family and friends. Don't be afraid to take on different new hobbies.
Embroidery with satin ribbons, step-by-step patterns for beginners
This type of needlework, like any other, is based on several features and secrets. You can embroider in different ways: ribbons are placed in stitches, like ordinary threads, or in three-dimensional patterns - ruffles, flowers, etc. A combination of both methods gives excellent results.
To get started you will need:
- fabric or canvas;
- ribbons and threads;
- hoop;
- needles;
- scissors;
- ruler and compass;
- a simple pencil or disappearing marker;
- if desired, decorative elements such as beads, seed beads, etc.
Important! The fabric should not be too thin, otherwise the embroidery may spread. To embroider on thick fabric, you will need to pierce holes with an awl. And when choosing canvas as a base, you need to remember to process its edges.
You can take any ribbons - depending on how the finished composition should look, light and airy silk ribbons or stiffer polyester ones are used. If they are too long, they are cut so as not to be damaged during the embroidery process.
First you need to make a sketch of the composition on paper (or take a ready-made diagram). The drawing is transferred to the fabric - through tracing paper or using a pencil/special disappearing marker.
Then thread the ribbon into the eye of the needle. To do this, one edge of the ribbon is cut diagonally and cauterized.
Before you begin, you can make a knot at the end of the tape to secure it to the fabric. But still, it is better to avoid knots on the wrong side of the work - they can create an unpleasant lumpiness in the finished picture, and if the fabric is thin, then show through it. Alternatively, you can use blind stitches or leave the tape out completely - after a few stitches it will hold fairly firmly to the fabric.
Now you need to decide which stitches to embroider. There are quite a lot of them:
- straight stitch - performed in the same way as thread stitches. Suitable for making many details, such as flower petals;
- Ribbon stitch - almost like a simple stitch, but at its ends a needle is passed through the ribbon strictly in the middle. A good alternative to a simple stitch when making petals;
- Chinese knot - the fabric is pierced with a needle from the wrong side, the ribbon is stretched into a loop, and then the needle is passed from the front side through this loop. A popular way to depict flower cores;
- double Chinese knot - performed as the previous one, but before inserting the needle into the fabric you need to thread it through a ribbon folded like an accordion;
- French knot - the fabric is pierced from the inside out, after removal, the tape is wrapped around the needle, then the needle is brought out inside out. A very interesting type of stitch - you can use it to make flower cores and create “scattered” compositions.
The above are just the basic types of embroidery techniques that will allow you to depict several simple flowers. All types of stitches are simple and quick, and a beginner can immediately begin creating picturesque flower bouquets. But embroidering complex paintings will require experience - when doing them, it is very important to “feel” the composition correctly.
Ribbon embroidery for beginners step by step lessons
So, the first thing you need to do to get started is thread the needle and secure it. And only then begin to study the types of stitches.
Securing the tape
We take a thin 6mm and pull it into the eye of the needle. Now it needs to be secured. Place the tip of the needle on the edge of the ribbon, stepping back 1.5 - 3 cm from the edge, and make a puncture.
Next, you need to lower it to the end of the eye of the needle and pull it down - a knot has formed.
And the final stage of fastening, when starting embroidery, you need to fasten at the very end. We take the end of the tape and wrap it twice, about half a centimeter each, and pierce it. By stretching the needle to the end, we get a knot.
Ribbon embroidery for beginners: video
Our time can be called the era of the revival of handicrafts. Anything made with one's own hands is of great interest. Thus, an increasing number of needlewomen are starting to engage in ribbon embroidery. Such embroidery immediately attracts attention with its brightness, volume, and colorfulness of the products.
On the European continent, France and its kings are considered to be the founder of the fashion for products in which ribbon embroidery was used. Louis XV himself was engaged in this type of needlework, often giving his courtiers elegant little things created with his own hands. The British adopted the love for such embroidery from France, and spread it throughout all their colonies.
The technique of ribbon embroidery allows you to create extraordinary decorative elements, decorate clothes, and make real works of art in the form of panels and paintings. New unusual accessories will add zest to any traditional look.
Getting ready for work
Those who have decided to try their hand for the first time, novice craftswomen, need to choose the right materials for the work. The right tool will help you avoid failures in the learning process and when creating your own masterpieces.
- A special set of needles for ribbon embroidery.
You can purchase a ready-made set or assemble it yourself. It is better to choose needles with a coating, for example, gold-plated or galvanized, so that the needles do not rust. The eye of the needle is wide, allowing the tape to slide without twisting.
One needle will not be enough, because the tapes are used in different sizes. Needles should have a blunt tip.
Some craftswomen also use needles with a sharp tip, but in this case you should be especially careful not to tear the warp threads.
- Hoop that holds the material tightly.
It is better to have small and large hoops when embroidering. Hoops can be square, rectangular or round, as well as wooden, plastic, or using both wood and plastic. Be sure to choose a hoop that allows you to adjust the tension of the fabric. If possible, the picture itself should fit completely into the hoop. This will avoid deformation of the tape seams.
- Scissors. Lighter for processing the ribbon edge.
You should not burn the tape near the needle. A sooty ear will ruin all your work.
- An awl, if you are going to embroider on a sufficiently dense material. In this case, pliers may also be required.
- Fabric, the choice of which depends entirely on the task at hand.
A voluminous colorful pattern, an embroidered tablecloth, an elegant trinket - everything requires a certain type of fabric. The fabric can be chosen with a pattern already applied or a simple plain one. Handicraft stores sell many kits with ready-made templates and canvas for embroidering. Finished products, for example, a cosmetic bag, dress or handbag, in the spirit of fashion trends, are often decorated with similar embroidery.
- Satin, silk, corrugated ribbons.
Stitches, seams, loops, knots, main varieties
- Entwined straight stitch (hereinafter abbreviated as PS) and with attachments
- Herringbone
- Sliding classic and colonial knot
- Zigzag
- Cretan
- Spikelet
- Bow
- Bud classic, printed, convex
- Rococo knot
- Loop flower
- Chain stitch
- twisted rose
- Net
- Extended stitches
- Colonial Knot
- Basting tied in the center
- Twisted loop
- Zigzag basting
- Stem seam
- Seam grip
- Loop with attachment and straight stitch, with eyes
- half loops with classic and zigzag attachment
Of course, you can’t learn everything right away. The main thing is not to stop halfway and create a product step by step.
Read more about seams in the master class
To further master the art, you need to learn different types of stitches.
Because these elements make up flower petals, buds, stems and leaves. Also, some types of seams are used to finish a picture or embroider some kind of decoration. You can’t imagine how much stitches can transform your idea for a painting; you can embroider anything.
Loop stitch
This stitch is convenient for embroidering leaves and petals. Having secured it in the needle, we bring it from the back to the front.
Then, stepping back a little, we make a puncture, forming a loop:
And without bringing the needle completely to the wrong side, we pierce it closely in the center of the half-loop diagonally and bring it to the front part.
We stretch the needle and ribbon, adjust the loop and we get this element.
Then you need to make a puncture at the top of the loop to form a girth and get a bartack, that is, a “loop” seam with a bartack.
By tightening this fastening, it looks like a leaf:
Curl stitch
The next version of the leaves includes a stitch with a “curl”. They come in two types - straight and offset. An example of a straight stitch with a curl is very simple. We work with ribbon from 1cm – 1.5cm. We bring the needle from the wrong side to the front side and arrange it vertically evenly, straightening it.
Next, we make a puncture in the center of the ribbon and pull the needle through, straightening the loop.
Don't forget to carefully lay the curl.
Offset Curl Stitch
An example of a straight stitch - “offset curl” is also very simple in technique.
We also bring the needle to the front and lay the ribbon vertically
But we no longer make the puncture in the center, but along the edge of the edge on the right.
We stretch it, leaving a loop and we get a curl that is turned to the right.
It is also necessary to embroider this stitch with an “offset curl” facing to the left.
Twisted stitch
There is also the option of creating leaves and stems. It's a little simpler. The stems are made using a twisted stitch. The green one with a width of no more than 6mm is pulled onto the front one and scrolled until a certain spring is formed. Next, we insert it at the base of the bud on the wrong side.
2. In this way, a thin stem is obtained; if it does not hold well and moves along the canvas, secure it in the middle with ordinary thread.
French knot
The most common one in creating buds, as well as some other elements, is the French knot. They use it to embroider bunches of lilacs, grapes and even tree fruits. Having threaded the needle and secured it, we make a puncture on the front:
Next, we twist the needle so that it takes on the appearance of a spiral and wind it three or even four turns onto the needle.
And not far from the first 1-2mm puncture, we insert the needle on the wrong side.
The result is a beautiful lush knot that looks like a bead.
Video: learning to embroider roses with ribbons
How to embroider lilacs correctly
Before you begin, you need to prepare the following tools and materials: canvas or fabric with small holes for ribbons. For ease of work, you can take a hoop, frame, needles, threads to match the ribbons, as well as many other things.
Step-by-step technique for embroidering lilacs:
- The embroidery fabric is stretched onto a hoop or a special wooden frame.
- Using colored pencils, you can transfer the design onto the fabric, and you need to convey all the details of the pattern.
- Ribbons should be selected as carefully as possible.
- It is best to start with a lilac branch and edge. To do this, a large needle is threaded into the fabric so that its tip is only on the wrong side. After this, you can tie a small knot on the ribbon, which is best hidden.
- To embroider lilacs, you will need to thread the ribbon from the wrong side to the front side of the working fabric. Here you can remove the needle and silk thread. It is sewn only with small stitches across the work, after which you can make a few stitches along the edge of the tape.
Ribbon embroidery from A to Z will open for you new horizons of beautiful and breathtaking needlework! A flight of creative imagination will make this activity completely unique and inimitable every time.
Sunflowers, daisies and other field bouquets
Embroidering flowers with ribbons, such as sunflowers and daisies, is quite easy for a beginner and therefore they are used more often than others in needlework. And this, in principle, is not strange, because a bright flower can attract everyone’s gaze and with its extraordinary beauty will transform even a dull room. In the modern world of HAND MADE, which simply means handicrafts, things are highly valued not only from an aesthetic point of view, but also from a financial point of view. A huge number of designers use it in the design of their clothing collections.
Painting sunflowers in a vase
Cushions, bedspreads and many decorative items fetch tens of thousands of dollars at auction. Floral motifs adorn the emblems of successful corporations and appear on promotional products. All this once again confirms that this type of art is not forgotten, but is just beginning its revival. Today we will try to learn together how to create bright pictures with these wildflowers using a master class from an experienced embroiderer.
Prints for ribbon embroidery of sunflowers on canvas
A sunflower is made in almost the same way as a chamomile, the difference will be in the length of the petals, their color and, of course, the middle. A sunflower petal is formed using the “turned seam” technique. You will need to pierce not only the fabric using an awl or needle, but also the parts of the ribbon that should lie on it. Thus, it turns out that the tip is slightly turned up. The petals on a sunflower should overlap, there should not be much space between them, 0.3 cm is enough. The middle is made with black French knots, they should resemble seeds that have already ripened in the sunflower.
Ideas and secrets in creating sunflowers for beginners
Video: master classes
Easy-to-read video tutorials on ribbon embroidery can be found on websites for needlewomen. It demonstrates step by step how to embroider with ribbons. Many things can work out the first time. This is great motivation for beginners to continue the fun of ribbon embroidery.
You can also learn from the video that embroidery with ribbons is not a newfangled activity. This art has been known in France for several centuries, and it was mostly used not to create paintings, but to decorate the clothes and hats of noble ladies.
Rose
Lilac
Lavender
Sunflower
Required materials and accessories
Sunflowers must be started by collecting the necessary elements. And if you use a ready-made set, then it will be extremely convenient for you to do handicrafts. For girls who are encountering this method of needlework for the first time, we advise you to pay special attention to the selection of materials. The wrong fabric and threads can ruin several days of hard work. At the beginning of their careers, it is better for embroiderers to use wide-weave fabric. Tight material is difficult to pierce with a needle; in addition, holes often remain at the puncture site, which are then difficult to hide even with large beads. And a mandatory assistant for canvas is a hoop (round, rectangular, oval or square). Embroidery hoops are recommended for inexperienced needlewomen; they stretch the canvas well and simplify the work.
For needlework you will need:
- 12 mm thick yellow and 3 mm black
- green 24mm
- olive 15 mm
Try not to use lengths longer than 45 cm, as they will get tangled under your hands and prevent you from applying straight and twisted seams evenly. The optimal length is 30cm.
Needles
No less attention should be paid to the choice of needle; it must match the density of the fabric, otherwise a too thin needle simply will not fit or will get stuck in a dense fabric. There are many sizes of needles; tapestry versions with a wide eye are used most often. It is important that the ribbon can be easily pulled through the eyelet, so select the number of needles according to the width of each. If the width is from 2 to 3 mm, then a needle with number 24 is selected.
You also need to prepare scissors, a lighter, and threads in advance.
Basic materials
Anyone who has ever tried to embroider knows that the most necessary things are a hoop, a base and a needle and thread. In this case, ribbons are used instead of thread. To ensure that the work is pleasing to the eye and the desire to create does not disappear, the features of technology and requirements for materials are taken into account:
The base fabric must be strong and freely allow the needle and ribbon to pass through. Needlewomen use embroidery canvas, tapestry or linen.- Selecting the ribbon according to the color scheme will make the embroidery realistic. The work uses ribbons made of silk, satin, and organza with a width of 2 to 50 mm.
- Comfortable hoops. The base material must be tightly fixed. For small projects, hoops that are sold in handicraft departments are suitable, and for larger projects, professional hoops that resemble an easel are suitable.
- Regular pointed needles will not work as they cannot be used to thread ribbons through. Tapestry needles with a wide eye are used.
Petal embroidery technique
Embroidering sunflowers begins with the first thing you do is draw a diagram if you don’t have one ready. Place the flower on the canvas as you wish, but it is important to place large sunflower heads in the center of the picture, and smaller ones on the sides. A template like this:
For most beginners, the problem occurs already at the beginning - they are not able to properly secure the ribbon in the needle. To make the threading process less time-consuming, cut the edge diagonally. Next, insert it into the needle and pull it about five centimeters. Using the sharp end of a needle, pierce it at this distance and stretch along its entire length. This way you will have a well-fixed ribbon. Be sure to make a knot at the other end and burn it with a lighter, it will not come undone and your creation will not fall apart.
fixation
Embroider the petals with a “ straight stitch” in the direction from the center to the edge:
The technique is practically no different from daisies, only the middle is left larger. Wide ones tend to twist, so make sure that each stitch is placed evenly. You should not tighten the stitches too much, because the composition will bulge forward, and the canvas itself under the flower may unravel. It's sad if you spend a lot of effort and time, and it gets ruined by such stupidity. Remember that satin ones have a reverse side, which differs in texture from the smooth outside.
“Straight” they go around the flower in a circle and move to the middle. It will be done in black and a French knot, or rather knots, since there will be a lot of them. These nodules should resemble seeds that are already ripe.
french knot
On the finished sunflower, everything looks quite realistic and three-dimensional. Sometimes, needlewomen replace the black center with two shades of brown ribbons, making the same knots, but in two colors. There is a dark color along the edge, and a light shade closer to the middle. This choice is the author’s personal preference, so experiment as you please. Many argue that the more shades there are, the more spectacular the result.
We recommend craftswomen with extensive experience to make petals using Japanese stitches. This type of embroidery involves piercing not only the canvas, but also the base of the ribbon. When the puncture moves to the edge, quite spectacular images are obtained. If you want a uniquely shaped petal, you can also experiment with the amount of tension you use, just be careful not to overdo it.
Ribbon embroidery: flowers
In previous articles we told you how to embroider icons with cross stitch and beads. The theme of this material is ribbon embroidery for beginners. Flowers embroidered using this technology look like real flowers and look great in any interior. We will give you an embroidery lesson (flowers with ribbons) so that you too can create such beauty.
Previous Next
Ribbon embroidery: roses
Ribbon embroidery (roses) may seem like a complicated process for beginners. We will tell you several ways to do this neatly and beautifully.
Method 1.
From a strip 25–30 mm wide, cut 10–12 cm and singe its edges. Fold it in half (if you have a double-sided satin ribbon, then you don’t need to fold it). We wrap the edge of the tape diagonally. It should extend beyond the edges by 2–3 mm. We bend the corner and secure the edge of the tape with several stitches. The base is ready.
We twist the ribbon in a circle, securing each turn at the base. We also wrap the remaining end of the tape diagonally and secure it. We sew our bud to the canvas. Cover the base with a leaf of green ribbon.
Method 2.
We make the base of the rose the same as in the first example. Sew the rosette to the fabric. Next, stepping back a couple of millimeters from the core, take a needle with a ribbon tucked in and pierce the fabric from the wrong side. We pass the needle to the front side, completely pulling out the ribbon. We retreat a little space and thread the needle through the wrong side again. We create a loop from the tape. We embroider several of these loops around the core.
We start the next row with a new ribbon in the same way as the second. We pull out the loop, make it even and embroider a stitch with a curl, that is, we stick a needle on top of the ribbon, pulling it down, and, tightening it, forming a curl. Thus we close the last row of petals. The more petals, the more magnificent and natural the rose will look.
Previous Next
Ribbon embroidery: daisies
Draw daisies on the fabric using a pencil. Next, we embroider the petals according to the pattern. We sew the flower petals with a straight stitch. We bring the needle and ribbon to the front side. Having retreated the required length, we pierce the tape and fabric with a needle, stretching the tape to the wrong side. Do not tighten the tape too much, otherwise the stitch will turn out sloppy.
We fill the core with French knots. We wind the ribbon onto the needle two turns, then pierce it next to it and pull the needle inside out.
To embroider the stems we use an elongated twisted stitch. Pull the needle and ribbon to the front side. We twist the ribbon several times and pull it to the wrong side. Flower leaves can be made using the same stitch as the petals.
Previous Next
Ribbon embroidery: poppies
We take a nylon tape 20 mm wide. We cut off 70 cm. Thread the ribbon through a needle and bring it to the front side, leaving 2 cm. Next, we pass the thread near the edge with an ordinary straight seam. Gradually tighten the threads. Having collected the entire ribbon, we form poppies. We lay out the ribbon in a spiral and carefully sew it to the fabric.
We embroider the core of the flower with green ribbon. We embroider the center with the same knots as poppies. To make our poppies look like real ones, we sew black beads around the green knot. Don't forget to make the stems and leaves of our poppies.
Previous Next
Ribbon embroidery: lilac flowers
Draw a lilac outline on the fabric. We will need a long tape 5 mm wide. We stretch the needle with the ribbon to the front side and next to it we pull out the needle with ordinary thread. We make stitches along the edge of the ribbon: two stitches along and one across. We repeat these steps several times. Next, we tighten the tape into an accordion. We bring the needle to the wrong side and fasten the flower. Be sure to secure each flower. Embroider all the flowers in the lilac inflorescence in this way. The trunk and leaves can be embroidered in the same way as we described above.
Previous Next
Ribbon embroidery: apple blossom
Embroidering an apple tree flower with ribbons is very simple. We apply the design to the fabric. We will make flowers from 6 petals. To do this, take a white or pale pink ribbon. We fasten it from the wrong side and bring it to the front side. We step back a short distance and thread the ribbon to the wrong side. Straighten the ribbon and do not tighten it all the way: this will make the flower more voluminous. We fill the core with French knots. For leaves we use a straight seam.
Ribbon embroidery: vase with flowers
To embroider a bouquet of flowers in a vase with ribbons, it is best to buy an embroidery kit. The vase will already be drawn, and all you have to do is embroider the flowers. But if you want to create your own composition, you can draw a vase and embroider it with ribbons yourself.
In the bouquet itself, you can use all those flowers whose embroidery technology we have given above.
Also try creating a bouquet of tulips.
Mark the approximate location of the tulips on the fabric with a pencil. We will need satin ribbon of different colors with a width of 25 mm. We fasten the tape from the wrong side and bring the needle to the front side. We perform the first straight stitch from the bottom up. We retreat a few millimeters and make the second petal from top to bottom. This is how we complete all the flowers. You can make more petals. Then we overlap the tapes. We embroider stems and voluminous leaves.
Previous Next
Ribbon embroidery: basket with flowers
You can also embroider flower baskets with ribbons. For this we need fabric, ribbons and a needle.
Draw the outline of the basket on the fabric. We make neat horizontal stitches from edge to edge of the basket. Next we make vertical stitches. We twist the ribbon into a flagellum. We intertwine with horizontal stripes and sew into the fabric. First we embroider the handle with stitches, then, without piercing the fabric, we wrap it with another ribbon. It is advisable to immediately take a large piece of tape so that it does not run out halfway through the work.
Embroidery of wildflowers with satin ribbons always turns out delicate and bright. Most often, daisies, cornflowers and poppies are embroidered in such compositions. We will complement the composition with spikelets. For this we need a satin ribbon 5 mm wide. We stretch the tape to the front side. We straighten it and turn it inside out again at the point where the top “grain” of the spikelet ends. We embroider the remaining “grains”, arranging them in a herringbone pattern, and watch the size: first the “grains” are smaller, then larger, then smaller again, as in a real spikelet.
Prepared by Yana Semashkevich
24.05.2021
Stem and leaves
After completing the flower head, it is necessary to add a stem, as everyone remembers, this flower has a fleshy stem, so a regular longitudinal seam will not work. Perform with a twisted stitch:
It is better to take a wide one for this, so that there is a three-dimensional “drawing”. As for the leaves, they are made with a straight stitch using a 24 mm ribbon. It works better than others for beginners. If you want to add realism, use iris threads to make several tie-ins to imitate the veins of a real leaf.
Additional composition elements
At the end, iron the work and therefore fix the petals properly. It is very important to iron the product only from the wrong side. The thin texture can stick to the iron and the sunflower will literally burn. Most people do not complement the composition with other colors, considering it unnecessary.
It’s a great idea to highlight the composition using wildflowers and herbs. They must be made using the same olive iris thread. You will get a spectacular bouquet of wildflowers that will decorate any room in your home in the form of a picture and will certainly attract interest. And even more so if you decorate your coat or blouse with them.
Don’t be afraid to experiment and add something new to traditional techniques, this is how new directions appear in the world of HAND MADE. There are a huge number of specialized sites on the Internet where lessons for beginners will allow you to improve your skills and become a real professional.
There are countless different seams and stitches in needlework. See our sections on embroidery of various kinds of flowers and pictures. I wish you success and patience in creating masterpieces with your own hands! Have a good mood and inspiration.
Embroidery with ribbons on decoupage
Decoupage is a unique decoration method, using which you can decorate already painted or embroidered pictures with various new details. Ribbon embroidery on decoupage will allow you to create incredibly beautiful and original paintings. Each painting will undoubtedly take its rightful place in your collection.
This is what embroidery with silk ribbons looks like on decoupage
It is worth noting that ribbon embroidery on decoupage is especially popular, since with its help you can turn an ordinary picture into a unique and, moreover, voluminous masterpiece. In addition, embroidery with silk ribbons based on a finished design gives even beginning needlewomen the opportunity to express themselves and create stunning pictures.
In general, ribbon embroidery using decoupage is no different from regular embroidery. You could even say that it is a little easier, since you will be embroidering pictures with ribbons based on a ready-made design. Moreover, you will only need to embroider individual strokes and some special details that you want to focus on.
Embroidery with satin ribbons is an incredibly exciting activity and everyone who tries it at least once will create more and more new pictures with ribbons. The main thing is not to be afraid to experiment and then many of your fantasies will come true.
Dandelion
If you are already interested, then be patient and work hard to get a good result. Then you will gain victory and become the author of your own composition.
Initial stages
To begin, prepare a ribbon so that one edge is cut at an angle of 90 degrees and scorched with fire, and the second end is cut obliquely - this is what needs to be inserted into the ear:
It is important to learn how to pin. One of the edges, cut at a right angle, needs to be folded by about 3 mm and then, piercing it, you get a knot:
If everything works out, start creating. All information, diagrams are on the Internet or in the store. Ready-made ideas from professionals will be a godsend for beginners.
Useful tips
The path to a masterpiece always begins with basic knowledge. Throwing simple loops, knots, and cobwebs is the basis of the most complex technique. For example:
cobweb
Take a separate piece of fabric and practice securing and making straight stitches on it. I would like to mention the “Japanese stitch” method. There is some similarity here with a straight seam. Its peculiarity is that it passes through itself and through the fabric. First you need to pierce the tape itself, and only then the base. In this way we obtain original compositions of flowers and leaves:
japanese stitch
Experiment. Let the flowers fall on the material with voluminous airy buds, and small thin petals sparkle on the canvas with the smoothness of silk threads. Butterflies, dragonflies and bees will not only add naturalness, but also breathe life into it.
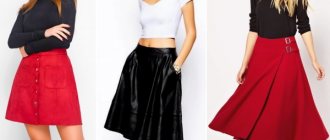
Decorating clothes with ribbons
Clothes decorated independently look beautiful and stylish. In addition, hand-made clothing items will always be unique. You just need to add embroidery or some kind of bow, a flower and the clothes will already be unique.
Any materials are suitable for decorating clothes, but decorations made from ribbons look the most beautiful. Agree, a dress decorated with ribbon flowers will be an original way to stand out from the crowd.
Ribbon flowers can be created in different styles. There are a lot of interesting solutions for this on the Internet. All you have to do is choose the one that suits you.
But not only women's clothing can be decorated with ribbon decorations. For a man, a good option would be a bow tie or a tie made of satin ribbons.
A homemade ribbon decoration will highlight any look. Just add a bow tie made from ribbons and a scarf made from them to a formal suit and your unique style is ready. An original holiday gift for your beloved man.
We embroider dandelions
Working with a dandelion image is quite easy. Such a simple creation can become the first in your photo gallery. To draw the diagram, use a thin, discreet pencil so that the original sketch cannot be viewed on the finished work.
scheme
It is advisable to choose dark material. This will give clarity to your drawing. Fix the material tightly with a hoop and transfer the image. Its traces are faintly visible on a dark background, but this will be enough to work with the general outlines of the drawing. If desired, transfer the dandelion drawing in another way: cut out a paper sketch of the flower and apply it to the fabric. This technology for transferring all the details of an object is much simpler:
Embroidery technique
Now let's take the base. Select threads of a suitable color and sew straight seams along the outline of the intended pattern. The tape is displayed on the front part. You need to wrap it around each seam prepared in advance, that is, we pass under the straight stitches made. The method allows you to get a narrow twisted stem in the future picture:
3. Japanese stitch is used to form leaves. We pick up the bottom edge and form a straight stitch. You should get a pointed leaf:
4. We begin to create the seed umbrellas of our dandelion. We embroider with white according to the principle of the stem, and it is better to display the white hairs with ordinary sewing thread.
5. We embroider the second dandelion, which has already bloomed, in yellow and use the Japanese stitch, around the flower:
6. And at the conclusion of our creation process, the last element remains - the jagged leaf. Advice: cut out the leaf yourself from a wide one and sew it on, or not cut it out. For example, from a narrow green ribbon we make a straight long stitch from the stem twice, so that between them there is, as it were, a leaf vein. Then, using a dark green thread, we will create a natural look for these veins:
Use your imagination, change the size of the stitches, try to achieve accuracy in your work and not clutter it with unnecessary seams:
Decorate the finished product with beads. This way you will add originality and originality to your creation. Imagine!
Ribbon embroidery: flowers in patterns
Regardless of the pattern you choose - and even before you find it - you need to learn how to properly thread the ribbon into the needle and perform basic stitches. So, cut the ribbon from the spool: the length is selected individually, but for starters it is better to take 2 lengths from your wrist to your elbow. Now make a 45 degree cut at either end; leave the opposite one flat and melt it with fire. The diagonal tip needs to be inserted into the eye of the needle, pulled out a little, pierced at the edge with a needle and tighten the knot. Now you are ready for the first test.
- It is recommended to start with embroidering roses with ribbons - we suggest you get acquainted with some of the simplest techniques. To do this, make a long stitch, but do not tighten it too much - let it sag a little. Then bring the needle visually in the middle, but at a distance, pull out the tape, use it to grab the center of the stitch and return the needle to the same hole. You will get 3 “rays” coming out from one point.
- Now, mentally drawing a circle that the tip of each of these rays should touch, and on it, in the center between 2 of them, draw a needle with a ribbon. Stretch it, as shown in the photo, through the far beam, bringing it under the stitch, and insert it at the same level into the fabric, but on the opposite side.
- After the skeleton of the flower of 5 rays has been formed, you can begin to design the bud itself. Pull the needle with the ribbon exactly in the center, from under the stitches, and begin to move it in a circle, in a counterclockwise direction. When meeting each ray, it should pass either above it or below it, alternating these options. The formation of circles is completed when the skeleton of the flower is no longer visible.
- Poppies in ribbon embroidery are even simpler to design, but ribbon alone will not be enough here: You will need a very thin thread, which you need to use to stitch its long edge with small stitches. After this, the thread is tightened to create a round open flower. It is advisable to first fold the ribbon in half lengthwise and stitch along the folded double edge so that the finished element is very voluminous and fluffy.
And the daisy embroidered with ribbons is straight stitches diverging from the center with the obligatory straightening of the material. The yellow center can be made up of many small nodules. The needle is brought under the outstretched tape, the latter is wrapped around the steel base several times, and then the needle is inserted back into the fabric at the same point. The knot is tightened, the edges are straightened, and a voluminous flower bud is obtained.
- You can create an embroidery pattern yourself by choosing a large pattern in the colors you like and marking it on the fabric. Most often, craftswomen simply combine several single elements into one picture, since this takes less time than searching for a finished image. Moreover, almost each of the schemes can be implemented in several versions. We offer you several sketches to try.
- Such a spectacular bouquet of daisies is obtained from standard straight stitches of different lengths, twisted ribbons as stems, and knots for small rare buds. Rounded large leaves are also straight stitches, but arranged in a herringbone pattern and without a gap between them.