Reads: 2,698
Reading time: 5 min.
no comments
Ballet flats have received the status of one of the most stylish and comfortable shoe variations, which not only has a large audience of fans among little girls and young ladies, but also enjoys undeniable popularity among adult representatives of the fair half of humanity. Just think before you buy ballet shoes that you can crochet them yourself in just one evening! And the amount of materials that you will have to purchase and spend to create a masterpiece will be minimal and will not leave you at a loss. Products of our own production can be used primarily as cozy, weightless slippers for the house, and if you attach them to a solid rubber sole, they can easily pass for a walking version of summer women's shoes.
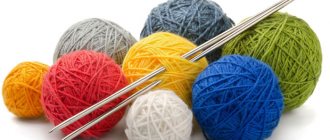
Yarn selection
There are several types of yarn, each of which has special characteristics:
- Natural. These include linen, cotton, wool, silk and others. Linen is limited in shades, wool is difficult to care for, cotton comes in a wide palette, but takes quite a long time to dry. In this regard, it is recommended to use silk threads for knitting shoes if the naturalness and environmental friendliness of the material are important.
- Artificial. These are polyester and acrylic, which are extremely easy to care for. The products do not lose their shape after washing, do not cause allergies and dry quickly, making them ideal for creating knitted ballet shoes.
- Mixed. They are considered the best option; they contain partly natural and partly synthetic threads, due to which they have all the features listed above.
When choosing yarn, it is important to choose the optimal thickness. A finer openwork pattern will be provided by silk fibers, and ballet flats in the form of house slippers can be safely knitted from thick wool. Another important parameter is the color scheme. Bright, rich shades are more suitable for summer, and pastels for spring. Deeper and darker colors pair harmoniously with warm clothing and are suitable for winter. When making it, it is better to choose a single-color yarn or combine a maximum of 2-3 shades, then the shoes will not look too colorful. Often linked models are created like this: one color for the sole, another for the upper.
Linen
Cotton
Wool
Silk
Acrylic
Polyester
Mixed
For a little girl
Let's look at the example of knitting ballet shoes for a 5-6 year old girl. To begin with, let’s take the simplest solution, which even a novice needlewoman can handle. The description will contain both diagrams and description.
So, we will need: a crochet hook size 2.5-3.5, a skein of thread to your taste, preferably darker (it’s more practical), contrasting threads for decoration.
Next you will see a master class on knitting ballet shoes for a 5-6 year old girl with a step-by-step description. For a leg of 16-17 centimeters you need to cast on 27 air loops.
We knit the next row with double crochets. Knitting is circular, that is, we tie strips of air loops on both sides. We knit six double crochets into the last loop.
We unfold the knitting and knit double crochets in the opposite direction. In the original loop, we finish the row by knitting 5 double crochets in it (in total there will be 6 of them in the 1st loop). We knit a connecting post.
Let's move on to the next row. We knit 14 single crochets. Then 9 double crochets. In the next 6 loops we knit 2 loops with a crochet. And then on the other side, similarly, 9 double crochets and 14 single crochets. In this way, we widen one side of the sole of the ballet shoe so that it follows the shape of the foot.
In order for the knitting to be more even, the next row we knit one double crochet in each loop, with the exception of the toe and heel. There we knit it like this: two double crochets in one loop, then 1 double crochet, and then again two double crochets.
Related article: How to sew a sack bag (beach bag) with your own hands: pattern with description
The insole is ready. For the second sole, repeat all steps 1-5.
Let's start knitting the top. It is necessary to grab only one loop with a crochet hook. This will allow the knitting to rise up. We recommend knitting the first row of the top with embossed stitches. But they can also be replaced with the usual double crochets.
We knit the second row of the top with double crochets in each loop.
The third row is knitted with single crochets.
We knit the fourth row with single crochets, but with decreases. You need to make seven contractions in the toe: every two columns.
We continue to make cuts, knitting with single crochets.
Fifth row. Seven cuts: two loops together through one skip loop. Sixth row. Seven layoffs in a row. The seventh row contains only two abbreviations.
One slipper is ready. For the second, repeat steps 7-11.
For beauty and elegance, we tie the ballet shoes in single crochets with a contrasting thread. You can make and sew pompoms from the same thread.
If difficulties arise during the work, a video on the process of knitting different types of stitches can be found on the Internet or at the end of our article.
The ballet shoes are ready. If in this example you use yellow rather than white thread, you will get dandelion ballet shoes. For decoration you can use ribbons, beads or ready-made stripes. It would be a very original solution for a girl to use a shiny gold or silver thread as a decorative thread. Another beautiful and popular solution can be knitting ballet shoes from garden thread.
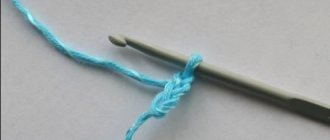
Required Tools
You can knit ballet shoes with knitting needles or crochet. In the first case, it is recommended to supplement the yarn with a felt sole (it should be taken into account that the thread consumption will be large, and a lot of time will be spent on creating the product). In the second case, such a need disappears, so most often beginners prefer to crochet ballet shoes.
The hook consists of three parts: handle, head and barb. The hooked end, called the head, should not be too sharp, otherwise it may cause injury. The round shape will not allow you to knit quickly, so you need to choose something in between. Only experienced needlewomen need a pen. If you are crocheting for beginners, it is better to abandon the handle altogether, since it will not allow you to control the tension of the loops.
When choosing, you need to consider the material of the hook. Steel products are considered the most comfortable to use, and they are also durable. Aluminum hooks are lightweight, but they can stain light-colored thread. Models made of plastic do not injure your hands, are light in weight and are cheap, which is why they are especially popular. But there is also a drawback - fragility. Wooden products quickly lose their appearance and can become electrified. A bone hook can be a good tool when creating ballet shoes with your own hands, although it costs more than steel or aluminum.
The hook number indicates the thickness of its working part. You can use it as a guide when purchasing a tool. Experienced craftsmen advise starting knitting ballet shoes using three hooks: No. 3 is needed for the sole, 1 and 2 for working on the upper part.
Spokes
Hooks
Features of ballet shoes and slippers
Ballet flats, knitted or crocheted, differ favorably from other shoes in that they do not cover the entire foot, but do have a heel. They are comfortable to wear, and most importantly, easy to knit. It will take little time to make such slippers, and needlewomen of any level can handle them.
Let's look at some details. Ballet shoes can be made with felt soles, then they will last much longer. But the tracks can be connected. In this case, the work goes on in one breath, since, starting with the sole, they finish with processing the upper edge.
There are many patterns with descriptions for ballet shoes: these include booties for babies and slippers for adults of various types - openwork, knitted with an elastic band, straight and with fasteners.
Taking measurements
To crochet cozy soft slippers, you first need to measure your foot size. For these purposes it is necessary:
- prepare a sheet of white paper, pen or pencil;
- completely outline the leg;
- measure the length from the edge of the big toe to the heel;
- add about 10 mm to the result.
It should be remembered that a lot depends on the elasticity and type of yarn. It's easier to count by the number of loops. For example, 40 loops (air) need to be cast on for a size 39 leg. The width of the foot is also important; this is also an individual parameter, so when knitting it is worth doing an intermediate fitting. You can focus on house slippers.
To ensure accurate measurements, you need to measure your foot at the end of the day. This is necessary so that the feet have time to rest from the load and return to their usual volumes without swelling. For demi-season shoes, you can additionally wear a thin sock; for summer shoes, this is not necessary.
Crocheted slippers - ballet flats. Julia's work
Hello! Now we will knit ballet slippers!
- interesting selection on kru4ok.ru!!!
- A selection of patterns and descriptions for crocheting adult and children's sneakers
- … And
To knit slippers you will need 150-200 grams of yarn, in any two colors, hook No. 3 and a small piece of satin ribbon for decoration - bows.
When knitting, make a thin thread in two folds so that the knitting is dense and thick. And so we knit 4 soles.
First you need to knit the sole of the slipper , use dark-colored yarn. Cast on the initial chain of loops, for size 36 40 chain loops. Knit the sole in circular rows, tying it around the starting chain.
First row: from the second loop from the hook, knit 2 tbsp. b/n, then along row 19 tbsp. b/n and to widen the foot, knit 1 half-stitch, 17 tbsp. s/n, from the last loop for rounding, knit 5 tbsp. s/n, then knit 17 sts on the back of the chain. s/n, 1 half st., 19 tbsp. b/n, from the last two loops, 2 tbsp. b/n. Complete the row of connections. Art.
2nd row: make 1 chain stitch. rise, from the first loop knit 2 tbsp. b/n, then knit over st. b/n – art. b/n, above half-st. – half-st., above st. s/n – st. s/n. To round a sock from 5 tbsp. s/n of the first row, knit 2 sts from each. s/n, on the heel, also make 3 additions of art. b/n.
Knit the next 5 rows st. b/n, making 5 additions for rounding on the toe, and 3 additions on the heel. And thus we knit 4 insoles. Then we connect two insoles together by tying st. b/n. At the end of the row, make a connection. Art. into the first loop, cut and fasten the thread.
Knitting the upper part of the slipper.
Attach a thread of a different color to the knitted sole and knit 5 rows of stitches in a circle. b/n. Knit rows of columns in a spiral, i.e. To proceed to knitting the next row, start knitting a stitch from the first loop.
In the 6th row, to narrow the upper part of the slipper, divide the number of loops in the front part by 6 and decrease in these places, knitting 2 tbsp. b/n together after 5 st b/n. Places of decrease can be seen with paper clips by pulling them through the decreased columns.
In the next rows, decrease through 4 stitches, then through 3, 2 and 1 stitch. In the last two rows on the heel, also make 3 decreases so that the slipper stays well on the foot. In the 10th row on the top of the slipper, after decreasing through 1 stitch, knit 4 stitches along the row, b/n. Then turn the work and knit back 3 tbsp. b/n, on the central part make 3 decreases after 1 tbsp. b/n, 3 tbsp. Turn the knitting again and knit the row back, making decreases after 1 stitch. The last time, turning the work, knit the 3 central columns together, make a connection. stitch along the row, cut and fasten the thread.
To tie the edge of the slipper, attach a dark thread and knit the last row in a circle, st. b/n or “crawfish step”. For decoration, make a bow from ribbon and sew it to the top of the slipper. In my case, I tied a bow, to decorate the slipper, it’s up to your imagination! The second slipper is knitted in the same way as the first.
Knitting stages
The procedure for getting started depends on the selected tool. If knitting needles are used, first you need to make 2 loops, which are then strung on one or 2 knitting needles connected together. This will make the process of creating the second row easier. Taking a hook, you will need to make one loop, then a series of air loops in the form of loose braids, these will become the beginning of the product.
Since the crochet hook is more convenient to use than knitting needles, it is often chosen by beginners. If the shoes did not turn out as planned, then the part with the defect can always be unraveled by simply pulling the thread. The use of knitting needles eliminates this possibility. Below are the steps in the process of crocheting ballet flats:
- The first row will be the basis for the sole. First you need to cast on 40 loops. The initial chain should be tied in a circle. The pattern will be as follows: from the 2nd loop, 2 single crochets (SC), then 19 SC, after 1 half-column (needed for expansion). Then 17 double crochets (dc), starting from the last loop, 5 dc and around in reverse order.
- Crochet the next row must begin with a lifting air loop. If you look at any diagram with a description, you can see that the knitting order will be as follows: above the single crochets there should be similar loops, above the half-columns, respectively, half-columns. That is, the order is observed in the same way as in the previous step. To round the foot, you need to add 3 dc, for the toe - 2 dc, for the heel - 5 stitches from the first row.
At the end, you should add another 5 RLS, rounding the toe and heel in parallel, but already 5 and 3 additions, respectively. While working, you need to ensure that the sole of the knitted ballet shoes matches the size of the insole.
Work on the upper part of the product begins with using yarn of a different color. With its help, you need to throw 5 rows without a crochet, and now the movement will not be in a circle, but in a spiral. The next step is to narrow the toe. To do this, the front part of the loop row is divided into 6 and reductions are made in these areas. To avoid confusion, it is worth marking the places with pins or paper clips.
Decrease of the following rows must be done on every 4 columns, then 3, 2 and one. You need to finish the top row with 4 sc, then turn in the opposite direction and knit 3 sc. Having reached the center, turn again and decrease through 1 loop. This continues until the height and width of the ballet shoes are as needed.
Knitting patterns for ballet shoes will be similar to those using a crochet hook. The only difference is that after processing the insole, you need to tie a felt sole, as well as in the method of starting knitting, as mentioned above.
Slippers
Before crocheting indoor ballet slippers with your own hands, you need to prepare the following set of materials and tools:
- Wool blend yarn YarnArt Merino De Luxe 50 (280 m in 100 g) - for the upper part of the shoe.
- Wool blend yarn ALIZE Lanagold (240 m in 100 g) - for the sole.
- Hook No. 2.1 – for working with the upper part of slippers.
- Hook No. 3 – for making the sole.
- Satin ribbon for a decorative bow.
For size 39 - one of the most popular parameters for the female foot - you will need to cast on 40 chain stitches and perform 7 consecutive rows.
The diagram below demonstrates how to crochet a sole for ballet shoes:
Row 1: In the second stitch from the hook, knit 2 single crochets, then along the row 19 single crochets, 1 half double crochet, 17 double crochets, in the last chain stitch (to round off the knitting) work 5 double crochets . Then go to the second side of the chain and knit 17 double crochets, 1 half double crochet, 19 single crochets, and work 2 single crochets in the last 2 stitches. Finish the row with a connecting column.
Row 2: Make 1 chain stitch for lifting, knit 2 single crochets into the first loop. Next, perform 1 single crochet over all single crochets, 1 double crochet over half double crochets, and 1 double crochet over each double crochet. Regarding how to crochet the sole of ballet shoes, for beginners, here is another tip: on the toe, from each of the 5 double crochets made for rounding, knit 2 double crochets. On the heel, make 3 single crochet increases.
Rows 3-7: then perform all the loops with single crochets, not forgetting to make 5 increases on the toe and 3 on the heel.
Make 4 of these soles, fold 2 of them together, back to back, and crochet them, fasten the thread and trim carefully.
Look at the video on how to crochet the soles of ballet slippers:
Next, on the heel, attach another thread to the sole, chosen for making the upper part of the slippers, change the hook.
The knitting pattern is presented below:
Rows 1-5: Single crochet all over in a spiral pattern to avoid creating a scar from joining the rows.
Row 6: Begin shaping the toe. You will need to perform 5 decreases on the toe. First, find the center of the sock, count back 14 loops from it (until this point, knit everything from the heel with single crochets), make the first decrease by knitting 2 single crochets together, then 5 single crochets, then decrease again and repeat the fragment so that in total there were 5 decreases. Next, work to the end of the row using single crochets.
Row 7: work similarly to row 6, but decrease through 4 single crochets.
Row 8: work similarly to row 6, but decrease through 3 single crochets.
Row 9: knit similarly to the 6th, but decrease through 2 single crochets + 3 decreases on the heel through 2 single crochets.
Row 10: from the heel, knit similarly to the 6th, decrease after 1 single crochet, finishing the decrease ATTENTION! immediately turn the work and work 4 short rows over them (back and forth), knitting a decrease in the center of each row. Next, knit to the heel with single crochets + 3 decreases on the heel through 2 single crochets.
Tie the ballet shoes around the edge with the threads used to knit the sole.
For tips and tricks from experienced knitters, as well as a step-by-step master class on how to properly crochet ballet flats, watch the video below:
When the shoes are ready, decorate them with bows made from satin ribbon. You can use any other decor option that your imagination suggests.
How to decorate a product
Knowledge of how to knit ballet shoes has been acquired, all that remains is to work on the decor. Home or outdoor ballet shoes will have a finished appearance due to various decorations. For these purposes, a satin ribbon that matches the shade is used. It can be glued using hot glue or woven into the side of the products. Ideal for decorating ballet shoes for girls.
You can also glue rhinestones, artificial semi-pearls, or any stones you like. Nude shades are well emphasized by eco-decor in the form of jute twine of various thicknesses. If you don’t want to spend time creating jewelry, you can purchase ready-made elements, for example, metal brooches and cabochons.
If the ballet shoes are plain, a knitted decor made from yarn of other colors will look original. For example, these could be plants or flowers in the form of individual elements. A bright composition will look especially impressive against a black background.