Baptismal dress pattern
Seam allowances – 1 cm.
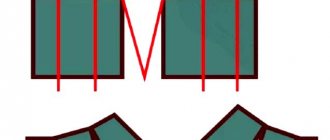
Pattern plan
Print out the pattern sheets and glue them together. Pay attention to the printing scale - it should be 100%.
Sewing a dress
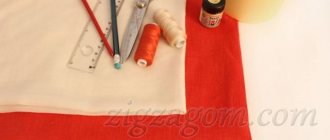
Cut details:
- 1 piece – front part of the bodice,
- 2 parts – back,
- 1 piece – front part of the skirt,
- 1 piece - back of the skirt,
- 2 parts – sleeves.
From lace:
- 1 piece – front part of the skirt,
- 1 piece - the back of the skirt.
Dress details
Apply 25 cm wide lace to the back and front of the bodice of the dress, as shown in the picture below. The edge of the lace should be about 1.5 cm longer than the main piece. Attach the lace around the neckline, shoulders and armholes. Baste and trim excess lace. Do the same on the back of the dress so that you have two completely lace-covered back pieces.
Apply lace to the bodice details
Fold the sleeve in half in the center. Place a smaller width of lace along the folded edge of the sleeve and pin. Trim around the edges. Repeat this procedure for the second sleeve. Sew two lines. Pull the threads to gather the fabric.
Making lace gathered sleeves
Place the back and front right sides together. Sew stitches on the hangers. Press seam allowances. Insert the sleeves into the armholes and secure them. If necessary, tighten the threads to gather more. Sew on.
Finish the neckline with an overlocker or use a zigzag stitch on a sewing machine. Fold in 0.5 cm and sew. Also process the cuts on the back: turn them in 0.5 cm and sew.
Sew the details of the bodice and sew on the sleeves
Place the front piece of the lace skirt on top of the front piece of the linen skirt and baste together. Baste the edges in two lines along the top of the skirt to gather the fabric. Pull the ends of the threads to gather the fabric. Continue tightening until the top of the skirt matches the width of the bottom of the bodice.
Fold the front part of the skirt and bodice right sides together and sew, turning away the lace edge. After this, stitch seam allowances along the edge of the bodice. Turn the edge of the lace back.
Sew the front and then the back of the skirt to the bodice
Sew the back pieces. Gather the back part of the skirt and sew it to the back. Sew seam allowances along the bodice. Sew a loop and button at the top of the dress. Fold the front and back faces together. parties together. Match the details of the skirt and bodice. Sew the side seams. Turn up the hem of the dress by 1.5 cm and sew.
We lay the side seams and make a hem at the bottom
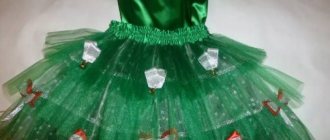
Attach a 25cm wide lace ribbon to the bottom of the skirt, starting at the side seam and finishing there. Cut off the excess lace. Sew the edges together using a zigzag stitch. The baptismal dress is ready!
Ready-made christening dress for girls
Headdress for a newborn for Christening
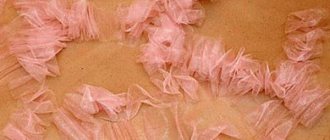
You can make a beautiful headband or hat with a flower from fabric. The principle of creating such a flower is shown below. Or you can sew a cap. Below there is a pattern and sewing instructions.
Cap pattern
Applying lace
Sew the details
Sew on the strings
Sew on the lining
The baby's cap is ready!
Translated from the site: https://seekatesew.com/free-blessing-dress-pattern/
Another cap pattern
Material selection
Experienced craftsmen recommend paying special attention to the choice of fabric that we will use to create the pattern, cut and sew the product under study. Most beginning craftsmen prefer linen; some even work with silk or satin. Although both professional seamstresses and church ministers agree that the most suitable material for sewing a baptismal shirt for a boy, as well as a baptismal dress for a girl, is cotton. The most common white cotton. However, this does not mean that the finished product will be too simple and ordinary. With a creative approach, it will be possible to transform it into a true masterpiece. More on this later.
How to sew a dress for Epiphany without a pattern
If there is no pattern of a suitable size, you can take as a basis any children's T-shirt that is just right for the child at the moment. We will remove the bodice pattern from it. Or you can take as a basis one of the patterns for children's dresses proposed in this article.
Christening dress without a pattern
Bodice
The photo clearly shows how to remove the pattern from the finished product; in particular, we only need the bodice. Remove the front, back and sleeves. Don't forget to leave 05.-1 cm for allowances. In the photo below, about 2.5 cm was added on the back of the dress in the center for fasteners.
Removing the pattern from the dress
Cut out the bodice pieces from the main fabric and lining. We sew two parts of the back and front of the bodice (satin parts) on the sides and shoulders. We do the same with the lining details.
Bodice
Now we connect the bodice parts from satin and lining. Place them together, pin them along the neckline and on both sides, as in the photo below. Sew the pieces together (0.5cm seam allowance). If you did not use an overlocker, but a zigzag stitch, then you will need to cut off the excess allowances. Turn the bodice inside out and straighten out all the corners. If necessary, there will be excess fabric here and there in the corners, turn the bodice inside out and cut off more allowances.
Now you need to remove the pattern from the sleeve. In the photo, the sleeve is gathered, so it’s not so easy to remove the pattern; below you can see what the author of MK did. Don’t forget to also add 0.5 cm to the allowances. We make a basting along the top and bottom of the sleeve. We gather the sleeve to the desired size, but do not forget to leave a little allowance.
Removing the pattern from the sleeve
Making a sleeve
Cut a strip of satin the same length as the lower section of the sleeve, the width is optional, the author of MK has a width of 3 cm. Attach the strip to the lower section of the sleeve with the right side to the wrong side of the sleeve. Sew the strip to the sleeve. Allowance = 0.5 cm. Then trim off the excess fabric so that the strip is not too thick when folded later.
Turn the sleeve over, fold the strip twice and pin it together. Place a line. Fold the sleeve in half and sew the edges. Repeat the same with the other sleeve.
Insert the sleeves into the armholes, matching the seams on the sleeve and on the sides of the dress. The basting that was made earlier will help you adjust the sleeve to the size of the armhole. Sew on the sleeves.
Insert sleeves into armholes
Make several buttonholes on the back. Sew buttons and fasten. The author of MK did not have buttons at the time of sewing, so the back was simply pinned together with pins.
The bodice is ready
How to sew a christening shirt for a boy or girl
A product for a boy or a girl differs only in the type of finish. Below is how to sew a baptismal shirt with your own hands.
The first step is to take measurements.
What to measure:
- ½ neck;
- ½ chest;
- shoulder girth;
- sleeve length;
- shirt length (depending on the child’s height).
Choice of style
The style should be such that the child feels free in the product, and movements are not constrained.
The color of the shirt is most often white or cream - this symbolizes the innocence of the child. After the baby is lowered into the water, it is necessary to wear a shirt or kryzhma; here the choice is made by the parents themselves. Below is how to make a pattern for a baby boy's christening shirt.
Dress pattern for girls
Constructing a pattern
Step-by-step sketching process:
- The drawing is based on the sleeve; to draw it, you need to measure the half-circumference of the arm and make allowances for freedom of movement. It is also necessary to measure the length of the sleeve and indicate it in the picture;
- Draw a sketch of the back and front in the middle. To do this, measure the half-circumference of the baby’s chest and add about 10 centimeters to the measurement;
- Mark the sleeves on the wrong side with a smooth line;
- Next you need to draw a neck section for the product. In the center of the shelf, set aside an amount equal to 1/4 of the neck circumference + 3 cm on both sides from the middle mark of the product. Draw a smooth line.
What is a christening shirt
The baptismal shirt is the first piece of clothing that a child is dressed in after the baptism procedure. According to the rules, such a shirt should be long and light-colored, mainly made from natural fabrics. Traditionally, the shirt is provided by the godparents.
Attention! There is a special pointer on the screw handle that helps the craftswoman find the correct grip, thread management, finding the tongue slot, etc.
We sew a baptismal dress for a girl aged 2 years
Share on social media networks:
Baptism is an important moment in a child’s life, although he himself does not realize it. Parents want their little daughter or son to look especially cute on this day. In stores you can now find sets of baptismal clothing for both boys and girls. But if you have a sewing machine and some free time, the godmother can handle this task herself. From the article you will learn how to sew a dress for a girl's baptism with your own hands.
Ready-made patterns of baptismal shirts for girls and boys height 64 - 104 cm
Good afternoon. I am posting ready-made patterns for baptism shirts, height 64 - 104 cm. The shirt is suitable for both boys and girls.
Loose shirt, raglan sleeves. There is a gather at the neck and the sleeves are also gathered. Ideal for a baptism ceremony.
I drew these shirts at the request of Elena, who sews baptismal clothes for children. From this photo:
According to my idea, the shirt has an open back. Elena sent me several photos of the sewing sequence, I post them below. She decided to make the shirt not open, but with a slit in the front. It turned out very well))
Pattern in PDF file in full size. When printing, set the scale to 100%. When printing, set the scale to 100%. After printing, you need to glue the sheets end to end, without overlapping the sheets and without cutting off the margins.
The first sheet has a square whose sides are 4 cm. Check with a ruler. If not, then the print scale is set incorrectly.
Patterns are given without seam allowances.
Patterns cost 54 rubles. After payment, a letter with a pattern file will immediately be sent to the email address you provide.
| 64 cm / 3 months / 44 cm | 54 rub. |
| 72 cm / 6 months / 47 cm | 54 rub. |
| 80 cm / 1 year / 50 cm | 54 rub. |
| 86 cm / 1.15 years / 52 cm | 54 rub. |
| 92 cm / 2 years / 54 cm | 54 rub. |
| 98 cm / 3 years / 55 cm | 54 rub. |
| 104 cm / 4 years / 57 cm | 54 rub. |
If the pattern has not arrived within 20 minutes, check your Spam folder and write to the address, be sure to include number 88740