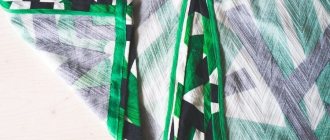
One way to finish cut edges on necklines and armholes is with bias tape. This method is very suitable for thin fabrics: lace, cotton, cambric and others.
This method is suitable for both children's and adult clothing. Summer, evening, and lace clothes can be processed in this way.
The trim can be made from the fabric of the product itself, or you can choose another fabric to match or contrast. For example, the trim can be made from chiffon, cambric, or mesh.
How to trim corners with bias tape, master class | Sewing Advisor
How to finish corners with bias tape? You will need the answer to this question when working on complex cutouts in women's and children's clothing, as well as when sewing home textiles: decorative blankets, napkins and panels, aprons and potholders.
Our master class will show in detail how to process corners with bias tape with your own hands quickly and accurately. It's not difficult at all! We will look at external and internal right angles.
How to trim corners with bias tape: basics and nuances
How to trim corners with bias tape yourself? Bias tape is a very convenient material for processing and finishing the edges of any product. You can purchase ready-made bias tape at your local sewing supply store.
It comes in a variety of widths and colors, so you can find the bias tape that's right for your project.
However, making bias tape with your own hands is not at all difficult! We recommend using only your own bias tape in cases where it is visible from the front of the garment.
The bias tape is cut at an angle of 45 degrees to the grain of the fabric.
Most often it is 3 cm wide, but you can increase it at your discretion. The cut strip of fabric should be ironed in half lengthwise, and then both long sections should be ironed to this middle line. That's all!
Processing the corners with bias tape can be done with a finishing stitch on the front side or fixed manually with a hidden seam on the back side. We will show you how to make an internal corner with a machine stitch, and an external corner with a hidden seam.
So, let's learn how to finish corners with bias tape yourself!
External corner
Fold the bias tape right sides together to the edge of the piece. Sew, not reaching the edge, a distance equal to the width of the allowance. That is, if you sew a stitch at a distance of 5 mm from the edge (the future width of the finished edge), then you need to finish the seam 5 mm before the edge.
Pull the part out from under the needle. Fold the bias tape upward, exactly from the last stitch.
Lower the binding down as shown in the photo. Pin or clamp together.
Sew, starting the seam at the same distance at which you finished the previous one.
Turn the binding to the wrong side.
Pin the binding to the seam allowances on one side first.
Pin the tape to the seam allowance on the other side.
Fold the corner.
Hand sew the edge of the bias tape with a blind stitch. Also tack the corner seam. Iron.
Internal corner
Reinforce the area near the inner corner with stitching. Cut the corner with scissors almost to the stitching.
- Align the binding right side to the right side of the product and pin, opening the corner so that the cuts form a straight line.
- Sew to the full length required.
- Iron the bias tape up.
- Make a bevel on the front side and drag it to the back through the notch.
Fold the trim around the edges and pin them to the seam allowances. Carefully fold the corner.
- Stitch close to the edge.
Source: https://sewingadvisor.ru/pp/ugly-kosoj-bejkoj/
Finishing the neck with finishing stitching
Today I want to show step by step the sequence of performing such a facing, starting with its cutting, in a product with a raglan sleeve using the example of a polka dot dress ... I think that MK will be especially useful for beginners.
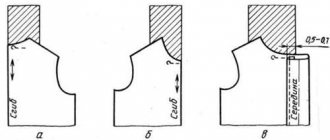
It’s no secret that a carefully crafted neckline and armholes are the face of the product and the key to success is the precise cutting of the facing parts with obligatory observance of the direction of the grain thread . I never remove facing patterns from the pattern sheet, because... During the sewing process, the cutout and shape of the neckline and armholes may change. I do this at the stage of setting up the product before joining the shoulder seams. In products with raglan sleeves, the neckline is made after connecting the sleeve to the product, because In such a product there are no shoulder seams as such. Warping involves refining the depth and shape of the neckline and trimming the excess to the required seam allowances. So, let's get started: 1. Sew the sleeves into the armholes, the zipper into the middle back seam:
2. Prepare the neckline for sewing, that is, fold the product in half, bending it along the line of the middle front and aligning and pinning all “paired” seams:
3. Lay the chopped neck flat on the table and make the basics:
At this stage it is convenient to make a pattern of facing parts on paper. I usually do this directly on the fabric. If the fabric allows, the facing can be cut whole without seams, but usually it is made in two parts, forming a seam in the shoulder area. To avoid excess thickness in this area, I move the facing seam towards the front or back so that it does not coincide with the shoulder seam. In this dress, the seam is shifted towards the back. 4. Bend the piece of finishing fabric so that the grain thread runs along the fold, pin it with pins and place it under the fixed neck, starting from the front and aligning the fold of the flap with the fold in the middle of the front:
6. Cut along the markings and try on the neckline: 7. Stepping back 3-5 cm from the neckline cut, trim the outer edge of the facing (parallel to the neckline) and the seam connecting to the back facing:
8. In the same way, form the back facing, using suitable “lunges” of the finishing fabric:
11. Duplicate the facings with non-woven fabric; I do this not individually, but in pairs, which prevents the facings from skewing and makes them “mirror-like”. I start with the back facings:
13. Chop the neck of the product and lay it flat in the shape of a circle, face up. The facing is tried on, laid out face down on top and pinned, starting from the middle to the left and right:
To avoid excess thickness when turning out, the allowances of all main seams both on the product and on the facing are cut at a corner:
This stitch allows you to quickly form an edging due to the fixed seam; it seems to wrap itself up and facilitates further basting (see point 15), like here: Specifically, I did not do this operation on this product. 15. All that remains is to sweep out the seam (it is recommended to iron it first), forming a narrow edge from the facing. To do this, make oblique basting stitches no more than 1 cm long at a slight angle to the seam. This stitch prevents the seam inside from taking other positions, i.e. the seam is firmly fixed and allows you to get an edging of the same width, which is then easy to iron and it is convenient to lay a finishing stitch. Usually the seam is basted from the side of the facing, in this case the edging was intended to be “visible” from the face, so basting was done from the side of the product:
And the last thing: so that the facing does not turn out during wear, in the places of the seams it is attached to the seam allowances manually, and in the area of the zipper it is hemmed to the zipper tapes. In the area of the shoulder seam, the facing is fastened with a short bartack directly into the shoulder seam:
processing of cuts with bias tape | | Creative workshop Angel A
Necklines and armholes in summer dresses without lining can be conveniently treated with bias tape. Bias binding is strips of fabric cut strictly at 45 degrees to the weft and warp fabric. They are so flexible that they can easily follow the rounded lines of armholes and necklines.
Bias binding is also a facing, but in the form of a straight strip of fabric.
There are several ways to trim sections with bias tape. My favorite method is not the easiest, it is quite labor-intensive, but I prefer it more than others.
Why? Because it gives a completely flat, thin processed edge. The bias tape does not need to be folded in half first. It is better to cut the bindings from very thin fabric. I never buy bindings at the store. I never iron them in 4 layers. There is only one reason: I don't like it.
So: Italian linen, back with yoke and “tricky” neckline. New look style dress. There are a lot of sections and they need to be processed in stages. Let's start from the back. The darts are sewn, the yokes are either basted or already sewn on by machine, not reaching 2 cm from the end of the seam.
Description of slice processing:
1) strengthen all tensile sections with thin adhesive doublerin (non-woven fabric). I often glue the armholes and neckline: the cuts are fixed from stretching, and the processed edges in the finished product look clear and finished.
2) pin the bias tape “face to face” to the cut being processed. Often I not only pin it, but also baste it if there are complex bends ahead. This way I am confident that the binding is clearly fixed, in a straight line, and I am not distracted by removing pins. I never write on pins - I feel sorry for the typewriter.
- 3) sew the binding on the machine 4) iron the seam and press the binding to the seam allowance
- 5) stitch the binding to the seam allowance from the front side.
6) iron again and cut off excess allowances. You can trim the seam allowances in steps using regular or scallop shears for a flat border on the finished edges. 7) sweep out the piping. In other words, turn the binding over to the wrong side and secure the edge with bias stitches so that 1 mm of the main fabric folds over to the wrong side.
 fold the edge of the binding, sweep it (or pin it with pins) and sew it on the machine. But most often I sew this edge with hidden stitches. Still, individual tailoring is a special way of making clothes. There is a lot of manual work, but the end result is worth it. The seams are thin and flat. The time spent is repaid by the special sincerity and warmth of things.
All other sections are processed using the same technology. Sew the shoulder seams and apply bias tape to the neckline. In principle, the plastic trim will allow you to beautifully describe smooth curves and roundness. There is no need to pull it out with an iron before stitching. But in this dress the front neckline is triangular, and it was here that I made an exception - I stitched the trim “on the corner” at the bottom point of the neckline.
This is a processing that is unlike industrial technologies. Man-made.
- Simpler methods of piping with bias tape can be seen in this article.
Source: https://angel-a-dress.ru/texnologii/gorlovina-i-projmy/obrabotka-srezov-kosoj-bejkoj
Master class: neck processing
Share the link to this article with your friends on social networks.
When sewing chiffon clothes, it is very important to properly process the neckline . You can do this beautifully using bias tape. The task, of course, is very painstaking and requires special care, but it is really worth it. Our master class describes the entire process in detail and will help even a beginner to cope with it easily.
Sew shoulder and side seams on the blouse. Mark the middle of the front and back, fold the neck in half. Without stretching, fasten the blouse to a flat, thick fabric and measure the length of the neckline. This is the length you need to prepare bias tape.
To cut out bias tape, place a piece of chiffon on a flat piece of cotton fabric and pin it in place.
You can use, for example, a tablecloth or sheet folded in 4 layers. This will help you more accurately cut out bias tapes of the same width. It is important that all corners of the fabric cut are straight.
- Baste the straight edge of the bias tape to the neckline, right side to right side, pulling slightly.
- If you sew the binding too loosely, it will not lie nicely.
- It is also impossible to adjust the main fabric, since the chiffon will then be impossible to iron.
Mark the junction of the binding, trim off the excess and stitch the ends along the grain thread. Iron the cuts.
Sew the binding at a distance of 5 mm from the edge.
Press the binding onto the neck edges. Then turn it to the wrong side and baste the folded edge to the neckline close to the stitching seam so that on the front side the width of the binding is 0.5 cm.
- From the outside, sew a stitch into the stitching seam, setting the stitch length to 2.5 mm.
- Steam the neck through a thin cotton cloth.
- The elegant neckline of the chiffon blouse is ready!
- We hope our master class with a detailed description of the process of processing the neck of a chiffon product using bias tape helped you in your sewing.
Especially for the site Handicraft Lessons Valery-r.
Source: https://xn—-htbdjdhckueqe7ag0q.xn--p1ai/master-klass-obrabotka-gorloviny/
How to process the neck of a knitted product
Knitted fabric is now in demand, and the fashion for clothes made from it is gaining momentum. You don’t have to buy the item in a store; you can sew it yourself. Moreover, in stores with fabrics and accessories you can find everything for this: special needles for knitwear for sewing machines, a large number of elastic bands, threads and other things. The most difficult question may be how to process the neck of a knitted product. Below we will look at simple options. Try to be interested in step-by-step master classes on thematic sites, pay attention to the comments under the publication. Other people's opinions can be very valuable.
Preparatory stage in working with knitwear
Remember that a lot depends on the choice of quality material. Before you buy knitted fabric, you need to know that it differs in density, type of pattern, and composition. Accordingly, it is divided into types: fleece, terry, cooler, stretch, header and others. A competent seller will tell you which fabric to choose for a particular product. Some tips:
• Choose a product with a lower percentage of artificial fibers, otherwise the clothes will be uncomfortable to wear;
• High-quality fabric has a uniform color, without stains, and is quite elastic;
• Pay attention to how the fabric is folded on the cuts - for coils and other defects.
Before doing anything, the knitwear must be processed:
- To prevent the neck from stretching, attach adhesive tape or run a stabilizing stitch along the edge. An even more accessible way is to sew a regular ribbon along the wrong edge;
- If you want the neckline, on the contrary, to stretch, then use an overlocker. Of course, not everyone has it, but the studio will finish this element for you for a nominal fee and correctly. You can replace this item with a double needle stitch or a zigzag stitch.
Processing of knitted neck
For T-shirts and tops, a simple hem technique is suitable. Sew the securing stitch with short stitches no more than 2 mm. Then sew the shoulder seams. Finally, secure with two decorative stitches.
Don't know how to finish the neckline of a knitted dress? First of all, decide on the type of cutout. It can be deep round, boat-shaped, v-shaped. Mark on the pattern where the neckline will be. Create the first line where the stripe will go. After that, fold it in half and iron it in the middle. The edges can be secured with non-woven fabric. Making an indent, sew the neckline.
Another question that causes difficulties for novice needlewomen is how to sew knitted bias tape to the neckline. Remember, the knitted trim is cut across the buttonhole row. Measure the length of the armhole and cut out the binding. We fold it in half and go over it with an iron, then move on to the overlock machine. We sew the binding to the product by hand. The next step is to remove the manual basting and secure the element to the overlocker. The final step is decorative stitching on a machine of your choice.
Processing armholes in sleeveless items with bias tape: preparation for work, rules - shvejka.com
0 151 views Sleeve patterns
In sleeveless products, the treatment of the armhole may vary depending on the material and model of the garment. For knits, stretch and other stretch fabrics, it is convenient to use bias tape.
Bias tape seals the cutouts of clothes, making them beautiful and neat (photo: sewingadvisor.ru)
It looks beautiful on round, oval, V-shaped and teardrop necklines.
Preparing for work
How to cut strips of bias tape from fabric. The edging tape is made from strips of material cut along an oblique line. Thanks to this, they can be laid out in a circle in the finished product (which will not happen when cutting along a longitudinal or transverse line).
Manufacturing master class:
- Determine the total length of bias tape needed to cover the neckline and armhole.
- Place the fabric with the wrong side facing you. Mark strips of the same width on it at an angle of 45°.
- Carefully cut strips along the line with scissors.
Important! If the binding turns out to be short, it can be lengthened. The line connecting the parts of the tape should be oblique, so they are ground at an angle. The edges of the stitching strips are cut at an angle of 45°.
Preparing the bias tape, ironing the hem. The strip is folded in half (the edges should clearly coincide) and lightly fixed with a hot iron. There is no need to iron it too much. After this, the width of the binding will be reduced by about half.
To make sewing the ribbon easier, it is recommended to iron the hem as well. Its edges are fixed with an iron, unfolding the slightly ironed strip. With this scheme, the guideline for creating the hem will be the line in the center of the strip that the iron will leave.
Tips before processing
The edging strip for bias tape is most often made 2.5-3 cm wide. The narrower the tape, the better it fits the curves of the neckline, especially at the shoulder seams. For thin materials and linen products, you can use binding up to 5 cm. After ironing when folded, its width will be half that size.
Before work, you need to prepare not only a homemade strip for edging, but also a store-bought one. The ironing method is the same as for bias tape cut from fabric with your own hands.
Before work, the binding needs to be prepared and ironed (photo: burdastyle.ru)
Before sewing on the ribbon, check the condition of the sewing machine and the thread tension. Make sure the needle and thread numbers are correct (they must match the fabric being sewn).
Note! It is not recommended to sew bias tape with a small stitch, since frequent piercing with a needle can damage the material
Stitching the neckline and armhole (part 1).
Friends, hello everyone!
If on a product, in the area of the neckline and armholes, you need to get a smooth, even and beautiful front side, instead of “autonomous” processing of the neckline and armholes, they can be processed with one facing. This facing is called single, combined or one-piece and is cut out from one piece of fabric.
Processing of products with different shoulder widths with a single (combined, one-piece) facing occurs in different ways. In today's article we will look at the simultaneous processing of the neckline and armholes with a facing, on products with narrow shoulders (tops, dresses without collars and sleeves).
Combined (one-piece, single) facings, pattern.
How to make such a pattern yourself?
To lay it out on the fabric, we will need a finished pattern of a combined facing. And to make it more convenient to carry out all the necessary “manipulations” with the pattern, we will make copies of the upper part of the back and front, while capturing sections of the main parts of the pattern below the armhole line by 5 - 7 centimeters.
If there is no asymmetry on the main parts of the pattern, the contours of the combined facing can be applied only to half of the back and front pattern.
The one-piece facing of the neckline and armholes holds the shape of this area of the finished product quite firmly and firmly. So, it makes no sense to perform voluminous finishing details, such as folds, gathers, etc., in those places on products where the neckline and armholes are hemmed with one facing.
Products with a short shoulder line, processed with a single facing, and shoulder darts do not have. And the chest piece, coming out of the side seam, remains out of use.
But items with narrow shoulders may have bust darts extending from the armhole.
Or the back and front may consist of several parts. For example, middle and side parts, front and back. And they all “have access” to the armhole.
Therefore, from the main parts of the pattern (two or more), we also redraw the lines of all seams, darts and longitudinal lines.
And now, on the copied patterns, aligning the parts into one line of the neckline and armhole, we lay, pin or seal all the seams and darts (if any) and apply new lines for the neckline, armhole, side seams and middle lines on a new sheet of paper.
The bottom line of the future facing is applied to the paper in compliance with several rules set out below.
- In the narrowest place (the middle of the front and back), the width of the facing should be at least 6 cm.
- But at the same time, a one-piece facing should not “spread” to the area of the shoulder blades (back) and the chest area (shelf).
- The bottom facing line, along the bottom of the armhole, should completely repeat the armhole line copied from the product. And at the same time, it should be “located” at a distance from the copied armhole line, 3 to 5 centimeters lower (according to the model, it depends on the type of fabric).
- In the area of the mid-back and front lines, the bottom facing line should run perpendicular to these lines.
Well, now, based on all these rules, we try to draw the bottom line of the facing.
We cut out and lay out the resulting patterns, along with the rest, on the fabric.
Combined (one-piece, single) facing of the neckline and armholes for products with wide (from 5 cm) shoulders.
Combined (one-piece, single) facing of the neckline and armholes for products with through fasteners running from the neck line to the bottom of the product.
Combined (one-piece, single) facing of the neckline and armholes for products with a fastener along the shoulder line.
Combined (one-piece, single) facings for products with narrow shoulders, cutting and processing.
The fastener on the product, the neck and armholes of which are processed with a single facing, can be in the side seam, along the lines of the middle front or back, and along any other line “coming out” of the neck or armhole (according to the model).
Therefore, when cutting out two parts of the future facing, do not forget about the seam allowances for such a fastener.
And in order not to get confused about which seams, where, and how wide the allowances need to be allocated, let’s make them all 1.5 cm wide. The excess can then be trimmed off.
Along the bottom contour, the width of the allowance and whether it is needed at all, determines the method of processing this cut.
Combined facing is intended for those products where the front side must be very smooth. Therefore, it will not be correct to compose the facing like a puzzle, from separately cut parts, if there is a lack of material. Long, thick seams will bulge unsightly above the surface of the product.
For an excellent final result, it will be better if you think a little longer and either place the pattern details on the fabric more rationally, or choose an additional fabric that matches the color and texture of the main one to perform such a facing.
The cut out facing parts are strengthened with adhesive cushioning materials.
Then the front facing is connected to the back facing with pressed seams. How many of them there will be and in what places the stitched seams will be made depends on where, in what place on the product the fastener will be located.
For example, if the clasp is in the middle of the back,
front,
or in any other seam coming out of the neckline or armhole, which means that the facing parts are connected to each other along the side seams.
If the fastener is on the side, the facing parts are connected to each other only along one side seam.
The product may not have a fastener at all. And then the two parts, the front facing and the back facing, are connected to each other along the side seams.
As you can see, the shoulder seams, in different ways, this way and that, of the connected facing parts, still remain free, not stitched.
One way is to process the bottom edge of the facing.
Stitching combined (one-piece, single) facings on products with a short shoulder line.
Combined facings, on products with a short shoulder line, without any fasteners and with fasteners located in different seams of the product, except for those intended in the shoulder seam, are performed in the same way.
The finished facing is applied with the front side to the front side of the product.
One-piece facings are basted onto the product after accurately aligning all of the lines of the neckline, armholes, middle and side seams.
At the same time, along the seams in which zippers will be located on the finished products, simultaneously with basting the facing we carry out the necessary preparatory work. Namely, we prepare the seam allowances of the product and the facing for making the zipper.
We lay machine stitches along the lines of the neckline and armholes.
As you can see, only the lines of all shoulder seams remain unconnected.
When making stitching lines, we reach the shoulder line and stop exactly at this line and make bartacks.
We trim the allowances of all seams to a width of 0.5 - 0.7 cm.
On all, even slightly curved sections of the seams, we notch the allowances.
Now it's time to connect the shoulder seams.
We turn the facing inside the product, baste the stitched neckline and armholes and iron everything.
We bend the shoulder seam allowances on the facing, both from the back and from the front, along the marked seam line outward and secure it with a temporary hand stitch. It should not interfere with the shoulder seam.
Along the lines of the shoulder seams, fold with right sides facing each other, back and front.
The seam lines drawn earlier during marking on both parts should match just perfectly. We baste them and then connect them with a stitch stitch.
Now you need to manage to carefully iron this completed shoulder seam. This can be done by placing something very narrow, wooden, under the seam. For example, on the handle of a brush for applying paint, on a pencil, etc.
We tuck the seam allowances of the pressed seam inward, between the layers of the main back and front parts, and the facing parts.
“Release” the facing seam allowances from hand stitching
and tuck them in there, inward, bending them along the line of the shoulder seam.
And in this position we secure it with a permanent hidden hand stitch using oblique stitches.
Everything, a one-piece single facing of the neckline and armholes, for products with a narrow shoulder line, is done!
In the next article we will look at how single facings are performed on products in another way.
That's all for today! Good luck to all! Sincerely, Milla Sidelnikova!
Video tutorial: Processing the armhole or neckline with chiffon bias tape
12 04 2021 Lina Frolova
Beautifully graceful finishing of an armhole or neckline with bias tape is not an easy task for beginners. But sometimes the entire type of product depends on how they are processed. Especially on thin and transparent fabrics.
To make products made from fine fabrics look beautiful, it is advisable to use a treatment that will favorably emphasize the properties of the fabric, and not ruin the appearance of the product with rough details.
Here it is no longer possible to use facing processing for processing armholes and necklines. Processing with bias tape is ideal.
I have already shown one of the methods for processing with bias tape.
This time I will show you another way in which you can make bias binding even more subtle and elegant. I really like this method. It is both reliable and elegant. I highly recommend that you master it.
This processing is not difficult at all, and may even be easier than the more well-known, common methods of processing with bias tape.
In this master class you will see a fragment from the film on sewing a two-layer chiffon dress.
The film itself has not yet been released. Maybe we’ll release it again, I don’t know yet... The quality of the film itself confuses me a little because of the black fabric in the work. I will NEVER make video tutorials with black fabric again. They have done such a great job and now they are having doubts whether to release it...
I still decided to post a small fragment on processing armholes with bias tape in the master classes, because you will definitely need it.
Don't be confused by the shape of the armhole. It’s just that this dress has an unusual cut (you won’t be able to see it) and the armhole configuration is therefore different from the standard version.
- So, watch the video MK and take into account an interesting and reliable method of processing with bias tape:
- ????
- *Let the video load for a more comfortable viewing experience.
- If the video does not play, download and install a flash player
Source: https://armaliniblog.ru/obrabotki-gorloviny-kosoj-bejkoj
