Why is this practical?
Even before the cold season sets in, the question arises - how to make a shirtfront yourself? How is this wardrobe item better than the usual everyone’s favorite scarf?
There are many advantages. The shirt front does not slip, it does not need to be adjusted, and most importantly, it fits perfectly to the neck and prevents cold air from damaging the little person’s throat.
Despite the apparent complexity and unknowns that knitting needles and needlework conceal, everyone can cope with such a task!
Note!
- Knitted raglan - step-by-step instructions, patterns, recommendations. Photo review of the best works and new products from craftswomen
Knitting a shawl - step-by-step instructions for making a shawl with your own hands. Tips for beginners on knitting + photo reviews
- Amigurumi ring ⭕: features of the amigurumi technique. Step-by-step DIY master class with simple knitting patterns + 180 photos
What are the advantages of a shirtfront?
Dickies, like any other wardrobe item, have their own positive features. Here are the main ones:
- The collar, also known as a golf collar, ensures a tight fit;
- The wide part allows you to cover not only the neck, but also the baby’s chest and shoulders;
- Does not slip or change its position even with active movements of the child;
You can knit such a wardrobe item with both circular and straight knitting needles. At the same time, circular ones are necessary for seamless knitting with raglan - a variation for experienced needlewomen. But even if you're just starting out on your DIY journey, this setup shouldn't be intimidating.
The main difficulty can only arise in calculations, which are not so difficult to overcome. This shirt-front does not need to be sewn and can be used immediately after finishing the work.
If you still don’t want to get such an experience, knit on simple knitting needles. This method produces a two-piece product, which will have a front part and a back part.
Dickey on two knitting needles
The model on 2 knitting needles can be knitted in 2 variations: solid fabric with a seam and with buttons. Let's consider both options.
Dickey with seam
Necessary materials:
- yarn for knitting;
- straight knitting needles suitable for the thickness of the selected yarn;
- tape measure;
- scissors;
- hook;
- needle for stitching knitwear (plastic or metal with a blunt end).
Scheme
The shirt front is knitted from top to bottom on straight needles with increases on the main fabric. Before starting knitting, the neck height, head circumference and length of the product from the neck are measured. The loops are calculated according to the sample. First you need to knit the neck, then the base.
Make a garter stitch binding. Sew the edges of the knitted fabric together.
Description
After calculation, cast on the required number of loops on the knitting needles. When casting on, add two edge loops that are not included in the yardage and repeat.
Tie the neckline with a 2x2 or 1x1 elastic band of the desired height.
Next, you need to move on to knitting the main part of the product. We knit using stockinette stitch. Starting from the first row, you need to increase before every 4 stitches of the row and after 3 rows (1, 5, 9...rows). Loops are added from pulling or by crossing the main thread.
Having knitted the required number of rows, you need to move on to tying the fabric. Knit six rows in garter stitch (all rows are knitted with knit stitches). The loops are closed using a hook. Cut off the working thread, leaving an end 20-30 cm long for stitching. Using a knit stitching needle, connect the edge loops on both sides of the knitted fabric to each other.
The shirt shirt for a boy with knitting needles, the diagram of which is described above, is ready.
Shirt with buttons
The model with buttons is knitted on 2 needles according to the same pattern as the previous product. A distinctive feature is the presence of a strap, which is needed for attaching buttons.
The convenience of the model lies in the detachable fabric, which makes it easy to put on and take off the shirtfront directly on the neck, bypassing the head.
Materials required for work:
- yarn (wool, wool mixture);
- straight knitting needles;
- scissors;
- hook;
- tape measure;
- buttons;
- needle with thread.
Scheme
The product is knitted from top to bottom on two straight knitting needles with a placket. The neckline is not folded in half, but knitted to the height of the necks.
The following measurements are used for knitting: neck height, neck circumference, shoulder length.
Description
Cast on the required number of stitches on the knitting needles, plus 5 stitches for the part of the strip that will overlap the product. First row: 5 knit stitches, alternating - 2 purl, 2 knit (elastic band 2x2), knit the last 5 loops. Next, always knit the first and last 5 stitches of each row with knit stitches.
Starting from row 4, make holes for buttons on one part of the placket. To do this, close the loops of the bar and then add the same number of loops in the same row by crossing the main thread. This creates holes for the buttons.
Having knitted the neckline, you need to move on to knitting the main part with increases that need to be made every 3 rows before every 4 loops. Knit the first part of the strap. Next comes the front stitch: in the front row there are facial loops, in the purl row there are purl stitches. Then knit the second part of the plank. Continue knitting until the desired length is reached.
The last 6 rows are knitted only with knit stitches in each row. In this way, the edge of the product is tied. Close the loops using a hook. Cut the working thread with scissors and hide the tail on the wrong side of the knitting.
Sew buttons to the part of the placket that has no holes, exactly opposite the holes. The shirtfront with buttons is ready.
What will you need for work?
Before you start creating the perfect scarf for your child, check that you have all the materials and tools:
Note!
- Knitted braids: simple patterns and the best master class for creating patterns with knitting needles. How to knit braids with your own hands + photo reviews
Knitting booties for newborns: detailed patterns for knitting booties for beginners + 150 photo reviews of the best products
- Mittens - TOP 100 photos of the best creation ideas. Description of the technique + instructions for knitting mitts with your own hands for beginners
Yarn
Before starting work, choose yarn. You can choose any color or combination, make patterns. Choose shades for a reason, but focus on outerwear and the general color scheme of your baby’s wardrobe. This will make the item really beautiful and easy to combine with existing items.
It is best not to skimp on yarn and choose only natural ingredients. Wool that contains merino or alpaca fibers is ideal. This wool has excellent warming properties and will not prick the baby’s neck. Another best option is to use a combination that contains a percentage of acrylic.
Advice: do not make a shirtfront from 100% acrylic; it warms you up very poorly outdoors, increasing sweating indoors. As a result, the baby will not be comfortable, and there will be no health benefits at all.
Sample
Having selected all the necessary tools and materials, make an experimental version. To do this, cast on about thirty stitches on the knitting needles and make the intended pattern. Do the work until the product sample reaches ten centimeters in length.
Having completed the work, close all the loops and wash the sample product. After drying, measure the workpiece with a centimeter. The task of such a sample is to calculate the number of loops and rows in one centimeter.
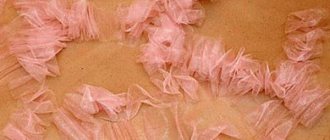
Knitted shirt front for girls 2 – 4 years old. Knitted shirt front for a boy 2 – 4 years old
Whether the accessory you knit will be for a boy or a girl depends on the color of the yarn you choose. The photo shows a model that will warm both a little princess and a brave knight.
Knitted shirt front for a child 2-4 years old
For work you will need:
- Bambino yarn (TM Kamtex). Composition: wool - 35%, acrylic - 65%. Total weight: 100 g. Footage: 300 m.
- Spokes on line: #4.
Attention: double thread is used!
Description of work:
- Cast on 80 stitches on the knitting needles.
- Connect the cast-on edge into a circle and knit the collar to the required height (+/- 16 cm) with a 2x2 elastic band: 2 SC, 2 IZ (repeat from *).
- After reaching the required collar height, start working on the yoke (see the loop distribution diagram).
Scheme for distributing loops for a shirt front
After distributing and marking raglan loops, add loops (using yarn overs or knitting from a broach) in every 2nd row.
At the end of all increases, there are 136 loops in the work.
- Bind off the shoulder, back, shoulder loops. Continue knitting in turning rows, lengthening the front of the shirt front. You can leave it rectangular or make it rounded by decreasing 1 stitch at the beginning and end of every 2nd row. The number of decreases is 7-8. Close off the remaining loops.
- If you wish, you can decorate the edge of the product with decorative crochet binding (see video at the beginning).
What needs to be done before starting work?
Take measurements. This is the second step after checking all the required materials. When preparing, it is important to understand that the neck should easily pass through the head, but also fit snugly to the neck. We measure the circumference of the head, and also do not forget about the circumference of the chest.
Carry out calculations. Using measurements, we multiply the result by the number of loops in one centimeter and as a result we have the required number of loops for the neck. We calculate the number of rows depending on the desired length of the future product.
How to take measurements for knitting a shirt front
Before you start knitting a shirt front for a boy using knitting needles according to the patterns suggested below, you will need to take measurements using a measuring tape.
A shirt front is a product that is worn over the head, so the main measurement is the circumference of the head.
This measurement is taken along the protruding points of the forehead above the ears to the back of the head.
Neck height
This measurement is taken from the socket at the junction of the collarbones at the front to the base of the skull. The measurement must be doubled, since the collar in the finished product is folded in half. The exception is the button model, in which the measurement value is not doubled.
Shoulder length
This measurement is needed to determine the maximum possible width of the product. It is measured from the neck to the highest point of the shoulder.
Neck circumference
The measurement is taken at the base of the neck in the area of the pit.
Step-by-step instruction
Let's start the knitting process using the example of an ordinary women's shirtfront. We follow the entire sequence of steps.
We make a sample according to the previously stated principle. We cast on the required number of loops. In this case it is 84. We divide them into four double needles. This makes twenty-one loops for each. You can also work with circular knitting needles.
We make the necessary elastic band, consisting of two front and two back blocks. In the example, this will take 13 centimeters. We use circular knitting needles and use markers to mark the beginning of the raglan. This line will consist of two loops. The result is the following picture: 19 loops, then a marker, then two loops and again 19 loops and so on in a circle until the next marker.
Making the front beautiful part. Each time we add one loop before and after our raglan line in every second row. In the example it will take twelve centimeters.
The last two rows of the product are made using garter stitch. This will allow the edges to curl up. Then close all the loops.
We wash and dry the product so that it no longer shrinks, then steam it, and now the shirtfront can be used for its intended purpose.
Dickey for a little girl
It is very important for a child to feel warm and comfortable, especially for girls.
Let's look at a small master class on knitting this collar for a child. The product is designed for children aged from four to eight years. Prepare light yarn consisting of acrylic and wool, knitting needles number 4.5, dark blue satin ribbon. The false elastic pattern must be knitted as follows:
- 1 rub. – 1 person p., 1 p. P.;
- 2 r. – 1 i. p., then insert the knitting needle into the middle of the next loop, but from the previous row, and knit the link in the front way. Repeat these steps until the very end. You need to alternate these rows.
The pattern for double decreasing buttonholes will be as follows: you need to remove two stitches on the right needle, then knit one stitch. etc., and then throw it over the removed one.
The knitted density of the product is 16 p. by 32 p. = 10 by 10 cm of false elastic. Cast on seventy-three stitches with knitting needles and knit a false elastic band. Start and end the strip with one face. st. When the height reaches nine centimeters from the edge, close 1 st at the beginning of the row, and then continue to knit a false elastic band, decreasing sixteen links in one strip. You need to make eight double decreases with your knitting needles.
Read
Youth women's sweater knitted in patterns and step-by-step master classes
After this, knit the lie again. Rub the elastic band up to a height of twenty-four centimeters from the edge and bind off all the loops. A children's shirtfront for beginners is easily and quickly knitted, and the master class is complete.
Photo selection of shirtfront for girls
Instructions for a child aged five years
If you lack experience and knowledge, you can look at the exact instructions for the child’s age. It is worth remembering that each child is individual and sizes may vary, check this at the initial stage of preparation.
Children's shirtfronts for beginners will not be difficult for real needlewomen, even if they have not tried to work with knitting needles.
What knitting do we use?
- We use garter stitch on the front and back sides.
- Knit stitch also knit and purl rows.
- For a 2*2 elastic band, we alternately use 2 knit and 2 purl rows;
- For an elastic band 2*1 - alternately 2 purl and one knit.
In this case, we use a knitting density at the rate of 15 stitches per 22 rows, equal to 10 * 10 centimeters.
If in doubt, you can read the description of step-by-step actions for each size and age. It all depends on the measurements and size of the child. The smaller the baby, the faster you can make a shirtfront with your own hands. This wardrobe item can easily be worn until school age. This will perfectly and reliably protect the child from unnecessary colds and cold winds.
Today you can find a huge number of useful offers on the Internet. For example, find a master class, a children's shirtfront - this will allow you to create a wardrobe item under the guidance of real craftswomen.
A baby shirt for a year can be an excellent gift, and the process of knitting baby shirts is not a bad way to distract yourself and relax in silence. This kind of work perfectly relaxes, adds creativity and makes the world more beautiful!
When choosing a shirtfront, you don’t have to limit yourself to just the scarf itself. It would be ideal to knit a kit that includes a hat. A more extensive version of the set may also include a warm jacket.
A single style solution and one pattern repeated on all items of clothing will become a stylish solution that pleases the eye of the family and instills a sense of beauty in the child.
The shirt-front can be made by both the child’s mother and other relatives - grandmothers, aunts and cousins. This is truly the thing that will not remain lying at the bottom of the chest of drawers, but will delight the eye during all winter walks, and most importantly, give warmth and care.
Create with pleasure, be inspired by beautiful pictures and create only those things that you would be happy to keep for yourself. Remember the evenness of lines and rows, and may there be enough creative inspiration for many wardrobe items for your own kids!
Knitted shirt front for a child: diagram and description for beginners
Knitted shirt front for a child.
Children's shirtfront knitted with a detailed description A shirt shirt knitted for a child is the most practical option for a winter scarf. It completely protects the baby's throat from the wind, fitting tightly to his neck. That is why every mother or grandmother simply needs to learn how to knit a wardrobe item that is knitted quite simply.
Content:
- Children's bib is a practical wardrobe item
- Types and methods of knitting a shirtfront with knitting needles
- Preparation, calculations, necessary materials
- We knit a shirt front with raglan knitting needles for children
- Dickey for a child aged 5 years
- Knitted shirt front for little ones
- Children's set of hat and shirt-front collar - sizes from 1 month to 4 years
- Knitted set: hat-helmet and shirtfront with buttons for girls
- How to knit a shirtfront for a child (video)
- Ideas for inspiration
Children's bib is a practical wardrobe item
How to knit a shirtfront for a child is a question that every knitting mother or grandmother asks with the onset of cold weather. Why a shirtfront and not a scarf? The fact is that the high collar of this wardrobe element completely protects the baby’s neck from cold and wind. Unlike a scarf, it does not slip, it does not need to be constantly adjusted or bandaged.
Knitting a baby shirt with knitting needles is quite simple. Rest assured, even if you are a beginner knitter, thanks to our article you will succeed, no doubt!
Types and methods of knitting a shirtfront with knitting needles
A warm collar in the form of a bib is the most suitable option for protecting a child’s neck during cold weather and here’s why
- the golf collar fits tightly to the child’s throat;
- the wide part covers the baby’s chest and shoulders;
- the shirtfront is tightly dressed and, unlike a scarf, it does not slip and does not need to be re-tied;
- the child is comfortable in it, he simply does not notice that he is wearing it;
- The shirtfront is knitted simply and quickly on both circular and straight knitting needles.
The shirt front can be knitted on circular and straight knitting needles. Circular knitting needles are used for seamless knitting with a raglan line. This method is very familiar to experienced craftswomen who know first-hand about knitting raglan from the top. Beginners should not be afraid, since the complexity of this method is only in the calculations, which are not so difficult to carry out. A children's shirtfront with raglan knitting needles on top is knitted quickly and does not need to be sewn; you can put it on immediately after finishing work.
But if you don’t want to torture yourself with math, and want an easier way to knit a baby shirt, then knit it on straight knitting needles. In this case, the product will consist of two parts - front and back. The loops for knitting the neckline are cast on already sewn parts of the shirtfront.
Preparation, calculations, necessary materials
- Yarn . Before you start knitting a shirt front, you must choose your yarn. Choose natural fibers such as merino or alpaca. These threads warm well and at the same time do not prick, and this point is very important for a child. You can also choose a blended yarn such as wool blend. But you shouldn’t choose pure acrylic for your child. It provides almost no warmth in the cold, and indoors the child will sweat in it.
- Knitting needles . When the choice of yarn has already been made, it is worth buying knitting needles. The yarn has a tag or label indicating the size of the recommended knitting needles and the approximate thread consumption for the product. It is not necessary to buy straight knitting needles; you can also knit a product on circular knitting needles, even if you planned a non-raglan shirtfront, knitting in forward and reverse directions.
- Marers . They are necessary to mark the beginning of work, as well as the location of the raglan lines.
- Centimeter tape for making calculations.
- Sample . Having prepared all the necessary materials for work, the first step is to knit a sample. Knitting a sample is an important stage of work, it should not be ignored! To knit a sample, cast on 30 stitches on the knitting needles (usually this is enough) and knit with the pattern of your choice until the length is 10 cm or a little more. Once the pattern is knitted and the loops are all closed, it needs to be washed and dried. Then you need to measure your workpiece with a measuring tape. Your task is to find out how many loops and rows there are in 1 cm.
- Taking measurements. To knit a baby shirt, it is important that the neckline passes freely through the head and at the same time fits snugly to the neck. To do this, measure your head circumference or use the data from the table below. Since the bib also covers your baby's chest, you may also need a Bust measurement.
Size chart of head and chest circumferences relative to the child's age - Calculations . Multiply the result by the number of loops per 1 cm and get the number of loops needed to cast on for the neck. Depending on the required length of the product, you can also calculate the number of rows; to do this, multiply the length you need by the number of rows per 1 cm.
We knit a shirt front with raglan knitting needles for children
Let's look at knitting a baby shirt using the example of knitting a shirt for a woman.
Before starting work, knit the sample and wash it. After the sample has dried, count how many loops and rows you have in one centimeter. From these indicators, make calculations for the sizes you need.
- Cast on the required number of loops on the knitting needles (in our example, 84 loops). Distribute them onto 4 double needles (21 stitches per needle) or knit them on circular needles if you prefer.
- Knit the desired length of 2x2 elastic (knit 2, purl 2). In our example, 13 cm. Switch to circular knitting needles. Use markers to mark the raglan lines. Let your raglan line consist of two loops. Then: 19 loops, marker, 2 loops, marker, 19 loops, marker, 2 loops marker, 19 loops, marker, 2 loops, marker.
- Next, knit in stockinette stitch, adding 1 stitch before and after the raglan line in every second row. Knit the required length of the shirtfront in this way. In our case 12 cm.
- Knit the last two rows in garter stitch so that the edges of the shirt front do not curl. Close all loops. Wash the product and lightly steam it.
We knit a raglan bib for children
Dickey for a child aged 5 years
Shirt for a child - age 5 years
Age: For 5 years.
You will need
Crazy Color yarn (25% wool, 75% acrylic, 260 m/100 g) - about 70 g melange.
Yarn “Jeans” (55% cotton, 45% acrylic, 160 m/50 g) - 50 g melange.
Stocking needles No. 5.
Knit in two threads in the round.
Garter stitch: knit. and out. rows - persons. P.
Facial surface: faces. and out. rows - knit stitches. When knitting in the round, knit all loops.
Rib 2×2: knit 2 alternately. p., 2 p. P.
Rib 2×1: alternate 2 purls. p., 1 persons. P.
Knitting density: 16 stitches x 22 rows = 10 x 10 cm, knitted in stockinette stitch.
Description of work
Cast on 88 stitches, distribute them onto 4 knitting needles, and knit with a 2×2 rib. After 10 rows, decrease 1 person at a time. p. in each front track and knit further 30 rows with a 2 × 1 elastic band. It should be 16 stitches on two needles, 17 stitches on the other two needles.
Next, knit faces. using raglan satin stitch, adding 2 stitches in every second row. in this way: tie the first loop, add 1 stitch, then knit without any increase, make the second increase before the last loop on the knitting needle. Knit in this way until there are 36 stitches on two needles, and 37 stitches on the other two needles.
Next, knit only on 37 loops of one of the knitting needles, decreasing 1 st on each side in every second row. When 19 sts remain on the knitting needle, continue knitting in the circle on the loops of all knitting needles, cast on an additional 9 sts for each raglan bevel. Knit 2 rows in garter stitch, cast off the loops loosely.
Knitted shirt front for little ones
Size : 3 (6) 8 months.
Tools:
yarn (100% sheep wool; 100 m/50 g) – 50 g pale pink; knitting needles No. 4; 3 (3) 4 mother-of-pearl buttons.
Patterns for children's shirtfronts
Garter stitch: work knit and purl rows.
Border with picot on 4 loops:
Rows 1 and 2: knit in garter stitch;
3rd row: knit 2 stitches together, yarn over 1, knit 2 stitches from the next 2 stitches.
4th p.: Remove 1 p., like a front one, 1 knit. and pull the removed loop through it, k1. and pull the 1st loop through the 2nd, k1.
Repeat rows 1–4 constantly.
Openwork pattern
1st r. (= purl): * Knit 2 sts together, 1 yarn over *. Repeat from * to *, finish with 1 knit.
2nd r. (= knit. r.): knit all loops and yarn overs.
Knitting density
21 p. x 42 r. = 10 x 10 cm, knitted in garter stitch.
Progress
Cast on 16 (22) 30 sts on knitting needles and knit as follows: 4 sts of picot border, attach a marker, 11 (17) 25 sts in garter stitch, edge stitch.
After 2 cm from the initial row, between the edge and the marker, knit 2 rows. openwork pattern.
Then continue knitting in garter stitch again, but in shortened rows as follows: * knit 6 (10) 16 sts after the marker, turn, knit all the loops, turn, knit 10 (14) 20 sts after the marker, turn, knit all the loops, turn, 2 r. knit all loops, knit 10 (14) 20 p. after the marker, turn, knit all loops, turn, 2 p. knit all loops *. From * to * (= 10 rubles) constantly repeat and at the same time repeat the openwork pattern every 5 cm (measured at the narrowest point).
After 17 (22) 22 cm from the initial row (in the narrowest place) after the openwork pattern, knit 2 cm in garter stitch (without shortened rows), and after 2 r. evenly make 3 (3) 4 holes for buttons - knit 2 stitches together, 1 yarn over. Close all loops.
Assembly
Lightly moisten the shirtfront, stretch it and let it dry. Sew buttons.
Children's set of hat and shirt-front collar - sizes from 1 month to 4 years
Hat: Sizes: 1/3 –6/9 –12/18 months (2 –3/4 years) Head circumference: 42 –44 –46 (48 – 50) cm Material: Drops FABEL studio yarn for all sizes 50 g . Color. No. 912, delicate chocolate
Neck: Sizes: 1/3 –6/9 –12/18 months (2 –3/4 years) Material: Drops studio yarn DROPS ALPACA 50-50-50 (100-100) gr. Color. No. 618, beige
Hat: DROPS double needles and circular needles (40 cm) no. 2.5 Knitting density: 26 p. x 34 r. With Fabel yarn in stockinette stitch = 10 x 10 cm. Collar: DROPS knitting needles .No. 3 Knitting density: 24 p. x 32 r. With Alpaca yarn in stockinette stitch = 10 x 10 cm. DROPS wooden buttons no. 513: 3 pieces.
Garter stitch (back and forth): 1 edge of garter stitch = 2 p.
Hat: The work will be knitted in the round on circular and double needles. Fabel yarn on circular needles no. 2.5, dial 112-120-128 (136-144) sts and knit. 8-8-10 (10-12) cm with rib = 2 knit stitches/2 purl stitches. Then knit in stockinette stitch – AT THE SAME TIME in 1st row. Distributing evenly, decrease 16-18-20 (22-24) sts = 96-102-108 (114-120) sts. After 13-13½-15 (15½-17) cm every 16-17-18 (19- 20) p. insert a marking thread or marker. Further in each 2. r. After the marker, knit 2 stitches together 5-5-6 (6-7) times and then in each row, after the marker, knit 2 stitches together. 9-10-10 (11-11) times = 12 sts. Knit on the remaining loops 2 cm = Tip of the cap. Then knit every 2 stitches together. Then cut the thread and pull it through the remaining loops. The work is equal (including the tip of the cap) approximately. 20-21-23 (24-26) cm.
1. eyelet of the cap: Fold the elastic over the top. Hold the cap with the tip facing you and use Fabel yarn on double needles no. 2.5, knit as follows: on one side at the bottom, pick up 22-24-26 (28-30) sts (knit 1 loop from each loop.). Work garter stitch back and forth - see above. – AT THE SAME TIME, decrease 1 stitch on both sides, knitting 2 outer stitches together. Perform decreases in every 4th row. 5-5-6 (6-7) times and every 2. p. 4-5-5 (6-6) times. = 4 sts on knitting needles. Knit these loops along. 2 together. Pull the last 2 loops through each other. Cut the thread and pull it through the last loop. The ear is approximately . 5-6-6½ (7-8) cm.
2. cap eye: Start 42-42-46 (46-50) sts after the first eye (these 42-42-46 (46-50) sts = middle front). Using Fabel yarn on stocking needles No. 2.5, pick up stitches by knitting: 1 stitch from each stitch, pick up a total of 22-24-26 (28-30) stitches (the back distance between the ears is 26-30-30 (34-34) stitches) . Knit further as the first eye.
Ties: Cut 3 strands of 60 cm from Fabel yarn and twist them together. Pull the lace through the bottom of the eyelet and let it curl. Tie a knot at the end of the lace and do the same on the other side.
Collar: The work consists of 2 Parts and is knitted from bottom to top.
Before: Work knitted forward and backward. Using Alpaca yarn on size 3 needles, cast on 32-36-40 (44-48) sts. Knit 2 garter stitch ribs - see above. Then knit in stockinette stitch and on each side knit 4 sts in garter stitch - AT THE SAME TIME in 1 st on both sides, inside 4 sts in garter stitch add 1 st, knitting between 2 sts 1 st from the transverse thread between the loops . Add 4 rubles for each. total 6-6-6 (8-8) times = 44-48-52 (60-64) sts. Work in stockinette stitch and with 4 sts in garter stitch until work reaches 15-17-19 (20-22 ) see Is the knitting density correct? Now set aside the middle 8-10-12 (14-16) for the neck on a spare needle. Now knit each side to the end separately. Remove the loops on the right side onto a spare knitting needle.
Left side: = 18-19-20 (23-24) sts. Then in each row at the beginning of each row along the inner edge of the neck close 2 sts 2 times and 1 st 2 times = 12-13-14 (17 -18) p for shoulder. After 20-22-24 (26-28) close the loops.
Right side: pick up stitches from auxiliary needle = 18-19-20 (23-24) sts. Work as left side until work reaches 19-21-23 (25-27) cm = 12-13-14 ( 17-18) p on knitting needles. Knit the next row as follows t (from the front side): 2 knit stitches, 2 knit stitches together, 1 yarn over, 4-5-6 (8-9) knit stitches, 2 knit stitches together, Yarn over 1, knit 2-2-2 (3-3). Purl 1 row with knit stitches and then work 2 garter stitch ribs on all stitches. Then close all the loops.
Back: Cast on stitches and knit in the same way as you did when knitting the front - however, after 18-20-22 (24-26) cm, close off the middle 18-20-22 (24-26) sts for the neck. Now knit each side separately . Place the stitches on the right side on a spare needle.
Left side: = 13-14-15 (18-19) sts. Work further in stockinette stitch with 4 sts in garter stitch with - AT THE SAME TIME at the beginning of the next row to round the neck. 1 p. = 12-13-14 (17-18) p. on knitting needles. After 19-21-23 (25-27) cm, knit 6 garter stitch ribs on all stitches and then bind off the stitches
Right side: = 13-14-15 (18-19) sts. At the beginning of the next row, cast off to round the neck. 1 st = 12-13-14 (17-18) sts on knitting needles. After 20-22-24 (26-28) cm close the loops.
Assembly: Sew the right shoulder.
Collar: along the edge of the neck with Alpaca yarn on circular needles no. 3, cast on approximately 82 to 102 stitches (including stitches on the auxiliary needle, the number of stitches should be divided by 4 + 2). 1 purl. R. knit stitches . Then knit as follows: 6 sts in garter stitch, * k2 sts.. / p2 sts. *, repeat from *-* until 8 sts remain, finish with k2 sts. and 6 p. garter stitch. Knit like this further - AT THE SAME TIME, after 2-3-3 (4-4) cm above the other button loops, knit 1 button loop (when viewed from the front side): k2 stitches, k2 stitches together . , 1 yarn over, 2 knit stitches. Next, knit an elastic band with the last 6 stitches in garter stitch. After 3-4-4 (5-5) cm, close the knit stitch and purl the stitch. Sew buttons
Knitted set: hat-helmet and shirtfront with buttons for girls
Head circumference - 52 cm
You will need: Midi mosaic yarn (25% wool, 75% acrylic, 170 m/100 g) - 200 g melange, knitting needles No. 4, four buttons.
Garter stitch: knit. and out. rows - only faces. P.
Rib 2x2: knit 2 knits alternately. p., 2 p. P.
Knitting density: 16 p. x 28 rows = 10 x 10 cm
Knitted hat for girls with pompom
Cast on 32 stitches and knit in garter stitch in short rows as follows: 1st row - k16. p., expand the work. 2nd row - 16 persons. p., crossed yarn over. 3rd row - 20 persons. p., expand the work. 3rd row - 20 persons. p., crossed yarn over, unfold the work. 4th row - 25 persons. p., expand the work. 5th row - 25 persons. p., crossed yarn over, unfold the work.
6-7th rows - persons. p., at the end of the 7th row - crossed yarn over. Repeat rows 1 to 7 8 times. Then close off 26 stitches and start knitting the middle part of the hat. 1st row - 8 persons. p., expand the work. 2nd row - 8 persons. p., crossed yarn over. 3rd row - 10 persons. p., expand the work. Row 4: K10, crossed over. 5th row - 13 faces. p., expand the work. 6th row - 13 persons. p., crossed yarn over.
7-8th rows - persons. p., at the end of the 8th row, crossed yarn over. Repeat rows 1 to 8 twice. Knit the second half of the hat symmetrically. Pull the cap along the top edge with a working thread, sew a back seam, and sew a pom-pom using threads of various lengths.
Knitted shirt front
Cast on 30 stitches and knit 8 rows with a 2×2 rib. Then switch to garter stitch, knit 4 rows, at the end of the last row, make a crossed yarn over and then knit in short rows as follows: 1st row - 8 knits. p., expand the work.
2nd row - 8 persons. p., crossed yarn over. 3rd row - 12 persons. p., expand the work. 4th row: 12 persons. p., crossed yarn over. 5th row - 16 persons. p., expand the work. 6th row - 16 persons. p., crossed yarn over.
7th row - 20 persons. p., expand the work.
8th row - 20 persons. p., crossed yarn over. 9th row - 25 persons. p., expand the work. 10th row - 25 persons, crossed yarn over. 11-12th rows - persons. p. 13th row - 2 p. together knit., 25 knit. p., expand the work. 14th row - 25 persons. p. 15th row - 2 p. together knit., 20 knit. p., expand the work.
16th row - 20 persons. p. 17th row - 2 p. together knit., 16 knit. p., expand the work. 18th row - 16 persons. p. 19th row - 2 p. together knit., 12 knit. p., expand the work. 20th row - 12 persons. p. 21st row - 2 p. together knit., 8 knit. p., expand the work. 22nd row - 8 persons. P.
3rd row - 2 stitches together, knit. all loops to the end of the row.
24-25th rows - persons. n. 26th row - persons. p., at the end of the row - crossed yarn over. Repeat rows 1 to 26 7 times to make 7 petals. Then knit 8 rows with a 2x2 elastic band, while knitting 4 button holes (close 2 stitches, in the next row, retype 2 stitches in place of the closed ones).
Children's shirtfront with knitting needles (not raglan) 2/3 (4/6) 7/8 years
DIMENSIONS
For ages 2/3 (4/6) 7/8 years
YOU WILL NEED
Yarn (98% wool, 2% nylon; 110 g/130 m) – 1 (1) 2 skeins of white; knitting needles No. 12.
PATTERNS
FACIAL SMOOTH
Front rows - front loops, purl rows - purl loops.
shawl stitch
Front and back rows - front loops.
RUBBER
Alternately knit 2, purl 2.
DECREASE 1 P.
Knit 2 sts together with a slant to the left = slip 1 st, knit the next stitch and pull the removed loop through the knitted one.
KNITTING DENSITY
11.5 p. x 15 r. = 10 x 10 cm
ATTENTION!
For a bib size for 4/6 years, it is important to maintain the knitting density, because with a higher density, 1 skein of yarn may not be enough.
COMPLETING OF THE WORK
FRONT HALF
Cast on 25 (30) 35 stitches and knit 4 rows. garter stitch.
Starting from the 5th p.m. (= faces. r.) and then knit as follows: knit the first and last 2 loops in garter stitch, and between them knit in stockinette stitch.
Continue knitting in this way until the length of the product is 12 (14) 16 cm, finishing with a purl row.
Next, close off the first 5 (6) 7 stitches from the front side and knit the entire row to the end.
Knit the next (= purl) row as follows: bind off the first 5 (6) 7 stitches and purl the row to the end, leaving 15 (18) 21 stitches on the needles.
In the next (= front) row, add 5 (6) 7 sts: * k1, 1 yarn over, p2, * repeat from * to * until the end of the row = 20 (24) 28 sts.
Continue working with the rubber band.
After 14 (15) 16 cm, close the loops on the front side.
Break the thread, leaving a long end for further assembly of the product.
REAR HALF
Knit the same as the front one.
ASSEMBLY
Sew two halves of the product: on the shoulder areas, sew the seam from the wrong side, on the ribbed collar - from the front side.
Fasten the ends of the threads.
How to knit a shirtfront for a child (video)
We also suggest you pay attention to video master classes on knitting shirtfronts.
Shirt shirt with raglan knitting needles on top. Detailed master class. by Natalia SV
Knitted shirt front. Not raglan. Short rows. Seamless. MK. from Svetlana Kolomiets Knitting School
A simple knitted shirt front. from the warmth of your hands