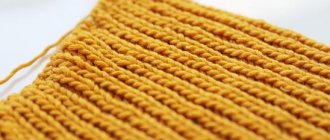
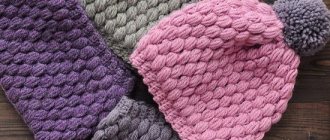
Products knitted with knitting needles will always be in fashion, because, in fact, they are unique and inimitable masterpieces created by needlewomen. Each craftswoman spends a lot of time and effort to create an exclusive knitted item that will attract the glances of passers-by and evoke envious sighs.
When looking at wonderful knitted items, few people think about how much effort was spent on their creation. But in order to create a beautiful thing, you need not only to learn how to hold knitting needles in your hands, but also to know exactly how to calculate the number of loops, decipher the symbols used in knitting, find out the appropriate density, and also “read” the pattern. In order to make a knitted item you need a pattern. After all, it is on it that the order of actions is indicated.
The meaning of schemes
All diagrams use special symbols. That is, small graphic symbols, deciphering which the needlewoman can knit a finished product or a small part of the fabric according to the pattern.
There are a huge number of different schemes and it is quite difficult to understand them. This is why common icons called symbols were developed. These conventional symbols help you quickly decipher the pattern and knit a beautiful, exclusive item using knitting needles. Any diagram consists of individual cells. Each cell equals one loop.
The patterns have front and back rows. The front rows are deciphered from right to left, and the back rows - from left to right.
In addition to symbols, you can also see generally accepted abbreviations in the diagrams. In order not to learn all existing symbols by heart, you can remember only the most basic ones and have a convenient table of tips at hand.
Some symbols are very similar to each other, so in order not to get confused while knitting, it is better to use this table to decipher the patterns. This will allow you to quickly and correctly decipher any even the most complex scheme.
The most difficult thing for needlewomen is to decipher the various patterns found in foreign knitting publications. This is primarily due to the fact that the symbols used abroad often differ from the symbols adopted in the countries of the former USSR.
Some large Japanese publications, in which the description of the schematic pattern is made in hieroglyphs, supplement all conventional icons with small knitting patterns. This approach greatly facilitates the work of domestic craftswomen and allows them to easily and quickly decipher the symbols and knit the pattern they like.
Experienced craftswomen recommend that when knitting patterns taken from foreign publications, first make a small piece of fabric and only then begin to form the whole product. In case of incorrect decoding of a schematic drawing, this will help to detect the error in time and correct it at the very beginning of work.
Basic conventions for knitting
L. p. in l. R. or and. p. in i. R..
I. p. in l. R. or l. p. in i. R..
2 p.vm. persons p. for the front st..
2 p.vm. persons p. for the rear st. One or both stitches should be turned in advance.
2 p.vm. And. P..
2 p.vm. And. p., picking up the p. from below. Etc. sp. we go into both stitches from the inside out. on the left e.g., n. them on the right sp., put them on the left again and wire.. 2 vm. purl P..
3 p.vm. l. n., behind the front st..
3 p.vm. l. p., by the rear st.. P. should be turned in advance.
3 p.vm. l. n. (from the central n.). We cross the stitches, the second stitch should be on top of the first.
3 p.vm. And. P..
Straight yarn over.
Double Yarn over - on sp. 2 yarn overs, and in the next r. first n. do purl p., second - persons. P..
Arr. Yarn over
Air P..
Yarn over without openwork (cross stitch).
P. sn. with lion on Ave. sp. unknitted. Yarn per sp..
P. sn. with lion on Ave. sp. unknitted. Yarn before sp.
P. with nak.. We do nak., then remove the p. unwired.. Yarn on the back..
P. with two caps.. P. and cap. previous p. remove with a new cap..
Loop with three buttons. Loop with two buttons. remove with a new cap..
L. p. between p..
Two points from one.
Three points from one.
5 points from 1.
From 3 p. prov. 3.
Double L. p. or p. with 2 turns. Etc. sp. needs to be directed to p., as with l. p., wind the thread onto the sp. twice, sp. by the hour. arrow, the thread needs to be pulled towards you.
Double long and. p. or p. with 2 turns. Etc. sp. enter into paragraph, as with and. p., winding the thread 2 times, stretch it away from you.
2 p.sk. to the right. Etc. sp. we pick up the 2nd stitch from the faces. art., without removing the st. from the sp., prov. 1st p., both p. dn. with lion sp..
2 p.sk. to the left. Etc. sp. we pick up the 2nd stitch from the back. art., without removing the st. from the sp., prov. 1st p..
Interception from 3 l. p. with incl. to the right. 1 and 2 p. sn. back to an additional sp., then 3 sts and sts with an additional sp. sp..
Interception from 3 l. p. with incl. to the left. 1 p. sn. forward to additional sleep, prov. 2 and 3 p. knits., p. with extra. sp. like l. P..
Interception from 4 l. p. with incl. n. to the right. 1st and 2nd sts. for an additional sp.. First the 3rd and 4th sts, and then the sts with an extra sp. sp..
Interception from 4 l. p. with incl. n. to the left. 1 and 2 p. sn. for additional sleep before work. Knitting 3 and 4 p., and then p with extra. sp..
Interception from 1 l. p. and 2 i. p. with incl. to the right. 1st and 2nd sts. back to additional sp.. 3rd p. prov. l., and then the 1st and 2nd p. with extra. sp. And. P..
Interception from 1 l. p. and 2 i. p. with incl. to the left. 1st st. forward to additional sp., 2nd and 3rd p. prov. purl, p. with extra. sp. persons..
Interception from 4 p. with an incl. to the right. 1, 2 and 3rd and. p. sn. back to an additional sp.. We knit the 4th st. l., and then 1, 2 and 3rd st. and..
Interception from 4 p. with an incl. to the left. 1st st. forward to additional sp., prov. 2, 3 and 4th p.i. p., and then p. with additional. sp. l. P..
Covering st.. End of straight sp. between the 2nd and 3rd stitches, grab the thread with knitting needles, pull out a long stitch, put it on the left sp.. Then pull the 1st stitch from the group of entwined stitches into the long stitch.
Crossed p. to the left. The end is lion. sp. capture n. (or nak.) and so on. there are two traces in it. P..
Crossed p. to the right. We leave it on the left. sp. 3 unwired n., end of right sp. grab the 3rd stitch and throw it over the 2nd and 1st stitches in front..
Lack of items on the diagram..
More complete list of notations
We make calculations and get acquainted with the density
In order to knit a high-quality beautiful thing, it is not enough just to find a pattern and decipher it. It is necessary to find out the density of the future product, as well as calculate the exact number of loops required for the manufacture of a particular pattern element.
Any knitting begins with a search for a schematic pattern and its subsequent decoding. That is, from a careful study of the diagrams and symbols for them.
After the description of the process of creating a knitted product has been thoroughly studied, you can begin taking measurements, creating patterns and calculating the density, as well as the number of loops. The appearance of a knitted fabric largely depends on the number of knitting needles, as well as on what threads the craftswoman used.
Due to the fact that the density of the same pattern may be different for each craftswoman, before starting work, you need to knit a small piece of fabric. As a rule, its size is 10x10 cm.
After the sample is ready, it is necessary to calculate the loops:
- take a ruler and measure the length of the knitted sample. In order to get a more accurate figure, do not take into account the first 2 and last 2 stitches from the edges of the sample;
- count the number of stitches in the measured area;
- divide the number of loops by the length of the sample. This will allow you to find out how many loops are in 1 cm;
- the result you get will need to be multiplied by the length of the product.
The resulting number is the number of stitches that need to be cast on the knitting needles in order to make this or that pattern. Separately, it is worth noting the fact that if several patterns are used in the work, for each of them you need to make a separate calculation and find out the density.
To summarize, we can say that the density of a knitted fabric is the number of loops horizontally and rows vertically. For each pattern, number of knitting needles and yarn, its own density is calculated.
There is a template for determining the knitting density and calculating stitches if you find it difficult to count by hand. This is a rectangular plate with a hole in the center for measuring the number of loops and rows of 10 cm. The plate has holes for measuring knitting needles. The device contains a table for performing calculations.
We knit with knitting needles. How to read and understand diagrams
To bookmarks
A knitting pattern is a visualization of a pattern through specific designations assigned to each loop in the pattern. A pattern is a tool that will help you understand how to knit a pattern. You need to be able to read them confidently, and even with some arrogance, which sometimes allows you to correct the scheme, because they were also compiled by people, and people sometimes tend to make mistakes.
Rest assured, this skill will definitely come with time. We start, as usual, with the simplest, and patience and work will certainly lead you to the peaks of mastery that are shining in the distance, the main thing is to never give up on your knitting needles!
You can knit in rows forward and backward, as well as in the round. Today we will look at patterns for rotary knitting , that is, for knitting in rows.
All pattern schemes are based on repetitions of vertical and horizontal rows . A certain sequence of loops is repeated horizontally. A certain sequence of rows is repeated vertically. Together they form a pattern, which determines how your fabric will look - smooth or embossed, dense or lace.
The diagram is made up of cells, like a table (or grid), and each cell represents one loop. The cells horizontally are a row ; you can immediately count the loops needed to cast on along the row. cells are the number of rows of the pattern.
The pattern starts at the bottom of the chart and is worked up and to the left . So when you start reading a knitting pattern, you should start from the bottom right corner . The first row is read from right to left and knitted according to the pattern from right to left. In most cases, the first row is called the front row and is knitted from the front side of the product.
Once you have completed the first row, you turn the work inside out to knit the second row. This row is generally called the purl row and is knitted from the wrong side of the product. And this time you will read the pattern along the second, purl row, from left to right, and also knit the loops in the order shown in the pattern.
The patterns are read and knitted in the same direction in which you would work. Thus, the first row and the remaining odd rows, called knit , are read and knitted according to the pattern from right to left .
The second row and the remaining even rows, called purl , are read and knitted according to the pattern from left to right .
So, read the first, odd row and knit along the arrow, from right to left. The second, even, again following the arrow, from left to right. And so on.
Numbers are usually placed near the diagram. Vertical columns of numbers indicate row numbers , usually located to the right of the diagram. However, the Japanese often get original and number all the rows on the left of the diagram (by the way, in some diagrams you can find odd numbers on the right and even numbers on the left).
This diagram has vertical numbering, but no horizontal numbering. It happens. And pay attention - the vertical numbers are only odd, there are no even numbers. What this means is discussed below.
The horizontal lines of numbers indicate the numbers of loops in the row and, as usual, are located at the bottom of the diagram. The loops are numbered from right to left, but the Japanese... well, you get the idea. In Japanese diagrams, loops may be numbered from left to right.
So, each cell (aka cell) of the pattern has its own symbol , indicating how to knit the loop corresponding to the cell. These symbols typically illustrate the front side of the pattern, what the loops look like on the front side. The good news is that you will immediately see the entire pattern, each loop and its place in the pattern, and you can quickly find the place where you made a mistake if it doesn’t work out. The bad news is that the symbols for the loops are different for different diagram authors, and most often they are listed next to the diagram in a separate list.
This is how knit, purl, yarn over and two together can be indicated in different patterns. There are only a couple of options here, but there are more... therefore, always read the symbols for the knitting pattern.
And there is some really cool news - according to Murphy’s laws, the diagram of the most beautiful and terribly necessary pattern does not have symbols. And this is where cognitive dissonance begins. There are no signs, but I want to connect. Put these schemes aside for now, with time and experience intuition will come, and you will definitely connect it, it’s been verified!
This diagram is correct, it has symbols. The row numbers on the right are shown only as odd ones, which means that there are only front rows in the diagram. Where are the purl rows and what kind of bracket is at the bottom under the first row - more on that a little below.
universal set of symbols for loops . Therefore, be careful, always check before starting knitting whether the pattern has its symbols. By the way, sometimes the most humane authors draw next to the symbol how to knit this version of the loop (mainly the same Japanese do this).
This version of the symbol also shows graphics that allow you to understand how to knit loops using the given symbol.
Edge loops (that is, the first and last loops on a knitting needle) are for the most part not shown on the diagrams . How to understand whether there are edges on the diagram or not? If there are any, you will definitely see them in the legend to the diagram.
In decent diagrams, you may see an area highlighted with bold or colored lines. This is a repeating part of the pattern, it is called rapport . Rapport is an element of a certain number of loops and rows, the repetition of which creates a pattern.
In this diagram, odd row numbers are on the right, even row numbers are on the left, and the repeat is indicated by a thick orange line. By counting the cells of the horizontal line bounded by orange, you can find out that the repeat of this pattern is 11 loops wide. The height of the repeat of this pattern is 14 rows, this can be seen from their numbers.
And as a result of knitting according to the pattern above, you will get this pattern
Rapport can also be indicated not by lines on the diagram, but by arrows under the first, bottom row. The patterns that indicate repeat are knitted in width like this: first you need to knit the loops before the repeat, then repeat the repeat as many times as necessary, and then knit the loops after the repeat. Repeat in height shows those rows that need to be repeated for the pattern to appear in the canvas.
Some patterns do not have even row numbers . This means that they only show the odd, front rows. But what about the even and purl ones? It’s very simple, even rows in such cases are knitted according to the pattern . That is, like a well-known technology - what I see, I sing. You see the front one - knit the front one. If you see a purl, knit a purl. Recall that the knit stitches look like the letter V, and the purl stitches look like a raised dash.
So, here is a diagram of one of the simplest drawings. The front loops are an empty square, the purl loops are a dot. Vertical numbers are only odd, that is, even rows are knitted according to the pattern. The repeat is indicated by arrows and is 8 loops wide. When knitting the first row, you need to knit 4 purls and 4 knits, and repeat these 8 loops for the entire width of the row. You need to finish with four purls. This means that for this to happen, the set must be a multiple of 8 plus 4 loops, which are usually referred to in calculations as 4 loops for symmetry. These 4 loops are knitted only once, at the end of the row. After the knitting is turned, the second row needs to be knitted according to the pattern - that is, what you see is what you knit.
There are patterns of patterns in which the designation “ no loop ” appears. Often this is just an empty cell of the diagram in which no icon is drawn. So where did the loop go and what to do about it?
This happens because the number of yarn overs and stitches knitted together in a row does not match each other. Consequently, the number of loops in the row will be changed, there will be more or fewer loops than when cast on. Therefore, in order to maintain the rectangular shape of the diagram and the place of each loop in it, the missing loop is indicated by an empty square. If this is not done, the stitches may move along the rows and the knitter will get confused in the pattern.
When knitting according to this pattern, do not pay attention to these empty cells , just skip them. There is no need to move anything anywhere, add or subtract anything, and generally you should not show your creative imagination. You need to not see these empty cells point-blank, move on to the next loop, vigorously knit it and that’s it. When you knit the rapport in height, it will settle down by itself and the number of loops will be the same as when cast on, no doubt.
And here is a wonderful illustration! Look at row 8 - there are only 4 yarn overs in the row and two times 9 (!) together. In total, 4 loops were added, and as many as 18 were decreased, and the number of loops after this crazy row, of course, became different. But in the next rows it will be evened out with yarn overs, and you don’t need to knit anything together there. That is, there will be increases, but no decreases, and when you complete the repeat, you will get the same number of loops as when you cast on. So you need to knit the eighth row like this: purl two, yarn over, proudly walk by three times without noticing anything, nine together... and so on.
The most important thing to remember about diagrams is that they usually show the pattern from the front side. This means that on odd purl rows you must understand all symbols as reverse. Although, unfortunately, there is no agreement in the world of knitters, and it is impossible to say that odd rows need to be knitted in full accordance with the conventions or not. If you knit loops in an odd row in full accordance with the pattern, but the pattern does not work out, it means that the loops in the pattern are drawn on the front side and you need to knit them backwards. In principle, this is always visible on the diagram and it is not as difficult as it seems. Of course, there is a question for beginners, but once you get the hang of it, you won't see it as a problem.
It must be said that knitting loops according to the designations in the purl rows is typical for complex patterns. As a rule, for most simple patterns, the purl rows are knitted according to the pattern, and do not cause any special problems. Therefore, and for other reasons, you should not start reading patterns and knitting according to them with complex patterns. Your first samples should knit, purl, yarn over and two together to maintain the number of stitches.
To make the diagram easier to read, place a ruler on it. Or something else horizontal or square, a piece of paper, for example, so as not to get lost and to indicate a row. Place the ruler above the line of the diagram you are on - this will allow you to see what you have already connected.
This nice ruler will make it easier to read the diagram at first
Knitting is an excellent hobby that allows you to train hand motor skills and brains, and also provide yourself, your family and everyone you want with original accessories, clothes, household items and other products. Patterns help you learn and remember a pattern faster, it’s easier to track where you’re knitting, it’s easier to identify mistakes; in general, if you knit, you can’t live without patterns. Patterns can make your knitting a lot easier, we promise! And if you knit according to them constantly, pretty soon you will be surprised to discover that you have become a master at reading patterns.
Source: Jolly Hamster Knitting
Author of the publication
offline 16 hours
Knitting Here
0
We knit together, our hobby is the best hobby!
Comments: 57Publications: 2242Registration: 07/22/2019