How to tie a belt correctly: choosing an accessory
- A belt is an accessory no less varied than the models and styles of the dresses themselves. The simplest, classic option is a regular tape made of fabric or a strip of a harder material (the same leather or artificial leather) on average about 5 cm wide. Moreover, you can tie both the first and second models of belts.
- There is also a sash (how to tie it is written below), which is well complemented by various decorative elements: jewelry, rhinestones, etc. A corset is also considered a type of wide belt, but you shouldn’t even try to tie it.
Sash
- A belt equipped with an elastic band is typically worn exclusively at the waist; it is better to tie narrow belts with a bow and combine them with adjacent dresses, and add a buckle to wide belts.
Types and shapes of belts
There are many different styles and shapes of belts. The classic option is a strip up to 5 cm wide. Models made of soft fabrics are tied in the form of various knots and bows. Rigid samples are not recommended for tying difficultly or giving unusual shapes. A leather belt with a buckle is ideal for knitted, denim or viscose dresses. A medium-length leather belt, tied with a simple knot, looks elegant and can be worn at the waist or hips. If you put a belt on your hips, your height visually increases and your silhouette lengthens.
The sash belt is borrowed from men's fashion. This is an elongated, wide specimen with slightly tapered ends. A belt is put on - a sash - by wrapping it around the waist, with the ends tied in a knot or bow. The wide part, depending on the style of the dress, is placed in the front or back, and the bow (knot) can be in the center or side of the dress. Sashes are often decorated with brooches, fur inserts or rhinestones. This is a stylish and bright accessory with which you can create a luxurious look.
A corset is one of the varieties of a wide belt; it adds sophistication and a certain frivolity to a woman’s image. The corset is relevant for evening dresses and wedding dresses.
How to tie a belt on a dress correctly?
- Let's start with simple solutions to tie a belt . The easiest way to tie a belt is with a simple knot, bringing it from behind and tying it, carefully straightening the ends.
- You can use the same method to tie not an ordinary knot, but a double knot , or you can twist the belt several times before tying it. Another option is to make a loop: fold the belt lengthwise, wrap it around the waist and thread both ends into the resulting loop.
- If you thread the ends one by one, in the opposite direction to each other, you will get a double-sided loop.
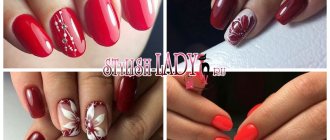
Beautiful
How to tie a sash?
This is one of the options for a wide belt. It is wrapped several times around the waist. Typically, such an accessory is made of leather and has fabric ribbons. With their help it is fixed. The sash is often the accent of the image. It can be complemented with an elegant half bow.
To properly tie a belt on a dress, it is important to adjust the tightness of the accessory. A tightly tied belt can highlight extra pounds. A too loose-fitting accessory can demonstrate that it’s time for you to change your wardrobe.
How to tie a bow on a belt?
A half bow is always elegant . You can tie it like this:
- Place the right edge on top of the left, bring it in from the bottom and release it to the top.
- Make a loop of the required length.
- Place the opposite end of the belt on the resulting half-bow and pull it through the resulting loop.
- We tighten the ends, making sure that the loop does not twist or tighten.
A semi
-bow in a corrugated style can be attached to a belt made of soft creeping fabrics:
- We fold the belt into an accordion, making it narrower.
- We tie the resulting belt around the waist, and then bring the right end over the left from the bottom up, crossing them.
- The directed end of the belt clasps the horizontally opposite one and is pulled out into the resulting loop.
- Tighten the knot horizontally, avoiding twisting.
- We straighten both ends (they should not be long), achieving falling flounces.
The corrugated
belt can also be styled with a classic bow:
- We cross the ends of the tape and throw them over each other.
- We equip the lower edge with a loop, the upper one - we throw it over the lower one and draw the loop out.
Start
Bow
How to tie a belt on a kimono dress?
The belt with which the kimono is tied at the waist is called obi . Tying a belt is a whole science and a certain etiquette, which in the homeland of the kimono, Japan, was taught to girls from childhood. It was by the correctly tied belt that a girl’s taste was judged. The dimensions of the kimono belt are impressive: up to 4 m in length and up to 30 cm in width.
- We start by throwing the right end over the shoulder so that it is about 20 centimeters below the shoulder.
- We wrap the body twice with the left end of the belt, after which you should hold only a short piece of tape in your hands.
- Now we throw the right end over the left, tying a knot, thereby creating additional fixation.
- We fold the right end of the obi into an accordion and secure it with a finger in the form of a bow, while wrapping it with the left end of the belt.
- Next, we tuck the right end of the belt so that it takes a vertical position (it is possible that it will peek out from under the layers of the belt.
- The last step is to turn the obi back with a bow. This is not so well known here, but in Japan, a bow on the front indicates that a woman is a person of easy virtue.
The bow will be at the back
. You can offer many variations with a bow. A small specially adapted pad will make it more voluminous. For particularly complex bows, there are even special obijime and obiage cords.
The bow can be decorated with a blossoming branch of sakura (or, in our conditions, cherry), the cords can be trimmed with beads, decorated with stones, rhinestones, and tassels. Obi for men look more strict - the bows of their belts are shaped like rectangles or triangles. But in any case, the location of the bow is at the back.
Fashion standards
Modern fashion allows wearing a belt not only along the waistline, but also under the chest and on the hips. There are many ways to tie or fasten a belt in an unusual way - adding a sophisticated twist to your look.
How to wear: patterns on how to tie beautifully
At waist level - suitable for dresses of any style and is a classic option.
If necessary, correct imperfections in the proportions of the figure or add style, the belt is moved higher or lower than the waist.
Just above the waist - worn with French length (midi) dresses. This solution allows you to visually lengthen your legs without introducing disproportions to the silhouette. The look will be especially stylish if you choose a Marsala-colored dress.
Under the bust - with dresses in the Greek style or Empire style of different lengths. At the same time, the breasts stand out perfectly and the imperfections of the waist are hidden.
on the hips with a tunic or a thin belt with an elegant sheath dress.
Wearing a belt on the hips is definitely not recommended for women with not too long legs or a rounded tummy, as it will emphasize figure flaws.
Stylish bow at the waist
How to tie it beautifully - fashionable ways
Short belts are fastened with a buckle, buttons or hooks. Much more options for wearing are offered by long models that can be tied, thrown over, tied with bows, or formed into flowers. Craftswomen weave a thin cord belt with macrame knots, but we will turn to simpler options:
Even a homemade dress from scrap materials, which you can literally create from trash, such as paper, old curtains or T-shirts, can decorate and make a luxurious bow stylish.
Free loop
Suitable for light leather, faux leather and some types of fabrics (except smooth and slippery ones such as silk and satin).
This is done step by step like this: a wide long belt can be folded in half, placed behind your back, placing the loop and both ends in front of you. We insert the ends into the loop and release.
A free loop on two sides differs from the first option in that the ends are threaded through the loop towards each other.
“Free loop”
Half bow
The sequence of movements should be like this:
- Place the belt behind your back and hold the ends in front of you.
- Place the right end over the left and bring it inward from the bottom up, twisting but not deforming.
- We bend the end that comes out from above down along the outside and place it under the freely hanging second end.
- Having measured, on the part of the belt held in the hands, a distance of 10–20 cm from the intersection with the free end, we make a fold - we get the eyelet of the half-bow.
- This eyelet must be threaded into the even knot that appeared as a result of step 3.
When tying an asymmetrical half-bow, you cannot pull equally on both ends. The knot formed in this way will not look aesthetically pleasing.
Wool half bow on a dress
Flower
A half-bow tied on a belt 15 cm wide or more can easily be transformed into a flower (perfect for peasant young lady dresses that are popular this season). To do this, you need to take the eye of the half bow from the inside with your fingers by the middle and push it under the knot. The loop transforms into two semicircles with elegant folds, similar to a flower.
It is advisable to discreetly secure the middle of the loop with a pin.
This option will be in harmony with a dress in a retro or vintage style.
Flower tying pattern
Step by step: corrugated bow
This type of bow can only be tied on soft, non-slip fabric of medium length and wide width. The length of the fabric should be folded evenly.
For what to wear with a checkered shirt dress, read the article, which will tell you in detail about the latest catwalk trends.
To create a corrugated effect, four folds are enough. Wrap the belt around yourself, trying not to let the folds fall apart. And then follow these steps:
- Place the right end over the left and bring it inward from the bottom up, twisting but not deforming.
- We bend the end that comes out from above down along the outside and bring it under the freely hanging second end, forming a knot.
- We pull the held end under the upper tissue of the knot.
The shorter the free ends are, the more obvious the shape of the corrugated bow will be.
Corrugated bow
How to tie a classic bow correctly
Looks beautiful on belts of various widths, medium and long lengths. A correctly tied bow will consist of an even, smooth knot and symmetrical loops.
You can decorate it with both casual and modest wedding dresses to make it more memorable and add individuality.
The loose ends can hang at the same level or one above the other.
- Place the belt behind your back and place the ends in front of you.
- We put the left end on the right and bring it inward from the bottom up.
- We take the lower end to the right and bend it with a loop.
- We lower the right end down from the outside, holding it in place of the knot with a finger.
- We bend the free edge with a loop and wrap it around the first loop from the bottom, inside out, up and out, avoiding twisting of the fabric on the knot. Insert the held loop under the first layer of knot tissue from the outside.
- Gently tighten, avoiding creasing and adjusting the length of the loops.
Classic bow
It was classic bows that decorated Grace Kelly’s exquisite wedding dress and children’s outfits. Such a bow will also be advantageous for a dress that is short in the front and long in the back.
It is also quite appropriate to add a touching christening dress for a little princess with an airy bow with a mother-of-pearl pearl in the middle. A school dress with an apron is also tied with a classic bow.
Video - how to tie a belt into an elegant bow
Descriptions and diagrams do not always reveal in an accessible form the subtleties of a particular technique of tying with a strap or belts. Next you can find a video containing a visual aid on how to make a belt at the waist not only functional, but also a trendy element of the image.
By choosing different belts for the same dress, you can achieve a change in style, emphasize your figure, and enhance color accents. A variety of tying methods gives fashionistas plenty of room to change their looks.
We also recommend that you familiarize yourself in more detail with the pattern of a school white apron for the last bell.
How to properly tie a belt on a kimono for karate, judo, taekwondo, and aikido?
The main thing in the process of tying a belt is to prevent twisting, otherwise it could result in injury.
We sequentially perform the following actions:
- Place the belt on the right side of your waist using your left hand.
- Using your right hand, wrap it around your body twice, making sure there are no twists.
- We bring the right edge of the belt to the left side.
- We bend the belt, moving from below, under each layer and bring it to the top so that a free loop remains.
- We bend the second part upward and insert it into the resulting loop, then pass the belt through the layers.
- Pull in opposite directions, tightening with a knot.
On a kimono
Where to wear it?
You can tie a belt not only at the waist. Here are popular placement options for this accessory:
- At the waist. This is a classic placement method. It is suitable for various styles of clothing.
- Above the waist. This option is suitable for knee-length dresses. This technique helps to visually lengthen your legs. If you combine a belt with brightly colored outfits, you can create a stylish and interesting look.
- Under the chest. This placement will emphasize the chest and make the figure visually slimmer. It is best used for empire style dresses.
- On the hips. This placement method is best used with a tunic dress. However, it is better for plump women not to consider this option, because in this case the belt on the dress will unfavorably emphasize the stomach.
How to tie a long belt on a dress?
- Such long belts include, in particular, the sash, which fashionistas borrowed from men.
- The sash is wrapped around the waist in several layers, and the ends are secured by making a knot of various shapes, either in front or on the side - as you like. Alternatively, it is even possible to use a buckle closure.
- A long belt generally gives room for imagination; you can not only tie it around the waist, but also throw it around, knit bows and flowers from them.
- To make a loose loop, you need to fold the belt in half and throw it back, while holding the edges of the belt and the loop in front of your eyes, into which we put both ends, and then release them.
- tie a long belt not only with a loose loop, but also with a half-bow (both symmetrical and asymmetrical).
Long
- From a half-bow (if the belt is not only long, but also wide), you can always create a flower by pushing the eyelet from below under the knot - then from the loop we will get two hemispheres, the folds of which will resemble a flower. To be sure, it is better to grab the loop in the center with a pin.
- Short belts can be fastened with a hook, buttons or buckle.
Different variants
How to knit a belt on a dress?
Short belts can be fastened with a hook, buttons or buckle. Long versions are tied, thrown over, and used to create unusually beautiful bows and flowers. The long belt is folded in half and wrapped behind the back. You can place the ends of a long belt, the loop in front of you. The ends of the belt are inserted into the loop, folded in front of each other and released.
The easiest and most convenient way to tie a belt on a dress is with a bow. The standard version of the bow looks chic on dresses of different styles; it is made up of a knot and loops. You can make a bow from a belt of various widths and lengths; the free parts can be at the same or different levels.
The bow tying diagram demonstrates the technique and description of the method. To make a bow, you need to bring the belt back, then the left end is overlapped with the right end and wound from the bottom up. We make a loop from the lower end, and pass the right one down, while holding the place of the knot with our fingers. The free edge is bent with a loop and with its help the first loop is wrapped from the wrong side, from above and from the outside. It is important to prevent the fabric from twisting at the knot. The retained loop is then inserted under the first outer layer of the knot and tightened with ease.
How to tie a belt with rings?
If there is only one ring on the belt, there is nothing to think about: you pass the free end through it and fasten it or secure it in any other way. But what to do when there are two rings at once?
- To begin, grab the loose end and pull the belt through both rings.
- Now insert the tail between the rings.
- Tighten the edge, fixing the belt in this way.
Fastening
If your belt is made of materials such as thin leather or suede, it is difficult to find the best way to tie the belt.
Idea
How to tie it correctly
The difference between the described model and the classic one is that the role of a buckle is performed by 2 rings. They are sewn parallel to each other at one end of the belt. In addition, on the other side there are no holes for the fastener - it is solid. Products with a buckle have holes punched at regular intervals. Step-by-step instructions will help you understand how to properly fasten a belt with two rings:
- Wrap the belt around your body. If the rings are on the left, then the free edge of the tied accessory will hang to the right. If you want a stylish drapery of the free end on the left side, do it the other way around. The rings in this case are initially located in the right hand.
- Pull the free edge of the belt through both rings simultaneously, moving away from you.
- Move one ring slightly away from the other.
- Using a reverse motion, pass the end of the belt over the ring closest to it and thread it through another, located further from the edge.
- Tighten the product to the desired size.
- Tuck the free end under the belt loops of the garment.
The result is a neat design in which the belt does not come undone, and the rings act as a buckle. When fastened correctly, the free end returns to its original direction. If the belt is quite long, then this edge can be used as an additional decorative element. To do this, it should be draped beautifully, you can decorate it with embroidery or cut it figuratively, then you will get a unique women's accessory. It happens that it is not possible to fasten a belt with two rings correctly right away, but this is not a reason not to have such a model in your wardrobe. If you practice, you will succeed.
Triangular, rectangular, and square elements can be used as a buckle, but the tying mechanism is the same for all.
Wrap the belt around the body, pull the free edge through both rings
Pass the end of the belt over the ring closest to it and thread it through the other
Tighten the product
Thread the free end
How to tie a leather belt on a dress?
- If the belt is narrow, then it needs to be wrapped around the waist, passed through the buckle and wrapped twice around the belt downwards. Pass the free end through the loop made at the buckle and wrap the belt again, hiding the remaining tail. If the edge turns out to be long enough, it can be left hanging freely.
- A wider belt can be tied by threading it through the buckle and releasing the free edge, wrapping the belt first. And then blow the hanging edge through the buckle from the inside out - this way you will create a loop that will be released from the buckle.
- Braided leather belt , if it has a wide buckle, is wrapped around the waist, and the free edge is threaded through the buckle. Then you need to wrap the outside of it with the number 8, thereby hiding the buckle.
- Typically, complex weaving is not used for leather belts; a simple knot and buckle for fixation or a free loop is enough. How to do it:
- If there is a fastener , simply fasten the longer edge, insert it into the belt from below, and then pull it into the loop that is created and pull it down.
- If there is no clasp , a loop will form if your belt is long enough. Fold it in half and bring the loop and loose ends in front of you, which you then thread through the loop. And then, going from below, repeat the same threading from above.
Wide
Leather
Options
Ideas
The main secret is how to tie a belt on a dress “correctly”
I’ll tell you this secret - but first I want to ask you: have you noticed, while wandering around clothing stores, that very often the things worn on mannequins look much better than on us when trying them on?
Oh yeah! And me too! But I know what it’s all about and I’ll teach you. Let me explain: the mannequins are simply non-standard! That is, their chest is size 48, and their waist is size 42. Of course, the blouse will look better on high, large breasts, and even the waist is aspen!
And that is not all! Mannequins have a shorter torso length (this is the length from the shoulder to the hips) than real people. So my secret: if you want a dress with a belt to look on you like on a mannequin, tie the belt 1-2 cm higher on the waist, I understand, it’s a little inconvenient! But girls are comfortable only in a tracksuit and sneakers, and you are in a dress!
Beauty requires sacrifice! It’s just the thinnest place on your torso, and that’s not all! This way you lengthen your legs even more! I always show my customers this secret, and when they come back to me for shopping, they tell me that they always use this technique.
I hope the article was useful to you and you learned how to beautifully tie a belt on a dress. And don't forget about our “secret”
Yours, Irina
Designer scarves made of Italian silk. 50% discount! Sewing in 2 days. 19 colors. Free delivery within the Russian Federation
How to tie a belt on a coat?
- A narrow leather belt, especially if it is black and the coat is light, will look great if you use a bow knot.
- A belt made of the same material as the coat itself is considered traditional - it is usually tied with a simple knot, which is located in the front. But if you wish, you can move it to the side.
- Just like a belt for a dress, tie a belt on a coat not only with a bow, but also with a half-bow. Another option is to try using the Biedermeier knot: cross the ends and wrap the short one with the longer one, passing it into the loop that formed under the cross you folded. Now do it again, only now use the short end rather than the long end.
- You can also use the method used when tying a tie: wrap the belt around your waist and fold the ends in a cross, bringing the longer one upward behind the second part of the belt, and then guide it back and put it under the free-hanging short edge. Now bring it up again and, having wrapped the belt, lower it down through the ring. For a more secure fit, tighten with a knot.
On the coat
Step by step Ideas
To knit
Knotted belt on dress
The very first way is to tie a sash, either from the dress or selected, with a knot. I don’t recommend choosing a black sash for any dress (well, unless it’s black) because, to be honest, this is already yesterday and a budget option.
Tied with a double knot and the ends just hang down - such a neat casual option
Next, we’ll look at the option of tying thin straps for a dress. Let's take the most interesting
First way
Suitable for the evening, and you can learn how to tie it every day very quickly
Another option is how to beautifully tie a belt on a dress. This one is more for every day
Next, the third method is very simple and universal, suitable for all cases, and easy to implement
The fourth option is for a more formal dress, suitable for every day, for work
I’ll also show you an option - not many people know it, much less use it - this is when you put on 2-3 thin leather straps at once, just be sure to choose the right color for the dress! This is the whole trick of this method - the colors of the straps! If you can’t choose, just take everything the same color
And just a photo of how beautiful it is to tie a belt on a dress with a knot. The methods are interesting and you can easily repeat them