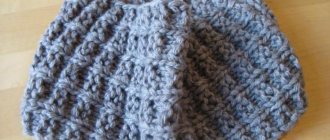
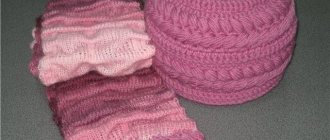
Takori hats have become a hit; absolutely everyone wears them, regardless of age or any other nuances. In general, amazing models, they magically suit everyone, both children and adults. They knit easily and quickly, literally in one evening, and the new accessory is ready to please you.
The tailor also reminds us that we knitted interesting Helsinki hats from thick yarn, and everyone also likes the excellent collection of mink fluff berets. In a word, we are happy to surprise and inspire you to create fashionable hats for your wardrobe.
The models all go perfectly with any outerwear. Like down jackets, jackets, coats, fur coats, etc. Even if you took off your outerwear indoors and decided to leave your hat on, it still looks great.
What does "tacori" mean?
The mysterious name of the hat is actually the surname of the designer who created this model - Svetlana Takori. This talented female fashion designer not only came up with a headdress with a wide lapel made of mohair with an English elastic band, but also created her own clothing brand, which is also called “Tak Ori”.
Although the prototype of this item is a headdress, which was at the peak of popularity in the 80s of the last century.
The classic takori is performed using an English elastic band. The model is a long stocking cap with a wide hem that turns up 2-3 times, giving the product additional volume. It turns out that knitting such a headdress with knitting needles is not difficult, all you need is the desire.
Its distinctive features are the following details.
- The product is made with an elastic band pattern.
- Using fluffy bulky yarn.
- The presence of at least one gateway is required.
The advantage of this item is that as a result you get a little thing that will protect you from the burning frost. Due to the double flap, the takorri prevents the penetration of cold to the ears and scalp as much as possible. At the same time, the model is combined with most style solutions in a woman’s winter wardrobe.
What you need at work
To knit a hat with knitting needles using English elastic according to the takkori pattern, you will need the most ordinary threads and knitting needles. Here is an approximate set of tools and materials that need to be prepared:
- wool yarn, approximately 200-250 meters thick per 100 grams;
- stocking or circular knitting needles No. 4-5;
- tape measure;
- scissors.
Angora or mohair takori can be knitted with 2-ply thread, as these are quite thin threads. It is better if the yarn contains not only 100% wool - fibers woven with acrylic are much stronger and more durable.
The original product uses Kid-Silk mohair yarn on silk (composition 75% mohair, 25% silk, skeins 210m/25g) in 5 threads. You can choose other yarn with similar parameters and properties. For example:
- Soft Dream by BBB (200m/25g, kid mohair on silk) 4-5 skeins of 5 threads;
- VITTORIO (200m/25g, kid mohair on silk) 4-5 skeins of 5 threads;
- LANA GATTO (210m/25g kid mohair on silk) 4-5 skeins of 5 threads.
How to knit a fashionable takori hat with your own hands
You can never have too many hats, especially if you want to look stylish all the time, then you should keep up with the times and follow the new products. Lately you can often hear the phrase Tacori hat. But only when you see it in the picture, you will immediately understand what kind of model it is. No one could have thought, including its author Svetlana Thakori, that they would become so popular. Despite its simplicity in execution, the knitted Takori hat looks charming.
What is a knitted takori hat?
A takori hat is a knitted headdress made of thick fluffy yarn, which has a wide lapel (often even double).
Try adding this fashionable hat to your wardrobe and you won’t regret it, especially if you knit it yourself.
What you need to knit a takori hat with knitting needles:
- yarn (containing mohair or angora), 110g/500m;
- knitting needles No. 5 circular, or 5 stockings.
Knitting hats
Knitting very comfortable and warm hats and “socks” will not be difficult. They can be knitted in different lengths: not very long ones, which are knitted 20 cm from the cast-on edge to the decrease, will have no lapel; a longer headdress, with one turn-up, is knitted from the cast-on edge to a decrease of 24 cm, and to get a hat with two lapels, 28-30 cm are knitted. A hat with an English elastic band with a double turn-up is more suitable for very cold days, because it fits the head more tightly , protecting from cold and wind.
Necessary tools for knitting hats in patent knitting:
- Circular or straight knitting needles;
- yarn;
- needle;
- hook;
- scissors;
- tailor's tape.
For a product size 55-56 without a lapel, approximately 100-150g of yarn will be used.
Measurement:
- height from forehead to crown is 20 cm;
- the depth from the point of one ear to the point of the other ear through the crown is 39 cm.
Knitted Tacori hat: diagram and description
Description of the takori hat on circular knitting needles is designed for a head volume of 54-56cm.
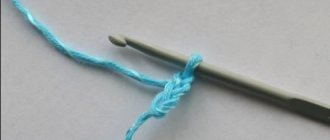
The knitting thread is folded 4 times and 60 loops are cast on to create a tight edge.
We continue knitting the takori hat with a thread folded in half.
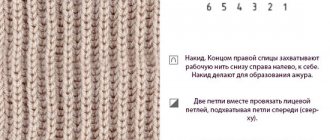
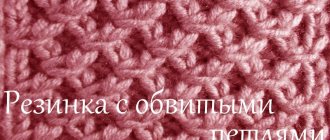
We knit English elastic: 1 p. remove, remove the 2nd loop with a crochet together as a purl. We knit the third one with the front one together. Continue this way until the end of the row and all odd rows.
Second row: slip 1 stitch, knit the 2nd double crochet stitch, purl the 3rd double crochet stitch. You need to finish the row with a purl. We knit all even rows according to this pattern.
We continue to knit according to the pattern, alternating rows, until the fabric reaches a size of 36 cm.
Let's look at several options for how to make decreases when knitting a takori hat
Descriptions of the three main methods will help you decide what to do in your case.
First option:
It consists of a smooth transition from English elastic to single (1p*1k) or to stockinette stitch. The first option will look more organic.
Divide the fabric into three parts, knit 2 loops together in each front row at two points that you choose as key.
The first decrease should be immediately behind the edge loop, the remaining two decreases should be located evenly on the canvas. Knit 33 rows like this. Reductions made in this way will be invisible on the finished product. You will be able to see a thin braid that serves as decoration for a takori hat.
Second option:
The method is adjustment. We make decreases in every third row of 4 loops. Knit 2 loops together, paying attention to the yarn overs. Their location should also be uniform around the circumference. Also knit 33 rows. Pay attention that the drawing does not give braids. Then you will have to make adjustments, moving the decreases according to the diagram.
Third option:
Almost similar to the second one, but on the top of the head you will see 4 triangles that connect.
Divide the loops into 4 parts. We make decreases at the beginning and end of each part, knitting together three loops (knit, purl, knit) on every 4th row.
Please note that the loops at the beginning of each part should be inclined to the right, and at the end - to the left.
We knit 33 rows like this.
Completing knitting a takori hat with knitting needles.
It is worth making decreases until there are 10-13 stitches left on the knitting needles. Pull them together, leaving thread for the seam.
This is how long the hat will be
All you have to do is wet it and dry it on a towel.
Fold the edge of the cap twice and you can safely try it on.
This cute Tacori hat can be worn with classic clothes. It is not necessary to select accessories to match this headdress, otherwise you can only spoil the image. After all, the takori hat itself attracts attention.
The Tacori hat has its own characteristics:
- the length of the hat cannot be less than 47-50 cm (since the lapel is two turns);
- the hat is knitted seamlessly on circular needles (I use short needles number 4);
- knitted from mohair.
Bookmark the description of three different patterns for the Tacori hat, each of which is good in its own way! Share with your friends, leave a comment of gratitude. ⠀ In the original product I use mohair yarn on Kid-Silk silk, (composition 75% mohair, 25% silk, skeins 210m/25g) in 5 threads. You can choose other yarn with similar parameters and properties. For example:
- Soft Dream by BBB (200m/25g, kid mohair on silk) 4-5 skeins of 5 threads;
- VITTORIO (200m/25g, kid mohair on silk) 4-5 skeins of 5 threads;
- LANA GATTO (210m/25g kid mohair on silk) 4-5 skeins of 5 threads. ⠀
For those who prefer knitting needles
Many women prefer that their hats are not only warm, but also beautiful and fashionable. One such hat that is extremely popular is the takori style beanie. Our master class will teach a beginner how to knit a hat using knitting needles, based on the pattern. If a novice needlewoman uses the instructions provided, she will be able to cope with this task without difficulty.
Some girls who are just starting to knit note that this pattern is easy to knit, and the end result is an excellent hat with cuffs.
What we need to prepare:
- threads 250 g, wool or acrylic of the chosen color;
- circular knitting needles and stocking needles No. 6.
Knitting density - 10 by 10, 32 rows.
Related article: DIY chiffon and tulle flowers
Let's start knitting a hat. The product is knitted using English elastic. We knit this rubber band as follows.
1st row: we start knitting from a purl buttonhole, then remove one also purl and continue knitting until the end of the row. 2nd row: the first buttonhole will be purl, then we knit the front buttonhole together with the yarn over and continue to knit it until the very end.
We knit this way until the height of the hat is 15 centimeters. In the second strip, you need to knit one purl, and then the front one together with the yarn over. Now we remove all the buttonholes onto an additional knitting needle. We do the same with the buttonholes of the dial row, then we fold the product into two equal parts and turn it inside out. Afterwards, you need to knit like this: we knit the first link from the first knitting needle and one from the other, taking into account the pattern. Next, you need to take stocking needles and we will use them to reduce the buttonholes.
We begin to decrease the buttonholes as follows. 1st row: purl, knit, then knit 2 knits together, continue until the end of the row. We knit the 2nd and 3rd rows taking into account the pattern - purl and two front ones. 4th row: purl, 2 knit stitches combined into one. The 5th and 6th rows, taking into account the pattern - one purl and then one knit. 7th row: next we knit two knit stitches into one and so on until there are 15 buttonholes left on the knitting needles. We cut the thread and pull it through these remaining buttonholes. Now we tighten the thread and pull it inside the cap. Next, we wrap the lapel, and now our hat is ready.
DESCRIPTION OF THE TAKORI HAT
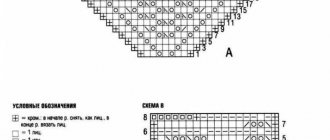
To knit Takori, you can use one of three patterns. Each has its own characteristics. I knit the loops in the classic way! ⠀ For all three hat patterns: The number of loops must be a multiple of 4.
Decreases:
- 1st row: – 3 loops together with a slant to the left, pulling through *(slip 1 knit stitch onto the right needle as a knit, knit 1 knit and 1 purl together and pull it through the removed stitch); 1 purl* and so on until the end of the row, we again have a 1 by 1 elastic band;
- 2,3,4,5 rows: – knit with an elastic band 1 by 1;
- 6th row: – knit as 1st row;
- 7,8 rows: – knit with an elastic band 1 by 1.
Cut the working thread, leaving a tip of 10-15 cm, insert the end into a knitting needle, remove the remaining loops on it, pull and fasten the loops of the crown. With the top of this cap covered in this way, it can be worn on both the front and back sides.
Pattern 1 – Elastic 1 by 1 (1 knit loop; 1 purl loop)
A white cap is knitted with this pattern.
This pattern is the simplest and most economical in terms of yarn consumption. For a head circumference of 57-59 cm, cast on 80 stitches on needles No. 4 (if you need a size smaller, cast on 76 stitches) and knit 43-46 cm with a 1 by 1 rib. Next, move on to decreases.
Pattern 2 – English elastic without crochets (lush elastic) in a circle
A cap in the color “dusty rose” is knitted with this pattern. This pattern is for those who don’t like to knit with yarn overs, or forget to do them, or want a more voluminous pattern. With this method of knitting English (patent) elastic, the pattern is more voluminous and fluffy. For a head circumference size of 57-59 cm, cast on 56 loops on needles No. 4 (if you need a size smaller, cast on 52 loops). Basic row: 1 x 1 rib.
- 1st row: *K1. knit into the loop of the previous row, purl 1*, repeat from* to* until the end of the row.
- Row 2: *K1, P1. knit into the loop of the previous row, *, repeat from * to * until the end of the row.
Alternating, we knit 1 and 2 rows 42-45 cm. We switch to a 1 by 1 elastic band and knit 2 cm, approximately 4-5 rows. Then we move on to decreases (see above).
Pattern 3 – English rib with crochets in a circle
A marsh-colored hat is knitted with this pattern. This pattern is the most popular for Takori, it is a classic version of the English elastic band in a circle.
For a head circumference size of 57-59 cm, cast on 56 loops on needles No. 4 (if you need a size smaller, cast on 52 loops).
- Row 1: * Yarn over before the knit stitch, k1. remove the loop, purl 1. we knit a loop together with a purl yarn over* repeat from* to* until the end of the row; (Attention! In the 1st row we knit a purl loop without a yarn over, since there is no yarn over yet, we will make a yarn over before the purl loop in the second row).
- Row 2: *K1. We knit a loop together with a knit yarn over, make a yarn over before the purl loop, purl 1. remove the loop* repeat from* to* to the end of the row.
Alternating, we knit 1 and 2 rows 42-45 cm. We switch to a 1 by 1 elastic band and knit 2 cm, approximately 4-5 rows. Then we move on to decreases (see above). ⠀ Do an OBE. That's all, the hat is ready to decorate and warm!
Let's try to make something simple
Takori hats have been very popular lately, so many needlewomen strive to knit such a hat themselves. This is due to the fact that the hat is easy to knit, but with this in mind it looks very beautiful. In this master class we will knit another takori hat with an English elastic band, but we will sew it with a crochet rather than a needle, which will allow the seam to be more natural.
Note! For those who find it difficult to use a crochet hook, a needle will be able to connect all the parts.
What we will need:
- Nako threads, in which 40% mohair and 60% acrylic - 100 g per 500 m in two threads;
- knitting needles number 5;
- hook or needles.
Related article: White knitted sweater: women's and men's versions with photos and videos
The following is a description that even a novice needlewoman can use.
For a head size of 54-55 cm we cast on 61 buttonholes. It is best to fold the thread in half to make the knitting more dense and elastic. Now in the primary row we remove the first buttonhole, and remove the next one with a double crochet as a purl one, the third one will be the front buttonhole, so we knit it to the end of the rows, alternating buttonholes. The final buttonhole will be knitted purlwise. This is how we knit all the odd rows and the first row.
We knit the second row and those that are even as follows: the primary buttonhole needs to be removed, the next one is knitted with a double crochet, but as a knit one, but we remove the third with a double crochet, but as a purl one, and the last buttonhole is also a purl one.
We knit our product to a height of 35 cm. After this we need to make a decrease. We switch to knitting elastic bands one on one, this will allow the knitting to be beautiful. Now the knitted piece needs to be divided into three parts and in the front row we knit two buttonholes together - we make the first decrease after the edge buttonhole, and then two more at the same distance. Thus, we get a smooth decrease that resembles braids. So we knit 32-34 rows, look at the photo below.
Here we have 11 or 13 buttonholes left on the knitting needles, after that we pull the thread through all the loops and tighten them, but do not cut the thread, because we will need it for stitching, or we connect it with a crochet hook. The resulting product must be wetted, dried on a cotton towel and the cap tucked. All is ready!
