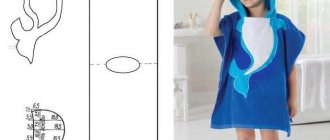
Laconic cut of the model
The four-piece skirt pattern takes its rightful place in high fashion because of the uniqueness of its construction. It is a classic because one of its advantages is its versatility. The product fits almost all body types. In addition, it is visually slimming. From the main drawing you can model several different types of products consisting of cut out parts. What is the most important thing in a four-piece skirt? This is pattern making, which is not such a complicated process.
Who is this style suitable for?
Attention! This product is best suited for girls with narrow hips, as the splendor of the wedges adds a little volume. Basically, the skirt emphasizes the waist and makes you look slim. Fashion designers and designers recommend this style of skirt for any figure and for any age. Plump girls can reduce the volume of their hips a little and emphasize their shape. Floor-length skirts will help hide leg imperfections. A product with a yoke as a type of skirt with wedges is suitable for girls with an hourglass or pear body.
If you need to visually change the size of your hips, then it is better to take a skirt with a shelf. Cross stripes add volume and slightly reduce height. Longitudinal stripes, on the contrary, slim the figure, adding a few cm of height. The oblique stripe makes the figure look a little slimmer.
You might be interested in this: Creating a pattern and cutting a blouse with one-piece sleeves
Women's body types
Instructions
To create a step-by-step pattern for a four-piece skirt, you need to prepare a sheet of paper, a pencil, a ruler and an eraser. We need tracing paper so that we can make a design on it, as well as draw precise thin lines using a pencil and ruler. But the eraser is used for erasing, correcting defects and putting everything else in the correct order. It is necessary to position the paper sheet towards you so that it is convenient for you to draw precise lines on it (of course, after calculations).
How to make a four-piece skirt pattern for a girl? A simple construction method is used for this. Let's make a small indent from the top edge of the sheet down by 2 cm. Draw a straight line parallel to the line of the top edge of the paper. Let's divide this line in half and put a dot in the middle, mark it with the letter A. This long straight line means that it is the waist line. Now from point A to the right and left along this line we place points A1 and A2.
For example, when taking measurements, we found out how many centimeters we currently have when measuring our waist, say 64 cm. Then we begin to calculate 64:8 = 8. It turned out to be 8 cm. From point A, put 8 cm to the right and left, designated by points A1 and A2. A1A = AA2 = 1/8 waist circumference.
Then, from point A, perpendicular to the segments A1 and A2, draw straight lines and mark point C on one, and point B on the other, where:
- From point A to point C is the length of the segment from the waist line to the hips, this measurement is measured from the waist line to the hips, it is approximately 16 - 18 cm.
- From point A to point B is the length of the skirt section, this measurement is measured from the waist to the knee or below, fixed on a line in centimeters.
- We draw a straight line through point C, and also through point B we draw a line. The straight line of the hips and the bottom line are parallel to the waist line, the segment of which is equal to A1A2.
- We measure segments from point C to the right and left. We give an example, if after taking measurements the hip circumference is 94 cm, then you need to measure from point C to the right side 12 cm, to the left side 12 cm. Here 2 cm is given for a loose fit, so we add them to the hip circumference (it equals 94 cm). This means 94 + 2 = 96 cm. Divide the number 96 by 8, we get 12 cm. From point C we put 12 cm to the right and left. We denote it as points C1 and C2. C1C = CC2 = (hip circumference + 2 cm): 8.
- From point A1 we draw a straight line, connect it to point C1, bring it to the bottom line and at the intersection with it we designate point B1, and also from point A2 we draw a line, pass through point C2, draw it to the bottom line and at the intersection with it we put a point AT 2.
- The waist line must be drawn up; to do this, you need to move 1.5 cm down from point A, mark point A3. From point A1 we draw a smooth line and connect it to points A3 and A2.
- After this, you need to draw the bottom line of the drawing of the four-piece skirt. To do this, you need to measure the length from point A3 to point B, this length should be marked on side A1B1, mark it with point B4. We also measure the length from point A3 to point B, measure the resulting distance in centimeters on side A2B2, and denote it as point B5.
- From point B4 we draw a smooth line to points B and B5. The pattern drawing for the four-piece skirt is ready.
Making your own four-blade pattern
After all the measurements have been taken, you can begin drawing the pattern. To do this, use tracing paper, Whatman paper, graph paper or old wallpaper. You will also need a ruler, a triangle, a simple pencil and an eraser.
Below are detailed construction instructions for beginners. Follow a certain sequence of actions.
Step-by-step instruction
- To begin, step back about 2 cm from the top of the border of whatman paper. In the middle, make a mark in the form of point A.
- Through point A, draw a straight line parallel to the top edge of the Whatman paper. The result is a waist line.
- Next, you should place points A1 and A2 to the left and right of point A, respectively. Segments AA1 and AA2 are equal to 1/8 OT. For example, with a waist circumference of 64 cm, you need to set aside 8 cm in both parts.
- From point A downwards we draw a line AB equal to the length of the product.
- From point A, a segment AC is laid down, corresponding to the distance from the waist to the hips.
- Through points C and B we draw segments parallel to A1A2.
- From point C we retreat equal parts to the right and left. CC1 = CC2 = (OB + 2 cm), divided by 8. Let's assume that the girth is 94 + 2 (cm) for freedom of movement, then 96 cm. Divide by 8 and we end up with 12 cm.
- We connect points A1 and C1 and continue until they intersect with line B. Mark point B1. In the same way we find point B2.
- From point A we retreat 1.5 cm down and put mark A3. Next, draw a waist line, smoothly connecting A1, A and A2.
- Find the length of A3B and put it on the straight line A1B1 and A2B2. We denote the new points as B4 and B5.
- By connecting B4, B and B5 with a smooth line, we get the bottom line of the product. If desired, you can make a stronger flare of the product.
The resulting drawing must be cut out and used for the next stage of work.
Belt
Now you can start cutting out the belt. Its length is equal to the waist circumference plus 12 cm. Next, it is advisable to clarify how wide it will be when sewn according to the author’s idea.
So, if the width of the belt is 3 cm, then the element will be equal to two widths plus an increase for connecting the seams (3+3+1+1=8 cm). You can also sew a skirt with elastic, which is much easier for a beginning craftswoman. In this case, a rectangle is drawn equal to the waist circumference with the corresponding increases. Later, after sewing, an elastic band will be inserted into it.
ATTENTION! Do not ignore allowances that are made directly on the fabric. You should add 1 cm along the waistline, up to 2 cm at the bottom and 1.5–2 cm at the sides.
By following the proposed instructions, you can draw a pattern for a four-piece skirt in a couple of hours, taking into account your body parameters and personal preferences for length and flare. Having learned to draw this base, you can make a six-piece skirt using a similar pattern.
Knitted stole
Women's panties and shorts photo
Additional details for the skirt
Then we use scissors to cut out the finished pattern of the four-piece skirt on paper. We lay out the wedge-shaped pattern on previously prepared fabric. Then you need to cut out four wedges. Before cutting, do not forget that you need to add 1.5 cm to the seams along the waist line, 1.5 - 2 cm at the bottom of the part, and 1.5-2 cm at the edges of the wedge. After the increases along the edges of the wedges four parts can be cut.
To cut the belt, you need to know the waist circumference measurement, add another 12 cm to this calculation (waist circumference + 12 cm), after which you can cut out a strip of the length you need. And for the width of the belt, when cutting out, you need to know how many centimeters it will be in finished form. For example, if in finished form it is 3 cm, then when cutting we add the width of the part twice, on each side we need to add another centimeter (3+3+1+1=8 cm). For this version of the belt, a zipper is used.
There is another type of belt processing for patterning a four-piece skirt with an elastic band. In this option, a belt is sewn to the skirt at the top of the product and an elastic band is inserted into it. Only when cutting the wedges at the waist line, you need to add a few centimeters on both sides, this is taken into account, since the skirt needs to be assembled in this area. This pattern of a four-piece skirt is suitable not only for girls, but also for adult women.
Pattern in 10 minutes
It’s worth saying right away that patterns for a six-blade are built according to the same principle, the main thing is to understand the basics. As always, work begins with construction. Tracing paper is most often used for drawing, but thick Whatman paper and flipchart paper can also be used. As a last resort, wallpaper with newspapers will also work; there are craftswomen who work with transparent cellophane.
First you need to take measurements and write them down in a working notebook.
| Measurement name | Short designation | Measurement result, cm |
| Waist circumference | FROM | 70 |
| Hip girth | ABOUT | 100 |
| Length of the product | DI | 65 |
Let's take arbitrary measurements close to real sizes.
Our goal is a four-piece (skirt), which means that the product will be sewn from four elements (parts), but only one pattern is used to cut them. The pattern is built according to the measurements taken.
The waist circumference should be divided by 4 (number of wedges): 70:4=17.5 cm.
The hip circumference must be divided by 4 (number of wedges): 100:4 = 25 cm.
These measurements are enough to create the pattern we need. On tracing paper we draw a horizontal line, 17.5 cm long (1/4 waist circumference). Divide the segment into two and put a point (center): 17.5:2 = 8.75 cm.
From this point, at a right angle downwards, draw a line 65 cm long (DI).
The most convex point of the hips is approximately 19 cm below the waist; in your specific case, you can measure this length separately. On the DI line from top to bottom, set aside 19 cm and put a dot. Through this point you need to draw a horizontal line of 25 cm (OB), respectively 25:2 = 12.5 cm, i.e. set aside 12.5 cm in each direction
When the main elements are marked on the fabric, you need to connect the side points with straight lines and decorate the bottom. It turns out to be a trapezoid.
The four-bladed version is marked in red, which will not be as fluffy, but it will require less fabric. We also remember that the length of the skirt is 65 cm, so the sides should also be that long. We round off the extra centimeters at the corners with chalk and cut them off.
Varieties of skirts
The skirt model includes four trapezoidal parts (wedges) and vertical seams - side, front and back. Folds allow you to add pomp. A year skirt looks very attractive, as it visually adds airiness and lightness to the figure. This is a wonderful wardrobe item suitable for special occasions and special occasions. The half-sun skirt looks no less impressive and presentable - a one-piece product with a circle inside. The sample has one or two seams, while it flows beautifully and hugs the hips.
A four-piece skirt with a yoke looks fashionable and attractive, suitable for slender women and young girls. The product may have patch pockets and a stitched belt. These details allow you to emphasize the individuality of the female image. Models with elastic or fastener (zip) are available. Skirts with buttons are comfortable, they perform the main function and represent a decorative element.
Skirts are available in different versions - medium, short and floor-length. A short, four-piece skirt adds attractiveness and sexuality to a woman’s look. Such products will highlight the beauty of the legs and add flirtatiousness and lightness. The average length is appropriate for business meetings and formal presentations. Midi length is the most versatile and in demand. A special highlight is the long, four-piece skirt, which creates incredible comfort and freedom of movement. It is the floor-length skirt that gives nobility, sophistication and elegance to a woman’s image.
Pattern of a four-piece skirt
Share on social media networks:
A skirt is a truly unique item of women's wardrobe, which makes it possible to create a huge number of different looks. A four-piece skirt is one of the simplest options. It consists of 4 wedge-shaped fragments - hence the name. The article presents a pattern for a four-piece skirt and gives useful recommendations related to wearing this product. The peculiarity of the product is that it covers the waist quite tightly, while expanding downwards. To the delight of beginning craftswomen, designing a pattern for such a product is a very simple task. You just need to decide on the length of the future product and waist circumference.