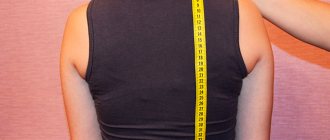
Taking measurements
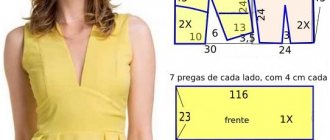
The basis of the dress is built once according to one’s own measurements, and then, using modeling, the detailed features of the product are created. A drawing of an accurate pattern will help emphasize the advantages of the figure and hide the flaws.
To create a basic design, it is necessary to remove a certain number of dimensional characteristics from the figure, using a measuring tape and mathematical calculations, convert them into segments of the required length, laying them down on the plane of the paper.
Required dimensional characteristics:
OG-chest girth. This measurement is taken along the convex areas of the front of the chest.- CG-center of the chest or 9SHG. This measurement is the length between the breasts, measured between.
- OT-waist circumference. The measuring tape is placed around the narrowest part of the body, above the hips.
- Hip circumference. Measurements are taken from the most convex places of the thigh, taking into account the sides and stomach.
- ШС-back width. Measure horizontally passing in the area of the shoulder blades.
- OSH-neck girth. The circumference of the neck is measured where the tape passes along the jugular zone and spine.
- ШП - armhole width. The circumference of the arm along the edge of the shoulder along the armpit.
- DP - shoulder length. The size of the shoulder line itself, the size is counted from the neck to the end of the shoulder joint.
- DI is the length of the dress. Measured along the back, from the seventh cervical vertebra to the expected length of the product.
- DST - back length to waist. They change according to the DI principle, the end result is the waistline.
- DPT - front length to waist. The size indicator is taken from the junction of the shoulder and neck lines, along the protruding areas of the chest to the waist.
In order to clearly present the principle of constructing and carrying out calculations, we should consider an example with standard numbers.
In this case, the basic dimensional characteristics of women's size 48:
- OG=96.
- SG=48.
- CG=9.5.
- OT=76.
- ST=38.
- OB=106.
- SB=53.
- ShS=36.
- OR=36.
- ShP=12.5.
- DP=13.5.
- CI=110.
- DSt=38.
- DPt=43.
Construction of the bodice
Net
The middle of the back, the vertical line on the left, is equal to the measurement Back length to waist - Dst (in my example 41 cm).
The middle of the shelf, vertical on the right, is equal to the length of the shelf to the waist DPT (44 cm).
Back width = Chest circumference / 4 - 1 cm, in my case 92/4 - 1 = 22 cm.
Shelf width = Bust circumference / 4 + 1 cm, 92/4 + 1 = 24 cm.
Neck
Neck close to the neck:
Back neckline depth = Neck circumference / 16;
Width of back and shelf necks = Neck circumference / 6;
Shelf neck depth = neck width + 2 cm.
My example: back neck: depth 38/16 = 2.38 cm; width 38/6 = 6.3 cm. Shelf neck: 6.3 and 8.3 cm.
Shoulders
On the shoulder line, use a protractor to mark an angle of 18 degrees for the back and 26 degrees for the front, then use a ruler to draw the shoulder lines.
Bottom of armhole
Low point of armhole: Length of back to waist / 2 + 1. Set aside from waistline.
41/2 + 1 = 21.5 cm
Reference point for constructing the armhole
B1 = Back length to waist minus back length to armhole (previous figure) minus back neck depth divided by 3 and add 1.
B1 = (41 - 21.5 - 2.3) / 3 + 1 = 6.7 cm.
Set aside from the middle of the back Back width / 2, 34/2 = 17 cm
From the middle of the front set aside chest width / 2, 31/2 = 15.5 cm
Armhole
Bust dart
We find the center of the dart by setting aside the Bust Height (24 cm) from the top of the construction, and half of the Bust Center to the left (17/2 = 8.5 cm).
Draw the first dart line from the middle of the shoulder to the chest height mark. Draw the second line from the bottom point to the shoulder line, retreating the amount of the tuck opening on the shoulder line.
The dart opening is equal to 1/20 of the bust circumference.
tuck solution = 92/20 = 4.6 cm
The second dart line should be the same length as the first. In order for the shoulder line to align when closing the dart, the remainder of the shoulder in relation to the second side of the dart must be drawn at an angle of 72 degrees.
We move the reference point of the armhole to the opened solution.
Redrawing the armhole
Back dart
The dart on the back is located in the middle of the shoulder line and forms an angle of 90 degrees with it.
Dart opening = +/- 1 cm, dart length = +/- 7 cm.
It should be noted that shoulder darts on the back are rarely used in small sizes, but they cannot be avoided in large sizes, as well as for products made from thick, heavy fabrics (jackets and coats). If the work uses soft, easily draped or stretchable fabric, then shoulder darts are not made on the back.
Construction of an individual pattern
To understand how to create a dress pattern according to your own measurements, you should remember that some measurements are made using only half the value.
This way the dress pattern will reflect ½ of the front and back.
It is best to construct the base of the dress on graph paper using a ruler and pencil .
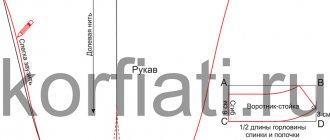
- Drawing grid structure. Point A is placed in the upper left corner, a full size equal to DI or 110 cm is laid down from it, marked below with the letter H. From A, a horizontal line is drawn with an indicator of SG = 48, adding 5 cm for the freedom of fit, the end point is marked with the letter B. B draw a straight guide parallel and equal to AN downwards, fixing it at the bottom as H1.
- Outlining the lines of the chest, waist and hips. From, A, a DST corresponding to 38 cm is laid down in a straight line, adding 0.5 cm for freedom of movement. This is the waist line, which is designated by point T, from which a perpendicular BH1 is drawn and the sign T1 is placed. The direction of the hips is formed according to the same principle: 1/2 DSt = 16, fix with point B, draw a straight line to the opposite edge of the sheet and place B1.
- Construction of the armhole mesh. Section AA1 is 19 cm, that is, ?ShS-18 cm to which 1 cm is added for freedom of fit. The A1A2 value is put off to the right, this is the SG indicator, which is summed up with an increase in the freedom of fit of 0.5 cm. The resulting number is 12.5, this is the width of the armhole of the future sleeve. From A1 and A2 downwards it is necessary to draw 2 parallel lines to TT1.
- Shaping the back neckline. 6.5 cm should be set aside from A1, is this? OR =18. From this value, take the 3rd part, which is equal to 6 cm, adding 0.5 cm for the freedom of fit. Thus, it turns out that A 3 from which a straight line is drawn upward with a value of 1/10 of the half-circumference of the neck is 1.8 cm + 0.5 (increase). The resulting point is A4, from which a smooth line is drawn connecting A3 and A4 with an arc. The same method is used for Carfiati (korfiati) when constructing a pattern for the base of a dress.
- The back shoulder line and the construction of the dart. From A1 downwards, a figure of 2.5 cm is laid down, marking the end of the segment with the letter P. From A4, through point P, a line is drawn whose length is equal to DP (13.5 cm), taking into account the undercut on the back of the future dress, this is 2 cm. A4P1 = 15, 5 cm, forming the shoulder of the product. Along the same guide from A4, a standard size of 4 cm is set aside, at the end they put the letter O. The groove on the back has normalized indicators - this is OO1 = 8 cm, OO2 = 2 cm, 01O3 = 8 cm. It remains to connect the points with straight lines, like O3 P1.
- Back armhole drawing. From point G, a distance equal to 1/3 PG is set aside upward, adding 2 cm for freedom of movement. The resulting distance from G and P 2 is corresponding to 8.3 cm. Point G4 is the middle of the armhole, its value is? GG2. When constructing the base of the dress in a simple way, a smooth, curved curve is used to connect the resulting points to each other, forming the back armhole.
- Front armhole drawing. From G2 upwards an indicator equal to ? SG adding an increase of 5 cm. The value is 17, the resulting point is defined as P4. The segment P4 P5 is 1/10 SG, the indicator of which is 4.8 cm. The sleeve roll is formed at the expense of point P6, which is found by dividing G2P4 by 3, the indicator G2P6 is 5.7. The distance between P5P6 is divided into 2 parts, putting 1 cm towards the front. The bending point of the armhole P7 appears when the angle G2 is divided into two parts, setting aside 2.5 cm G2P7. For the correct outline of the front armhole, it is necessary to connect P5, P6, P7, G1, as well as the back with a smooth line.
- Construction of the front neckline. The distance G3B1 is half of the SG with an increase of 1.5 cm, the segment is 25.5 cm. Along the front it is necessary to continue the straight line from G2, setting point B 2. From B1 to the left it is necessary to set aside the value corresponding to 6.5, this is 1/3 of the SG and an increase of 0.5 cm. In the value of B1B4, the same indicator is used, only 2 cm is added, where you need to set aside a segment corresponding to 8. Points B3B4 are connected by a line, dividing it into two parts using angle B1, and point B5 is placed. All the resulting points are combined with a curved one, getting the front neckline, as in the construction of the basic pattern according to Zlachevskaya.
- Constructing the front shoulder line and breast dart. Mark the central part of the chest for this from G3 to the left, set aside 9.5 cm (CG) and place a point G6. A perpendicular is drawn upward from it until it intersects with straight line B, and point B6 is placed. The shoulder line is formed by putting 1 cm down from point B6, the resulting B7 is connected to B3. The same straight line is continued to P5, from which the DP is laid off, excluding from it the distance B3B7 corresponding to 3 cm. The resulting point B8 will be part of the breast groove, P5B8 is equal to 10.5. From the formed point G6, it is necessary to draw a segment through B8, corresponding to the distance G6B7. With the apex at point B9, which is connected to P5 forming a shoulder line and an undercut.
- Construction of the side seam and distribution of warp undercuts. On the segment GG4 it is necessary to place point G5, the value of which is 1/3 ШП 4.2. Draw a straight line vertically at the intersections and place points P, T2, B2, H2. When designing a dress, semi-fitting or loose base, the side line is drawn with this in mind. When considering a straight silhouette dress pattern for beginners, guide the side part without bends. To determine the waist undercuts along the side seam, add 1 cm to CT, the resulting value is 39 cm, subtracted from the distance TT1. The value equal to 14 is the total tuck solution. At the same time, the undercut of the front is ? part of the entire size is 3.5 cm. The rest goes to the back - 4.2 cm, 6.3 remains on the side.
- Step-by-step drawing of the undercuts on the dress. The dart openings are located from the bust lines to the hips. Points B2B4 are formed by putting 1 cm in both directions from B2. T3 and T4 are the calculated margin for the side part of 6.3, where T2T3 = T2T4 = 3.2 cm. The resulting points should be connected to point P; also draw a straight line from T3 to B4, as well as from T4 to B3. To construct the back groove, the distance G1G with the point at the top G8 should be divided into 2 parts by drawing a straight line down. This guide will be the middle of the dart on the hip line, you should determine point B8, waist T8. Distance T6T7=T6T8=2.1 cm. Which corresponds to half the recess opening. G8 and 1 is a distance equal to 1 cm. B8 and 3 indicator is 3 cm. All obtained points are combined by straight guides. The front recess is built according to the principle of the back, where point G7 serves as an axial distribution point through which a straight line is drawn. On it along the waist, the solution values T10 and T11 are set equal to 3.7 cm. The distance B7 and 4 corresponds to 4 cm. At the same time, the distance T9 -4 is the same in the chest area and hips.
- Construction of the bottom of the product. Depending on the dress model and the silhouette base, tapered and flared at the bottom. H points can change their meaning. Basically, the front is longer than the back, so 3 to 5 cm are laid down from H1 and connected to H2.
Construction of the front of the dress
Neckline - from point K1 to the left and down - off. 1/3 Ssh + 1 cm (dvr) = approximately 7.3 cm.
Connect the points together with a dotted line and dividing this line in half from point K1, draw a line = neck width = approximately 7.3 cm.
We decorate the neckline with a concave line.
The shoulder width of the front from the neck to the dart is from point 7 (top of the neck) to the left off. 3 cm and from t. 3 down off. 0.5 cm (door), connect straight t. 3 to t. 7 (top of neck).
From point 0.5 down we draw a dotted line until it intersects with the line GG1 - point g .
Extend the shoulder line from point 0.5 to the left by 1 cm (door) along the slope.
We connect t. 1 with t. g - at the intersection with P2G1
Chest dart - from t. 1 to the left, 7 - 8 cm off and connect it with the lower end of the tuck t .
The sides of the dart should be equal to each other.
Depth of chest dart up to size 50 = 7 - 8 cm (door), above size 50 = 10 - 12 cm.
The width of the shoulder from the dart to the armhole - point 7 (top of the neckline) is connected with a dotted line with the upper division of line PP1
We set aside from point 7 (top of the neck) to the left Dp - 4 cm (set aside from the neck to the dart) = approximately 10 - 11 cm, everyone has their own shoulder length measurement.
From t. 10 down off. 1.5 cm (dvr) - shoulder tilt.
We connect straight t. 1.5 with t. 7-8 (darts)
Front armhole line - lay a dotted line from point 1.5 to the bottom division of line P2P3
We divide this dotted line in half and turn it off to the right 1 cm (door)
Divide corner P2 in half and turn off 2.5 cm (door)
We draw the front armhole line from t. 1.5 (shoulder), through t. 1, through the lower division of the line P2P3, t. 2.5 and touching the line GG1 to t. L.
Side seam - from t. T2 to the right, 2 cm off (door) and connected to t. L - we continue the side line down from t. 2 through t. M2
We connect t.2 with t. L and L1
If the circumference of the hips according to the measurement turns out to be larger than in the drawing, then make an increase - 2/3 of the difference to the front and 1/3 to the back.
Dart along the waistline of the shelf - from point 2 along the waist line to the left off 7 cm (door) - from point 7 to the left off. 3 cm (door) - divide in half - this is the center of the dart - and connect the division point with a dotted line to the end of the chest dart. Departing from the chest dart 4 cm (door) - we connect the shelves to points 7 and 3 along the waist line. Next, draw a dotted line from the dividing point of the dart down, not reaching the hip line 2 cm and connect. with items 7 and 3 along the waistline there are shelves.
Side dart along the waistline of the shelf - divide the distance from the side seam to the waist dart in half and draw a side dart - the opening of which is 2 cm, and the length up and down is the same as in the first option.
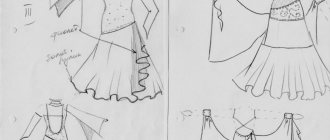
Modeling based on a basic pattern
The resulting dress, a sheath with a straight silhouette, can be transformed and modeled. A similar designation of points and details of how to make a pattern for beginners can be found in Muller’s method.
Almost all elements of the dress can be modeled, here are some of them:
- Front neckline, collar design.
- Converting undercuts into cut-off yokes, raised seams, undercuts.
- Width and length of the product at the bottom.
- Modeling the sleeves and armholes of the dress, determining the length and features.
- Fastener location (zipper, buttons, hooks).
If the basic pattern is created, then you can make any model of a blouse, sweater, jacket and even coat from it.
Only the allowances for freedom of fit change, which the craftsmen know and use in design. They are necessary to create maximum comfort when walking.
