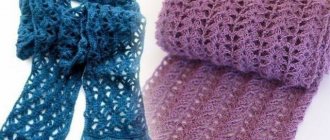
Openwork shawls, scarves on the head and shoulders look incredibly feminine. Crocheted scarves look especially stylish and beautiful due to the ability of the knitted fabric to be airy and lacy. There are many patterns and patterns that are easy to make even for beginner knitters. And if an experienced craftswoman gets down to business, the result of the work will exceed all expectations. Therefore, the given descriptions of crochet scarves with diagrams and descriptions will be useful both to beginners in knitting and to craftsmen with a wealth of knowledge.
Abbreviations for knitting patterns
For convenience and better understanding, the following designations are used in the description of the work:
- air loop - AirLoop. (or V.P.);
- double crochet - StolbSNak. (or SSN.);
- single crochet - Column. b/Nak;
- column - Column. (or with.);
- chain - CHAIN;
- loop - P.;
- yarn over (loop thrown over a knitting needle) - NAC;
- *…* — the pattern between the stars is repeated.
These designations are used for each of the presented circuits.
Large scarf-shawl with grapes for an elegant lady
The pattern with grape bunches is voluminous and quite complex. It will be difficult for beginning craftswomen to cope with this motif. But after carefully watching the video tutorials, even they can cope with knitting a winter scarf-shawl:
Knitting pattern for grape bunches:
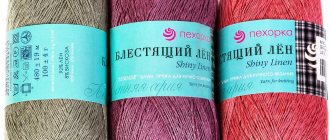
Grape bunches are knitted in lush columns. Grapes can be formed from any threads. In the knitting video, Vita Brilliant yarn was used, so the shawl scarf turned out to be not only elegant, but also warm!
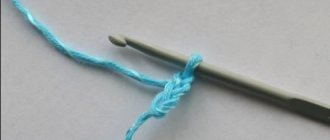
To get started, you need to form a sliding loop. Then you need to dial on 3 more air loops. After this, you need to knit 3 double crochets inside the sliding loop. Further knitting is carried out strictly according to the pattern.
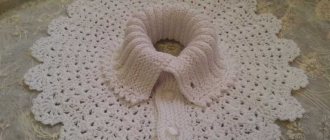
Openwork scarf
The scarf was previously used at the end of the 18th century to cover the neckline of the karako (a jacket with long tails and semi-long sleeves).
To knit such a scarf (shawl), you need to select about 300-400 g of thread in pastel shades No. 32/2 in 4 layers. The shawl pattern is a combination of two types of rhombuses, in one of which flowers are knitted, and in the other a mesh is knitted. The shawl is knitted from the bottom end, while the knitting evenly expands on both sides .
- 1st row: a chain of 3 chains, then a bunch of 2 columns is knitted. in 1st P. chain, 3rd Loop. and a combination of 3 StolbSNak. in the 1st P. of the original chain (see center of the diagram).
- 2nd row: 3 Air Loop. for upward growth, a bundle of 2 StolbSNak. (the hook must be inserted under the top of the previous combination Column.), 4 V.P., Column. b/NAK. under a chain of 3 V.P. of the previous row, 4 AirLoop, combination of 3 ColumnSNak.
- 3rd row: Three Air Loops. to increase upwards, a combination of 2 ColumnsSNak. in a bundle Column. from the previous row, 4 VozdPetl., S. b/Nak. for a chain of 4 air loops, CHAIN. of 5 air P., table without loop, CHAIN. from 4 AirLoop. and a combination of 3 StolbSNak. into a combination of columns of the bottom row.
- The 4th, 5th and subsequent rows are knitted according to the pattern, while the shawl fabric expands evenly. Work on all rows is completed with a combination of 3 ColumnsSNak.
Then you need to knit diamonds in two rows, in which the flower is in the center, and the diamonds with the mesh and the flower alternate with each other. At the end of the work, the product is tied along the upper edge .
- 1st row: 3 chain stitches, S. without a chain stitch thrown over each chain of five chain stitches of the previous row.
- 2nd row: * Column SNak., 1 Air Loop. and so on from the asterisk to the end of the row (Column SNak. Use in turn for this either S. single crochet of the previous row, or a chain of 3 chain loops). Then they continue tying, without tearing off the thread, on the sides (those that are short) of the shawl like this: * a column with a stitch draped under each link of the rhombus, 3 air loops. and so on from * to the end of the row. Next, you need to tie the work along the upper edge in the opposite direction with columns without a loop thrown over it (the hook should be inserted under all the chain loops of the previous row).
When the shawl is ready, it must be carefully ironed, trying not to crush the flowers from the wide columns; To decorate the shawl, fold tassels of thread into 16 - 20 layers, tie them along the edge of the work and intertwine them together at the same level. This shawl can be worn both on the shoulders, in the form of a cape, and as a scarf around the neck. A hook, a diagram and a description, not counting the threads, is all that is needed to complete this work, since it is not at all difficult, and even beginners will enjoy the result.
Kerchief. Option #3.
This scarf is knitted very simply. Different colors do the trick.
The scarf is crocheted from acrylic No. 2.7.
Description.
We start knitting with a pink strip. We collect a chain of 5 air loops.
We knit about 6 cm of strings, then add loops until it becomes 6 cm.
We continue to knit an even fabric of approximately 35 cm. Then we decrease the loops symmetrically to how we added them at the beginning.
The total length was 65 cm.
Now we take gray yarn and cast on loops in the center of our strip.
Next we will decrease 1 loop at the beginning of each row.
Without tearing off the thread, we tie the resulting scarf with one row of single crochets.
You might be interested:
Headdress for the summer. Bandana, warrior, hat, scarf?
Crochet cap. Schemes and description. 2 options.
Crocheted bags. Description and diagrams.
Knitted mesh patterns. Schemes, description.
House slippers with felt soles.
Snow-white shawl
Shawl - a strip of rectangular fabric that came from eastern countries, which served to cover the upper body from the cold. In the 15th century, in the Indian region of Kashmir, shawls were made from the fine wool of Tibetan goats. Authentic shawls were distributed throughout Europe during the Directory. They were an addition to suits that imitated the antique version - gathered clothes, which lacked sleeves and had a deep neckline. Precious cashmere shawls quickly began to be replaced by more affordable fake options.
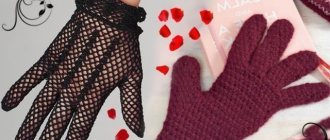
Scarf and gloves
At the beginning of the history of their appearance, gloves not only protected, but also decorated hands. Examples of these clothing items were discovered in the pyramids of Egypt during the 21st Dynasty. Initially, gloves looked like bags with no openings for fingers, and much later a product similar to a mitten appeared.
In the Middle Ages, they used gloves that had no compartments for the fingers, and they were similar to today's mittens. A leather version with a cloth lining, or gloves made of metal rings, were part of the equipment of warriors and hunters. For the highest rank, this type of clothing was encrusted with jewelry.
For the finished product you need to take 200 g of light-colored yarn No. 32/2 in 3 folds. To do the work, take a hook size No. 3. The scarf will be about 22-26 cm wide, its length will be 140-150 cm.
The product should be started from the center, i.e., connected with a CHAIN. from 50 AirLoop. and then carry out the presented pattern (the result of completing the product will be three “fan” patterns in width) first in the first direction, and then from the center of the work in the second direction. Finish the work on the two halves of the scarf with the second row of the pattern according to the diagram.
Next, the finished product should be tied in three rows in a circle, continue to knit “fans” along the edges of the scarf, while the hook is inserted on the first side of the work under a chain of seven Loops, on the second side under the Pillar. with 2 yarn overs. In the third row of processing, the teeth are made of 3 VozdLoops. make a “fan” along the entire “fan” of the previous row (each “fan” will have 9 teeth).
Alternatively, gloves can be knitted on 4 knitting needles of the second size with an additional fifth to complete the work in a way that everyone knows as knitting sock fabric. The gloves will be decorated with four openwork stripes of 3 front stitches each against the backdrop of purl stitches throughout the glove. To make an openwork pattern, knit every 4th row in the following way: NAC., three loops together, NAC.
Black shawl with colored stripes
At the end of the 40s. In the 19th century, an accessory such as a scarf was incredibly fashionable, but only in a single-color version, as an addition to the checkered crinoline, which was very popular.
Material: 200 g wool yarn No. 32/2. Hook No. 2.5 or No. 3.
The pattern is presented in the diagram, but the principle of its implementation is simple: 3 ColumnsSNak. form a combination, between them there is a chain of 3 Air Loops.
So, the beginning of knitting is the middle of the wide side of the work. The dimensions of the product can be different, as you need. Increases are made only in two places - on two sides of the center line emanating from the beginning of knitting.
- 1st row: knit a chain of 3 Asc., then perform 2 Stolbs. on the first P. of this chain. Knit another chain of 3 Air Loops. and 3 SSN. on the same original P. TsEP., on which 2 ColumnsSNak are already connected.
- 2nd row: chain of four Air-Loops, two Columns. in the first P. CEP. air loops, chain. from 3 AirLoop. further above the CEP. of the last row, two groups of 3 St. SN are knitted, separated by a CH, from 3 Ch. - in this way, additions are made, this action is repeated further in this place in each next row. Next, perform CEP. from 3 AirLoop. and 3 SSN. on the last P. of the last row.
As you can see, this knitting is not difficult. Between the colorful stripes there are 3 rows, connected with black threads. The colors of the stripes can be selected in different colors as desired.
The finished shawl must be tied with 2 rows of StolbSNak., and another option is a small border. The pattern of this border is shown in the diagram. At the end of the work, brushes are tied, the length of which will be 12-18 cm.
Crochet scarves for women with a pattern for beginners
Size of the finished scarf: 25x44 cm.
We will need: 100 g of cotton yarn (140 m/50 g) and hook No. 3.
Pattern diagram:
Explanation of the diagram:
Description of the pattern: we knit the scarf fabric according to the pattern in straight and reverse rows. We collect three air loops. We knit five double crochets in the third chain stitch from the hook, making three chain loops between the stitches. In the next rows, instead of double crochets, we knit three lifting loops. We knit the last double crochet of the row in the third instep stitch of the previous row. The diagram shows the first four rows. The remaining rows are knitted in exactly the same way with repeating between the arrows marked in the diagram.
Knitting density: 34 loops x 13 rows of the main pattern = 10 x 10 cm.
We study a step-by-step job description
Scarf fabric: the entire scarf is knitted with the main pattern. We knit the first four rows according to the pattern. We begin to expand the fabric from the fifth row, adding double crochets in the same way as in the third and fourth row. Having knitted 23 cm (21 rows), we knit two more rows of double crochets.
Tying the edge of the scarf: for this you can use yarn of any other color. We secure the thread with a connecting post (provided that a thread of a contrasting color is used for tying). Next, to the upper corner of the scarf, we perform rapport: two air loops, one single crochet into the next third double crochet, while inserting the hook into the column located one row below. Then we knit four single crochets into an arch of three chain stitches and finish the row, performing symmetrical rapport.
Assembly: to make the ties, from the corners of the scarf fabric we collect a chain of air loops 26 cm long. Please note that they need to be knitted with thread in two folds.
Openwork mohair shawl
Mohair is a fabric that was obtained by processing the wool of the Angora goat, long and thin, with a silky sheen. Mohair was brought to Europe from Asia Minor.
To get a beautiful and openwork shawl, you should take thin peach mohair (another pastel color) - 100 g (in one thread), and 35 g of dark beige or other opposite shade of thread No. 10/2 (in one thread) for knitting the trim. Hook size no. 3.
Knitting: the main pattern is given with the shawl pattern: CHAIN. of 5 Air Loops, secured by two posts without a loop thrown over, between which three Air Loops are connected. (pico). The hem is made with teeth - the knitting pattern is shown in the diagram.
The shawl is knitted starting with the VozdLoop chain. the length of which is 160−170 cm (according to the diagram). Then you should knit on the chain. through one P. ColumnSNak., and between them along the 1st Air Loop. (see row 1 of the diagram of the main pattern) - this way a “lattice” pattern is obtained. All further rows are knitted with the main pattern, but there is no need to knit 5 Ch.Loops at the end of each row until one chain of 5 Ch.Loops remains.
After this, you need to tie the shawl on both sides with a “lattice”, and on it tie a border of 3 rows of the main pattern, ending it with the same “lattice”. After this, you need to tie the border with cloves with brown thread (see diagram). The finished teeth should be tied with b/NAK posts. pink thread.
To decorate the lower corner of the shawl, ruffles are made, which should be knitted from pink threads; and the cells that formed the main pattern must be tied on 3 sides (the diagram shows the direction of processing). All parties end as follows:
- 1 ColumnSNak.;
- 1 Column. with two NACs;
- 3 AirLoop;
- 1 Column. with two NACs;
- 1 ColumnSNak.
Tie the completed ruffle with a contrasting thread in one row using a single stitch.
Crochet headscarf: openwork crochet headscarf for women
744 Reading time: 12 min.
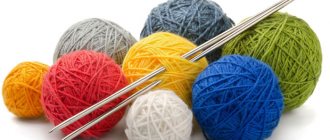
Yarn selection
The yarn model depends on the product itself (size and thread). Iris yarn is perfect for a light summer scarf. This is a thin thread from which the craftsman usually makes elegant napkins. Contains pure cotton thread.
A summer scarf for a girl instead of a Panama hat is a creative solution for parents. You can also use thicker cotton. A thread with different inclusions, for example, sequins or different thread thicknesses, looks unusual.
But warm scarves can be made from wool yarn. It is very important that the yarn does not contain acrylic, as it magnetizes the hair and wearing such a product will not be very pleasant, plus the hairstyle will deteriorate. But a small amount of it cannot interfere, so a small percentage can be included in the composition of the selected fabric.
Hook
A hook for making a scarf must meet only two requirements.
First, it must match the thread (selected by number and often the yarn itself already contains in the instructions the numbers of knitting needles and threads with which you can deal).
Secondly, it must suit the craftsman (not all craftsmen prefer hooks with thin handles; when making a large product, their hands get tired of holding a thin product, especially if there are complex patterns in front of it).
It is very important that the hook is easy to use; for a beginner, you can choose one with a flattened center on the handle . This way, a beginner will quickly master the technique of how to knit and hold the tool correctly. And the pictures will help adults create their first masterpieces for themselves and their loved ones.
Crochet headscarf for women
Models of scarves that are suitable for women, and they can be made not only by an experienced craftsman, but also by a novice knitter. A detailed description and high-quality diagrams will not allow you to make mistakes in making a beautiful scarf.
Zigzag crochet scarf for women
A lovely scarf with a zigzag pattern will delight fashionistas with its unusual zigzags. They even look like waves. For more interest, you can dilute boring monochromatic threads with different colors. You can make it in a marine theme and choose several shades of blue. Any combination will decorate this model.
In this work, fluffy threads were used, but they do not interfere with viewing the pattern, and the canvas and all its small details are clearly visible. Beautiful curves are obtained by knitting several double crochets from one loop. And vice versa, when knitting several unfinished stitches into one loop (they have a common point and vertex).
For work use:
- light fluffy yarn;
- hook according to the thickness of the prepared thread.
Measurements
You must first indicate your measurements. The scarf is not knitted huge, as if it were half a scarf. More often, its dimensions are the length that is required only to tie a small knot. But this does not apply to models with huge lace edges.
A border can lengthen a product so much, and this will only make it more interesting and attractive. The first dimension is length and is the largest side of the triangle. The second one can be adjusted when knitting the fabric pattern.
You can calculate it immediately using the knitting density.
Sample
View the diagram for the handkerchief in detail and practice its implementation. To do this, you can knit a small square according to the specified fabric pattern. This is both training and at the same time a method for accurately counting stitches for a product.
Using a small square, determine how many columns there are per 10 cm, and how many rows of the resulting canvas will be in the same 10 cm.
Next, record these indicators, and the resulting two knitting density numbers will help you further calculate how many loops will be required to complete the first set and the entire product.
Zigzag pattern
Description
The scarf must be knitted from the top. This is very convenient, and in this way it will be possible to adjust not only the height of the triangle from its longest side, but also the length from the corners of the base of such an isosceles triangle.
Important! Knitting must be done symmetrically, that is, all increases on the right side must correspond to increases on the left side.
Make the addition exactly by one repeat of the main pattern. This way you will get a beautiful wave at the edges of the scarf and you won’t need to do any binding to the finished product.
Complete the required number of rows according to the fabric pattern and finish knitting symmetrically.
If the edges are not so smooth, you can tie the finished work with simple single crochets or simply connecting stitches.
Openwork crochet scarf for women
Very elegant work and the snow-white color suits the scarf very well. But that’s not all; the beautiful pattern around the edge is complemented by an original border. Very airy with several lush columns.
For work use:
- white iris yarn;
- hook according to the thickness of the thread.
Measurements
Measure according to the model how much length is required for the new scarf. The height of the triangle cannot be adjusted independently, as the pattern will shift and it will look ugly. Knitting should be symmetrical.
Sample
Initially, work should begin not with the scarf itself, but with a small square cloth, from which you will need to calculate the knitting density of a given thread and pattern.
Take a measuring device and count how many pattern elements you get per 10 cm. Do the same with the number of rows, and also calculate how many will be needed for 10 cm rows of fabric. Next, determine the required set of loops by size.
Be sure to take into account the number of repeats so that the pattern is symmetrical.
Scheme for a white scarf
Description
Knitting this pattern starts from the corner (opposite the longest side). Initially these are 3 air loops. Next, perform three lifting loops on a new row and knit the first row. Knit like this with appropriate increments for each new row. The fabric pattern itself begins only from the 14th row.
It is very convenient to knit this product, since during each row you can estimate the number of loops in the row, and how many more will need to be knitted before finishing the product. It is better to calculate all this in advance and know how much yarn and rows will be required to complete the model.
Border for scarf
Border
Upon completion of the product, you will need to knit a border along the edge, the diagram is shown in the model. The whole scheme consists of only 5 rows. The most difficult is the last one, it combines lush columns. But the first 4 have only chain stitches and single crochets. These are all elements that a beginner has already mastered.
This is how you can make a scarf yourself.
Crocheted scarves attract attention with their unique patterns. The owner receives a comfortable and very beautiful thing. Crocheting, especially with a thin thread, is a very painstaking task.
But what beautiful things come out with its help. It has already been proven that knitting calms the nerves, and therefore the master receives double benefits from performing painstaking work.
To all masters and beginners, great inspiration for new works.
Here are the charming models ready.
Did you like it?
( +4 points, 4 ratings)
Loading…
Found a mistake? Select it and press Ctrl + Enter. We'll fix everything!
Openwork shawl scarf for shoulders
Most often, such products are knitted from the corner, and this shawl is no exception. First, the CHAIN is knitted. from fourteen P., then knit rows of the pattern.
- 1st r. - 4 ColumnSNak. on 4 P. CHAIN., starting from the ninth P. from the hook, 4 Asc., 1 St. with 2 NAC. on the same P. TsEP. the product is turned at the end of all rows.
- 2nd r. - 8 air P., four Column. with a double crochet under a chain of 4 P., 2 V.P., 4 StolbSNak. under a chain of 8 P., 4 Air Loop., 1 Column. with 2 loops thrown under the same CHAIN.
- 3rd r. - 8 V.P., four StolbSNak. in the 1st chain, 3 V.P., 1 ColumnSNak. in the 2nd chain, 3 V.P., 4 ColumnSNak. in the third chain., 4 V.P., 1 Column. with two loops thrown under the same chain.
- 4th r. - 8 V.P., 4 ColumnSNak. in the first chain, 4 Air Loop., 2 S. b/Nak. under the 2nd chain, 1 Column. single crochet on ColumnSNak., 2 Columns. single crochet under the third chain, 4 air loop, 4 columns, 4 v. p., 1 column. with 2 yarn overs under the fourth chain.
- 5th r. - 8 V.P., 4 ColumnSNak. in the 1st chain, 4 V.P., 2 S. b/NAK. under the second chain, 5 S. b/NAK. on the base columns, 2 Columns. without crochet under the 3rd chain, 4 Ch., 4 Dc., 4 Ch. and 1 Column. with 2 yarn overs under the fourth chain.
- 6th r. - 8 AirLoop, 4 ColumnSnak. in the first chain, 2 V.P., 4 ColumnSNak. under the second CHAIN., 4 V.P., 5 Column. without NAC. at 5 Column. base, 4 V.P., 4 ColumnSNak. under the third CHAIN., 2 air loops, 4 ColumnSNak., 4 V.P. and 1 Column. with 2 NAC. under the 4th chain.
- 7th r. - 8 Air Loop, 4 SSN. under the first CHAIN., 3 V.P., 1 ColumnSNak. under a chain of 2 loops, 3 V.P., 4 StolbSNak. under the CEP. from 4 P., 3 V.P., 1 ColumnSNak. on the middle Pillar. without NAK., 3 Air Loop., 4 Column SNak. under a chain of 4 P., 3 V.P., 1 column with NAC. under a chain of two P., 3 VozdLoop., 4 ColumnSNak., 4 V.P., 1 column with 2 NAC. under the remaining chain.
Step-by-step master classes
Having understood the main stages of creating a crochet scarf, you can begin the main work. However, you need to take into account that depending on the chosen model, the algorithm of actions will be slightly different.
Women's openwork
The crocheted headscarf has an incredibly attractive appearance and is ideal for creating spectacular summer looks. Even a novice craftswoman can cope with its creation.
The main thing is to carefully study the scheme and strictly adhere to it at all stages of work.
The algorithm of actions in this case is as follows:
- All actions begin with the formation of the upper corner. For this purpose, you need to cast on three air stitches.
- After this, three lifting loops are made and the first row is completed.
- In each subsequent row, increases are made as indicated in the diagram.
- Starting from the 14th line, a pattern is created.
At all stages of creating an accessory, you should monitor symmetry and determine in advance how many lines are needed to complete the knitting. After this, all that remains is to knit the border. For this purpose, you must adhere to the scheme below.
Children's room, with an unusual pattern
In this case, several patterns are used to crochet a scarf. As a result, you will be able to get a canvas that represents an original chamomile field. In this case, you will need threads of green, orange and snow-white shades. All parts of such an accessory are created separately from each other and then combined into a single whole.
To create a flower, you need to do the following:
- Eight chain stitches are cast on from orange yarn. The resulting chain is closed into a ring.
- To create the core, three chain stitches, a double crochet and three chain stitches are performed. After this, six rows are alternated between two double crochets and three air stitches.
- After this, the thread is replaced with white and petals are created. For this purpose, the following actions are performed: three chain stitches, a pair of double crochets, eight chain stitches and three double crochets. As a result of performing such manipulations, it is possible to create eight petals.
- At the final stage, all air stitches need to be completed with fifteen double crochets.
Forming petals is no less simple. On the first line, the following actions are performed: five chain stitches, a double crochet in the first stitch, a pair of chain stitches, a double crochet stitch in the first stitch, a pair of chain stitches, a double crochet in the first stitch, five chain crochets and closing the line.
In the second row, the pattern is as follows: five chain stitches, single crochet, five half-column double crochets. You need to knit a half double crochet into a double crochet stitch, and then a pair of half double crochets into a pair of double crochets. Then the double crochet stitch is worked into a pair of double crochets, one double crochet, and another pair of double crochets. After this, all actions are performed in the opposite direction.
At the final stage, all the pieces should be steamed and assembled into a single whole. The number of flowers and leaves directly depends on the desired size of the accessory. As a rule, 15 leaves and 21 daisies will be enough for a five-year-old girl.
It’s not at all difficult to figure out how to crochet original accessories. Every needlewoman can master the intricacies of this process. To do this, you just need to be patient and carefully study the diagram. As a result of the efforts made, it will be possible to create incredibly beautiful, original products that will definitely be used.