What is Patchworking
Patchwork is the creation of things from fabric scraps. Initially, the pieces are connected into blocks that look like geometric shapes. After which they are used to sew blankets, pillows, shorts, dresses, chair covers, curtains and much more. For grandmothers, this type was economical. After all, he can give things a second life.
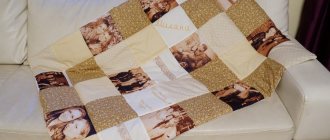
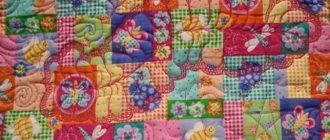
Now many people, using this style, make pillows, bedspreads and other household items with their own hands.
Reasons for doing patchwork:
- Instead of spending money on decorative items, you can create them yourself.
- The need to throw away damaged items and unusable pillowcases is completely eliminated.
- Exclusive and original things are created.
- While sewing, relaxation and rest from everyday work occurs.
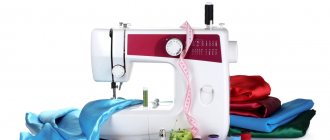
Patchwork for beginners requires a certain set of tools. These include: needle, thread, fabric, cutting knife, measuring tape, chalk or pencil, pins, iron, fingertip, ruler, cardboard and mat. For a faster process, it is recommended to use a sewing machine.
Historians claim that this technique was used in ancient times.
To master this type of sewing as correctly as possible, you should listen to the following recommendations:
- Try sewing from a ready-made kit - you can purchase a blank at any craft store. Next, all that remains is to connect all the elements. No cutting or cutting is required.
- Starting with squares is the easiest and simplest option. Connecting them will not cause any difficulties. It is better to leave complex figures for later creation of masterpieces.
- Sewing samples - before making a large product, it is recommended to practice on small pieces. This gives you the opportunity to take into account all the errors and learn how to correct them.
- Use large-sized scraps - small pieces require a large number of stitches. You can quickly get tired of sewing and not finish the product. Thanks to large flaps, much less time will be spent on production.
- Repeat after others - first you should fill your hand. That is, follow the step-by-step lessons that have already been presented. Firstly, you shouldn’t chase originality.
- Learn to combine colors - on special websites they will teach you how to select shades that are in harmony with each other.
Additional Information! Most often, this type of sewing is used to make quilts. In the United States of America this technology is called quilting. Almost every American woman has homemade products.
Schemes and templates for beginners
The template is a pattern made of cardboard or plastic. You can make it yourself or buy it at a specialty store. To create, you should draw the required element on a sheet of paper without any indentations intended for seams. Then make an indent of five millimeters on each side, then mark the second contour (seam allowance). Cut out both contours to make two blanks.
This needlework is simple, but if you don’t know the basics of patterns and sew the pieces of fabric incorrectly, you may end up with a vinaigrette rather than a patchwork.
The following schemes are suitable for beginners:
- Square within a square – triangles, which are isosceles, are connected into individual blocks that have a square shape.
- Russian square - stripes or triangles are sewn around the main figure.
- American square - rectangular shapes of different lengths but the same width are sewn around the base figure.
After the needlewoman has determined a pattern suitable for herself, she can begin sewing. There are also more complex options. But for study, it is recommended to choose a lightweight design and use it in a more bulky product. It is also advised to start by repeating after others, that is, using ready-made hands.
It is best to use cotton fabric; it does not stretch and irons well.
Style Features
Patchwork is a special patchwork technique. This is a direction of modern needlework in which products are created from pieces of fabric of different colors. This type of sewing arose out of necessity. In ancient times, people did not always have the opportunity and means to buy clothes or things, but sewing them themselves from pieces of fabric was a good solution.
The technique is the process of joining pieces of fabric into a single fabric. Despite its popularity throughout the world, patchwork originates specifically in the American interior. There are many types of patchwork, each with its own characteristics.
English technology. The figures are arranged according to patterns of the same sizes and shapes. This type has a clear geometry. Triangles, squares, and rectangles will do. The colors are always subdued. As a rule, 2 colors are used. The finished product is simple, laconic and very modest, which suits the interior of noble people in England.
How to make patchworking with your own hands
The patchwork technique will not cause any particular difficulties. The main thing is to choose the right material and tools. It is also desirable to have creative skills and imagination. In this case, you can create masterpieces that will inspire admiration among others. Moreover, production will take little time.
Pillows and bedspreads
To create pillows and bedspreads with your own hands in the patchwork style, you will need scraps of any material. Next, they are laid out according to a certain pattern. To ensure that the drawing remains in its original form, it is recommended to number each piece. Two scraps are pinned together with the right side inward and stitched on a machine. This procedure should be done with all the pieces. The squares are connected into strips, and those, in turn, into a canvas.
The triangles are connected into squares and then into the main product.
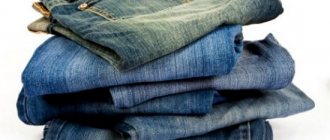
From jeans
To work with jeans you need to have special skills. After all, this fabric is denser than cotton. At the same time, there is no need for a lining, which greatly facilitates the work. The methods for making things are no different from other options.
When using denim, be sure to use a thimble. Due to its density, it is difficult to pierce. You will also need an elastic needle, longer and thicker.
Old things are used as consumables: skirts, shorts, vests, etc.
Thanks to this method, you can not throw away your favorite clothes, but give them a new life, make something interesting and unusual out of them.
Patchwork
For this type, you should first decide on the material. Collect all the pieces of fabric that are available, sort them by color and structure. Then you can start drawing up the diagram itself. The joining procedure usually consists of several stages: stitching together individual fragments, combining blocks that are already ready, sewing elements to the finished product.
Even if there is a material of a different texture, the product must be assembled from textiles of the same quality.
Blocks for patchwork
A block represents a detail of a future thing. Some of them are very simple, others are more complex. Let's consider both options.
Jacob's Ladder is difficult - choosing fabric in contrasting colors (for example, blue and red). Make four strips of it measuring 35x7 centimeters and four squares - 13.5x13.5 centimeters. All pieces should be of different shades. Place squares right sides together and strips separately. Sew one of the strips along the long side. Lightly press the seams. Connect it to the other right sides, without separating, cut into pieces of about seven centimeters (you should get five pieces). Do not take the pieces apart, sew them together. You will end up with four squares. Cut large squares at the corners and draw a line diagonally. Make a line at a distance of five centimeters from the line on each side, cut diagonally, but not along the lines. Iron, cut off the resulting corners, do the layout, sew everything.
Templates for patchwork patterns are sold in special stores; you can make it yourself according to the pattern.
An ordinary square is considered simple. To do this, take a flap (you can from a kit or cut it yourself). On the inside, mark a seam allowance of approximately one centimeter. Fold the product in half with the front side inward. From the inside out, sew the two sides along the marks, you should get an envelope. Next, you should turn it out and flatten it to form a rhombus. Now take the filler, cut a square in it to the size of the envelope, leave one centimeter for allowances. Insert the filler into the product, straighten out any irregularities. The open edges of the diamond should be folded inward and pinned together so that they do not stick out in all directions. Begin stitching the folded corners, removing pins as you go.
Each item made in this style is unique, even changing the shade of one of the details transforms it in a new way.
Important! In patchwork, you should not only perform careful sewing, but also try to ensure that the created composition is harmonious. It is allowed to use fabrics with different textures. The choice depends on the flight of fancy of the craftswoman. This is also an excellent opportunity for self-realization and creative development.
Basics of technology
There are several techniques for stitching patches. For beautiful and easy patchwork sewing, it is better for beginners to choose the following:
- Quick squares - sew squares of different fabric colors (no more than 4-5 colors), but with the same texture, and then form the required product from them.
- Watercolor - you also sew together squares of different colors, but there are more colors themselves.
- Stripe to stripe - these can be parallel, broken or zigzag lines that contrast with the main background of the product.
- Magic triangles - sew triangular scraps. You can make rhombuses, trapezoids and squares from them, and then form the planned product.
Types of patchwork
Before you start sewing any product, you should familiarize yourself with the patterns and templates. The activity seems easy and simple only at first glance. In fact, it requires special care and scrupulousness.
The execution technique must be carefully and carefully followed, then you will be convinced of the charm of the product itself.
Japanese
This technique combines the traditions of the West and the East. Silk fabrics and stitches are actively used. Various geometric shapes serve as the basis: squares, triangles, rectangles, rhombuses. In addition to making decorative bedspreads, this type is suitable for panels.
The spread of patchwork in Japan was also caused by the economic situation.
Knitted
Most needlewomen are familiar with it. The difference from traditional patchwork is that the patches are not sewn together, but are knitted or crocheted together. In this case, both fabric and knitting threads are used. The most popular accessory of this type is a woman's bag or a large bedspread.
It is almost universal - any product can be knitted using this technique.
Mill
It is considered the most common option. Consists of two pieces of fabric with contrasting colors. Provides the opportunity to create various figures and achieve original combinations.
Usually made from two fabrics in contrasting colors.
Log hut
The formation of patterns is done from stripes around the main element. Most often square. Laying occurs in a spiral. Another variation of this technique is to move the square into a corner.
You can also find another name for it – “Well”. In the English version it is called Log Cabin.
Note! In order for the pattern to be as clear as possible, the pattern must be assembled from strips of the same color. The collection takes place in pairs. It is worth remembering that everything should be in harmony with each other in color.
Crazy patchwork
Translated it means “crazy shred.” The main feature is the use of figures of various shapes. It may be irregular, crooked, or have the appearance of a non-standard appliqué. The seams are masked using braid or special embroidery. The product itself is decorated with various decorative details: beads, buttons or metal pendants.
Crazy – translated from English means crazy”, “crazy”.
The main points in the patchwork technique (patchwork): useful techniques for using patterns
This type of patchwork is based on somewhat unusual rules. Moreover, this technique contains some more secrets that will help make the little thing truly useful in the household. Read more about them.
Rules for selecting material for the implementation of equipment
Often, patchwork sewing uses fragments in the shape of a rhombus or a triangle. PHOTO: yandex.ru
In order for the product to ultimately gain recognition and become a reason for discussion among your neighbors and friends, it is important to monitor the quality of the material used. It is clear that remnants of various fabrics are used, however, they should not crumble, crumble, be full of holes or dirty
Since all products are made according to the mosaic principle, it is important that the textiles are non-slip, dense, preferably cotton. However, you should not ignore these types of materials: denim, silk, linen or wool
Some even use drape. As for the size of the fabric, you don’t need specific parameters of the fabric, the main thing is that it is enough for the planned number of templates and future patches. You shouldn't get stuck on one type of textile. To make your work look as original as possible, you need to try your luck in combining different textures with each other. The density of the material is determined depending on the purpose for which it will be used. For example, too thick fabrics are not suitable for night curtains, but for DIY patchwork bedspreads, capes and bedding, novice craftsmen should choose thicker textiles.
Popular articles Angel in a ball of threads
Remember that the size of all flaps should be the same, and the shape of the pieces that fit together should not be changed.
Product options for purchased items must have the appropriate palette PHOTO: yandex.kz
How to choose templates, make diagrams and cut out patchwork
Many bloggers who willingly share master classes and training videos provide the opportunity to buy or download special templates. The only disadvantage of downloading is that they then need to be printed, cut out and glued onto thick cardboard. However, there is always the opportunity to purchase this material at hardware stores.
Each needlewoman can make this option on her own. To do this you will need fabric, paper or cardboard. It is better to make several templates so that you can immediately apply them to the fabric and cut out the required number of pieces.
All the details in the picture can be marked with numbers, and then the fabric flaps can be numbered. PHOTO: pinterest.ru
If the diagrams are drawn by hand, then the base is pre-selected (you can make a drawing directly on it). If you are afraid of ruining something, it is better to do the rough work on a large piece of whatman paper. The drawing indicates the estimated pattern or ornament, the required number of parts, possible fabrics and colors in case there is a risk of confusing something.
When downloading from the Internet, it is better to choose templates that clearly show every detail in color PHOTO: liveinternet.ru
The templates are cut using scissors along the marked dotted line.
Please note that many patterns do not allow for seam allowance on the flaps. Therefore, the housewife must calculate this moment independently.
To prevent the product from coming apart at the seams over time, the amount of material per stitch should be at least 1-1.5 cm PHOTO: liveinternet.ru
What are the techniques for joining cut flaps into a whole canvas?
Today, two patchwork sewing techniques are used: American and block. The first method involves basting identical shapes to each other using paper templates. Next, a seam allowance is made for the turn-up, and then basted again.
Tactics using blocks takes less sewing time than English PHOTO: hu.pinterest.com
Block tactics are considered modern. It can be used by both experienced craftswomen and beginners. The technology is as follows: pieces of triangular or square shape are connected into blocks. After which it is sewn to the base, creating a specific three-dimensional pattern.
A patchwork style seam can be simple, hidden and decorative PHOTO: pinterest.ru
Master class on patchwork for beginners
For this type of sewing, fabrics with bright and colorful colors are used. Before you start cutting, it is recommended to iron and wash it.
An interesting variation of patchwork, which implies the absence of any order in creating the finished fabric.
Step-by-step pattern in patchwork style for beginners - pillowcase with a rose:
- First of all, square-shaped flaps are prepared. The more blanks, the greater the parameters of the finished product.
- Cut a circle from the fabric. Place a bulk filler or piece of material in the center. Fix using machine stitching. The middle of the future masterpiece is ready.
- Fold the square pieces diagonally. Take approximately three to five blanks and sew them to the resulting product (around its middle).
- Now you should choose pieces of a different color and larger size. Continue sewing them until the desired size flower is formed.
- Cut the petals that were sewn in a circle.
- Roses are distributed over the pillowcase and secured with a zigzag or tight stitch. The result was an applique called “voluminous rose”.
- As an addition, you can use a leaf made of fabric of the appropriate color.
Patchworking style gives old items the opportunity to get a completely new look. Any beginning needlewoman can master the technique.
Patchwork sewing step by step for beginners
Not many people know how to make things using patchwork. For beginners, the technique, step-by-step photos, and diagrams proposed in this article will become indispensable assistants in a new business.
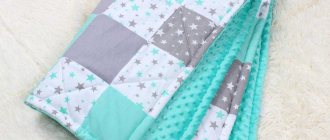
Blanket
Before actual work, you should decide on a pattern, choose a fabric (the best solution is one fabric of different colors, as well as a single-color fabric for the back side) and filler (usually padding polyester is used), make templates from cardboard or any other dense material (here we consider making a blanket from squares).
Step-by-step instruction:
- First of all, using templates, you need to cut out the required number of square elements. Their number and size depend on the personal desires and preferences of the needlewoman.
- Then, placing the scraps next to each other, you need to sew them together along the marking line from the wrong side. Having combined all the elements with each other, thereby creating the front side of the blanket, they should be carefully smoothed with an iron.
- The plain fabric for the backing should be laid out on a straight surface and the filling should be placed on top. The padding polyester needs to be cut out with a margin on each side. To prevent the filling from pilling in the corners, it must be quilted (from the center to the edges).
- The last step is to sew all three layers together. If the layers slip when stitching, they can be pinned down with pins or needles. To prevent the blanket from starting to fray at the edges over time, they can be stitched with braid.
Popular articles A small gift for the New Year
Rug
To make a rug, you can use small trimmings of an unlimited number of colors. However, you definitely need to purchase a single-color fabric (2.5 times larger than the size of the planned carpet), transparent fabric and filling. A single-color fabric should be laid out on a straight surface, and the filler should be placed on top so that it takes up only half of the fabric.
The second half needs to be covered with the filling on top, sewn and topstitched. Next, on the resulting “pad” you need to randomly (but artistically) distribute scraps of different shapes, colors and sizes, which are then covered with a transparent piece of fabric. Now the rug needs to be stitched over the entire area so that it does not fall apart.
Tack
It is best to use denim to make potholders, as it is quite dense and takes a long time to heat up. It can be performed using any of the techniques described above, but the most popular is the “Well” technique. To do this, you need to cut 10 strips of different lengths from denim fabric of different colors. Then all the elements must be combined according to the appropriate scheme.
Patchwork for beginners is used for sewing oven mitts, blankets, pillowcases, etc. Step-by-step technique, photos, diagrams can be found on the website.
The final touch is the framing of the potholder: you can sew any tape along the edges, which needs to be turned into a loop at the edge. This version of the technique is intended for beginners, but after getting the hang of it and studying many step-by-step photos, instructions and diagrams, each needlewoman will be able to perform more complex work using patchwork.
Patchwork entered the life of the Russian people a very long time ago, but in recent years it has not only not lost its luster, but is also becoming increasingly popular. Moreover, today this method of sewing is used not only by needlewomen for home design, but also by fashion couturiers for branded clothing.
