Selection of thread shade
Of course, an important point will be the selection of the required thread color. The task will be greatly simplified when the fabric of the product and the button have the same color and shade. If they are different , you should pay attention to what type of button it is.
A flat button attracts a lot of attention, and therefore its color should be matched to the color of the thread. When doing the work, the stitches that will be made on the front part will hide the color a little. If the buttstock is chosen on a leg, then the selection of thread should be carried out based on the color of the product (fabric), because in such a case the thread will not be noticeable from the outside.
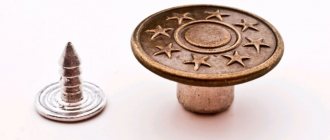
Installing a denim button using available tools.
And milla-sidelnikova.com is in touch with you again!
We continue to learn how to install denim buttons manually, at home, using improvised means and tools.
We have already learned how to install a denim button on a double leg (with two spikes) (the second link in the block of links below in the article).
And we already know that there are several types of denim buttons (the first link in the link block below in the article). And when installing denim buttons, each one needs its own approach.
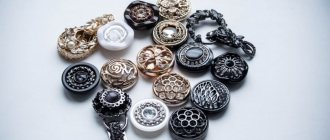
Denim buttons. Kinds.
How to put a button on jeans using special tools?
Installing a denim button using available tools.
How to change a button on jeans?
But they all have a lot in common.
1. The hardest thing about installing denim buttons is that many of them have a convex or concave top shape. This can become an insurmountable obstacle. Indeed, with the inevitable blows to the button with a hammer, these forms may change, and not for the better.
What can be done in this situation?
- Do not buy such buttons.
- If purchased, take them to a specialized workshop to install them.
- If the bulges are insignificant, you can dig out a recess under them, for example, under a small pebble-decoration in the center of a button, in the wooden surface of a block on which it is desirable to install all the denim buttons.
- You yourself, those friends or relatives who have been sewing clothes for a long time, may have accumulated the remains of special devices for installing buttons, eyelets, rivets, etc.
Here you can use them.
2. As I already wrote in this article, when choosing denim buttons it is better to take a set at once - a button + a stud.
But what to do if it did happen that this couple turned out to be from different “classes”?
It's easier with denim buttons with central holes on the surface of the button. (Read below in the article).
But with buttons without central holes on the surface, you can do this. In the place marked for the button, you need to measure with a toothpick, at the same time, the depth of the hole in the leg of the button and the thickness of the product on which the button is installed. (The toothpick is inserted through the hole made in the material, and at the same time into the hole on the button stem).
And then this measurement needs to be compared with the length of the nail. If it is longer than necessary, it can be cut off (bited off) with side cutters or
pliers.
Or you can put a spacer under the nail on the wrong side,
cut from something unnecessary and plastic.
3. But the first thing you need to do when attaching any denim buttons to a finished garment is to decide and mark the future location of the button(s).
4. Then, despite the fact that some of the nails that are paired with a denim button have a fairly sharp edge, it is simply necessary to make a puncture in the material so that the nail does not cause puffs. The puncture can be made with an awl, nail, thick needle, etc.
Since some nail rods are quite wide, sometimes it is better to make a hole for them with a punch.
5. All types of nails, all denim buttons without exception, are inserted into the hole in the material from the wrong side,
and the button itself is adjusted to the stud on the front.
6. The button will be installed correctly and evenly if any type of stud fits into the hole of all jeans buttons without exception in a strictly vertical line.
How to install denim buttons on a fixed and broken leg without a through center hole on the surface?
7. To install denim buttons with fixed and broken stem, and without center hole,
All that remains is to hit the head of the nail with a hammer! .
If someone knows, has done it, it’s like hammering a nail into something. Only this must be done without “fanaticism”, and literally in one or two blows to the head of the button stud.
Everything, denim buttons without a central hole, on a fixed and on a broken leg, are installed.
How to install denim buttons on a fixed and broken leg with a through central hole?
8. To install denim buttons with a fixed and broken stem, with a central hole, on the finished garment,
You also need to insert a nail into the hole in the material from the wrong side of the product. And if it is a nail with a circular notch, then all that remains is to hammer it in and the button will be attached to the garment, just like buttons without central holes (see above in the article).
If these are smooth all-metal or hollow tubular nails and they easily fit into the hole on the leg, then you just need to insert them there.
If it’s difficult, you can push them slightly there with a hammer.
And now, as I said above in the article, you can see whether the stud is sticking out above the surface of the button, whether the stud needs to be shortened, or leave everything as it is. (See the article above on how to shorten a carnation.)
9. Now you need to secure the nail in the button. To do this, on the wrong side, under the head of the button stud, you need to place something flat, metal. For example, a hammer. And from the front side, from above, directly into the central hole of the denim button, you need to insert a bolt of suitable diameter and
With a few blows of a hammer on the nail, flatten its top. It will spread out in the hole of the button, and thereby secure itself there.
That's it, the denim buttons on a fixed and broken leg with a central hole are installed.
10. But it’s so easy, only cloves with a cone-shaped top are flattened.
If the carnation is smooth, with a tube-shaped top
then its top must first be “turned around” by hitting something like a dowel (or something similar) with a cone-shaped end.
And when the top of the tube spreads out to the sides with its petals, then you can hit the bolt with a hammer into the hole of the button to secure the nail.
Having installed several currently existing types of denim buttons, we can draw an unambiguous conclusion.
The easiest way to attach a flat denim button to a finished product at home is without a central hole and on a nail with a circular notch.
Therefore, if there is a choice and the opportunity to “use” just such a button, with such a stud, then it would be best to opt for them.
The buttons on jeans are subject to the most significant stress. And that’s why many people are interested in how to replace a button on jeans. The next blog article will be devoted to this burning issue.
And for today, good luck to everyone and goodbye! Sincerely, Milla Sidelnikova!
Needle selection
Before performing the process of sewing buttons, it is worth choosing the right working tool, in this case a needle. As a rule, a needle of medium length is considered ideal. But if a needlewoman is working with very dense fabric, then a needle of medium diameter and length will not be suitable.
The end of the thread must be tied in a knot when working. The work can be done either in one thread or in two threads. The choice depends on the size of the buttons. For small buttons you can use one thread. If the buttons are large, then they need to be sewn in two threads for greater reliability.
Final fixation
Reliable design and final fastening can be ensured using:
- Passing the needle through the fibers of the fabric on the wrong side;
- Tying a knot using the resulting loop.
How to sew a stock on a leg
Designers and fashion designers usually sew this type of buttons on as decoration. Pedestal stocks are capable of carrying heavy loads, significantly more than their flat counterparts. This fact further confirms their necessity in the world of textiles, as well as the knowledge of how to sew them onto fabric. Since they are a massive element, to work with them it is worth using a strong thread that is folded in half. However, the thickness of the thread may not be suitable due to the small hole in the button on the stem.
It is worth starting the process from the wrong side. The fabric should be punctured together with the button puncture. Repeating this action is necessary; it should be performed several times. Getting into the same hole will ensure not only the beauty of the stitches, but also the strength of the element sewn to the clothing.
Do not sew buttons tightly, pressing them against the fabric. A special gap between the fabric and the button is necessary. Making such a gap is very simple . To do this, take a match and place it between the fabric and the button, on the front fabric of the product. Then you need to make 4-5 turns under the button, piercing the fabric towards the underside of the fabric. Then you should fasten the thread. This way the thread on the button will look beautiful. The process is completed after cutting the remaining piece of thread.
How to sew a button to a mink and other fur coat
There are several options that will require skills in sewing buttons to a fur coat. This could be an accidentally torn button or a design move to update the item and give it a new role. Whatever the reason, you can take the fur coat to a studio, or master the nuances yourself and do everything yourself. Let's look at how to properly sew a button to a fur coat at home (we're talking about a button without a stem):
- First you need to prepare a match, scissors, a long strong needle with a large eye, a thick thread (No. 60 - No. 80) to match the fur and two buttons (decorative and purl - small and flat). Thanks to the additional button, the load on the skin of the skin will be significantly reduced, which will prevent tears at the point of its attachment. You should check in advance whether the eye of the needle can easily pass through the holes on the back button;
- you need to free the holes on the flesh (the wrong side of the skin) from the remaining threads;
- the thread must be made double in order to secure the element more firmly to the surface of the fur coat and tie a knot;
- sewing begins from the inside out. You need to attach the purl button to the flesh and bring the thread through it to the outside of the product. Next, you should insert a needle into the hole on the decorative button and pull the thread;
take a match and place it under the decorative element. Bring the thread through the second hole to the wrong side, making a loop over the match. Repeat steps 10 – 15 times;
pull out the match. Wrap the thread around the “stalk” about 5 times, forming a foot around the button, which will ensure that the button is placed freely on the surface of the product. Due to this, the decorative element will not crush the fur;- secure the structure. To do this, you will need to thread the leg with a needle and bring it inside out, then return to the front side again. Do this several times;
- then you should wrap the thread around the needle 3-4 times, pull the needle through the stem, tighten the loop tightly;
- Bring the thread to the wrong side and cut it.
You should keep an eye on the fur fibers and straighten them while sewing on the button. If desired, the holes can be masked with rhinestones that have a special backing for fastening.
How to properly sew a beautiful button to a mink coat at home? The process completely repeats the steps described in the instructions above. The main thing is to choose the right needle thickness so as not to seriously damage the mink’s interior. The color of the thread should match the color of the fur.
You should pay attention to the direction of the pile so that it does not break when attaching the decorative element. And, of course, it should be an expensive, exquisite button model in order to fully reflect the beauty of a mink coat and emphasize the status and elegance of a woman’s image
How to sew a button on a leg to a fur coat yourself
It happens that the selected decorative button already has a stem. Let's figure out how to sew a button on a leg to a fur coat yourself. Essentially, the technology is the same, with the exception of one nuance. You need to wrap the threads under the leg to give the button a little freedom.
So, you can add individuality to a fur coat by adding original buttons to it. This will make the model unique. And the woman will amaze others with her stylish and chic look.
Sewing on a button with two holes
To sew on a button that has two holes, you need to take:
The choice of this thread size is determined by its ideal thickness. Very thin threads usually look sloppy on a sewn product. After threading the thread into the needle, you need to secure its ends into one small knot. After securing the thread to the product, you need to mark the location of the button on the garment. An ordinary soap remnant is ideal for this. Use it to make a mark in the form of a small cross on the front of the product.
After making the marks, you need to pierce the wrong side of the garment with a needle onto the front part of the product. Make sure that the thread is positioned slightly above the center of the soap mark. Then you need to thread the needle through one hole and thread the thread into its other hole. The sewn button will look neater if it falls into the same hole, designated earlier. When several repetitions of the above action have been performed and the thread looks like one piece, you can secure the sewn element.
Do not tighten the thread when sewing. After all, a thread that is pulled too tightly will ensure a very tight connection between the clothing and the button, making it not very convenient to fasten the product. The thread is tightened using a loop formed by looping the thread around the button and threading the free end through the loop.
This manipulation must be repeated several times and the remainder of the thread should be cut off. The sewn stock will hold tightly and perform its function in the future.
Coat button
The subtleties in this version are as follows::
- You will have to work with a very dense material with lining.
- You will need to sew on a subbutton (counter button).
The first problem can be solved by choosing the right thread and needle. Let's look at the second one:
- We mark the places where the fasteners are attached on the clothing.
- We pierce the fabric from the outside, stretch the thread until the knot stops, towards the wrong side.
- We string the buttonhole.
- Pull the thread back.
- We thread it through the hole of a large button.
- We make a bunch of buttons with several loose stitches.
- We fasten both buttons in the same way as any other.
It's not that difficult. The main thing is to take care of your fingers, don’t forget about the thimble.
How to sew a button with four holes
You can sew on a button with four holes using the same pattern as with two. With only one difference: they do it crosswise. This method allows not only to hold tightly to the item of clothing, but also to provide its owner with good spirits, as evidenced by the Old Slavic rune.
A button is not only an indispensable element of clothing, but also a harbinger of danger or good luck for its owner. If a person finds a button on the road, then you can be sure that the person’s path will be pleasant in nature with a positive ending. Pleasant changes on the path of life will not keep you waiting.
Finding a button in an unexpected place symbolizes advancement through the ranks and successful work. If a person finds a button with four holes, and its color is green or white, then you can expect good news and a monetary reward in the near future.
You should not pick up a found black button with several holes: this item does not bode well for its new owner.
If you notice that a button has come off from any item of clothing, do not immediately get upset. Firstly, you can return it. And secondly, it hints to its owner about changes in life, or more precisely, that now is the time to make a serious decision to change his lifestyle. A torn button may also indicate that in a person’s immediate environment there is an envious person who is preventing the person from achieving their goals.
Since ancient times, people have interpreted the torn buttons of a bachelor as a sign of his imminent marriage, or rather, the need for marriage.
Guzik (“button” from Belarusian) itself can act as a strong talisman. For example, if a person suddenly meets an unpleasant and angry acquaintance, then in order to reflect negative energy from oneself, one can button up oneself. They will help you build a kind of cocoon into which no flow of negativity can break through.
Losing a button is easy and simple. In magical terms, such a situation becomes a symbol of the loss of something in life and troubles.
Now you can sew on a button
Even for the smallest buttons you need to make a leg, or at least wrap several turns of thread around its base. This must be done on any product, not only on jackets, fur coats or sheepskin coats. The fact is that when a button is fastened into a loop, it should have a little “freedom” for the thickness of the fabric and easy passage through the loop. In addition, a button with a small shank or with a gap will last longer. since the threads and fabric will not “strain” during fastening.
The simplest technique for sewing a button with a stem is to place a match between the button and the fabric. This will allow you to later wind the “leg”, which is necessary for almost any button. The leg is needed not only to make it easy to thread it through the loop, the leg protects the fabric, for example a silk blouse or a dress made of thin material, from tearing.
For thin fabrics, you can use a paper match rolled into a paper tube. To sew a large flat button onto a heavy wool coat, use a wooden oven match. Do not use a toothpick instead of a match; it can easily prick you while working.
Find the place where the button was previously sewn. Carefully remove any remaining old thread. Now pierce the fabric from the inside out, trying to get to the point where the thread previously passed. Pull it all the way out, loop it past the match and thread it through the eyelet, pulling the thread taut. Insert the needle on the other side of the match. If the buttons have four holes, sew stitches with a cross or two parallel stripes, following the pattern in which the other buttons are sewn, not forgetting to make each stitch from different sides of the match. After making about ten stitches, bring the needle out into the gap between the button and the fabric.
Video on how to sew a large button to a sheepskin coat.
Sewing a button for good luck and money
It’s very easy to sew on a magic little tail for good luck. To do this, first of all, you need to go to the store and choose the button that you like more than the rest. It's best that it be new. It is worth sewing an element to clothing with positive thoughts. The day chosen should be unusual - the day of the waxing moon. This way, the item of clothing will be filled with magic and will have a positive meaning for its owner. There is no point in casting a magical spell in such a case. Guzik will become a talisman for its owner.