A rug is a practical and useful thing in every home. It gives a feeling of comfort, warmth and coziness. If you need such a thing, do not rush to the store. Try making a rug with your own hands. There are many benefits to this process. Firstly, a rug made by yourself will be unique; it can have any shape, size and design. Secondly, it will help you save money. Thirdly, you will get rid of old unnecessary things. In this article we will look at how to make a rug from scraps of fabric with your own hands.
Rug making techniques
Knitting - narrow strips of fabric are tied together according to the classical pattern.
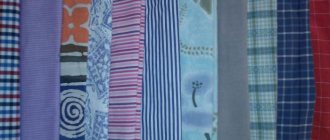
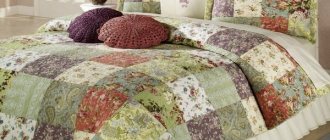
Patchwork – scraps of fabric are sewn together to create a mosaic.
Weaving - a special base is used on which scraps of fabric are woven or applied.
Stitching - parts of the rug are created, for example balls with padding polyester or braids from scraps of fabric, then all the parts are sewn together to form a rug.
Knitted rug made from scraps of fabric
You will need: old T-shirts, T-shirts or fabric, scissors, a crochet hook or knitting needles (it is more convenient to crochet a rug).
Master Class
- Cut the bottom seams off the T-shirts.
- Cut the T-shirts into long, narrow strips, or cut the item to create a continuous strip.
- To create a rectangular rug, take simple chain stitches in single crochets.
- To create a round rug, take 5 loops, close them into a ring and add loops on each row.
The knitted rug made from scraps of fabric is ready! I recommend watching the video master class!
How to crochet a rug from rags with your own hands
Rugs made from old things, what techniques can be used
Old things are an excellent material for creativity, which a thrifty housewife can always find. T-shirts, unusable towels, and any wardrobe items can always get a second life. But it is still very important to understand that in order to create new things from old ones, it is necessary to pay attention not only to the material for creativity, but also to the technique that we choose for this.
After all, rugs from old things can be:
- weave,
- to tie,
- sew.
And we will try to create a rug from old things with our own hands step by step, using detailed master classes and getting an excellent result.
Weaving
One of the oldest and most proven techniques for creating carpets is weaving. After all, this does not require a lot of knowledge or skills. And sometimes the simplest tools are required, easily replaced with something that is always at hand. And therefore, it’s worth starting to create your first rug with weaving or weaving.
Weaving according to the principle of macrame
If you think that macrame is only suitable for creating baubles and small decorative elements from cords and ropes, then now we will dispel this belief. After all, if instead of a thin lace you take something more voluminous and dense, then the result will be completely different.
There are no difficulties or tricks in weaving rugs from old things that are inaccessible to novice craftswomen. As in any technique, the main role here is played by the sense of taste and the desire to create. Therefore, any set of old clothes can easily be turned into a charming bedside rug with a little effort.
Basic knots and pattern combinations are great for weaving. But it is worth considering several factors:
- The rug is used actively and therefore needs to be washed from time to time,
- they will not only trample on it, but can sit, lie or use it as a bedding on a chair,
- it must fit into the overall interior.
That is why when choosing knots, do not forget that the rug should:
- look like a new, not well-worn rug,
- have a dense structure so as not to crumble in your hands and not turn into a string bag,
- not be easily soiled or bulky, for ease of cleaning.
And therefore, the most common way of weaving at present is to use the principle of French bracelet knitting.
Such a charming rug will definitely not go unnoticed in the house and will highlight the interior and taste of the owner. And to create it you won’t need much:
- wide strips of old things,
- adhesive tape,
- scissors,
- thread and needle.
To begin, arrange the 5 strips in the order you like best. Next, fold 5 more strips, but in a mirror image.
It is most convenient to fasten all the ends from the beginning side with adhesive tape. This will allow you not to be distracted during the weaving process, and also clearly define the sequence.
So, when all the ribbons are laid out, we take the leftmost one, take it to the side and fold it so that it lies on top of all the others, creating the number “4”. We place the working tape behind the adjacent one and tie the first knot.
We continue to tie the same knots on the next 3 ribbons, and then move to the opposite side, starting to weave towards the first series of knots.
When both working strips meet in the middle, tie them and continue weaving from the edge. Once you've reached your desired length, simply tie the last knots with a strong thread and trim off the rest to create a cute fringe.
The original master class from Lena Vorontsova will clearly and in more detail show how to weave a rug with such an interesting zigzag pattern.
Weaving on frame and hoop
However, if you want to get a denser rug from old things, and you don’t have enough work space to weave it, then you can weave it, as they did many hundreds of years before we were born.
And for this you do not need a special loom, threads or special tools. You just need to arm yourself:
- a strong frame (a frame for large photographs is quite suitable for a small rug),
- carnations (you can even use stationery ones),
- narrow strips of fabric from old things.
First we need to make an improvised machine. To do this, nail nails at equal distances from each other on two opposite sides of the frame. Stretch the threads between them to form a base, and then stretch the working strip of fabric under and over the base until you reach the desired width of your future rug. The result will be a very simple pattern, similar to chess weaving.
If you don’t like the fact that the warp threads are visible in the rug, then try following the advice of Melania Ars, which she shares in her video master class:
But the most interesting thing about weaving rugs with your own hands is that they don’t have to be straight. You can even create a round rug without much effort. You just need to find a suitable hoop or a large, strong ring.
The principle of weaving a round rug will not differ much from a rectangular one. You just have to note that you won’t need any nails, because you just wrap the hoop with the main thread. And then weave strips of fabric, starting from the center to the edge, alternating them under and above the base.
Once you have reached the desired rug size, simply cut the warp threads from the hoop and tie them tightly. And for greater reliability, you can run a needle and thread along the last strips to carefully sew them and fix them with each other and with the base.
To create such a rug, do not forget that it is best to use material with less elastane content. After all, after being removed from the hoop, it can become greatly deformed and become much smaller.
Depending on the choice of color and materials, you can create bright rugs that look more like mandalas, or calm rugs that are perfect for living rooms, country houses or bedrooms.
Braiding
Yet weaving on a loom also requires space and time. After all, we need to stretch everything well, place our frame somewhere, and even hide it from household members so that they don’t accidentally drop anything. And everyone knows how to braid hair.
It would seem, how can you compare braids and a whole rug? But there is a connection here. After all, a long and thick braid of fabric can turn into an excellent thick rug that you can place in your home.
What will it take? Nothing supernatural:
- old things that you don’t mind cutting into ribbons,
- pins,
- thread and needle.
So, first, we secure three strips of fabric with a pin so that they stick together well, and weave a tight braid. And then we twist the resulting braid into a spiral, grabbing it with threads around the perimeter so that it holds well.
You can sew the rug along the entire length of the spiral using a sewing machine and a zigzag stitch. This way you will give it rigidity and be sure of its durability.
You can understand in more detail how to fold and then sew a braid to make a rug out of old things with your own hands, thanks to the step-by-step master class from BurdaStyle.
These rugs are very easy to create, they are durable, bright and suitable for most modern interior styles. But an important question that arises when weaving them is how to prepare the longest braid ?
Since we are weaving from old things, and not fabric purchased by the meter, the strands will run out much earlier than we achieve the desired length. Of course, you can sew the ribbons together or tie them with a tight knot, but in these places the braid will become thicker and this will spoil the appearance of the future rug.
How then to solve such a problem? It’s very simple - when the tape begins to come to an end, but weaving is still in full swing, make a cut in the middle of the working strip and exactly the same on the new one that you want to attach. Insert the working tape into the slot of the new one, stretch it a little, and then insert the new one into the hole of the working tape. Pull both strips in different directions. Now you can continue braiding. This method of joining ribbons is presented more clearly by the Free Painter master, who talks in detail about how to join ribbons without seams or knots.
Don't forget that you don't have to twist the braid, you can fold it like a snake or lay it parallel to one another to get a charming rectangular rug with fringe.
Knitting rugs from old things
It is not necessary to weave rugs from old things; knitting is considered a more common solution for creating them.
Even if this is your first time picking up a hook, you will be able to create a charming and practical decorative element. After all, it is the large knitting that will help you quickly understand the intricacies of crocheting. And a pattern made from the simplest single crochets can look very bright and original if you choose the right yarn.
Moreover, yarn is also made from old things. This is how things can go:
- old T-shirts,
- jeans belts,
- just thin strips of fabric left over after sewing outfits.
It is enough to know and be able to knit increases, and then it’s a matter of technique.
If the yarn taken for the rug seems loose or thin to you, you can use an excellent trick - at the beginning of knitting, insert a strong cord into the stitches and continue tying it. This way your spiral will keep its shape perfectly.
To get a more openwork rug, knit with double crochets, increasing their number in each row. But keep in mind that although such knitting will be beautiful, it will be less dense.
Openwork rug
Thick cord rug
It is worth noting that you can knit a rug from old things without a hook - an interesting technique of knitting from rings on your fingers will help you cope with the disposal of small pieces without spending extra effort and without forcing you to buy any special tools.
You can learn how to knit from rings from Olga Popsueva. In her video master class, she explains in detail how to weave a braid and then form it into a rug.
Patchwork
When talking about using old things to create rugs, it is difficult to ignore sewing. After all, sewing from scraps began a long time ago and independently of each other in different countries.
As now, women did not throw away old clothes, children’s dresses or their husband’s worn-out shirts, preferring to collect them and then sew blankets, bedspreads, curtains and, of course, rugs. It’s no longer a shame to trample such rags, cut them and assemble them into various intricate patterns.
Over time, patchwork turned into a separate direction and began to occupy its rightful place in the field of needlework.
Shred garden rug
Magic patterns
But do not forget that despite the evolution of such sewing, its main task was initially to use old things for a second time. That is why many craftswomen are appearing again, using old clothes, towels and even umbrellas in patchwork. The main thing is to skillfully put into use something that has long ceased to be used for its intended purpose.
Carpet technology
But let's return to more classic ways of creating rugs. For example, to carpet technology, which creates interesting, soft and even fluffy rugs.
Fluffy rugs on mesh
In the last few years, fluffy rugs have become very popular, making it so much fun for children to play and crawl in them. And it’s just nice to immerse your feet.
The high pile and soft texture have won the hearts of craftswomen and housewives, and the bright colors attract the attention of household members. But what’s most pleasing is the fact that you can make such a rug without using any special tools.
A fluffy rug can be created in different ways:
- tying the cuts in knots,
- using a carpet hook,
- using the simplest crochet hook.
Our basis will be a mesh from a hardware store with a large mesh or a bath mat with holes.
In addition to the basics, we also need:
- fabric ribbons,
- scissors,
- hook (optional).
To begin with, cut short ribbons, but do not skimp on their length, because you need to take into account that they will be folded in half, and even tied or otherwise fixed to the mesh. Therefore, it is better to make them longer, and then cut them as you want.
When everything is ready, you will be left with the most important task - thread the strip of fabric into the cell so that both ends remain on the front side, and then you can tie them together with a simple knot, or pass them through a loop using a hook.
When the flaps completely cover the mesh, all you have to do is cut them to the desired length and the rug made from old things is ready to delight you and your feet.
Fluffy rugs using a sewing machine
If you don’t want to waste your time tying each individual ribbon, or you haven’t found a suitable mesh, then you can go in a simpler way, for which we will need:
- an old pillowcase or piece of fabric that will become the base,
- all the same ribbons from old things,
- scissors,
- sewing machine.
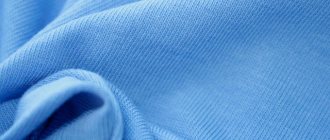
Knitted fabric is best suited for such rugs, as it is more elastic and soft. In addition, it is easy to sew on without fear of breaking the needle.
Bright carpet made from old knitwear
Heart shaped rug
After you cut the required number of ribbons, pull them lengthwise so that they curl a little, and then simply apply them to our base and sew them in the middle, row by row.
Don’t worry if the strip doesn’t lie flat, you can always trim the entire pile, leveling it to the desired length.
Rug made from patchwork fabric scraps
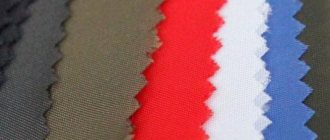
You will need: thick fabric (for example: drape, gabardine, tweed), lining (for example: batting, foam rubber, padding polyester, carpet backing), scissors, thread, needle, sewing machine (if you don’t have one, don’t despair, the work can be done manually), iron.
Master Class
- Iron the fabric.
- Cut the fabric into strips of the same size.
- Take the lining and pre-place strips of fabric on them. They can be arranged horizontally, vertically, in a chaotic order, creating a pattern according to a certain pattern.
- Sew strips of fabric onto the lining or sew them on by hand.
A rug made from patchwork fabric scraps is ready!
Woven rug made from scraps of fabric
You will need: old T-shirts, T-shirts or fabric (it is better to use knitted fabric), scissors, a large wooden frame, a ruler, nails, a hammer.
Master Class
- Take a wooden frame for future weaving.
- Drive nails 2.5 cm apart on two opposite sides of the frame.
- Cut the fabric into strips.
- Stretch the strips horizontally and secure them to the nails. This will be the base of the rug.
- Weave the first strip this way: pass it under the base of the rug, and then over it. The strip should be positioned vertically in relation to the horizontal base and should be in contact with all strips of the base of the future rug.
- Weave the required number of strips, creating a good density of the rug. Don't forget to pull the woven strips towards the first strip.
- Secure the weave with knots on the wrong side.
- Remove the finished product from the wooden structure.
The woven rug made from scraps of fabric is ready! I recommend watching the video master class!
Rug made of shreds woven on a frame (with comments)
Preparing yarn
Before you start knitting a rug from a variety of T-shirts and knitted rags of different colors with your own hands, you need to prepare the yarn.
Attention! The denser the fabric, the narrower you cut the ribbons for work.
Let's look at the step-by-step process of preparing yarn:
- wash and dry things well;
- cut them into even strips of equal width (about 1.5 -2 cm);
- stretch the ribbons a little so they curl into yarn;
- sew the strips together;
- Carefully roll the stitched ribbons into balls (make sure that they do not twist and have uniform tension).
It will be great if the balls turn out to be multi-colored.
The width of the strips depends on the density of the material. The thinner it is, the wider the cut strips.
Note! Knitwear for work can be cut in two ways: in a circle and in a spiral.
Rug made of pompoms
This rug is made using the patchwork technique. It is very warm and soft and children really like it.
You will need: old T-shirts, T-shirts or fabric (it is better to use knitted fabric), scissors, padding polyester or foam rubber, thread, needle.
Master Class
- Cut the fabric into squares of the same size.
- Form balls from padding polyester or foam rubber.
- Make pom poms by combining squares with fillings.
- Sew the pompoms together or sew them to the fabric base tightly to each other.
The pompom rug is ready! I recommend watching the video master class!
PATCHWORK ✨✨ WE SEW a voluminous rug #with our own hands!!! Patchwork technique
Knitted product
To create a T-shirt rug, use a size 15 hook.
It’s good if, before creating a rug from outdated old T-shirts, you had experience in crocheting or knitting.
Instructions: knit a ring, then tie it in a circle using double crochets, chain loops and skips.
The openwork product is obtained using air loops.
Knitting the rug in the round is done to the required size.
You can knit beautiful crochet rugs from T-shirts filled with a variety of patterns.
By alternating different knitting techniques, you will get a beautiful and practical rug.
Grandmother's rug made from scraps of fabric
You will need: old T-shirts, T-shirts or fabric, scissors, ruler, thick thread, needle.
Master Class
- Cut the fabric into strips 5 cm wide.
- Weave a long braid of stripes. As you weave, increase the length of the strips by adding other strips, securing them with a needle and thread.
- Twist the braid in a spiral and do not forget to periodically secure it with thread on the wrong side of the product.
Grandma's spiral rug is ready! I recommend watching the video master class!
How to make a round rug from old T-shirts
DIY rugs made from braids
Do you know how to braid hair? The usual one, of three stripes? You can make amazing rugs with your own hands. What’s great about homemade braided rugs is that you can make them from just about anything. Any old things will do. Literally any. The best place to start is with knitted t-shirts. Soft, flexible material that is easy to work with. You can also use:
- Old towels, sheets or terry robes.
- Knitted items (sweaters, jumpers, but not very thick).
You can make amazing carpets from cords - Fleece blankets and sheets that have lost their appearance or relevance.
- Cords - ready-made or woven, tied.
- Old bathrobes, colored sheets.
- Jeans.
You can make very interesting and beautiful rugs from old things. And not only for the dacha... - Children's tights (and women's, by the way, too).
- Jute ropes.
And whatever you find and consider possible to use. When selecting materials, we try to find them of approximately the same thickness and density. Then there will be no problems with weaving. At first, you don’t have to think about choosing colors. When experience comes, it will be possible to select colors. It’s more pleasant to work with knitwear and terry cloth, but old jeans and jackets can also work.
Preparing tapes
We prepare the material for the braids - we cut the found “treasures” into strips. The width of the strip depends on how thick you want the rug to be. To begin with, you can make knitted strips 6 cm wide. Strips of terry cloth are also made of the same width. But in the case of knitwear, the rug will be 2-3 cm thick, terry - at least 5 cm.
If you use T-shirts, cut off the “body” exactly at the armpits. We use the resulting pipe in this form. We cut into strips, but not completely, but leaving 5-7 cm uncut at one seam (as in the photo on the left). You'll soon understand why.
How to make a long strip of T-shirt for a homemade rug
Turn the uncut part towards you (as in the middle photo), take scissors, and cut along the bias from the bottom to the first cut. The next gap is also cut on the bias. And so on. You complete the last whole piece like the first - reduce it to nothing to the edge. The result is a long strip, several meters long, with barely noticeable seams. And there is less work - no need to sew. It’s easier with towels - you just cut off the edge, then cut it into ribbons, but they will need to be sewn.
During operation, the tapes will have to be connected. They can be tied or stitched. But there is a convenient way that allows you to reliably connect two strips of fabric/knitwear without a needle.
How to join two strips when weaving a rug
We place the edges of the strips one on top of the other, by 3-5 cm. We cut a hole 1.5-2 cm long approximately in the middle (with a strip width of 5-7 cm). We pass the free strip through this hole. The result is a reliable knot, which, nevertheless, does not interfere with weaving, does not stand out and is not felt later in the product. To understand how it works, try it on small pieces.
Braiding hair
The braid is usually woven from three ribbons. The length of the stripes should not be the same. They will need to be tied or sewn (it is better to sew). And it is much better if the connection points are spaced some distance apart.
Preparing the “material” for a braided rug
We fasten the selected strips together. They can be wrapped in thread, sewn, knitted. The thickest knot is obtained. This is not always convenient. We braid a pigtail. When one of the strips ends, we sew or tie the second one.
Footage - as needed or desired. It also depends on the thickness of the braid. If it turns out to be voluminous, you won’t need much length. If it is thin, then you will need 5-8 meters. In any case, you can not finish the weaving, but fix it with something so that it does not unravel. You can grab it with a thread and a needle, tie it with a rope, or use a binder.
DIY rugs made from T-shirts: you can start assembling and not finish weaving
Assembling the rug
You can make a rug of any shape from a woven braid: round, oval, square, rectangular. To make a round homemade rug from T-shirts, twist the braid into a spiral on the table. Take a large needle and strong thread and sew it together. We make small stitches, connecting the woven braid centimeter by centimeter. This is perhaps the most time consuming part. But with this method of connection, a double-sided mat is obtained.
Weaving a rug from fabric strips - sewing braids
To prevent the end of the rug from looking unsightly, make the stripes increasingly tapering for the last meter or so. So that the braid becomes thinner and thinner. The length of this “tapering” section is equal to at least half the finishing diameter of the rug. It’s not a problem to fold a narrow edge down and sew it there. You can also hide the “tail” under one of the stripes in the braid. In general, this completion is aesthetically pleasing.
Oval rug made from T-shirts, scraps, old things
If you want to make an oval rug, you need to twist the braid around a straight section. The longer the section, the longer the resulting rug will be. If you want a square or rectangular one, you will have to braid the braid “in place.” To ensure that the turns are not smooth, but sharp, a special technique is used.
How to make a twist in a braided rug
At the turning point, leave the bottom strip free. The one that is currently on top wraps around the middle one. You need to make two or three turns, sometimes more. Having turned the work, we weave in a third strip, directing it over the one that was wound and passing it under the “main”. It's difficult to explain in words, look at the picture above.
Special models
Braids woven from old things can be the basis of very interesting carpets and rugs. For example, you can make a number of braids of the same length. Tie them tightly along the edges, leaving 5-10 cm free and cutting these parts into “noodles”. Sew the resulting pieces together. You will get a rectangular rug. It will be convenient near the front door, in the bathroom, etc. You can also make a rather long rug that can be laid near a sofa, armchair, or recreation group.
Variations of rugs made from old T-shirts woven into braids
From fabric or knitted braids you can make a rug from small fragments. An example of this is in the photo on the right (see figure above). You roll up fragments of certain sizes and assemble them. From the same set of “materials” you can get dozens of variations of “carpets” and rugs.
Options for carpets made from old T-shirts. Beautiful and stylish
The imagination of needlewomen is limitless. Models of different shapes are assembled from circles of different diameters, and each of them is unique. This is not an ordinary circle or oval, these are original works.
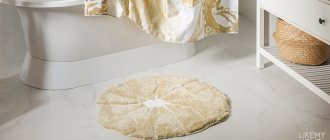
Rug in the shape of grass made from scraps of fabric
You will need: a rigid mesh with large cells for the hook to pass through (it can be purchased at a hardware store), knitted or cotton fabric, scissors.
Master Class
- Cut the fabric into strips.
- Use a rigid mesh as a base.
- Start weaving from the center in this way: place the fabric strip under the mesh, hook both ends of the strip to the front surface, then pull it a little and tie a tight knot on the cell wall.
- Fill all grid cells in the same way.
A rug in the shape of grass made from scraps of fabric is ready! I recommend watching the video master class!
FLUFFY RUG WITH YOUR HANDS
Rugs made from scraps of fabric will last a long time. They are very practical and easy to use. Before creating a rug from scraps of fabric, think about its design, color, shape, size and manufacturing technique. Remember, the rug should harmoniously fit into the interior of your home, elegantly decorate it, and emphasize the decor style. Create an exquisite masterpiece with your own hands!
Patchwork in a modern interior – 50 photos:
PreviousTextilesCreating pompoms from designer napkins
Next
Textiles How to wash fluffy terry towels to keep them soft?