Reasons to master cutting and sewing
There are many reasons to want to learn how to sew on your own. From the desire to learn a new and very useful skill or to show creativity to a way to save money or even just out of necessity. First of all, the sewing craft is so multifaceted - it includes sewing clothes, sewing home decor, creating beautiful things for children or grandchildren, fakes, patchwork, recycling old things and much more. And recently, self-sewing has been mentioned in such terms as “stylish”, “innovative”, “fashion forward”.
At the same time, many are stopped by the very thought of the technical components of sewing: winding a bobbin, what if the needle breaks or the thread runs out on the spool, how to insert a zipper or make loops... The little things are overwhelming, it all seems too complicated, and that’s why many never try learn to sew, despite the desire. But the benefits of learning to sew outweigh the unfounded fears.
How to learn to sew clothes from scratch? Mastering the craft of sewing is entirely possible for anyone, with motivation and practice. On the other hand, it is important to know and remember that sewing is a process that requires patience. Gradually, mastering step by step, from simple to complex projects, sewing will teach you to be a patient and passionate person and will want to sew all the time.
The main motivating reasons to learn to sew and cut from scratch on your own:
- Consider how sewing promotes self-esteem and develops a sense of independence. Whether you're repurposing store-bought clothing or creating a completely new item, it's an amazing feeling to know you can do it yourself!
- Sewing helps you save money. For example, whether you need to replace a zipper, hem a pair of jeans, or fix a rip, all you need is two scissors, a sturdy spool of thread, and a reliable sewing machine.
- Once you learn to sew, you will never meet your “reflection.” Perhaps a woman worries about this more than a man, but in general most people are intimidated when they find themselves face to face with someone who is wearing the same clothes.
- Sewing encourages you to express your individuality. Today it is especially important to be “obsessed” with brands. But making your own clothes means you're not limited by "authoritative" opinions on what's fashionable or should be worn this season. You dictate the trend yourself! And believe me, you will have a completely different attitude towards shopping. Visiting the mall will become more about finding sewing inspiration than spending money. Perhaps you'll set your sights on a particular fabric, color combination, or finish, find a way to incorporate it into your wardrobe, and really impress your friends and acquaintances.
- Sewing allows you to repurpose almost anything made from fabric. Old curtains can be turned into elegant pillowcases, a used blanket can become a new shower curtain, a man's shirt can be turned into a cute dress for a little girl or a fashionable skirt, and an old sweater can be turned into a decorative pillow.
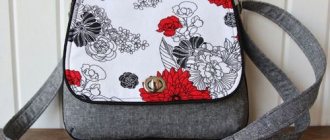
- Sewing can also provide new career potential. Having practiced and gone from a beginner to an experienced specialist, you can sew custom-made decorative towels or make a luxurious bedspread, repair upholstery on upholstered furniture or do amazing things, sew bags, accessories, clothes for pets.
- Why not try sewing couture clothes yourself, creating your own masterpiece with the help of patterns and fabric guides. Without sewing skills, fashion designers cannot be made.
Sewing is good for your health - that's a fact. According to scientific research, sewing calms the nerves and promotes the proper functioning of the body. If sewing helps patients diagnosed with post-traumatic stress disorder overcome their illness, then it can certainly help us relax after experiencing stress, such as at work. Sewing stimulates the mind - in choosing fabrics, patterns, designs and the process itself. The sewing skills of measuring and stitching nourish your brain cells, preparing them to take on more complex tasks in the future. Isn't this amazing?
I want to sew - where to start, what to do?
Before we get into the practical basics, it's helpful to understand some sewing terms. We can prepare everything we need to start sewing, but the instructions for our first DIY project can be confusing if they include sewing terms that we don't understand.
Buying handicraft tools
Sewing as a new hobby can be ruinous if you decide to buy every possible piece of equipment that is available for sewing. We are just learning the craft, and while we do not need to purchase complex sewing tools, it will be enough to have:
- Scissors: large for fabric, small for cutting threads, with serrated blades (for cutting edges). Sharp sewing scissors help maintain precise cutting, preventing hand fatigue. It's worth choosing high-quality scissors and spending a little more money. Tip: Clean the blades regularly and lubricate them periodically; Avoid overextending the blades by trying to cut through multiple layers of fabric at once.
- Seam ripper (sewing mistakes happen, but this tool removes unwanted stitches: the fine tip allows you to pick out individual threads, and the rounded tip removes stitches along the entire seam without tearing the fabric).
- A measuring tape is a must-have sewing tool. It is advisable to have several copies, including a tape measure for measuring body parameters.
- Tailor's pins and pincushion (as a rule, they are filled with sawdust or pieces of wool soaked in lanolin, which prevents the pins from rusting; special pads are filled with an abrasive material: this filler removes dirt and rust, keeping the tips of the pins sharp and smooth).
- Tailor's rulers: 1 m; template for marking and measuring, template for allowances isosceles square, cutting pattern.
- Marking tools (special chalk, marker). A very useful and economical marking tool that will be available to everyone is a bar of soap.
- Assortment of needles for hand sewing.
- Assortment of threads.
- Needle threader: An optional tool for hand sewing, however, some may find it difficult to thread the needle and may need it.
- Steam iron and ironing board, special fabrics (in extreme cases, a piece of muslin) for pressing. Pressing and ironing are an integral part of most sewing projects.
- Sewing awl.
- Round cutter (disc blade for cutting fabric) and self-healing cutting mat to protect other surfaces from damage.
To work on a simple sewing project, such as a tote bag, sachet or decorative pillowcase, you only need a few tools: measuring tape, needle, thread, fabric and sewing scissors.
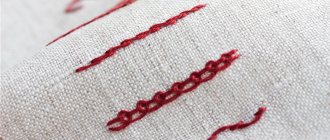
Before you learn how to sew your own clothes, create crafts, or take on other sewing projects, mastering basic stitches is a must.
Although modern sewing machines have virtually eliminated the need for hand sewing, there are still areas where hand-stitched seams are essential for a high-quality finish:
- running stitch;
- basting stitch;
- back stitch;
- long stitch;
- hidden (invisible) seam;
- overlock seam.
Choosing a sewing machine
First of all, let us clarify that there are three types of sewing machines for sewing at home: mechanical, electromechanical and computerized. The motor of the electromechanical machine is powered by the mains, but everything else is controlled by gears, levers and switches. For those who are just plunging into the fascinating world of sewing, it is better to start with a mechanical model. A novice tailor should not be intimidated by the number of options, especially since high-tech machines have so many functions, most of which you may never need to use during the sewing process.
Of course, a computerized sewing machine takes care of a lot of things like adjusting tension, remembering settings, and creating consistent stitches from start to finish and you may need one in the future, but the right thing to do is to focus on learning the basics of sewing with a good basic machine. To get started, all you need to master is straight stitch of various lengths, zigzag and the buttonhole function, which most modern models offer automatically.
It is equally important to have a manual typewriter in your collection as a backup before it comes time to buy an electronic or computerized typewriter. Computerized machines require regular maintenance, which you cannot do yourself, nor can you fix a possible problem in the system that controls the machine.
Regardless of your sewing skill level, there are several basic features that you will need when choosing a mechanical sewing machine:
- A basic sewing machine should have at least a dedicated buttonhole foot and a regular foot. Modern entry-level sewing machines come with a lot of presser feet, which is a good thing. If desired, you can purchase additional accessories and presser feet, but it is important to make sure that your machine is compatible with them (markings: adapter for fastening the feet, low, with an inclined needle bar).
- The choice of stitches (at least 10-15) will make the basic model more versatile.
- Speed adjustment.
- Needle raising and lowering function.
- Stitch length and width adjustment feature, important for fine-tuning each stitch (you may need different lengths and widths to create basics, buttonholes, stretch stitches).
- Reverse stitch function.
Save a lot of time and effort by purchasing a mechanical sewing machine with a vertical rotary hook (bobbin loading from the top, with a transparent cover) and automatic needle threading (although this feature is not available on most entry-level sewing machines, but the needle threading tool can be purchased separately ).
Tools needed for sewing
You only need to buy the most important things:
- Flexible measuring tape. It is used for taking measurements and must have double-sided markings starting from zero;
- Paper for patterns. To create a pattern, graph paper is used. Then it is transferred to tracing paper. The finished patterns are transferred to energy cardboard-thick paper;
Pattern paper is sold in rolls
- Tailor's chalk. It is needed for drawing contours on fabrics. Sold in different shapes, but the tip must be sharpened before use. This is necessary for clarity of lines and necessary comments;
- Scissors. The handles of tailor's scissors must be positioned at an angle with a straight blade. They must be made of stainless steel and well sharpened. For the future, you need to have several types of scissors for different types of fabrics;
The quality of the fabric cut will depend on the choice of tailor's scissors.
Please note! Careful care of scissors is required: keep dry, do not sharpen them yourself, use only for fabrics.
- A set of thin pins. They are needed to fix the pattern on the fabric;
- Needles for handwork;
Note! The thickness of the needle depends on the degree of fineness of the knitwear.
- Tool for ripping seams;
- Sewing threads.
Note! Select threads according to the composition of the fabric. For cotton - cotton threads, for synthetics - polyester.
You may be interested in: Cutting and sewing a straight dress without patterns
- Steam iron and pressing materials.
There is no need to purchase a tailor's table at the very beginning; any wide surface is sufficient. But you will definitely need a decent sewing machine.
Is it possible to learn on your own?
If you prefer to learn the basics of sewing on your own, at a relaxed pace, then available free online lessons or a paper textbook will be a good guide to the world of sewing. They'll guide you through every step, from sewing straight lines to creating buttonholes. Is it possible to learn to sew on your own? Of course yes, but don't expect perfection from the start, remember that learning to sew takes a lot of time and practice and it's okay to make mistakes. The beginning should be accompanied by the creation of simple sewing projects, such as household items. Sewing clothes can be challenging for complete beginners, so it's easier to start with bedspreads or decorative pillowcases.
How to learn to cut from scratch?
Making a base pattern yourself is not difficult if you know how to do it. It is better to sew your first piece of clothing from inexpensive fabric in order to forgive yourself some mistakes that are most likely inevitable during your first steps.
Taking accurate measurements of body proportions is the key to learning how to cut your own clothes and fit them well. All you need is a measuring tape, preferably a tape measure.
Learning to take measurements
Ideally, measurements are taken on underwear, swimsuit or tight-fitting clothing, standing in front of a mirror to see that the tape is in the correct position. Depending on what piece of clothing we have to sew, we take the appropriate measurements. To create a blouse pattern, we need to know the overall length, shoulder length, chest circumference, waist circumference and sleeve length; for trousers - waist circumference, hip circumference, overall length and bottom size; for a jacket - chest circumference, waist circumference, hip circumference, sleeve length, waist length, overall length, shoulder and back circumference.
Marking the measuring points will make the process much easier. For example, the neck: for the girth of the neck, we mark the center of the clavicle bone in front and the dominant bone in the occipital part; when measuring, the tape should touch them, closing above the jugular notch. We measure the length of the shoulder from the base of the neck to the tip of the shoulder, where we feel the rounded bone. We determine the length of the sleeve by measuring the distance from the end of the shoulder to the wrist, while the arm should be freely lowered. Armhole depth: This point is located horizontally on the side seam, and vertically it should be located approximately 1.5 to 2.5 cm under the armpit. The best way is to put on the T-shirt, look under your arm and note where the seams meet in a cross. You don't want to mark too high or too low because this will pull the sleeve into the armpit or make the armhole too low.
Let's start with simple patterns
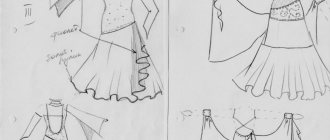
Training begins with constructing skirt patterns. The straight skirt base pattern will lead to other styles including pencil skirts, tube skirts, and circle skirts. Having studied all the techniques on how to learn how to make patterns yourself, you can create almost any style.
Let's move on to basic patterns
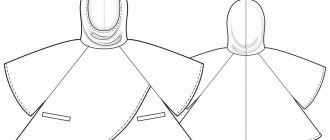
For women, this is usually a cut with a round neckline and a tight skirt. The dress in this silhouette has the same construction method as the crewneck bodice. Based on the base, you can add different types of sleeves or change the neckline.
How to learn to take measurements
To learn how to sew, you need not only to be able to create a pattern, to be familiar with a sewing machine and to know the basics of tailoring technology. You definitely need to learn how to take measurements. Don't think that taking measurements is easy. Unfortunately, it is incorrectly taken measurements that cause inaccurate patterns and cuts. Measurements should be taken from a person when he is standing in a natural position, without tension. However, with increased attention to any of us, we tense up, turning from stooped to slender, “losing weight,” etc. In the future, this results in poor fit of clothing or tightness of the product. To ensure accurate measurements, it is advisable to measure several times, especially if you do not have sufficient experience. Some measurements need to be done by two people.
Before taking measurements, you should girdle your figure around the waist with a slightly stretched ribbon located strictly horizontally. It is advisable to take girth measurements (chest, hips) from the back, so ask someone to help. When taking measurements, stand straight, without tension, in a natural position. It is advisable to take measurements over underwear. Don't think that taking measurements naked will allow you to get more accurate measurements. To avoid inaccuracy, the measuring tape should not be pulled too tight or held too loosely. Record your results in a table.
When creating a dress pattern, it is necessary to take many additional measurements. You will find a list of measurements for creating a dress pattern in this article.
Skirt pattern - pencil. Very simple construction, accessible for beginners. The video is in English, but you can choose captions in any other language. If you like to sew, be sure to subscribe to this video channel. You will learn a lot of useful things. The channel was created by professional tailors.
Choosing cutting and sewing courses
The choice of cutting and sewing courses depends on how much you want to learn in each lesson and what you generally expect from the training. There are programs for teaching the basics of sewing and sewing only basic models, for sewing underwear, for sewing children's clothing, guaranteeing how to quickly learn to sew.
There are expensive courses offering programs that last a year or more, bordering on the professional level, ready to teach clothing design and styling, also intended for people who decide to become sewing professionals, perhaps as designers or textile-related specialties . The competence of teachers plays a big role. What's the point of paying money for cutting and sewing courses, where the teacher is essentially self-taught, having completed short-term courses.
On the other hand, given the huge amount of information on sewing available in special books, DVDs, YouTube videos, on many websites and blogs, does it make sense to pay for courses to learn how to learn how to cut yourself and master the “secrets of sewing” ( which have long been revealed). It is true that some people like the social aspect or the way sewing courses organize the learning.
In-person courses / with a private teacher
It is extremely important that the teacher is experienced (the ability to sew does not always equal the ability to teach) and has a clear idea of how the training program will be structured. Often, in small private studios, sewing courses do not have such a program - everyone comes to class and everyone sews the product that they have chosen, and the teacher helps everyone as much as possible. Such sewing circles have their advantages, but from an efficiency point of view, this training format is not the best choice.
Take a look at the Burda Academy catalog if you are looking for sewing courses in Moscow! All courses are divided into difficulty levels, so you can easily choose the option that suits you.
Learning to sew on your own
Sewing on your own is useful and enjoyable, but if you are not patient enough or your first results do not meet your expectations, this can lead to disappointment and giving up on the idea of learning how to sew in general. We don't want this to happen and are ready to start a new exciting hobby, following step by step all the useful information on how to learn to sew yourself, improving each new skill by completing a few simple sewing projects.
Choosing an item to sew
It's best to start with stylish clothes, such as an easy-to-make skirt that is gathered at the waist, has a belt and patch pockets. This is a great project to learn how to sew on a sewing machine, work fabric, add buttons, finish hems, sew on pockets, try your hand at inserting a zipper.
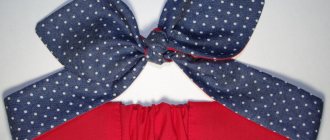
Other models for beginners that will help you practice your skills and learn how to sew: tops (one-piece, sherbet, boho style), a dress - a sundress or a fashionable dressing gown.
Selecting a pattern
Tailor's patterns help make the work easier when constructing patterns; with their help we make the necessary curves (for example, armhole lines, side seams, draperies, location of loops, marking of allowances).
Cutting with seam allowances
Seam allowance is the amount that is added to the pattern pieces, the distance between the stitching line and the edge of the fabric cut. Seam allowances required:
- to process seams and edges of fabric;
- leave enough space between the cut edge and the stitch line and allow for wear and tear on the fabric;
- leave enough fabric around the edge where the seam allowance pieces come together to give the front a seamless look.
The allowance for straight seams is usually about 1-1.5 cm, for curved seams (armholes or collars) - 0.7-1 cm.
Sewing on a machine
The creative possibilities of a sewing machine are almost limitless. But before you use it to sew products, you need to get to know your sewing machine well, which will solve almost any problem that you may encounter. Read the instructions, practice things that seem unclear. And before using a machine to sew clothes, it is better to practice with various seams on pieces of fabric that you won’t mind throwing away.
How to sew beautifully?
Smooth, neat stitches are the basis of a beautiful thing. And if you don’t succeed the first time, don’t be upset and don’t consider yourself a crook. Good results are achieved only through long training. You can “fill your hand” by sewing lined or squared notebook sheets, pieces of unnecessary fabric (old sheets, for example) with contrasting thread.
You can draw all the seam lines and sew exactly according to the markings. However, when the volume of sewing is large, using this method is not very convenient.
Another useful technique that will allow you to make even stitches is to mark with electrical tape on the platform of the sewing machine. We glue the tape and when sewing, we guide the edge of the fabric strictly along the edge of the tape. For different products, the electrical tape will have to be constantly re-taped.
The most convenient way to sew straight is to place a refrigerator magnet on the machine platform in the right place and guide the fabric along its edge.
You can also put an elastic band on the platform so that it fits tightly, and move it to the desired distance each time.
Even stitches also depend on the sewing machine itself, namely on the teeth that advance the fabric. The teeth in the slots should be exactly in the center. If they are positioned crookedly, then it is unlikely that you will be able to sew efficiently and evenly on such a machine.
Testing your sewing machine is easy. Let her sew by herself, that is, sew without holding the fabric with her hands. If the line goes more or less smoothly and only goes slightly to the side, then everything is fine.
If the machine pulls the fabric too far to the side, then you can try to send it in for repairs, otherwise sewing on it will be quite nerve-wracking.
Your indispensable assistant is special sewing machine feet. For example, a blind seam foot, thanks to its stopper, will help you stitch seams evenly.
Before you start sewing a product, be sure to check the stitching on the piece of fabric from which you will sew, using contrasting threads. If necessary, adjust the tension of the upper and lower threads so that the stitches at the top and bottom are the same, without loops.
A beautifully sewn item is not only the front side, but also a neat back side. Since most fabrics fray along the cut, the edges of the seams must be processed. And although household machines have zigzag stitches that imitate an overlock stitch, they still cannot replace a full-fledged overlock stitch. Thus, along the cut of seams processed with a zigzag, threads will still stick out; the stitch itself is sometimes difficult to adjust so that it does not tighten the fabric. Therefore, the inside will look unaesthetic. And not all household sewing machines “take” knitwear.
But a truly beautiful reverse side is obtained when processing seams and cuts with tape. This is a sign of the tailor's skill and high quality of the product.
We recommend
How to learn to sew clothes for yourself?
Many online resources specialize in cutting and sewing lessons, by viewing which you will learn how to learn to sew clothes from scratch. Plus, it's much more inspiring to sew items that we actually want to wear. But a necessary condition is the desire to learn and comprehend new things. Without an elementary share of patience and perseverance, we will only waste time. Before moving on to the sewing process itself, we select the model we want to sew, the next step is to create a pattern on paper using our measurements.
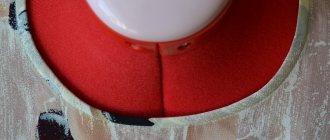
We fold the fabric in half and inside out and transfer the paper pattern onto it, securing it with pins, and outline it with chalk along the edges. To make cutting easier and not deform the fabric, it is important to use sharp scissors. Having cut out all the details, we proceed directly to sewing. One of the first elements of sewing clothes is tuck. A properly made dart will fit into the fabric and add a tight-fitting silhouette to the garment.
We sew ourselves quickly and easily 10 + 2 cool lifehacks
Hello dear needlewomen. Today I want to share with you some cool lifehacks from the sew-it-yourself series, quickly and easily, which I constantly use in my work. They greatly facilitate my work process. Making it simpler and easier. So enjoy it to your health!
Lifehack 1. Workplace
We sew ourselves quickly and easily in our own apartment in a specially equipped sewing corner. Here you can not be distracted by extraneous matters. After all, sewing will become much more enjoyable if the necessary tools are always at hand.
Let it be a separate table where you can put a sewing machine and cut fabric. The ironing board and iron should be located next to the work table. To store fabrics, accessories, and tool patterns, you can have a cabinet or hanging shelves.
Perhaps your apartment has free space on the balcony. I wrote about how I managed to make a home workshop out of a loggia in this article.
Lifehack 2. Transferring the pattern to fabric
When transferring a pattern onto fabric, some novice dressmakers trace the template twice. First, the pattern itself along the contour, and then taking into account the seam allowance. To be honest, I did this myself for quite a long time.
And now I make my work easier by setting aside only the seam allowance distance throughout the cuts.
And so as not to forget, I write down the size of the seam allowances on a paper pattern and then sew on the machine, retreating this distance.
Any sewing machine has a ruler that will allow you to sew exactly the amount of allowance that you set when cutting. Example in the photo - I sew a stitch 1 cm away from the edge. The edge of the fabric on the right is located at the 1.0 mark.
Lifehack 3. Transferring darts to fabric
What about darts, you say? Don't they need to be circled either? No friends - we are moving the darts. There is also a trick here, which I learned with experience. As we know, the shape of the dart is an isosceles triangle.
Therefore, we will not outline this figure, but make three dot marks with chalk: the top of the dart, and two marks where the dart is, diverging.
Then, when we remove the paper pattern, we simply connect these three points with chalk and a ruler.
Lifehack 4. Control marks
When cutting, we make control marks with chalk. Usually we mark the middle of the patterns, the shelf on the sleeve, etc. When we sew a thing, we drag the fabric along the table and these chalk dots have the peculiarity of then wearing off and disappearing. To prevent this from happening, use notches instead of chalk marks.
A notch is a cut in tissue 0.2-1 cm long, made with the tip of scissors. It has the shape of a triangle.
Lifehack 5. Sewing a skirt
Life hack for those who have a lock on the skirt, not on the side, but on the back. After you have finished cutting the skirt, you can immediately process the middle seam of the back panel using an overlocker or zigzag stitch. Because if you make any changes during the sewing process, you will make adjustments along the side seams.
Lifehack 6. Basting on a sewing machine
Remember how we were taught at school during craft lessons to sew together the details of patterns with a thread and a needle. And we sat for hours hand embroidering on fabric. I don't do that now. And I teach my students to also work without these stupid running stitches. And that's why:
- firstly, it does not give a normal visual effect when trying on. The product, basted with hand stitches, unravels when tried on.
- secondly it takes a lot of time
Therefore, dear needlewomen, use your sewing machine for basting. In the settings, set the longest stitches to 4 - 5 mm. and the lowest thread tension is 0 - 1. Then the stitching made in this way can be easily removed from the fabric.
Lifehack 7. Sweeping with pins
This lifehack is a continuation of the previous one. Since I work with individual patterns, they do not require adjustment. And therefore sweeping too. Therefore, I sew immediately without any preliminary stitches. By tailor's pins.
If you have proven patterns, then you can safely use this lifehack in your work.
Lifehack 8. Cutting the lining
This life hack will make your work easier when cutting things with a lining, such as a coat. In order not to transfer the patterns twice onto the fabric (as we know, the front, back, and sometimes the sleeve are duplicated on the lining). I take the main pieces that have already been cut out and cut out the pieces on the lining fabric directly from them. Very convenient, no need to mark seam allowances. The lining is cut just right!
Lifehack 9. Patterns
We always sew quickly if the necessary patterns are always at hand. Therefore, it is advisable to have patterns for the back, front, sleeves, and trousers in the required size. Let these be the most standard patterns from which you can quickly model a dress, jacket, pants, shorts.
I have a pattern from Burda with raglan sleeves, which I used to cut a sweatshirt, jacket, blouse, and dress for my child. It’s so awesome that even when my daughter has outgrown it, I still make larger seam allowances and sew on it.
Lifehack 10. How to quickly thread a sewing machine
We often spend a lot of time and nerves changing threads on a sewing machine. And how exhausting will a novice seamstress be who has not yet learned how to correctly pass the thread through all these thread guides in the machine. And if suddenly the sewing machine does not sew, you need to look up the instructions and look for where the mistake was made. Now you can breathe out: I found a great life hack for you!
If you need to change threads, do not rush to remove the previous spool. Unwind it a little and cut it close to the spool. Then tie this piece of thread with a knot to the spool on which you are going to sew.
And now you can pull the threaded piece of thread through the needle, and it will pull a new thread with it. Which will easily pass through all the thread guides.
All that remains is to cut off the thread with the knot and thread a new thread into the eye of the needle.
Lifehack 11. How to quickly remove chalk marks on patterns
After cutting, chalk marks remain on the fabric, and keeping water or vinegar on hand is not very convenient.
In such cases, wet wipes always help me out! They leave no marks, and the chalk disappears from the fabric in seconds. In addition, they do not wet the material much, and stains almost immediately evaporate from the surface without leaving a trace.
This helps me a lot at the last stage of sewing, when the product needs to be quickly brought into a corporate look and given to the customer.
Lifehack 12. How to store paper patterns
And this life hack will be useful for those who do not like to store patterns in a rolled form. This method will help your patterns always remain at hand, and storage will not take up much space.
All I needed to organize it was an Ikea curtain rod, paper clips, and kitchen rail hooks.
The rod can be easily cut to fit the length of the wall, and in the interior it looks quite stylish and immediately gives the room a special sewing flair.
Dear friends, if you liked my sew-it-yourself lifehacks quickly and easily, don’t be lazy to press the “share” button on social media. networks.
Source: https://dnevnikbeloshveiki.ru/10-krutyih-layfakov-kotoryie-nauchat-tebya-shit-byistro-svoimi-rukami/
How to quickly sew curtains and lambrequins yourself?
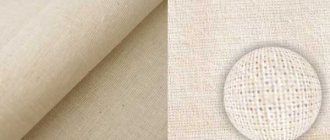
Curtains are good practice for beginners who are familiar with the basics of sewing. For the first sewing project, we choose a lightweight cotton fabric, that is, with a structure that will facilitate the sewing process (cotton blend or cotton and linen). Once the necessary knowledge is gained, the basic treatment can be applied to almost any type of fabric.
Curtains can be sewn to the length of the window sill, below the window sill or to the floor; something that will determine how much fabric is needed. For floor-length curtains (which will add beauty and softness to the room), the height from the cornice to the floor, the hem for the hem (45 cm) determine the required length of fabric. For folded curtains, the width of the fabric is calculated to be 1.5 times wider than the actual width of the window opening (standard width of curtain fabrics: 140 cm, 280 cm, 300 cm).
The fabric must be washed and dried before sewing, then carefully ironed, removing all wrinkles and folds. This is an important step so that the finished curtains do not shrink and the seams do not fray during the first wash.
- Trim the edge.
- For a hem seam, turn the side edges 1-1.2 cm (towards the wrong side of the fabric) and iron.
- Fold in another 2.5 cm and iron. We pin the double folded edges with tailor's pins (heads to the right of the seam, which will allow them to be easily removed during stitching) at a distance of 10-12 cm from each other.
- Sew with a straight seam, placing the stitch line at a distance of about 3 mm from each inner folded edge.
- Fold the bottom edge 1-1.2 cm and iron it.
- We turn it in another 10-12 cm and iron it, secure it with pins in the same way as for the side edges.
- We sew the bottom part (at a distance of about 3 mm from the inner folded edge) with a straight seam, but to make it more reliable, we use a reverse stitch at the beginning and end of the seam.
- The drawstring or “pocket” for the cornice is made in almost the same way as the bottom edge. Fold the top edge 1-1.2 cm and iron it.
- Fold it again by 5 cm and iron it; secure with tailor's pins.
- We sew, laying a line that secures the folded edge, securing it with a reverse stitch at the beginning and end of the seam.
To create a gathered lambrequin, cut a piece of fabric relative to the length of the cornice with a filling ratio of 1:3. So, if the length of the cornice is 2 m, then we will need fabric 6 m long and of a certain height (40-50 cm). We process the bottom edge and side edges into a hem. We sew the curtain tape to the top edge, and then process the fabric.