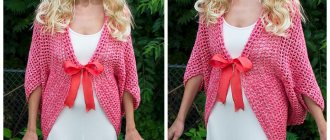
Shuttlecocks open up unlimited possibilities for experimentation. One single element will help create many different looks.
In today's article we will look at a variety of conical designs - from peplum skirts to ruffled sleeves. The general rule is: the longer the outer length of the conical part, the more expressive the visual effect.
If you want to maximize the fluffiness, simply spread the sections of the piece further apart along the hemline or sew two “suns” together.
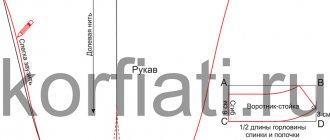
Sleeve with sun flounce
Shorten the dart along the elbow line by 1-2 cm.
Shorten the sleeve at the bottom by 12 cm.
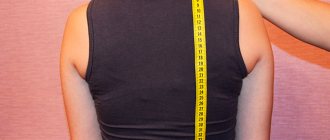
Measure the width of the sleeve at the bottom (W).
Draw the inner circle of the flounce (= the cut of the stitching to the sleeve) with a radius of r = 0.16 x W = 0.16 x 31 cm = 4.96 cm.
From the inner circle, set aside vertically up and down, horizontally to the left and right, as well as along diagonal lines, the length of the shuttlecock equal to 12 cm (corresponding to the amount of shortening of the sleeve), and connect the resulting points, obtaining two squares, respectively.
Draw a line for the bottom of the shuttlecock as shown in the drawing.
Style options
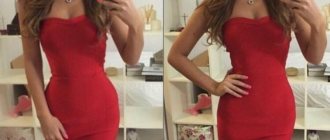
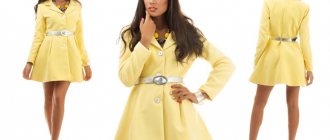
The fashion world offers various options for dresses with frills. A light wavy strip of fabric can decorate everyday and festive clothes. This detail helps to correct the figure, so a dress with a flounce sewn in the right place should be in the wardrobe of a plump or thin woman.
Evening
Women with any body type can wear an outfit with a flounce to a celebration or gala dinner. For thin people, the fish style is suitable - a long, fitted model with a flounce at the bottom. Plus-size women can wear an A-line dress with draping, wave-like fabric at the top. A wrap-around model with ruffles on the chest is suitable for any figure.
Free
A loose model with straight or asymmetrical ruffles can be worn every day. An example of such clothing is a sundress - a great idea for hot weather and summer holidays.
Direct
A straight model with a fluffy flounce at the bottom or side is suitable for slender and thin women. This outfit will add volume and make your hips more rounded.
Wide
A dress that flares out at the bottom and has a wide flounce at the hem will help hide figure flaws such as large hips and legs. A wavy strip of fabric sewn at the top of the model will visually enlarge the breasts.
Trapezoid
A trapezoidal outfit with wavy elements at the top or bottom will help a woman achieve ideal proportions.
Skirt with peplum-sun
Draw an inner circle (= upper edge of the peplum) with radius r = 0.16 x (OT measurement + 1.5 cm (loose fit allowance) + 2 cm (seam allowance)) = 0.16 x (76 cm + 1, 5 cm + 2 cm) = 12.7 cm.
Set aside the length of the peplum equal to 20 cm from the inner circle vertically up and down, horizontally left and right, as well as along diagonal lines, and connect the resulting points, getting two squares.
Set aside 2 cm from the sides of the squares. Draw a line for the bottom of the peplum through the resulting points, as shown in the drawing.
Skirt with pleated flounce
Shorten the skirt by 15 cm (the length of the flounce).
Narrow the skirt details at the bottom line on the sides by 1.5 cm.
Separately measure the total length of the lower section of the front and back panels of the skirt.
Draw a vertical down and a horizontal to the right from point Z. Draw an arc of a circle with a center at point Z, radius r = (0.16 x Length of the lower section of the front of the skirt) x 4 = (0.16 x 48 cm) x 4 = 30.7 cm.
Set aside 15 cm horizontally - the length of the shuttlecock and through this point draw another arc of a circle with the center at point Z.
Draw cut lines on the shuttlecock (on one quarter, i.e. on the front of the shuttlecock) to create folds, as shown in the drawing. Cut the front part of the shuttlecock and spread the sections of the part by the allowances of the counter folds.
The folds on the back of the shuttlecock are done in the same way.
How to build a shuttlecock
You can decorate a finished product with such details or add them to a new project, even if a shuttlecock pattern is not provided for the selected model. Before cutting the shuttlecock, you need to decide on the method of modeling and cutting. They are modeled and cut in two ways - in a circle and in a spiral.
Circular cutting method
Modeling a pattern in a circle
You can model a pattern in a circle by following these steps:
- First of all, you need to determine its length. To do this, you need to measure the length of the cut of the product. It will correspond to the length of the inner circle of the pattern.
- Then you need to calculate the radius of the inner circle. To do this, the length of the circle is divided by 2Pi.
- Using a compass, an inner circle is drawn on paper according to the dimensions.
- To form the outer circle, the radius of the inner circle is multiplied by 2.
- The distance between the circles is determined by the width of the shuttlecock.
- Once both circles have been drawn, they should be carefully cut on one side, it is best to do this diagonally.
- Cut the pattern along the outer and inner contours.
- The resulting pattern should be pinned onto the fabric and the contours should be transferred, cut out and cut into a strip.
You might be interested in this: Step-by-step instructions for sewing fabric bags
Skirt with ruffles in a circle
The part is ready. All that remains is to sew it to the product.
Spiral shuttlecock
Modeling a pattern in a spiral
Every seamstress knows how to cut flounces in a spiral. To do this you need to do the following:
- Take a piece of paper and draw two crossed lines on it.
- Mark points at equal distances on each line. The distance will be the width of the shuttlecock.
- Draw a spiral at the marked points.
- Using a regular thread, determine the length of the shuttlecock and, starting from the center, lay it in a spiral. Where the thread ends, the shuttlecock will end.
- You need to cut out the pattern exactly in a spiral or transfer the pattern onto the fabric and cut it out.
Skirt with a spiral flounce
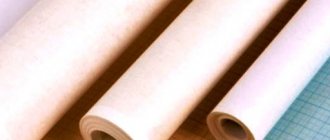
The spiral flounce is ready, all that remains is to sew it to the product. Before cutting out a shuttlecock in a spiral, it is recommended to prepare all the necessary tools and materials. In order to make the task easier, experts recommend using raster tracing paper rather than regular paper, since it is lined in a checkered pattern, which will greatly simplify the creation of the pattern.
Raster tracing paper
Skirt with flowing drapery
The front panel of the skirt should be mirrored relative to the midline.
Draw a curved line for the bottom of the drapery from the bottom end of the left dart to the bottom line of the front panel of the skirt.
Draw three cut lines on the drapery in accordance with the drawing.
First move the drapery sections along the left cut line so that the sides of the dart are aligned. Along both remaining cut lines, separate the drapery sections by 10 cm, respectively.
Draw a new line for the top cut and bottom line of the drapery.
Skirt with spiral flounces
To determine the width of the flounce at the hem line, set aside 10 cm along the middle line of the back panel of the skirt.
From the resulting point, draw a line connecting the flounce with the panels of the skirt to the middle of the upper section of the front panel of the skirt.
Draw a vertical line and a horizontal line intersecting it.
Draw a circle with a center at the point of intersection of lines with radius r = 3 cm.
Starting from the inner circle, draw a shuttlecock counterclockwise, gradually increasing its width (the shuttlecock is drawn taking into account seam allowances of 1 cm on both sides).
Measure the length of the line connecting the flounce with the skirt and transfer the resulting value to the line of the top edge of the flounce.
Distinctive features
A flounce is a strip of fabric that drapes in waves along the outer edge. It is sewn to clothing using the inner cut. The wave on only one edge is obtained thanks to a special cut - in a spiral or in a circle.
The model with a flounce can be worn on weekdays and on holidays. Any woman in such an outfit is transformed and becomes even more beautiful. A flounce located at the top or at the hem helps hide figure flaws. True, such a decorative element gives clothes not only lightness, but also volume. It is not advisable to place shuttlecocks on the part of the figure where there are extra centimeters. When choosing clothes, you need to carefully look at where this magnificent decorative detail is attached.
Top with double cap sleeves
Measure the length of the front and back armhole line (Dpr).
Draw a vertical line and a horizontal line adjacent to it at right angles at point Z with radius r = (0.16 x DPR) x 2 = (0.16 x 46 cm) x 2 = 14.7 cm.
From the horizontal along the arc of the circle, set aside 12 cm upward (the length of the front part of the cap sleeve) and down 14 cm (the length of the back part of the cap sleeve).
To determine the length of the lower wing sleeve, set aside 10 cm to the right of the arc, and the upper wing sleeve - 8 cm.
Draw sections of both wing sleeves, as shown in the drawing.
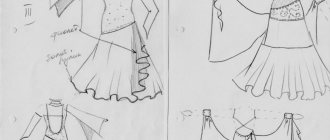
Modeling an off-shoulder dress
Let's look at several modeling options. Most “peasant lady” styles need to be modeled and cut using a raglan base. And making a pattern with raglan sleeves is very simple using a graphical method. You need your tried-and-true bodice base and a basic shirt sleeve pattern. We will now look at a basic modification of a set-in sleeve, which is quite suitable for our purposes.
It is necessary to join the front, back and sleeve at the point of the shoulder seam, find a compromise position of all three patterns in such a way as to get as close as possible to the development of the “raglan” cut. The lower parts of the sleeves and armholes will be temporarily placed on top of each other for ease of drawing raglan lines. Look how this is done in the picture. You need to draw raglan lines on the front and back: from the bottom of the armhole to the neckline. Then cut the patterns along the drawn line, and “attach” the cut pieces to the sleeve hem.
The raglan lines on the sleeve need to be straightened, drawn beautifully and thus get a raglan sleeve pattern. Small overlaps at the top of the collar will not hurt us, because this part of the sleeve will be cut off for open shoulders. Don't be afraid to model. This is not at all difficult, especially for our purposes.
Popular articles DIY crafts from Kinder Surprise eggs - a collection of cool master classes with photo ideas
Yes, now you can move the darts from the waistline to the neckline. Or you can spread the shelf even further (that’s what I did) so that the gathering along the chest line is thick. You can also extend the patterns along the waist line. And the sleeve can be converted into a flashlight.
We move directly to “cutting off” the top part, that is, to the most interesting part. We need to determine the depth of the cutout - it’s very convenient to do this in front of a mirror with a piece of elastic in one hand and a measuring tape in the other. Tie an elastic band around your shoulders and vividly imagine yourself as a queen in a luxurious off-the-shoulder dress. Does the elastic fit comfortably? Doesn’t it hinder your movements and doesn’t fly off? Is the neckline immodest enough? You like? What about your husband? In this case, ask him to take three measurements: from the point of the jugular cavity (where the neckline on the pattern begins) to the elastic, from the seventh cervical vertebra to the elastic, and from the point of the base of the neck (on the side) to the position of the elastic on the arm.
My measurements are as follows: front - 9 cm, shoulder and sleeve -15 cm, back -8 cm. I mark these points on the pattern, then join the front, back and sleeve along the raglan line and draw a smooth, beautiful line. I cut the pattern along this line. When you cut, check the length of the armholes on the sleeve and the front with the back again. Correct me if anything.
All. the patterns are ready.
Dear sewing colleagues, at this stage we will all differ in tastes and preferences. And each of us will make our own dress, very personal. Each of us will determine the density of the gathers along the top and along the waistline experimentally. I will be glad to hear your experience, please share. Let's discuss this point. How are you doing?
Top with flounces in the form of corners
Widen the neckline of the product along the shoulder line by 2 cm, deepen it in the middle of the front by 19 cm.
Draw a seam line for the yoke on the front, into which the upper cut of the flounce will be sewn from the new neckline to the armhole, as shown in the drawing.
Measure the length of the front neckline from the yoke seam line to the middle of the front and the length of the yoke seam line from the neckline to the armhole.
Draw a shuttlecock in the form of a triangle with an angle of 110 degrees at its apex based on the obtained values. Thanks to this angle, a model excess length of approx. 8 cm required to obtain the tail of the shuttlecock. The larger the angle, the greater the amount of excess.
Recommendations for choosing fabric
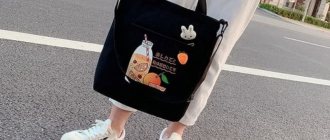
everything5pounds.com
Lightweight items with shoulder ruffles are made from a range of fabrics. Ideal for: silk, linen, viscose, elastic knitwear. For a thicker option, cotton denim is used.
Products made from translucent fabrics look original. At the same time, the details of the frills deprive the area of the chest in which they are placed of transparency.
Details are often made from decorative materials (for example, lace). Flowing multi-layer flounces are sewn from well-draped fabrics - chiffon, cambric, fine knitwear.