What you need for work
To make embroidery on a T-shirt, you will need a number of materials and tools. Their quality cannot be neglected. If the embroidery will be done on a light T-shirt, the threads must first be checked to see if they are fading, so as not to spoil the item when washed.
- Embroidery threads . This can be floss or silk for embroidery. The main criterion when choosing them should be the reliability of the manufacturer. If the embroidery is done with beads, you will need to buy transparent or translucent monofilament to secure it.
- Beads . Needed for additional decor. You need to choose a calibrated material that, when working, lies on the fabric as evenly and accurately as possible.
- Water washable marker . You can buy it at a craft store. Using this tool, the contours of the drawing are drawn. They will disappear when the T-shirt with the finished embroidery is soaked in water. Marker marks on the fabric should not be heated before washing.
- Scissors . Needed for cutting threads. It is most convenient to use small scissors with the ends of the blades slightly curved upward. Outwardly, these embroidery scissors resemble manicure scissors.
- Needle . You should choose a sewing needle for working with threads and a beading needle. It is not advisable to use a tapestry needle with a rounded end when embroidering on a T-shirt, as it can damage the fabric. It is important that the instrument is free of rust.
Have you already embroidered on T-shirts?
Not really
Editorial Voice
Matryona
Fan of embroidery and sewing
Ask a Question
You cannot use a hoop for embroidery on knitted fabric . They will lead to its deformation. To prevent the fabric from stretching under its own weight, you need to place it on the table.
Technique
The choice of equipment is a responsible task, because... Only the master can decide what the final drawing should look like. Before embroidering a name, go through a short list of techniques.
Back stitch
A stitch such as a “back needle” will help you embroider letters on a towel or other textile evenly and neatly. It is performed along the contour in one continuous row. All stitches should be the same size in length, which are made from right to left. The needle must be inserted at the end of the last stitch, then brought “to the face” with a shift to the left of the 2nd stitch. This way you can make not only a neat front side, but also the back side.
Seam "forward needle"
Very easy to make decorative stitch. It is done not only straight, but also curved if the design requires it. The direction of movement is from right to left. It is a dotted row, where emptiness and line alternate at the same distance. Before embroidering initials on clothes, it is better to draw a simple sketch or use a template.
Cross
If you decide to use a cross, then the question of how to embroider letters on fabric by hand can be answered in two ways. In essence, inscriptions are no different from creating a painting. The steps must be performed the same, with the difference being the amount of space to be filled. You just need to monitor the tension of the thread and follow the pattern planned in advance.
The first option is sequential and faster: first the stitch is tilted in one direction, and then in the other. Second: sew both sides at once.
First you need to secure the first thread with a knot or simply leave a tail on the back side so that you can sew it with stitches later.
Helpful advice. Do not layer the threads on top of each other so as not to create excess volume. It will be felt on clothes.
How to embroider letters on clothes with a cross so that the font is even and identical? Use ready-made templates that can be purchased in craft departments. If you want to create a sketch yourself, then graphic editors or special programs for creating a template come to the rescue. Of course, no one has canceled the old method of drawing on a notebook sheet.
By the way, it is better to make numbers and letters with markings. A fabric marker will help you draw the borders.
Surface
It is considered a more complex type of needlework, because it is no longer just stencil work, but real creativity with the selection of seams and techniques. Satin stitch embroidery turns out voluminous or realistic. The main difference from “crosses” is the tightest fit of the threads according to the intended sketch. Everything is done with stitches or a chain.
Here are instructions that describe how to embroider an inscription on fabric
- Before embroidering letters onto fabric, first draw a design directly onto the fabric or canvas. For this purpose, special fabric markers are sold that do not become clogged with lint and draw smoothly even on a corrugated surface.
- First of all, the contour is performed using the chosen technique. The threads should be thinner than those that will be inside. This will create volume.
- Now you can embroider the entire name onto the fabric, completely filling the space inside. One of the tricks is to apply stitches perpendicular to the contour, because... this will create additional volume.
- Next, completely fill the voids with stitches (again changing the angle perpendicularly).
Embroidery on knitwear: types of stitches
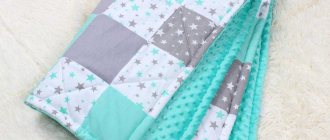
T-shirts are made from knitted fabric, which can be either single-colored or variegated. Manufacturers can decorate the product themselves using appliqués, stripes, embroidery, or sell it without additional decoration.
To make embroidery on knitwear beautiful, you need to decide what stitches can be used on it. Since the material of T-shirts is thin, with very small eyelets, a number of seams that are used for embroidery on sweaters are eliminated.
- Stalked . This is one of the basic seams. It is in many ways similar to the “back needle” seam. Each new stitch starts from the middle of the previous one and slightly overlaps it. Used for fine inscriptions and creating outlines of a picture.
- Tambour . This seam is also used to make thin, elegant inscriptions and outlines of patterns. With this technique, the thread on the right side forms a loop, which lies on the surface of the fabric and is held there by the next loop, starting from the highest point of the first.
- Forward the needle. Also a basic stitch, which is used for embroidery on knitwear. In this case, the stitches can be drawn in a straight line, or placed in any direction, including rays.
- Cross . Oblique stitches of equal length intersect along class=”aligncenter” width=”500″ height=”400″|fcw3qayjh5a| src=”https://miazar.ru/wp-content/uploads/2020/04/77525307111.jpg” class=”aligncenter” width=”500″ height=”400″|fcw3qayjh5a| src=”https://miazar.ru/wp-content/uploads/2020/04/77525307201.jpg” class=”aligncenter” width=”500″ height=”400″[/img]
- Smooth surface . A common technique for embroidering knitwear, in which the stitches lie close to one another. The length of the stitches can be the same or different, depending on the selected satin stitch embroidery method. With this technique, several colors of thread can be used in complex patterns, or one if a monochrome pattern is created. When you don’t have much experience in embroidery, it is better to choose a pattern for one color. The satin stitch is used to create various patterns, which may have a contour made in a different technique, or be without a contour.
- Goat . This stitch is similar to a cross stitch, but the stitches are made longer and cross at the top. Also, for a greater decorative effect, you can complement the goat with short stitches using the “forward needle” technique, which will cover the crossing points.
- French knot. This method is chosen for voluminous embroidery on a T-shirt. A thread is wound onto a needle, which forms a pattern on the surface. Depending on the number of turns, knots or rollers will be obtained. Flower embroidery looks especially beautiful in this style. They turn out tender and elegant, similar to the real thing.
The type of seam used depends on the personal preferences of the embroiderer and the chosen pattern.
Embroidering an inscription on a T-shirt
If the letters are large, it is best to strengthen the inscription on the reverse side with non- woven fabric .
It will hold the fabric and prevent deformation during washing. If the inscription is embroidered lightly, in which the outlines of the letters are drawn in one line, it does not need to be strengthened. To transfer a design to fabric, the outline of the pattern or letters is drawn on paper and placed under the fabric. Then, using a water-soluble marker, the design is transferred to a T-shirt.
Satin embroidery
Most often, preference is given to satin stitch embroidery. In order for the drawing to turn out smooth, you must have experience in this technique.
The outline of the pattern is filled with a simple satin stitch or alternating short and long stitches - depending on the volume of the pattern. It is important to pay attention to thread tension : seams that are too tight will deform the fabric, seams that are too loose will sag.
Editorial Voice
Matryona
Fan of embroidery and sewing
Ask a Question
It is necessary to fasten the thread at the beginning and end of the work so that the wrong side remains neat. Without this, the work will look ugly.
Cross-stitch
Cross stitch is one of the classic techniques that is often chosen to create folk-style patterns or complex images. The main feature of this type of work is that the embroidered area turns out to be very dense when completely filled.
To get a good result, you need to perform a series of simple steps step by step.
- Applying water-soluble or pull-out canvas . Without it, embroidering will be very inconvenient. To prevent the base from moving at the beginning of the work until it is held in place by the crosses, it is worth basting the canvas along the edge.
- Embroidery process . Cross stitch should be done from left to right, making sure that the direction of all the top stitches is the same. Otherwise, the pattern will turn out extremely sloppy.
- Removing the canvas . Depending on the type, it is pulled out or left to dissolve in warm water.
Cross stitch looks good on fairly thick T-shirts. If the material is very thin, the pattern will deform it.
Beadwork
The pattern embroidered with beads is quite heavy , so you should not choose too large patterns or heavy beads.
For work use a beading needle and monofilament. To make the embroidery look as neat as possible, you should work in rows and not in spots. It is especially important to follow this rule when creating an inscription on clothing.
Bead embroidery on knitwear, like thread work, is done by hand. What thread tension is sufficient will have to be determined by personal feelings. This is not difficult for experienced craftswomen.
How to remove writing from a T-shirt
There is a situation when a slogan or statement is outdated, but you like the thing on which the text was applied. Then the question arises of how to remove (remove, remove) the inscription from a T-shirt. You can remove it in different ways, which depend on the specifics of its application. Let's list some of them:
- Iron-on adhesive . To reduce it, use an iron with a steam function (or wet a T-shirt). Parchment is placed on the text and under the surface of its application. The ironing is continued until the iron-on adhesive transfers from the fabric to the paper. After this, the item is soaked in water with the addition of baking soda. Do the same with vinyl inscriptions , but after removing, take water and vinegar or wipe the fabric with nail polish remover.
- Thermal printing . To erase such an inscription, use ethyl alcohol. It is removed by moving the sponge in one direction. You can also use alcohol treatment and washing with powder.
- Special paint or marker . The choice of remover is determined by the type of dye. This may be acetone, thinner or alcohol. The selection is carried out by trying each of them on small sections of the text. Treatment (cleaning and washing) is performed several times, and then the remaining stains are removed with dishwashing liquid. It is applied for several hours, and then the item is washed.
The method for combining dichloroethane inscriptions can be seen in the video: