Cloak-cape with a hood: pattern, step-by-step sewing recommendations, video tutorials
The cloak-cape has a simple, loose cut; it is quite often used in creating children's New Year's costumes (prince, musketeer, Koshchei the Immortal, and many others). In addition, this model is great for sewing raincoats, as well as festive capes and overlins. You can not only buy such a wardrobe item, but also sew it yourself. In this article you will find a simple pattern for creating a cape, which is made with a hood, as well as detailed recommendations for sewing it.
Let's sew a practical raincoat yourself in a couple of hours
A raincoat can be not only part of a New Year's costume, but also a practical wardrobe item, for example, a raincoat. It is also easy to sew, but it will look much more interesting and impressive than a regular oilcloth raincoat. In addition, the product is so light and thin that it can easily fit even into a handbag.
To sew it we will need:
- thin raincoat fabric of your favorite color - 2 m;
- ribbon or lace for ties;
- threads, needle, scissors;
- sewing machine.
You won’t need a separate pattern for it; it will work right away with the fabric.
- Fold the cut in half with the right side facing inward. We measure 100 cm, this is the length of the base of the raincoat. Cut along the line.
- We fold the resulting workpiece in half again. In the upper left corner, mark the neckline for the back with chalk. We set aside 18 cm from it at a slight slope along the shoulder line. From the upper right corner we set aside 25 cm for the armhole, draw a rounded line from the shoulder line to this point. Cut out the resulting pattern.
- We correct the shape of the neckline on the shelves; it needs to be made deeper than on the back.
- We make shoulder seams.
- For the sleeves, cut out two rectangles 60cm long and 50cm wide. We cut out the eyelets along the line of the armholes on the basis of the raincoat. We sew seams on the sleeves. We sew them to the armholes.
- To pattern the hood, you can also use the templates given above, or cut out two rectangles 60 cm long and 45 cm wide, slightly rounding the upper corner. We measure the length of the neckline and use it to adjust the bottom line of the hood. We sew together the parts, sew the hood to the neck of the cloak.
- We bend and hem the edges of the product (bottom, shelves).
- We sew ribbons for tying or a button with a loop to the neck line.
Raincoat without pattern
A raincoat without a pattern can be made in a few hours. The most difficult thing in this process will be the correct calculation of the material. The best option would be a raincoat fabric with impregnation. It will protect from moisture and wind.
- A piece of material is bent in half and the length of the raincoat is laid down.
- The circumference of the hips is measured, the result obtained is divided by 2 and 10 cm is added. This will be the back.
- For sleeves, the length is set aside from the back, taking into account allowances of 1.5-2 cm.
- The neckline is cut according to the circumference of the neck plus a few centimeters.
- The front shelf is cut.
- The hood is cut out of squares, the upper corner is rounded.
The resulting product is complemented by a clasp and selected decorative elements.
Making patterns and sewing hoods for raincoats and raincoats
Sometimes, when you go to a store, you can’t find the right thing for yourself, either the size doesn’t fit, or the color or style doesn’t suit you. In this case, you can sew something for yourself. For example, you can make a great raincoat with a hood if you strictly follow all the instructions.
The hood will be a great addition to any outerwear. It will look great on a raincoat, jacket, sports jacket and sweatshirt, as well as many natural fur coats, have a beautiful hood, and how to sew a raincoat will be discussed below.
What does a hood for a raincoat look like?
Preparation: fabric and taking measurements
The pattern of a raincoat with a hood should begin with taking measurements. It is worth remembering that the hood is sewn exactly to the size of the head, so that later it does not fit on the forehead or, conversely, does not fall back.
Hood fabric
To make a pattern for a raincoat with a hood and then sew it, the first thing you need to do is prepare everything you need. The most common raincoat with a hood is the poncho. To sew it you will need:
How to sew a carnival cape and cape of Superman and Batman for a boy?
Boys adore superheroes and simply dream of being reincarnated as them at least for a while. You can become Batman at a carnival, simply in the game, by wearing a mask and a cape, attributes with which the man-bat acquires his unusual abilities.
IMPORTANT: Batman's cape is styled to resemble bat wings. Therefore, a round black cape will not be enough. You need to make the edge of the cloak with jagged edges.
Batman cape pattern.
- Batman's cape should be a semicircle with a diameter equal to the distance from the 2nd phalanx of the middle finger of the boy's left hand to the 2nd phalanx of the middle finger of his right hand.
- To make the raincoat truly resemble a membrane, think about how it will be attached to your hands. You can make a fold and stitch it in the form of a tunnel, then the boy will thread his hands through it. But it's not very clever. It’s better to sew 2-3 elastic bands on each side.
- To complete the image of a superhero, glue or sew his distinctive sign onto the cape - the silhouette of a bat on a yellow background.
DIY Batman Cape: Steps 1-4.
DIY Baman's cloak: steps 5-6.
Batman's cape.
How to sew a raincoat with a hood
To sew a raincoat with a hood, you should choose a material. Usually, paraffin or Teflon fabric, as well as membrane material, are used to sew a raincoat and cape. If you are planning to cut out an ordinary raincoat, then you can use not only windproof and water-repellent fabrics, but also leather, velvet, corduroy, suede, raincoat, cotton and others.
Pattern No. 1
Pattern and sewing of a raincoat
After preparing everything you need, you can start working. Many people wonder how to sew a hood on their own. All work on sewing a raincoat can be done in several stages:
- take measurements;
- transfer the pattern onto paper and then onto fabric;
- make individual fragments, sweep them, and sew them on a typewriter;
- sew all the parts into a single whole.
The women's poncho coat has several fragments. Its main parts include: front, back and neck. There are also sleeves, but they belong to the main part. In addition, finished models can be decorated.
First of all, the main part, front and back, are made, then the sleeves and hood are made. The next step will be processing the neck. And then you need to sew on the sleeves and sew in the hood.
The cloak and cape is sewn almost the same way, with the exception of some details.
Lay the fabric on a flat surface and cut out a rectangular piece of the required size, the measurements of which are taken in advance. Don't forget to leave indents for seam allowances.
Attention! To give the cloak its shape, you need to trim the corners of the fabric, after folding it in half. Then the edges will be rounded.
Pattern and sewing of a hood
How to cut a hood so that it fits perfectly on your head. After all, in cold weather, a hood will be an excellent alternative to a hat.
Take any sewn hood and mark the middle front point on it. And from that point you need to draw a measuring tape around your face. When starting to pattern the hood, you will need to add 820 cm to the resulting value, depending on the style of the hood. To calculate the height of the front edge of the hood, you need to divide the resulting number in half. Then, on a paper pattern, draw the front part according to that measurement.
The width of the hood is also selected individually. To get a close-fitting hood, you need to measure the distance from ear to ear. To make the hood wide, measure the distance from the brow ridges on the outside. Then you need to add 510 cm per allowance and divide the resulting number in half.
Having made a preliminary pattern, you need to attach it to the neckline of the product to fit it to the neckline.
After taking measurements, you need to draw a pattern on paper or cardboard and cut it out. Then place the pattern on the fabric and trace. Don't forget to leave a few centimeters for seam allowance and seam allowance. Cut out the resulting fabric pattern.
When sewing a product with a hood, you need to remember the basic rules: when you sew in the hood, you need to carefully ensure that the shoulder seam of the pattern coincides with the shoulder seam of the product. And the middle of the back of the product should coincide with the back seam. Before sewing in the hood, you need to sew the shoulder seams first.
Interesting! If the product consists of 2 or 3 parts, you need to fold them right sides together and sew the seams. If the hood consists of one piece, it must be folded so that the front side is inside, and the back of the head must be sewn.
What patterns are needed
To sew any clothing, you need a pattern; it is drawn according to the measurements taken from the person. To draw the pattern you will need paper, preferably graph paper, or tracing paper and a pencil. When the base pattern is ready, it is transferred to the fabric using chalk, a bar of soap or a special erasable marker.
Modern women's robes are presented in the form of cardigans, cape coats, jackets and even dresses. A woman can also use an academic robe, a judge’s robe, or a carnival robe (witch or princess costume). Depending on the model, the presence of hoods, sleeves, pockets, trims and other details, the complexity of sewing changes. The simplest one is the pattern of a medieval cloak. It doesn't have a lot of details, just the back, front and ties.
Pattern for women's academic gown
In many universities, during the presentation of diplomas, it is customary to dress students in graduation academic capes.
After finishing studies
For a woman's robe (master or professor), wool, viscose, gabardine are suitable.
Important! The length of the coat of scientists or undergraduates should be up to the middle of the calf.
The outfit has sleeves, but no hood; it is replaced by a confederate shirt. Below is a pattern for a height of approximately 180 cm.
Pattern for women's academic gown
Pattern for women's sleeveless product
A loose, comfortable, sleeveless robe made of warm fabric is called a cape coat. The coat can be any length; instead of sleeves there are slits, a fastener from the neck to the waist or a tie.
Cape coat
A women's cape with a hood (without a pattern) looks very elegant, and if you use fur or a fur trim to sew a coat, you will get a rich women's fur coat.
Cape coat pattern 1
Cape coat pattern 2
Pattern of a man's robe
Bat Norton “nomadic” is a unisex cape popular among young people. She is very cozy and warm.
“Nomad” is the trend of the season, and by sewing it yourself, you can save several thousand rubles.
Modern style
Robe with a hood - the pattern is very simple.
Modern robe pattern
Pattern for the King's Robe
The male king is a very eccentric image, for him it is enough to sew a king’s robe.
King's Robe
To do this, you will need dense, heavy scarlet fabric, white fur, a large shiny clasp, and white lining fabric. A medieval cloak pattern would be suitable.
You might be interested in: Ways to narrow and sew jeans on your own at home
King's Robe Pattern
Harry Potter Robe Pattern
Harry Potter is the most famous wizard in the world, his image is often used at costume parties and school holidays. One of the important details of the image is the mantle.
Harry Potter's Cloak
Harry Potter's cape is long, floor-length, with sleeves and a hood, made of silk or satin fabric in black and burgundy colors. Harry Potter cloak, the pattern of which is presented below.
Harry Potter Robe Pattern
How to sew a hood with your own hands: patterns
A hood can complement not only a raincoat or coat, but also a jacket. To choose a hood for a jacket, you first need to understand what types there are. There are several types of hoods:
- low volume;
- volume;
- tight-fitting to the head;
- falling down the neck;
- There are also many models that combine several of the listed types.
The simplest version of a women's jacket with a hood is the hoodie model.
The pattern of such a jacket will include the following elements:
- back;
- shelf with a hood;
- pocket details;
- sleeve pattern.
To sew a hoodie model, you can use fleece, velsoft, footer and faux fur. You can also combine it with knitwear, which will give an imitation of hand knitting.
To determine the material consumption, you need to decide what the size of the jacket and the width of the fabric will be. For example, with a fabric width of 180 - 200 cm (footer and velsoft), you will need from 180 to 200 cm of material. The width of fleece and faux fur is 140 - 160 cm, 170 - 220 cm of material will be required. When buying fabric and making calculations, you need to add a few centimeters to align the cut, or if there is a defect.
How to sew a product - a mantle
The process of sewing a robe begins with choosing a model and taking measurements of the person for whom it will be sewn.
How to take measurements
To take measurements you will need a measuring tape, a pencil and paper for recording data.
Measured:
- Length of the future mantle. To do this, a measuring tape is applied to the back at the base of the neck and lowered to the intended length.
- Neck circumference. Above the seventh vertebra, the full circumference of the neck is measured.
- Chest circumference. The encircling horizontal line along the most protruding points of the chest determines the size of the product.
- Waist circumference at the narrowest point.
- Hip circumference at the fullest part of the hips.
- Wrist circumference.
- Shoulder width is measured from the base of the neck to the point where it joins the arm.
- Arm length from shoulder to wrist.
- Around the face to get an idea of how much fabric is needed for the hood.
Taking measurements
Another thing that may be useful is: chest girth, with a measuring tape held at the armpits, and back width, which is measured from one hand to the other at armpit level.
Important! When creating a pattern, be sure to add 1-2 cm to the measurements for allowances and seams.
Cutting out elements (backs and shelves)
In order to cut elements, you must:
- Using a soap or chalk, transfer the pattern onto the fabric along the lines of the base of the back, neckline, armhole, and the beginning of the side seam.
Important! It is imperative to pay attention to how the lobar thread is positioned. It should run along or across the back.
- Fold the fabric in half and cut out most of it.
- Cut out a smooth round neck.
- Draw lines for the front details.
You might be interested in this: The procedure for constructing patterns for men's shirts
Transferring the pattern to fabric
Open the shelves:
- Draw the central part of the shelf, placing the middle of the pattern on the edge or cut of the fabric, mark the length of the side seam of the shelf, it is equal to the side seam of the back.
- At the beginning of the side seam, mark the width of the front.
- Attach the side part to the central part of the shelf.
- Holding the pattern at the level of the middle of the chest, spread the shoulder dart so that the side cut of the front begins at the level of the side seam.
- Connect the center of the chest with the beginning of the shoulder of the side part.
- Draw a line for the armhole and side seam.
Sleeves
When cutting sleeves of any shape, position the pattern so that the grain thread runs along the sleeve along the line of the high point.
The connecting seam with the sleeve should be located along the lobar, symmetrically on both sides.
Sewing
After cutting the fabric, it needs to be basted or pinned. At this stage you can perform the first fitting. If the robe fits without flaws, the fabric details are sewn on a sewing machine. The entire procedure is performed on the main fabric and on the lining fabric. When both parts are ready, the lining is stitched to the mantle and sewn with a machine stitch. The cut of the cloak is finished, all that remains is to turn the mantle inside out and iron it thoroughly.
Parts can be pinned together
Medieval hood: pattern for a cloak
A great addition to a carnival or fashion costume is a cape. This item of clothing has been used since ancient times to keep warm, to indicate one’s status, or simply for beauty.
What does a medieval cloak look like?
In general, the hood is also suitable for a jacket:
- The first step is to choose the fabric. Wool, satin, flannel and cotton are suitable for such a cape. It is necessary to purchase fabric in two shades. One for the outside, the other, lighter, for the lining.
- The next step is to measure your neck circumference and choose the length of the cape. The neck should be measured at the base. Then measure the distance from the shoulder to the expected desired length. Write down all measurements on a piece of paper. The length of the product may also depend on the style. The robe-like style is usually cut to the ankles or calves. The style, reminiscent of a cape, is made to the elbow or slightly lower.
- Then measure the circumference of the neck to calculate the radius. To calculate it correctly, the girth must be divided by two, then the resulting number divided by Pi. Round the resulting number up to a larger integer, and this will be the radius.
- Take the fabric and fold it into four layers. First, fold it in half crosswise, then in half again, you should get a square. Rotate the fabric so that the corner of the center point is in the upper left corner.
- Draw a neckline on the fabric. Take a piece of twine and pin it to the left corner of the folded material. Apply chalk to the other end, it should look like a compass. Draw an arc with this compass from the top to the left edge.
- Draw a bottom line. To the radius you need to add the length of the cape you need to obtain. If there is not enough string, you can lengthen it and draw another one, which will mark the bottom.
- Start cutting. You can start making a pattern by adding 1.5 cm for the seams. Once the pattern is ready, you can cut out the lining. You need to do the same thing as described above, only with the material prepared for the lining.
- A front cut is made on the cape. Unfold the part of the main and lining parts and place them on top of each other. Then fold them in half to make a semicircle. Cut fabrics along any fold. There is no need to touch the other fold. This creates a front cut.
- Fold and chop the material with the front side facing inward. The resulting semicircles need to be unfolded and one piece placed on top of the other so that the front side is inside. Carefully check that all the cuts are exactly aligned, and you can chop them.
- An allowance of 1.5 cm is laid around the entire perimeter. One of the straight sides does not need to be stitched to the end; leave space so that the part can be turned out later. As you stitch the material, you need to secure the thread at the beginning and at the end, so the product will be securely sewn.
- Turn the product inside out and iron it.
- Sew up the left hole. To do this, you can use a sewing machine or stitch by hand.
- For sewing, lay out the part with the wrong side facing you. They cut one side, just like they cut a cape.
- Fold and sew along the back seam. Fold again with the inside out. After the part is folded, the length of the hood should be 45 cm.
- To assemble the product, the top edge is sewn with two lines, so it can be assembled. Here you can also stitch either by hand or use a machine.
- How to sew a hood to a product. The hood and cape are fastened with the front side inward. You need to make sure that all cuts are laid evenly. Sew down the parts, not forgetting to leave room for allowance. You also need to secure the threads so that the seam does not come apart.
Raincoat pattern
In order to get started, you need to prepare the necessary materials: a piece of special fabric, chalk or soap, a measuring tape, a large ruler, scissors, a needle and thread and other accessories. First you need to draw a pattern. Even a person far from design can draw it.
Raincoat without pattern
A rectangle 180 cm long and 150 cm wide can be drawn directly on the fabric. It needs to be cut out, folded in four layers and the required shape drawn by eye. Then, connecting two points along a rounded line, cut out a hole for the neck and sleeve. The shelf is cut in half.
Raincoat pattern 2
Raincoat pattern 3
You can make a raincoat like a cape. The fabric is folded diagonally and a semicircle is built on it. Its radius should be equal to the length of the arm. Then the neckline is cut out and a cut is made in the front.
Raincoat pattern 4
Raincoat pattern 4
Hood pattern
The hood is cut out on a separate piece from the remaining material. The advantage of a raincoat in the form of a stole is obvious. This option is suitable for those who do not have a sewing machine. This product is made without seams, and the craftsman does not have to worry about connecting them.
If you want to create something unusual or designer, then it is always better to use ready-made patterns. It's also quite easy to trace around an existing rain cover and make a new one the same.
There is a way to make a raincoat strictly according to your figure. To do this, take your favorite long-sleeved sweater. Next, place it on a sheet of paper folded in half and outline the edges in the shape of a semicircle with a margin. From the resulting edge to the end of the sleeve there should be approximately 10 cm on each side. From the bottom of the sweater to the edge of the paper, the required margin should be at least 20 cm, depending on the desired length of the product.
In the part where there was a neckline on the blouse, we draw a notch for the neck. We measure the recesses for the arms strictly along the sleeve. We place it on the edge of the paper and, at the location of the shoulder, begin to cut off a round hole slightly larger than the neck. Then we cut the paper from the neck to the base on one side only. Cut out one sleeve from the rectangle. The hood can also be outlined according to an existing item.
Stages of work
The sewing process proceeds in the following sequence:
- Connecting the side seams of the resulting parts using a sewing machine or manually. Before stitching, the parts can be pinned together. For greater strength, they are reinforced with bias tape.
- Sewing on the hood. To do this, you need to attach it to the neck. The length of the neckline should match the length of the bottom edge of the hood. It is recommended to immediately hem the front edge of the hood by folding the fabric inside out twice.
- Bias trim on sleeves, hem, edges and hood. This is done both for beauty and to give strength to the product. You can simply fold the edge and sew it on a machine. In quick-fix products, processing may not be carried out at all.
- The choice of material and manufacturing technology for fasteners, if any. These can be ties, buttons, Velcro or snaps. It all depends on the personal preferences of the master. To ensure that the fastener stays on the polyethylene, it is recommended to place a transparent button under it.
- Decoration of the product. The raincoat can be decorated with rhinestones, appliqué, or interesting designs can be painted with indelible paint.
Read with this
- Jacket fabric taslan (taslan)
- DIY goblin costume
- DIY backpack
- What is sewn from mixed fabric and where is the material used?
- Types of huts made of branches and their construction
- Gabardine: description of the fabric with photos, areas of application of the material, care features
- Description of the properties of lurex: use of fabric, combination with others
- Description of calico: choosing the best density in bed linen
- Composition and properties of twill-satin: what kind of fabric is it, what are the qualities of bed linen made from this material?
- Oxford fabric - composition and technical characteristics, scope of application and care features
How to sew a cape for a New Year's costume?
We fold a piece of fabric of the desired color and size on top so that a ribbon or thin rope passes through for tying, sew it on a machine or hem it by hand, thread the ribbon through with a pin and, in fact, that’s all. It is advisable to hem the bottom so that the threads do not fray. Decorate with any tinsel if desired.
A cape for a New Year's costume can be not only short, but also long. For the cape, you will need to choose the color of the fabric; take fabric with a reserve.
I suggest making a cape in the form of a long cloak.
We measure your length from neck to toes. If you want to make a cape to the floor, then you should add another 5 cm.
Next, we cut out the cape using the fabric using the diagram:
You can sew on a collar, or you can make ties, buttons or linden on the cloak, then the cape can be easily removed. We sew the edges of the cape. If you need something, for example an applique or a design, we sew it onto the cape. Such capes will suit many New Year's costumes.
To sew a cape for a New Year's costume in the form of a raincoat, you will need a fairly large piece of fabric. After all, it is often done in the form of a half-sun. But sewing it is very simple. It is enough to make a pattern and sew a ribbon along the neckline for tying. If the fabric does not fray. then you don’t have to overcast it.
The simplest pattern is this:
For those who know how to sew well and are used to making correct patterns, here is an example of a poncho. It will come in handy for New Year or any other holiday:
If desired, you can sew or glue snowflakes or stars onto such a cape - it all depends on what kind of character the child should be at the matinee. Capes made from two layers of fabric of different colors look very impressive: the bottom is white and the top is blue. Or the top is black and the bottom is red.
This is probably one of the easiest parts of New Year's costumes to make. Meanwhile, it is needed when sewing many of them, for example, for the costume of Little Red Riding Hood, Musketeer, or Puss in Boots. The pattern can be extremely simple, as for a half-sun skirt, that is, it is half a circle, with a hole cut inside for the neck. Here is the simplest pattern, don't forget about seam allowances:
We process the edges of the cape, either simply hem it or process it with piping; along the neck line you can sew a tie that will be tied.
The pattern may be a little more complicated, it won’t be quite a circle, but it’s also nothing complicated:
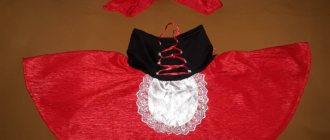
And here is a pattern for a cape with a hood, such a cape can be used, for example, for a Dracula costume, we sew the hood along the neck line:
Such a detail of a New Year's costume as a cape can give any costume recognition with a character, as well as originality.
Another huge advantage is that it is quite simple to make and does not require special sewing skills.
To make it look similar to the image, it is enough to choose the desired color and sew on decorative elements, for example, foil stars for the wizard and astrologer, paper snowflakes for the snowflake, and fur trim for the Snow Maiden.
How to sew a Little Red Riding Hood carnival cloak for a girl?
Little Red Riding Hood in the English version is not a Riding Hood at all, but a Little Red Riding Hood. Therefore, if your daughter has to play the role of this fairy tale heroine at a matinee, Christmas tree, or theatrical performance, as an alternative to a red satin cap, you can sew her a cape with a hood.
Little Red Riding Hood's cloak pattern.
Take:
- red satin or crepe satin
- red silk ribbon
- red braid
- elastic band
- Velcro
- chalk
- scissors
- threads
- igloo
- tailor's pins
Cape for Little Red Riding Hood's cloak.
Hood for Little Red Riding Hood's cloak.
This is what Little Red Riding Hood's cloak will look like.
- Fold a piece of red fabric in half. Use the pattern for a round cloak. If you don't have one, choose a round object that is close in diameter to the circumference of the girl's neck.
- To draw a large circle, measure the distance from the small circle to the edge of the fabric.
- Leave the same distance on both sides along the fold of the fabric. Don't forget to leave seam allowances.
- Sew the hem of the raincoat with a decorative seam or trim it with braid.
- Make a double hood. Cut 4 identical pieces for the hood from red fabric.
- First assemble the hood parts and process the cut. Then sew the hood into the neck of the cloak.
- Use red tape and Velcro to make a cape fastener and sew it on.
DIY Little Red Riding Hood's cloak: step 1.
DIY Little Red Riding Hood's cloak: step 2.
DIY Little Red Riding Hood's cloak: step 3.
DIY Little Red Riding Hood's cloak: step 4.
DIY Little Red Riding Hood's cloak: step 5.
DIY Little Red Riding Hood's cloak: step 6.
DIY Little Red Riding Hood's cloak: step 7.
DIY Little Red Riding Hood's cloak: step 8.
DIY Little Red Riding Hood's cloak: step 9.
DIY Little Red Riding Hood's cloak: step 10.
DIY Little Red Riding Hood's cloak.
How to sew a cloak - cape with a hood?
Little Red Riding Hood or the Witch?
A cloak or cape with a hood is an attribute of many fairy-tale characters. With it you can try on the image of both a red riding hood and a sorceress, witch, or magician. After all, sometimes even adults want to dream like a child and find themselves in a fairy tale... Thanks to photographer Galina Karatsyube for a wonderful photo shoot in which I felt like a fairy-tale character transported to a winter fairy tale.
How to sew a carnival cloak and king's cape for a boy?
To transform your baby into a king at a matinee or costume party, dress him in a white shirt and trousers, a crown, and a cloak - a mantle made with your own hands according to the pattern below.
Pattern of a cloak for the King's costume.
For the king's cloak, choose thick fabric - velvet or velor. Make a fur trim along the collar and hems.
King costume with cape.