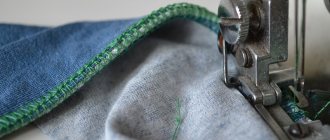
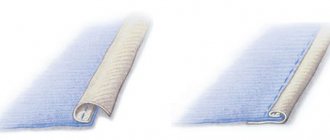
Overlock is an integral part of sewing tools. The purpose of the device is to create a more accurate product. The seams are even, the edges of the fabric do not fray when worn. If just a couple of decades ago such equipment was the property of exclusively sewing studios, today every seamstress can afford to acquire a valuable assistant.
Using the device is not difficult. The main thing is to know how to thread an overlocker correctly. Errors should be excluded here. Otherwise, you won’t get a good seam; gaps will appear on it, the overcast ends will stick out to the sides, and the fabric will bunch up.
Preparing for work
Before starting work, you need to prepare some tools that will facilitate the procedure for threading the overlocker, making adjustments, and promptly eliminating problems that arise.
Required:
- several multi-colored reels. Multi-colored threads will show which looper threading was done incorrectly and will help adjust the tension;
- set of knives for overlocker. They are used for cutting off protruding ends of threads, hemming the edges of loose fabrics;
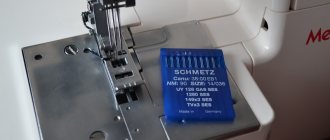
- set of needles If you have a spare set, rearranging a broken or bent needle does not take much time and helps you quickly get back to the sewing process. A needle change is also required if there are visible seam defects: frequent skipping, tightening. This may occur due to an incorrectly inserted or blunted needle;
- oil for lubrication. It is better to choose high-quality oil from the manufacturer specified in the equipment instructions. It is rarely required - the machine needs to be lubricated once every six months. So it's not worth saving on it. A standard disposable medical syringe is used for lubrication - it will be able to “reach” the most inaccessible places of the mechanisms;
- tweezers with narrow tips. It helps to pass the tip of the thread through the eye of the left looper. This is difficult to do with bare hands;
- a small piece of material for control. It will help you check the accuracy of threading the overlock threads and adjust the tension.
Advice from professionals
For proper operation of the overlocker, you should follow some tips and a number of rules. In addition, this will allow you to get a beautiful stitching of materials.
The most important thing is to keep the device clean.
It is worth remembering that all mechanisms require periodic lubrication. At the same time, there should be no dust or dirt particles on them.
It is recommended to use threads with the same thickness and twist for overlocking. Malfunctions often occur due to the fact that the thread is not tensioned correctly. This can be avoided if you constantly check the thread tension before starting to work on the device and, if necessary, adjust it.
It is important to select needles that are suitable for a particular machine model, as they differ in the length and thickness of the eye.
Moreover, needles must be replaced before they break. Excessive needle wear can result in poor quality overlock stitching.
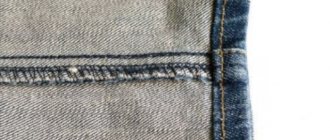
If a knocking noise occurs when working with an overlocker, then you should stop stitching. This happens when the item is too thick, such as drape fabrics or some areas of jeans.
With an overlocker, just like with a regular sewing machine, at the end of the operation you can not cut the threads, but place new parts under the presser foot and continue stitching. This will reduce thread consumption and prevent threads from being pulled out of needles or loopers.
On devices with a knife, it is important to choose the correct direction of the material so that the edge of the parts is evenly cut.
In the next video you can clearly see the correct and easy way to thread an overlocker.
In some cases, during the sewing process it is impossible to do without an overlocker. This device significantly improves the quality of the finished product by preventing fabric sections from shedding. However, some seamstresses do not use this machine due to the difficulties of working with it. They are particularly concerned about threading. There is nothing complicated in this procedure, you just need to carefully study the information on how to thread an overlocker.
Standard overlock threading scheme
Manufacturers produce different models of equipment. Before starting work, it is important to study the instructions and follow the advice given in it on the rules of work and the characteristics of the threads used.
The general scheme for threading an overlocker is the same in all machines:
- take the reel and place it on the holder. Direct the holder axis towards the thread guide;
- insert the tip into the thread guide (looks like a hook or slot);
- find the mechanisms for tensioning the contents of the coils. Different models have two or one (combined). If the machine has two mechanisms, the first one removes the yarn, the second one attracts it. It is important to adhere to the exact order of passing through them;
- Pull the end of the yarn through the eye of the needle. Check: the direction of the needle in the looper must correspond to the direction of movement of the material when sewing;
- Place the tip under the presser foot.
After threading all the threads, you need to test yourself: make a test stitch. To do this, use a small piece of fabric similar to the material of the product to be worked with. If any problems appear on the seam (gaps, material shrinkage), it means that an error was made when threading the overlocker.
When does an overlocker need adjustment?
When the overlocker is started for the first time, you may notice that the machine is skipping stitches or there are other obvious problems in operation. The reason for this is incorrect threading. But it also happens when it is possible to identify a poor-quality seam only if you have some experience working with the machine.
Let's consider situations when the overlocker needs to be adjusted:
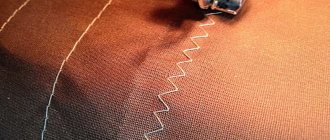
- There are loose loops in the purl seam. This indicates insufficient thread tension. To make it easier to determine which thread needs a stronger tension, it is advisable to use different colored threads when threading for the first time. Most often, problems arise with the last two threads that are threaded into the needles. To increase the tension, turn the plate to a smaller division.
- The seam loops, the threads extend beyond the edge of the cut, and voids form. This is also a sign of insufficient tension.
- The fabric is tightly stretched. It seems that when it is pulled, the seam may tear. In this case, the tension must be loosened. This is done by turning the pressure plates towards the smaller division.
- To set the size and frequency of stitches, the overlocker has a side panel with regulators. By changing the seam parameters, you can work with different fabrics.
READ How to lubricate overlocker comfort 550
Tension of all threads
It is recommended to adjust the thread tension using integer values on the adjusting element. The divisions between them are used to adjust the stitching for each individual sewing cycle. First, you need to intensively rotate the nuts of the conical springs, and then proceed to detailed step-by-step adjustments. It’s better to write down the indicators you set, which will help you avoid looking for them later.
To determine the required thread tension, it is recommended to correctly set the regulators on the machine body. So, for weak tension you need to choose a value from 2 to 3, for medium - from 4 to 5, for strong - from 6 to 7.
How to correctly thread overlock threads into loopers
There is a certain scheme for threading overlock threads inside the loopers. The loopers are located on top and look like hooks. Their task is to pick up the tips from the needles and connect them with the yarn coming from the lower parts. The result is a cross stitch.
First, work with the left looper. This is the most difficult stage of preparing the device for sewing.
It is done like this:
- the thread is passed through the thread guide into the hole in the cover located on the right, then through the slot in the protective cover on the left;
- a circle is made around the thread tensioner, the tip is passed into the hole leading towards the looper;
- the wheel scrolls to the right until the right looper is installed above the needle;
- the tip is wrapped around the lever mechanism of the right looper from behind, hooked onto the hook;
- the wheel rotates until the left looper lowers;
- the tip is pushed inside the left looper, the wheel is rotated until the right mechanism rises, which will pull the left one to the maximum upper position;
- The thread is tucked under the foot and fixed.
Next, the right device is charged:
- the thread is inserted into the slot of the thread tensioner, inserted from above into the hole of the module with a knife;
- the wheel scrolls until the right looper reaches the uppermost position;
- the thread is passed through the eye under the hook;
- the tip passes through the thread tensioner, the hole of the plate, going around the thread tensioner column;
- the tip is secured under the hook and inserted into the needle.
Electric overlock drive Prima
If the overlocker “buzzes” and “squeals” during operation, then most likely the tension of the electric drive belt has weakened. It is regulated in two ways. Either a screwdriver loosens the screws securing the motor to the bracket, and the motor moves away from the overlocker. Or use a 10mm wrench to loosen the fastening of the bracket to the overlocker body, and then the drive together with the bracket is lowered down. Or you will need both. By the way, if the belt is from Soviet times, then it is better to replace it with a new one.
Access to the electric drive is only possible after removing the protective cover. Do not completely unscrew the screws that secure it, just loosen them and remove the cover. There are only two mounting screws, they are shown in the photo.
Video on how to replace and properly tension the overlock belt.
How to thread a three-thread overlocker
A three-thread machine with one needle on top and two threads coming from below is considered universal. The direction of the thread is indicated by holes located on the body of the device. The threading pattern for a three-thread overlocker is similar to manipulating a conventional sewing machine.
The algorithm has the following stages:
- the thread passes through all the holes sequentially;
- the tip is inserted into the right looper and lowered down;
- the tip is passed through the eye of the needle, passed under the foot and pulled back.
Threading a three-thread overlocker ends with a test stitch on a spare piece of material similar to the one being used. Choosing a similar fabric is required because different materials react differently to thread tension. A test stitch helps adjust the tension.
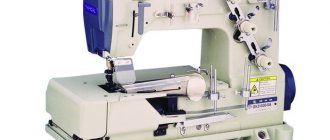
Overlock class 51: technical specifications
This type of sewing machine is designed for overcasting sections of knitted, linen and dress fabrics with a two-thread or three-thread chain-type overlock stitch. In this case, the standard stitch length is usually from three to six millimeters, while the thickness of the material when pressed should not exceed two and a half millimeters.
Overlocker class 51 is equipped with a needle mechanism and two loopers. If you want to replace the right one with a spreader, then this sewing machine will only use two of the three threads.
There is also such a model as the 51-A class overlocker. It is a more advanced version of this type of sewing machine. Its main difference is the presence of a differential mechanism for tissue movement. Such a mechanism usually consists of two parts, due to which the materials are stretched during the working process. This mechanism will work very well with knitted fabrics, so be sure to take this into account before you make a purchase. After all, all overlock seams will be very stretchable and elastic, which is very important for knitwear.
How to change the color of overlock threads
Sometimes during work you need to change the color of the threads. Before threading the overlocker, you must carefully trim the spool located on the machine at the level of the thread holder. The tip of the prepared coil is tied to the remaining tip of the old coil.
The following steps are followed:
- the thread is pulled until the knot goes beyond the foot (another option for pulling is to make several stitches);
- lift the foot and carefully pass the knot through the fabric;
- lower the foot;
- continue sewing until the knot approaches the eye of the needle;
- Pull the knot through the eyelet by hand.
The steps must be repeated until the unit no longer interferes with work.
Mechanism lubrication
Overlock 51 class is an industrial type sewing machine. It is characterized by centralized wick lubrication of mechanisms that are located under the platform of the product itself. In order to carry out the lubrication process, you need to find the crankcase at the bottom of the product and fill it with oil. But do not forget about lubricating the upper part of the mechanisms that are located above the platform itself. This must be done using a special oiler.
A three-thread overlocker needs to be lubricated at least once a month if the product is used very intensively. Be sure to lubricate all parts of the machine that rub against each other during the working process. Try to constantly rotate the shaft while lubricating. Experts recommend carrying out this process using an ordinary medical syringe. With its help, doing this is very simple, fast and convenient.
Please note that this type of sewing machine is equipped with a mechanism for adjusting thread tension, as well as the degree of pressure of the presser foot on the material you are using. You can also independently adjust the width and length of the stitches.
An important guideline when setting up a class 51 overlocker
The left looper is the most important reference point when setting up this sewing machine. While the needle will drop to its lowest position, the looper should also move to its leftmost position, about five millimeters from the needle. So, when the needle rises a couple of centimeters up, a loop will begin to form, which this looper should capture. In this case, be sure to pay attention to the gap between it and the needle itself. It should be no more than 0.05 mm. You can set this gap yourself. To do this, you will need to loosen the leftmost looper screw as much as possible, and very carefully turn it towards the needle. It is not always possible to establish the required gap on the first try. Don’t be discouraged, such skills will come to you very soon, along with experience. Once you have established the required gap, do not forget about the screw. It must be tightened.
Selection of threads
Important advantages of this unit are its durability and relatively low cost. An overlocker, the price of which is about 8,000-10,000 thousand rubles, will last for decades.
Class 51 overlocker is also characterized by the fact that it can work with absolutely any thread. Even old Soviet threads will do. However, what he likes most is the number thirty-five cone bobbins. Try to use the same type of thread of the same thickness on the overlock looper and needle. Of course, this is not necessary, but it is still advisable.
Please note that each type of thread has its own resistance, so adjust the tension of each of them separately from the others.
If you select the wrong tension, there is a high probability of skipping, as well as the terrible appearance of the stitch itself.