Preparing for sewing
A quilt is a great option for daily use. It is soft, comfortable, and most importantly, you can make such a product yourself to suit your taste. Quilts prevent the filling from moving around within the woven fabric. It would be ideal to buy a ready-made product. But if you wish, you can always quilt the blanket on a regular sewing machine or sew it yourself. Let's figure out how to do it correctly with the least cost, effort and pleasure. 1. Before sewing a quilt, you should cut the existing fabric into three parts: filling, top and bottom layers. The filling and bottom side should be five centimeters wider and longer than the top. It is advisable to iron the fabric well before starting work. 2. On a flat surface, you can use the floor, a cutting table, a large dining table, lay out the lower part of the cut, distribute the filler evenly on top, then the upper part inside out. 3. Be sure to mark the seam locations with chalk. To do this, find the center of the future quilt and secure it with safety pins in many places. Next, gradually fasten the entire surface of the product in the direction from the middle to the edges. You can choose any seam pattern: squares, diamonds, rectangles, lines.
Quilting a blanket on a sewing machine
Having dealt with the most difficult part - cutting and calculating the material, you can start quilting the blanket; it is best to do this on a sewing machine.
First of all, we mark the pattern on the fabric. To make it easier and more accurate, you should make a pattern of a figure (square or diamond) from cardboard, and applying it to the blanket blank (sewn three layers), trace it, starting from one corner and ending in the opposite lower corner.
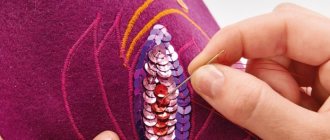
Having outlined the fabric in this way, we sew stitches on a sewing machine, moving from the center to the edges. The seams should match the contours of the outlined figure template as closely as possible.
And a miracle - in this way we get the cutest quilted bedspread!
RECOMMENDATION! It’s better to practice on a small piece of fabric first, and then start making a blanket, so you’ll get better at it and make fewer mistakes. In principle, using a similar technique - patchwork, you can sew not only a blanket, but many other things that will look beautiful and unusual.
By machine or by hand
The next step depends on whether you will make the quilt by hand or on a sewing machine:
- How to quilt a blanket using a machine? To do this, set the presser foot to darning and embroidery mode. A thick needle with a strong thread to match the fabric is inserted. Smooth speed without jerking and accuracy in the process of work will give you even, beautiful stitches and pleasure from the process itself. Work begins from the center and moves to each edge in turn;
- How to hand quilt a blanket? This procedure requires a short needle. You need to work with small stitches at right angles, achieving the effect of machine stitching. When making a quilt, rushing is extremely undesirable. The direction of movement is the same - from the center of the fabric to the edges.
Preparatory stage
To sew a high-quality bedspread, it is better to use a sewing machine, but you can make the stitches yourself. The sewing technology will not be too different, but in the second case it will take a lot of time, and besides, it is very difficult to make the stitches even by hand.
Bedspread size chart.
First of all, you need to assemble the pie. Place the facing fabric on the floor, wrong side up. Then put a spacer on it, and then a lining. Carefully align all layers, otherwise creases and folds will spoil the final appearance of the product. After this, be sure to secure the structure. The easiest way to do this is with sewing pins and basting.
Pin the edges and secure the center of the future bedspread. After this, decide how you will quilt the piece. For beginners, it is preferable to choose simple patterns, such as rhombuses or squares. After this, use a needle and thread of a contrasting color to outline the pattern of the future stitch. But if you are using fabric that shows puncture marks, such as satin, you should skip this step. Or use a special adhesive tape that is securely attached and serves as a guide. It is easily removed without leaving any traces, just moisten it with water.
After this, you can proceed directly to stitching.
Beginning of work
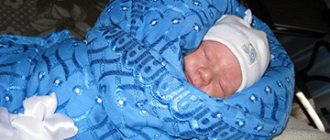
Before you sew a quilt for a child or for yourself, you also need to decide on a pattern. The simplest to perform will be loops and waves. Do not immediately take on straight lines. Until your hand is “stuffed”, it will be difficult to adhere to a clear and even contour. Be sure to do a small sketch on paper of your finished piece before moving on to the fabric itself.
To make a quilt using a sewing machine, clean and oil all necessary parts. Insert needle, thread, spool, darning foot. Check everything carefully again. If you don't have special gloves for quilling, regular gardening gloves will do. Their main task is to sit tightly in the palm of your hand and not interfere with working with the fabric. Free up your workspace. A sewing machine, for example, can be moved to the kitchen or dining table. You need a lot of space to work, nothing should embarrass you, distract you or slow down the process.
First of all, practice on a rough draft. Test the thread tension, stitch length, and whether the selected needle and thread are suitable for the thickness of the fabric.
Lining is the fabric that covers the back of the front surface of the quilt.
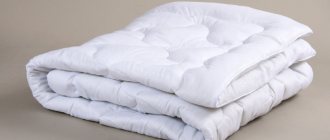
The padding is located between the lining and the top. Its thickness depends on the purpose of the quilt and the fabric used.
To make a quilted baby blanket, pillowcase, or even a regular potholder, thin fabrics are suitable: non-woven fabric, wool. For the bedspread, more voluminous materials are chosen - holofiber, padding polyester. It is not recommended to use cotton wool, as the product will deteriorate when washed. Quilt stitching is used to prevent the layers of filling from clumping together. You can try making the first seams in the shape of squares.
Taking measurements and cutting
Before you begin the actual production of the bedspread, you need to determine the dimensions, thickness and design of the canvas. Initially, measurements are taken from the bed/sofa. To do this, use a measuring tape to measure the length and width of the bed. These parameters are necessary to determine the exact size of the bedspread.
Taking measurements from the bed
Next, it is worth considering some additions for the design of seams and overlays. To determine the shrinkage of a material, a practical method is used - a piece of fabric must be washed, dried and ironed, and then assessed how much it has shrunk. In addition to the measurements obtained, add 1.5-2 cm for fit. It is also necessary to take into account the shrinkage of the fabric that occurs due to quilting the pattern - it is recommended to add another 5-6 cm.
You might be interested in this: How to sew a beautiful bow tie for a suit
Note! The smaller the quilted pattern is formed, the greater the shrinkage will be in the end. Therefore, you need to add more than 6 cm.
It is imperative to use the basic instructions to create increments. When taking measurements, it is not recommended to sew a square blanket. The shape of the product should be rectangular. This shape will visually make the pattern larger.
The dimensions of the bedspread may decrease after quilting.
When taking measurements from a bed/sofa, you should immediately decide on the size and frequency of the quilted pattern.
Pattern options with different shrinkage
The degree of shrinkage of the material will depend on this. If you want to cover the largest part of the surface with stitches, then the shrinkage can be about 20-30 cm. If the stitching is “sparse”, then you should add about 6-10 cm on each side to the basic parameters.
Training
Once you have decided on the pattern of the future quilt, you can begin the training itself. For this, two pieces of fabric 1x1 meter folded together are suitable. Pieces that are too small should not be used. Below is a rough example for practice. When you have filled all the empty space, start applying a new stitch on top of the already laid stitch.
For training, it is better to choose a thread that is contrasting in tone relative to the fabric, then the stitch will be clearly visible and you will be able to accurately move along the intended lines, which is necessary in the first stages during the first steps. Using quilting gloves will help you better control the process during practice.
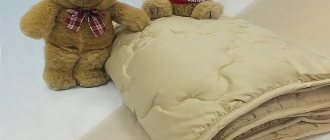
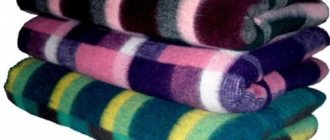
Wool blanket or bedspread
- Step 1: Before you hand quilt a wool blanket, you need to cut out three layers: the lining, the facing layer, and the interfacing. Remember that the padding is 1 cm or more larger than the top, and this depends on your method of processing the edges of the blanket. Don't be afraid, you can always remove excess fabric. The lining should exceed the top by as much as 5 cm. If the size of the lining is not enough for a quilt, for example, a large double blanket, then it can be increased by sewing two identical pieces of padding polyester with a regular machine stitch.
- Step 2. Iron the front side and lining before starting work.
- Step 3. Place the lining on the floor, wrong side up. Pull it tightly and secure it with tape in several places.
- Step 4. The next layer is the gasket.
- Step 5: Place the topmost layer right side up.
- Step 6. Secure the entire product with pins, starting from the center and working towards the periphery. Stretch the front side slightly, especially if you are sewing from scraps.
- Step 7: Baste the blanket from the center and work out to the edges using regular straight lines. Do not fasten the basting thread at the end and beginning of the seams, so as not to tighten the product. The basting stitches should be fairly loose. You need to see what the basting stitch itself looks like from the side of the lining of the same tone. On a motley surface made from different flaps, the seam will not be visible.
- Step 8. Remove the pins and apply a pattern to the top layer using a ruler or an existing template. Next, get to work.
After reading the information presented in this article, no one will have any questions about how to make a quilt with your own hands.
Work process
So, first, choose a sketch
How do you want your quilt to look? The most common ones are ordinary rectangular ones, which are easy to sew for beginners, but if you have experience in needlework and don’t want to settle on common models, you can choose something more interesting, adapting to the interior of the room and the function it will perform.
Next, we select the necessary materials
First of all, we purchase the necessary fabric. Please note that it can be of any color, content and composition.
Can be used:
– natural materials (linen, bamboo, cotton),
- artificial,
- synthetic,
- mixed
Cotton is considered the most popular material for sewing blankets. The following types of fabrics are often used as covers: teak, satin, satin - jacquard, twill, percale, cambric.
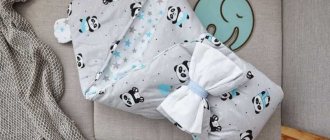
If the bedspread is being made for a children's room, then we recommend: flannel, calico, flannel.
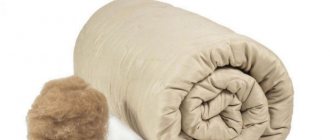
For the blanket filler, padding polyester is used, in which it is important to take into account the thickness - a thick layer will make a voluminous and airy blanket, but it will be more difficult to work with.
You also need to purchase:
- - threads in the color of the fabric,
- - needles,
- - scissors,
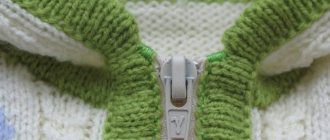
- - tape for edging,
- - a sewing machine - at best, otherwise, quilting a blanket by hand, although possible, takes a very long time.
Choose the material so that the future blanket best suits the purpose and interior.
We determine the dimensions, cutting and assembly of the quilted bedspread
To correctly calculate the fabric, you need to measure it with the dimensions of the bed, in length, width and height (to get an idea of how it will fall).
ADVICE! Make a schematic drawing of the blanket (to scale, respecting the proportions). Draw the lines of the planned stitches on the drawing.
Formula for calculating blanket parameters!
If d is the length of the bed, h is the height, w is the width, then the universal formula for calculating cutting will look like this:
Dina blankets = b+d
Blanket width = w+2h
It turns out three layers: back, filler, face. All of them are cut according to the same formula, only 2 cm are added along the entire perimeter of the fabric - that is, to the back and face, this does not apply to padding polyester.
Now let's stitch these layers together
To make the product more elegant, you can round the corners.