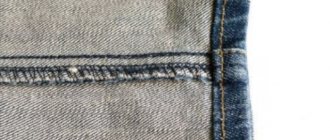
Problems with the sewing machine happen even to those women who carefully monitor it. How to cope with such a nuisance? Let's try to figure out the possible problems.
To avoid problems, the machine should be kept in a dry place, away from heating devices.
1. Threads and sewing needles vary in thickness and have their own numbers.
There are rules for what needles and threads to sew this or that fabric:
- - thin fabrics (cambric, chiffon, crepe de Chine, etc.) are sewn with cotton threads No. 100-80, needle No. 90;
Linen, calico, chemical fiber and staple fabrics - with threads No. 80–60, needle No. 90;
Light woolen fabrics and heavy ones made of chemical fibers - with threads No. 60–40, needle No. 100;
Heavy woolen fabrics - with thread No. 40, needle No. 110;
Coarse cloth, beaver, and burlap are sewn with thread Nos. 30–10 and needle No. 120.
True, it happens that the threads cannot be selected according to the tone of the fabric and the required thickness, then there is no needle, which is required. In these cases, you can sew with the most common needles No. 90 and threads No. 40.
2. When you start sewing, the thread guide and needle should be at the top. Place the fabric under the presser foot, lower it down, lower the needle, make 2-3 injections by hand, turning the hand wheel towards you.
3. Threading the machine can be made easier. If the top thread runs out or needs to be replaced with another, you should not pull it out of the machine, you just need to tear it off the needle and tie new threads to it.
Then pull the knot through the entire device to the needle and there just tear off the rest of the old thread. All that remains is to thread the thread into the needle.
4. Do not help the machine by pulling the fabric with your hands - the needle may bend or break, and the stitching will be uneven.
5. After finishing the work, raise the presser foot, pull the fabric back and to the left, cut the threads, leaving the ends 6-7 cm long. Place a cloth under the foot, lower the foot with the needle to the bottom position.
Hold the flywheel and release the idle screw by turning it towards you. Remove the belt if the machine is mechanical, and unplug it if the machine is electric.
6. But it happens that the machine stops sewing: the thread breaks and loops, the stitching is uneven, the fabric does not advance, etc. We need to find the problem and fix it.
Malfunctions and their elimination
Upper thread broken
. The needle is not installed correctly (inserted too high or too low). Thread and needle numbers do not match. The needle is too sharp or dull or bent. The thread has knots or its thickness is uneven. The thread tension was too high.
Bottom thread breaks
. Maybe from too much tension. The bobbin case is not installed correctly. The bobbin is bent or has burrs. The threads on the bobbin were wound incorrectly. The stroke body is dirty or not lubricated. The bobbin case is clogged.
The machine is skipping stitches
- this means that the needle is not inserted properly or the thread is wound carelessly onto the bobbin of the shuttle. It may also depend on the quality of the fabric, as some machines do not accept synthetic and silk fabrics well. The seam can be improved by placing strips of thin paper or tracing paper underneath it.
The upper thread gets tangled
.
They forgot to thread it into the “plates” (regulator) of the upper thread or its tension is too weak. The thread thickness does not match the needle number. Machine stitch tightens seams
. The tension of the upper thread or the thread from the shuttle is too strong; the tension of the threads should be relaxed.
Fabric does not advance
. The teeth are lowered too low or, conversely, they are raised too high. Weak presser foot pressure. A lot of dust has collected under the needle plate.
The thread forms loops
. The thread is not threaded correctly. The thread thickness does not match the needle number. The tension of the upper or lower thread is weak, it is necessary to adjust the tension of the upper thread so that it meets the thread from the shuttle in the middle of the layers of fabric being sewn.
Uneven stitching
. The screw in the bobbin case is not screwed in tightly enough. The screw threads are clogged. The zigzag mechanism is not completely turned off (if the machine has one).
The needle tightens the threads in the fabric
.
The needle tip is broken, blunted, or the needle is too thick for light fabric. Cutting fabric
. Press the presser foot firmly. The needle is too thick, the stitch is too fine, or the thread is too thick. The needle is not inserted firmly enough. The needle is not installed correctly in the needle bar. The needle is dull or bent. The thread number does not match the needle thickness. The material is too thick. There are sharp burrs on the teeth, needle plate, and foot.
The needle breaks
. When pulling the fabric up during sewing, the needle bends and hits the mechanism with the shuttle - you should not pull the fabric out from under the foot; the bobbin of the shuttle or the shuttle itself is not inserted well, the needle hits the shuttle and breaks - you need to check how the shuttle is inserted; the needle is slightly curved and hits the shuttle mechanism.
The material is “collected”
. Incorrect tension on one of the threads. Weak or strong presser foot pressure. The sole of the paw has worn out. The tooth lift is too high. The needle holder is too short.
Heavy running of the machine
. The old grease has thickened. The machine is poorly oiled. Threads are wound between the bushing and the flywheel of the machine.
Basic, typical malfunctions and malfunctions in the operation of sewing machines: poor stitching, thread breakage, needle breakage. Skipping stitches in the stitching of a sewing machine and overlocker appears if a low-quality thread or needle of the wrong thickness is used. The size of the gap between the needle and the nose of the shuttle (loopers in an overlocker) also affects this. Defects such as “bias stitch” and broken upper and lower threads can usually be eliminated by adjusting the tension of both threads. But, if, after adjusting the tension, stitch defects do not disappear, then you will have to adjust the interaction of the shuttle stroke and the needle, the mechanism for advancing the fabric, etc. This is especially typical for the Chaika sewing machine. Moreover, if the installation parameters of the “Seagull” shuttle have gone wrong, then it is quite difficult to make such an adjustment yourself. But, basically, sewing machine malfunctions and malfunctions can be eliminated by correctly adjusting the thread tension, replacing the needle, lubricating and cleaning the machine.
— Incorrect threading. — Poor quality threads. — The thread number does not match the needle number. — The spring of the bobbin case lock has weakened. Inside the bobbin case you can find a very small screw, and if you unscrew it, the lock mechanism can be removed and you will find a long spring. Try to stretch this spring slightly, but it is better to buy a new bobbin case. — There are nicks and burrs along the way the thread passes to the needle. Carefully follow the path of the thread and, after detecting nicks, remove them with a small needle file. In older Podolsk-type machines, there may be thread cuts on the tensioner rod. Disassemble the tensioner and inspect the rod; if there are such cuts, remove them with sandpaper.
Looping the lower and upper threads. Bad line
— The thread on the spool and bobbin is unevenly wound. Do not wind the thread onto the bobbin by hand; use a special device for this. Evenly laying the thread on the bobbin ensures the same uniform thread flow. Hand-wound thread can get caught in other turns and pull the upper thread more than it should. As a result, loops appear at the bottom.
— The upper thread tension is too loose or the bobbin thread tension is too tight. Adjust the tension of the bobbin thread so that while holding the thread, the bobbin case does not fall down. Only with a sharp movement should the thread come out slightly from the cap. — There are scraps or pieces of thread between the washers of the upper thread tension regulator. Over many years of operation of a sewing machine, thread frays accumulate between the tensioner washers. Gradually they turn into seals that prevent the washers from completely clamping the thread. — The bobbin thread tension is too loose or the top thread tension is too tight.
— Dirt or fuzz or thread trimmings have gotten under the leaf spring of the bobbin case. — A slot has formed under the leaf spring on the bobbin case. This happens after many years of intensive use of the sewing machine. You should not fix bobbin case malfunctions yourself, except for cleaning and adjusting the thread tension. The best solution to fix a faulty bobbin case is to buy a new case. — Weak tension on both threads. - Strong tension on both threads.
— Weak pressure with the foot. — The sole of the foot is skewed, and it does not press the fabric with its entire surface. — The teeth of the rack have become dull. — The sewing machine feed is set to embroidery mode or the feed dog teeth are too low and do not grip the fabric well. The correct position of the teeth when sewing medium-thick fabric: with the maximum rise of the feed from the needle plate, the teeth should rise completely, but not higher than the height of the teeth. Their position too high will create a “fit” in the fabric or tighten it.
— The needle number does not match the thread number or fabric thickness. — The needle is bent. — The needle is not inserted into the needle bar all the way. — The needle does not pass through the center of the needle hole of the plate. The needle must pass exactly in the center of the hole in the needle plate. Make sure that the needle does not touch the rail while using the sewing machine. Incorrect needle position may be caused by a bent needle bar. — The needle bar position is set too low or high. - Incorrect sewing. While sewing, do not pull the material by hand; find the reason why the machine does not advance the fabric well. Adjust the presser foot pressure on the fabric.
Common problems with zigzag seams
This seam is a useful and practical option, which is equipped with most modern models of equipment. It is very convenient for overcasting the edges of knitwear, and is also often used as a decorative stitch. At the same time, the owner does not need to buy an overlocker, which is especially important for novice users who do not sew often.
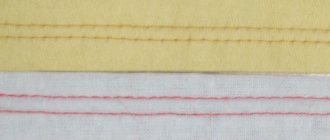
The correct “zigzag” is distinguished by the same stitch size along the entire length and a clear geometric shape. If the machine begins to skip stitches, and thread ties, creases, “accordions” or other deformations appear on the treated fabric, then these are the first signs of a problem.
The most likely reasons why zigzag on a sewing machine does not work:
- drive gear wear;
- displacement of the rocker to the side;
- loosening of the fastener;
- needle displacement;
- settings failure.
In most cases, it will not be possible to correct the defect that has arisen on your own. Therefore, it is better to call a specialist who will promptly identify and eliminate all existing breakdowns.
Gear tooth wear
If during the sewing process the device begins to spontaneously change the step length, then most likely the teeth on the main gear, which are responsible for correctly capturing the thread and its uniform placement, have worn out or become deformed.
Some engineers advise removing the gear and manually restoring the geometry of its teeth. This method may delay the manifestation of the malfunction for some period, but will not be a real solution. If the gear wears out or several teeth break, it is worth installing a new part.
Malfunction of the rocker arm
If the maximum stitch length was initially set, but during sewing the actual step turns out to be much smaller, then the problem is that the sewing unit rocker arm is deviating from its normal position. You will need to adjust the rocker arm, which is a rather complex process that requires certain skills. To carry it out, it would be better to call an engineer.
Skipped stitches
— The needle is too high when meeting the nose of the shuttle, and it does not grab the needle loop. — The needle is bent or the needle point has become dull. A curved needle can be identified in the light by twisting it on a flat and dark plane. — The needle is not installed all the way or incorrectly, on the wrong side. — Using the wrong type of needle for this sewing machine. Often, industrial-style needles are used in household sewing machines. They do not have a cut on the flask and are absolutely not intended for such machines. — The settings for the interaction of the needle and the shuttle are misaligned.
Of course, these are not all the malfunctions and malfunctions of sewing machines. The above list of faults is designed to eliminate them yourself, without contacting a specialist. Failures associated with wear of parts and malfunction of some components cannot be eliminated with your own hands without special knowledge and experience.
Basic, typical malfunctions and problems of sewing machines
: bad stitching, thread breakage, needle breakage. Skipping stitches in a sewing machine and overlocker appears if low-quality thread of the wrong thickness is used, as well as changes in the gaps between the needle and the shuttle or loopers in the overlocker. An oblique stitch, the upper and lower thread loops or breaks, including at the bottom - the reasons, as a rule, are weak or too strong thread tension. Sometimes the thread breaks, this is especially typical for the Chaika sewing machine, if the shuttle installation parameters have gone wrong, and it is difficult to make such an adjustment yourself. But basically, malfunctions and malfunctions in the operation of sewing machines can be eliminated by adjusting the thread tension, replacing the needle, lubricating and cleaning the machine.
Engineers' recommendations
During a work shift, operators at the A-Iceberg service center receive dozens of calls from machine owners. And most often people complain about problems with zigzag seams. We have prepared some recommendations that will help you avoid problems.
- Before starting work, check that the seam settings and switch position are correct. You could accidentally change the parameters (or children could change them when playing with the device).
- Always inspect the needle for deformation.
- Select the correct thread-needle pair for a specific fabric. Most often, questions about the quality of the seam arise due to a discrepancy between the thickness of the needle and the thread of the selected fabric.
- If during the sewing process the stitch type changed randomly, and the device began to make noise, knocking, squeaking or other extraneous sounds, then stop what you are doing as soon as possible and unplug it from the power supply. This is a sign of serious internal damage. A service center employee will be able to accurately identify the defect and eliminate it.
- Adjust the length and type of seam according to the operating instructions, but avoid setting maximum (limit) values.
- If problems are identified, do not try to repair the unit yourself. Due to unqualified intervention, there is a risk of injury, damage to other elements, or the product becoming completely unsuitable for repair.
If your machine begins to malfunction, then there is no need to “help” it (forcibly push the fabric, adjust the thread tension on the device that is already turned on, etc.). Most often this leads to the formation of additional damage. It is better to call a specialist from the A-Iceberg service center, who will identify the source of the malfunction and eliminate it in your presence within one to two hours.
Problem #1:
In photo 1, the switch from left to right injection occurs under the needle plate.
On the handle, the width of the zigzag is number 5. And from the edge of the hole, on the right, to the needle is more than 0.5 mm and on the left more than 1 mm. Or vice versa. Doesn't matter now.
No. 1. Eliminate:
The needle should switch over the needle plate.
Procedure:
- We lower the needle, on the right zigzag injection, to the lowest position, turning the handwheel.
This is when, a little more, a little more and she will switch. In photo 1, the needle, in the upper right point is zero.
Broken upper thread
Incorrect threading. — Poor quality threads. — The thread number does not match the needle number. — The spring of the bobbin case lock has weakened. There is a small screw inside the bobbin case; if you unscrew it, the lock mechanism can be removed and the spring can be stretched slightly. But it is better to buy a new bobbin case. — There are nicks and burrs along the way the thread passes to the needle. Follow the path of the thread and remove them. In old Podolsk-type machines they can be located on the tensioner rod, in the form of cuts. Disassemble the tensioner and inspect the rod, remove them with sandpaper.
The stitch in the sewing machine loops: causes and solutions
When working with a sewing machine, it happens that the bottom thread of the seam begins to loop. Most often, the cause of this malfunction is an insufficiently tensioned thread. The stitching becomes uneven in the bottom row, which may seem to be due to the bottom thread, but do not be mistaken. The reason for the looping is precisely the upper thread, and if it is tensioned according to all the rules, the undesirable phenomenon should disappear.
But solving the problem is not always so easy, and the action taken may not give positive results. Let's find out why the sewing machine sews loops, what is the root cause of this effect and how to fix this problem.
What are the disadvantages of a zigzag seam?
| Fault options | Causes | How can they be fixed? |
| The machine starts sewing, then the handle automatically switches to another line. | The screw securing the control for switching stitch types has become loose. | The screw needs to be tightened. |
| When setting the maximum stroke width, the stitch length is shorter. | The rocker arm of the zigzag block has shifted in one direction. | It will be difficult to independently adjust the operation of the unit. It is better to seek help from a specialist. |
| While sewing, the step length changes unevenly. | Several teeth on the main gear have worn off. | The part needs to be replaced. Straightening the teeth if they are wrinkled will bring a temporary effect. |
| The machine starts sewing, then automatically switches to straight stitch. At the same time, the stitch selection knob remains in place. | The fastening connecting the lever that switches stitch types and the settings control knob has become loose. | Requires complex adjustment of the zigzag block. You need to contact the master. |
| The movement of the needle during the transition from left to right and from right to left occurs almost next to the needle plate or in the thickness of the fabric. | The operation adjustments of the unit have gone wrong. | You need to seek help from a specialist. |
| There was an unusual knocking sound when sewing a line. | Requires professional diagnostics and adjustment by a specialist. | |
| The needle has moved to one side and is hitting the needle plate. | The needle holder on the zigzag block is loose. | A master can set the needle holder correctly. |
| Inconsistency between the positions of the switching stitch handle and the type of decorative seam being performed. | The wizard will help you set the position of the regulator knob. |
Features of a zigzag seam
At home, not every dressmaker can buy an overlocker in addition to a sewing machine. Especially if she doesn’t sew often. Therefore, many craftsmen use a zigzag seam to process the edges of the product. To obtain a beautifully overcast edge of the product, the seam must meet certain requirements:
- The length of each stitch should be the same.
- The pitch distance between adjacent punctures should be the same.
- The seam should not tighten the fabric. This happens especially often on thin fabrics.
When working with dense fabrics, zigzag almost always works well. But if you use a zigzag stitch to overcast the edges of thin fabrics (even cotton), the quality of the seam will be reduced. Experienced seamstresses use various tricks to work with thin fabrics, for example, placing paper under the thin fabric, or processing the edge of the fabric with a hem. But in this article we will not dwell on this issue in detail.
