Your Brother, Pfaff, Bernina, Astralux, Janome or any other sewing machine has broken down, contact the SuRem service workshop. An experienced master will come to your home or studio in Moscow at a time convenient for you. You can fill out an application to call a specialist on the website or call by phone. We work from 8:00 to 23:00 without breaks and weekends.
Identifying the problem thread
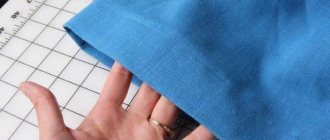
Before starting work, regardless of which machine it will be used, it is necessary to thread the working threads. The operating principle for all devices will be identical. Preparation must be carried out with the device turned on, with the presser foot in the upper position.
The top thread should be threaded first. Fill the bottom one next. How to do this is better to look in the user manual for a specific machine model.
Problems with threads can cause the following seam defects.
- With a high-quality, even top line, the bottom loops. It may seem that it is the purl (bottom) thread that is not threaded correctly. In fact, the top thread goes down and forms loops. The situation can be corrected by increasing its tension.
- On the contrary, the appearance of loops at the top occurs with high-quality bottom stitching. Here the problem lies in the thread coming from the shuttle. It is necessary to adjust its tension.
If simply adjusting the tension cannot correct the situation, it is worth considering other reasons and checking all possible options.
Why does the bobbin thread form loops?
Most often, the reason lies in insufficiently thorough and non-periodic maintenance of the sewing machine.
At the same time, it is worth remembering that independent intervention in the device is not encouraged by the manufacturer; as a result, the warranty may be void.
The machine must be used strictly in accordance with the rules specified in the manual.
Usually the bobbin thread loops for the following reasons.
- The thread is not wound well on the bobbin. This can happen if the craftswoman did it manually. In this case, the thread is distributed unevenly in height, with different tensions. As a result, it is also supplied unevenly and loops to the workplace. The problem can be solved by simply rewinding the bobbin, but this time using a sewing machine. The bobbin winding function is provided in all models of machines, from simple to professional.
- Working with fabrics and threads that are not suitable for this machine (usually the user manual contains a list of materials recommended for use). Sewing with threads or fabrics not specified by the manufacturer can have unpredictable consequences, including looping of the bottom thread in the finished seam.
- The lower thread is not adjusted correctly: there is insufficient thread tension from the shuttle. Using threads of different brands (they can have different thicknesses, textures and degrees of elasticity), it is necessary to adjust the tension of the thread coming from the shuttle each time. This is done using a screw located on the tension plate on the bobbin case or on the bobbin holder. To increase the tension, you need to turn it a little.
- The bobbin or shuttle case is defective. A crack or break can affect the quality of the seam. Moreover, the breakdown may not be visually detected. If the above nuances have been adjusted, but the quality of the seam has not improved, you should replace the shuttle parts with new ones.
Thread frays have accumulated between the tensioner plates
While the sewing machine is operating, meters of thread pass through it, leaving behind an almost invisible mark - thread stripping. It accumulates and harms the sewing machine. The result of filling the plates with fraying will be a looping stitch.
You might be interested in everything about women's sewing measurements: a detailed plate
To troubleshoot problems, remove debris between the plates.
Attention! You need to have a special piece of cloth for the machine to remove dust and fuzz.
Cleaning the sewing machine with a brush
If the upper thread forms loops
As already mentioned, a problem with the top thread is diagnosed by looking at the loop at the bottom. There may be several reasons for this.
- Insufficient upper thread tension. There is a disk tension regulator on the body of the machine. The setup must be done using it. It is also important to check whether the needle size matches the thickness of the threads used.
- The tension regulator is clogged with debris. Over time, thread fluff can accumulate between the adjuster discs, causing the washers to not press against each other tightly enough. You can remove debris with a brush or a brush with long, stiff bristles.
- The lower thread is over-tensioned. You can adjust it using the algorithm described in the previous section. The screw will rotate in the opposite direction.
- Failure of the bobbin case spring. If the material from which it is made begins to fray, the thread will get stuck in the notches of the metal, and the tension will become uneven. In this case, the part must be replaced.
- Problems with the thread guide. You can see them if you start sewing slowly on a test piece and watch how the top thread behaves. If it catches on the notches on the thread guide, it should also be replaced.
Main types of sewing machine malfunctions
Problems with sewing a product arise due to improper operation or equipment breakdowns. Minor problems related to settings errors can be resolved yourself. To solve serious damage, you will need the help of a specialist. This applies to cars of domestic (“Podolsk”, “Chaika 142 M”) and foreign (“Dzhanom”, “Singer”, “Jaguar” “Brother”, etc.) production.
What problems are encountered:
- thread break;
- skipped stitches;
- needle breakage;
- poor tissue advancement;
- looping of the upper and lower threads.
Stitching defects or why the bottom thread loops in a sewing machine
The thread is not threaded correctly. Different models (Juki, Janome, Jaguar, Brother, Singer, etc.) may have some differences in threading, so it is important to follow the instructions. If your sewing machine is looping, you can try removing the thread and threading it again.
There are nicks on the needle plate. As a result, the thread begins to cling to the notches and forms a loop at the bottom of the line. To avoid this problem, do not pull the material by hand while sewing. You need to adjust the pressure of the presser foot on the fabric so that your hands are not needed.
There is no compensation spring on the tension regulator. It is needed to create a high-quality stitch. Thanks to the spring, the shuttle resets the thread, tightens a strong seam and receives the required amount of material from the spool. Over time, the part may fail, so it is replaced with a new spring mechanism.
Additional Information! In rare cases, older manually operated machines (such as “Chaek”, “Podolsk” and “Singer”) may not have a compensation spring at all, but this does not affect the operation of the device
The bobbin thread is too tight. When the machine tightens the thread too much, the stitching ends up looping or crooked. The seam is broken, and when you try to smooth it out, the thread breaks. The tension is adjusted with a screw on the bobbin case. In a correctly executed stitch, the bottom thread will be visible from above, and the top thread will go to the wrong side of the material.
The thickness of the lower thread is greater than that of the upper thread. The leading role is played by the top thread. She pulls out the bottom one, which should be a number thinner and more elastic. Otherwise, the seam will turn out uneven and loops will form. The defect is corrected by replacing the threads.
Important! Threads are selected according to the thickness of the fabric and needle number
The spring on the tension regulator does not press the thread well. As a result, an excess of thread appears, which accumulates at the bottom and begins to tangle and loop. Sometimes it happens that the regulator axis is pinched, and the longitudinal slot does not allow the spring to compress and decompress freely (typical of Podolsk cars). Also, the upper coil of the spring mechanism may be deformed. To eliminate the malfunction, you need to bring the control axis into a position so that the spring moves easily.
The upper thread should be thicker than the lower thread (photo: dns-shop.ru)
The tensioner washers remained loose. When the foot is raised, the washers are released. If they remain in this position when lowering the presser foot, the thread begins to pass too freely and forms loops. The problem occurs due to dirt, rust, bends, broken springs, etc. The defect must be removed by disassembling the tensioner assembly and eliminating the cause of the jamming.
The conical spring is not functioning properly. As a result, the fabric is not pressed by the washers, wobbles and creates loops at the bottom of the seam. To get rid of the problem, you need to adjust the control axis. It must be in such a position that the spring moves freely along the axial hole.
The washer pusher is stuck. Most often the problem occurs due to rust, contamination of parts or damage to the mechanism. To fix the problem, you need to clean the parts from rust or dirt, replace damaged components, or purchase a new pusher.
Roughness has appeared on the surface of the shuttle. The reason may be the machine being idle for a long time without use, especially when stored in a damp place. The defect must be eliminated by replacing the bobbin case or polishing with cloth and a special paste.
Setting the stitch on a sewing machine
You can correct defects yourself if the reason lies in incorrect equipment settings. You need to check how the thread is threaded and adjust the tension. The thread and needle must be selected in accordance with the thickness and texture of the fabric that needs to be sewn.
When the car loops from below, what to do:
- Check thread tension.
- Inspect the entire path of the thread.
- Make sure the bobbin and cap parts are in good condition.
- Check the quality of the thread winding on the bobbin.
- Check the settings with the instructions.
In case of serious breakdowns, when you need to replace some parts or components, you will need the help of a specialist. Trying to repair the car on your own may make the situation worse.
Important! In order for the sewing device to work properly, it must be cleaned and lubricated with special machine oil in a timely manner.
How to Avoid Looping and Other Sewing Machine Problems
Often, malfunctions during sewing occur due to improper operation of the device and lack of proper care. The equipment must be set up strictly in accordance with the machine manufacturer's instructions.
Before using the machine, it is important to read the instructions (photo: remrus.ru)
Recommendations:
- thread correctly;
- monitor the tension;
- use threads and needles in accordance with the type and thickness of the material;
- lubricate the machine in a timely manner and remove dirt;
- store in a dry place out of reach of children.
Threads and needles must be suitable for the fabric being processed. You cannot sew thick material (jeans, tarpaulin, twill, etc.) with a thin needle, otherwise the product will be damaged. The thickness of the needle and thread is indicated by number markings.
Useful tips on sewing techniques
Before work, you need to check the ease of movement of the mechanism, fastening of parts, threading and needle installation. Do not use bent, rusty, deformed or blunt needles. First, it is recommended to sew test stitches on a small piece of fabric, and then start creating the product.
Clean the machine with a soft brush or cloth. Tweezers or a needle will help you get debris out of hard-to-reach places. It is important to ensure that lint, thread residues and dust do not accumulate in the shuttle and other parts of the machine. To access the internal mechanisms, use a screwdriver.
The frequency of lubrication depends on the intensity of use of the device. For frequent use, it is recommended to lubricate with special sewing machine oil once a month. If you have to sew occasionally, once every six months is enough. You can purchase accessories and oil for your car in specialized stores in Moscow and big cities.
The serviceability of sewing equipment depends on proper operation and proper care. In case of errors in use, you can eliminate the defect yourself; in case of serious damage that requires replacement of parts, you need to contact a specialist. The video below explains in more detail why the bottom thread loops in a sewing machine.
Repairing machine malfunctions
Let's take a closer look at the various mechanical problems that lead to looping threads and how to fix them.
Threading in jerks
Does the thread move with sharp movements in the gap between the shuttle and the pusher, lingering slightly after this? This means that the gap between the inlet part of the pusher and the shuttle nose is less than the instructions require. In such a situation, normal work is impossible, which is why the bottom line loops.
Troubleshooting is complicated by the lack of uniform values. For each model it is selected individually.
Experts recommend trying to increase the space at the exit of the thread from the shuttle. You can also reduce the tension on the compensation spring, which may be over-tightened. Although this is paradoxical, this position also leads to the fact that the lower thread loops.
The hook is too low relative to the needle
You have corrected the tension problems, but the problem persists. Why does the thread loop in this case? It is possible that the nose of the shuttle, being in its extreme position, extends beyond the needle by more than two millimeters. The situation is complicated by the increased gap between the interval plate on the shuttle stroke body and the needle. If it exceeds one millimeter, the thread will be firmly captured by the shuttle, but will fly off too slowly.
This is the main failure in many models. It's all about the way the shuttle shaft is attached to the capsule crank. The use of a pin for these purposes has long been unjustified and is subject to much criticism from experts. Such a design is not capable of ensuring reliable operation.
Replacing the thread guide plate in the sewing machine or repairing it will help correct the situation.
- Carefully remove the part and anneal the areas with technical holes over an open fire; you can use a candle for this.
- Leave only the working area untreated; it must not be annealed.
- After this, take a large needle file and cut holes in the direction away from the work area.
- Place the part in its original place, leveling the gap between the needle and the plate to one millimeter.
- Upon completion of the procedure, you will have to replace the unreliable pin with a mounting bolt.
- Having achieved reliable fixation, set the distance between the nose of the hook and the needle in the extreme position so that it is equal to two millimeters.
The spring on the tension regulator does not press the thread well
The bottom line of a sewing machine loops if the thread in the tensioner is pinched. You can check this in a simple way. It is necessary to begin to pull the upper thread a little, without threading it into the needle, with the foot lowered and raised. Repeat this several times. If the thread begins to sag or stretch weaker than usual, there is a problem.
Important! The upper thread is not tensioned correctly, being pinched between the spring, which causes the lower thread to loop.
If the spring is deformed, then it can change the distance between its turns during operation. This causes the upper thread to feed incorrectly.
You may be interested in: Using the Moscow seam for thin fabrics
To troubleshoot problems, the Podolsk plant recommends inspecting the spring. If the spring moves with snagging, then you should move its coils apart with a screwdriver.
Thread tension regulator diagram