MACHINE WORK: Finishing seams
Finishing seams are the last of 3 distinguished groups of seams (according to classification). We will describe it similarly to connecting and edge ones: name, diagram, manufacturing process with specifications and example of application. Be patient - the end will soon... Simple finishing fold Scope: finishing solid parts with folds Description of the execution process with possible specifications:
- The fold is marked from the inside with three lines: middle, side and perpendicular to them with a line limiting the end of stitching of the fold (if the fold is supposed to be stitched to a certain level)
- The part is folded with the front side inward along one intended line and swept along the second longitudinal intended line or ground down to the transverse intended line.
- The fold is ironed and the basting threads are removed.
Complex finishing fold Scope: finishing of solid parts with curved folds Description of the execution process with possible specifications:
- On the front side, two lines are drawn: the location and depth of the fold.
- On the wrong side, along the depth line of the fold, a strip of cotton fabric is stitched
- The strip is unscrewed to one side, the fold is swept up, folded face out along the second line and ironed.
- Place a fastening stitch by stitching the part onto a strip of cotton fabric. Remove temporary threads.
Simple connecting fold Scope of application: finishing of prefabricated parts with folds Description of the execution process with possible specifications:
- The fold is marked on one part from the inside with two lines: a depth line and, perpendicular to it, a line limiting the end of stitching of the fold (if the fold is supposed to be stitched to a certain level)
- The parts are folded right sides together and stitched down. 10 mm.
- The parts are swept along the fold depth line or ground down to the transverse line.
- The fold is ironed and the basting threads are removed.
Complex connecting fold Scope: finishing of prefabricated parts with folds Description of the execution process with possible specifications:
- The edge of the upper part is ironed inside out to a fold depth of + 7-10 mm
- On the front side of the lower part, mark the orientation line for the fold of the upper part.
- The upper part is placed on the front side of the lower part with a fold to the intended line (less often with the cuts aligned) and the depth of the fold is adjusted.
Finishing embossed tuck Scope: finishing the surface of shirts, dresses Description of the execution process with possible specifications:
- Mark the relief with one line from the front side
- The part is folded along the intended line with the front side facing out and stitched in. 1-3 mm
- The part is unfolded
Finishing embossed line Application: finishing of products Description of the execution process with possible specifications:
- On the front side of the part, two parallel lines are drawn at a distance of 5-10 mm from each other.
- When laying stitches from the inside out, a strip of cotton or lining fabric is placed, forming a drawstring for threading the cord.
- By using voluminous material for the backing or by setting slack when laying the second line, a voluminous seam effect is achieved.
Finishing tuck simple Scope: finishing of products (imitation of divisions) Description of the execution process with possible specifications:
- Mark the relief with one line from the wrong side of the part
- The part is folded along the intended line with the front side inward, laid on a strip of cotton fabric and adjusted with a width. 1 mm
- The upper part of the part is folded back and re-attached onto a strip of fabric sh.sh. 5-10 mm
Complex tart finishing Scope: finishing of products (imitation of divisions) Description of the execution process with possible specifications:
- On the front side, the details outline the relief.
- Place a stitch along the intended line, placing a strip of cotton fabric under it on the wrong side.
- The part is folded inside out relative to the connection line and a stitch is laid along it. 1-2 mm
- The upper part of the part is folded over to the front side and it is sewn onto a strip of fabric with a seam width specified by the model.
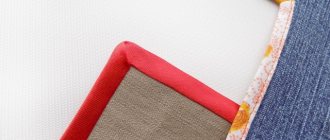
Finishing with connecting edging Scope: finishing of connecting seams of parts with edging Description of the execution process with possible specifications:
- The edging strip is ironed in half lengthwise, right side out
- The strip is stitched to one part, laying it on the front side of the part with the cuts aligned, sh.sh. 4-14 mm
- The parts are ground sh.sh. 5-15 mm
- Seam allowances for stitching parts are ironed
Finishing with edge edging Scope of application: finishing the edges of parts with edging Description of the execution process with possible specifications:
- The edging strip is ironed in half lengthwise, right side out
- The strip is stitched to one part, laying it on the front side of the part with the cuts aligned, sh.sh. 4-6 mm
- The parts are ground with a width of 5-7 mm
- The part is turned out relative to the connection line 5. The edge of the part is straightened and ironed.
Finishing seams with sealant in a wooden house
The most effective means for solving the problem under consideration today are special acrylic-based sealants. They have many advantages over materials of natural origin. The main advantage of such sealants is their high elasticity. Due to this, they reliably protect the space between the crowns from moisture in all weather conditions.
There are other arguments in favor of finishing seams with acrylic. Sealants based on it are attractive because they only need to be applied once - after the main shrinkage of the house (that is, about a year and a half after assembling the frame). At the same time, they improve the appearance of the house. Thanks to a wide selection of shades, owners of a log house made of any type of wood can easily choose the product that best suits them.
Today we will talk about seams that are made on a sewing machine. Machine seams are divided into 3 main groups - connecting, finishing and edge. By studying the types of seams, understanding how each seam is made and practicing on samples, you will ensure that all seams in your products are made perfectly.
Connecting seams
Stitched seams are used to stitch together parts of a product, and are the most common when sewing products. Stitched seams are made using a simple machine stitch. The stitch length depends on the fabric and the purpose of the seam.
Rice. 1. Types of seams - connecting
Stitch seam "on edge"
To form a stitch seam, place two parts on the edge with their right sides inward, align the cuts and machine stitch at a distance of 0.5–2.0 cm from the edge.
The seam can be made either without a fit or with a fit of one of the parts being sewn. When making a seam with a fit, the upper part is seated. The rib stitch is used when connecting sleeves to armholes, pocket burlap parts, and also when making other stitched seams.
Pressed stitch seam
When making a backstitched seam, first a stitched seam is made on the edge, then the allowances are ironed and both allowances are ironed on one side. The pressed seam is used to connect side, shoulder and other seams of products made of thin fabrics.
Pressed seam
When making an open-iron stitch seam, first a stitch seam is made on the edge, then the stitching is ironed, and the seam allowances are ironed in different directions. The seam is used to connect side, shoulder and other seams of products.
Rice. 2. Types of seams - connecting patches
Overlay seam with open edges
To make an overlay seam with two open cuts, the parts are placed on top of each other with their right sides up and stitched at the same distance from the cuts. The cuts are left open. The width of the allowance is 0.2–0.7 cm. This type of seam is used when sewing fabric products that do not require processing - loden, sheepskin fabrics, parts of gaskets, etc.
Overlay seam with one closed cut
When making an overlay seam with one open cut, first make a stitch seam on the edge. Then the stitching is ironed, the seam allowances are pressed onto one of the parts, along which a finishing stitch is laid on the front side. The distance from the stitching line to the sewing line depends on the model, 0.5–1.0 cm.
If the model provides two finishing lines, then the distance from the stitching line to the first stitching line is 0.2 cm. The distance from the first line to the second is 0.5–0.7 cm.
An overlay seam with one open cut is used to connect parts (for example, a yoke with a front) in the manufacture of clothing.
Overlay seam with two closed cuts
a) To make an overlay seam with two closed cuts, the edges of the cuts are folded to the wrong side or basted by 0.5–0.7 cm. One edge is placed on the other and a stitch is laid at a distance of 0.1–0.2 cm from the folded edges This seam is used to sew belts, straps, cuffs, etc.
b) The second way to make an overlay seam with two closed cuts is to bend both cuts by 0.5–0.7 cm, apply it to the product and stitch at a distance of 0.2 mm from each edge. Used when making drawstrings.
Rice. 3. Types of seams - connecting seams
French seam
To make a French or double seam, the parts are folded inside out and stitched with a seam width of 0.3–0.5 cm. Then the part is turned right side out and the stitching seam is straightened so that it is located along the edge. The second line is laid at a distance of 0.5–0.7 cm from the fold so that the cut of the seam is sealed inside. This type of seam is used when sewing clothes from loose and transparent fabrics.
Covering seam
To make a sewing seam, two parts are folded with their right sides inward, the allowance for one part is cut to 0.5 cm. Then the parts are ground down. The allowances are folded to the side of the part so as to cover the smaller cut. The cut of the larger allowance is folded and a second line is laid at a distance of 0.1–0.2 cm from the folded edge. The width of the sewing seam is 0.7–1.0 cm. The sewing seam is used for the manufacture of bed linen, as well as in products made from thin fabrics without lining, denim clothing.
Lock seam
The lock seam is similar in design to the closed seam, but is performed a little differently. First, an overhead suture is made with two open cuts. Then each part is turned over and adjusted according to the allowance. The lock seam is very durable and is used when sewing products that require reinforced stitching - work clothes, backpacks, etc.
Rice. 4. Types of seams - finishing
Topstitch stitch
To make a topstitch seam, first a stitch seam is made, then the seam allowances are laid out in different directions and two finishing lines are laid on the front side at the same distance from the stitch line. The distance from the stitching line to the unstitching line depends on the model (0.2-0.5 cm), from the seam cut to the unstitching line - 0.2-0.5 cm. The unstitching seam is used for joining sections of products made from materials where the seams are ironed not allowed. For example, in leather goods.
Backstitch
To make a seam, you need to mark the required width of the fold, lay the fold according to the marking and stitch it. The seam is used to make folds on products.
Open cut adjustment stitch
To make an open-cut adjustment seam, you need to stitch the part according to the markings, turn it right side out and topstitch along the edge. The seam allowance remains open. This seam is used when making pockets, yokes, etc.
Closed bevel adjustment stitch
It is performed in the same way as an open-cut adjustment stitch, but the seam allowance is cut off and stitched inside with a finishing stitch. This seam is used when making pockets, yokes, etc.
Rice. 5. Types of seams - finishing
Overlay seam with edging
Place the piping between the parts according to the markings and stitch. Place the stitch at a distance of 0.3–0.4 cm from the edge of the edging. Turn the parts right side out, place allowances on one of the parts, and iron. It is used for finishing seams on the front side of products and on the lining.
Overlock seam with edging
Fold the edging with the piece of the product and stitch. Turn the parts right side out and iron them. This type of seam is used when finishing pockets, collars, bed linen, etc.
Rice. 6. Types of seams - edge
Open cut edge stitch
When making a seam, the bias tape is attached to the product part at a distance of 0.5 cm from the edge, folded over to the front side and adjusted 1 mm to the right of the edge of the tape. The inner cut remains open and can be covered with a lining or left open, depending on the product.
Closed-cut edge stitch
When making a seam, attach the bias tape to the seam allowance of the product at a distance of 0.5 cm from the edge, wrap the seam allowance with the tape, tuck the edge of the tape and stitch at a distance of 0.2 mm from the edge. It is used when edging sections of products without lining.
Edging with braid
When performing edging with braid, braid with closed cuts is used. The width of the braid is determined by the model. To make a seam, the edge of the part is wrapped with braid, folded in half, and a seam is laid along the edge of the braid. Used for edging pockets, collars and other parts.
Framed edge stitch
To make a seam, the bias facing must be folded in half and ironed. Apply the facing according to the markings, sew a seam, bend the facing and iron it. This type of seam is used when processing pockets into a frame.
Overlock seam "In split"
When making a split seam, a seam is first made “on the edge”, then the parts are turned to the front side, and the seam is straightened so that it is located along the edge. The seam is used when processing belts and other double-sided parts.
Overcast seam "in edge"
When making a split seam, first a seam is made “on the edge”, then the parts are turned to the front side, the seam is straightened to form an edge on one side. The seam is used when processing hems, collars, cuffs and other parts of clothing.
Rice. 7. Types of seams - edge
Overlock seam with closed binding
To make a seam, you need to bend the binding in half, stitch it to the part of the product along the edge at a distance of 0.5 cm from the edge, turn the binding to the front side and stitch along the edge. This seam can be used to process the bottom of parts and sleeves, lining pockets, etc.
Overlock seam with double tape
To process a seam, you need to stitch one side of the binding along the edge of the part, turn the binding to the front side, fold it along the edge and stitch at a distance of 0.2 mm from the edge of the binding.
Rice. 8. Narrow edge seams
Moscow seam
To complete the seam allowance, you need to turn it up 0.5 cm and sew a stitch at a distance of 0.2 mm from the edge. Cut off the excess allowance, bend the edge of the part by 0.3 mm and lay a second line on top of the first. The Moscow seam is used to process the edges of items made from thin fabrics - scarves, shawls, etc.
Zigzag
To make a zig-zag seam, you need to bend the cut and stitch along the edge. The stitch width and frequency are determined by the model. Trim off excess allowance. This seam is used for processing the edges of flounces, sewing knitwear, etc.
Hem seam with open cut
A hem seam with an open cut is made in this way: the seam cut is treated with an overlock stitch, the seam allowance is folded and adjusted.
This seam is used when hemming the bottom and sleeves of products.
Closed hem seam
When making a hem seam with a closed cut, the seam cut is folded by 0.5–0.7 cm. The stitch is laid at a distance of 0.2 cm from the edge.
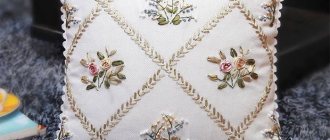
Most often, finishing stitches are performed on jeans, lapels, collars,
Pockets, along the edges of coats and jackets and on accessories, for example, finishing stitches on the seams of a bag.
Threads for stitching
For finishing stitches, the most common sewing threads are used, but, as a rule, twisted threads, which are thicker than usual, are used for topstitching.
Both tone-on-tone threads and contrasting colors are suitable. The latter are best used if you want to highlight certain details on the product. There are also special threads on sale for finishing seams, for example, for stitching jeans, as well as decorative threads for sewing
Marking finishing stitch lines
It is best to mark the lines of finishing stitches with a phantom pencil or “magic” tailor’s chalk, because after a while these lines will disappear by themselves. If you use regular tailor's chalk or soap, they can be easily sharpened with a regular knife. The marking lines will be thin and clear.
read the website
How to make a finishing stitch
Finishing stitches can be sewn with a single or double needle using a regular straight machine stitch of any length or
, however, the latter requires skill so that all stitches are the same.
Important!
When performing finishing stitches on jeans with special stitching threads, the latter are wound onto a bobbin. The top thread is not changed.
Finishing stitch along the lines of the motif
If the finishing stitch needs to be laid along the lines of the motif, then the motif is reprinted onto burda silk paper or regular tracing paper. A sheet of paper with a motif is pinned to the cut piece on the front side. The stitch is laid directly on the paper, and then the paper is removed.
You can also transfer the motif onto a piece of interlining, iron it on the wrong side of the product and lay a finishing stitch along the drawn lines on the interlining.
How to stitch straight
The finishing stitch must be done perfectly evenly.
First, you should practice on unnecessary scraps of fabric. Start stitching at low speed and gradually increase it. In addition, use all possible straight stitching tools in your sewing arsenal: Markings on the needle plate,
A special foot with a ruler or the edge of a presser foot.
A special stitch will also help you to lay an even stitch along the edge.
Due to its environmental friendliness, wood is extremely popular in the construction of residential buildings. Wood creates a microclimate indoors that is optimal for humans. In summer, a room made of such material remains pleasantly cool, and in winter it retains heat perfectly. It is also important that wood does not require special external and internal finishing. The only thing that may be required is finishing the seams of the house and sealing them.
Despite all the positive qualities of wood, it has a number of disadvantages. Due to constant contact with precipitation, sun and other atmospheric phenomena, the tree rots or dries out. When it rains and snows, logs absorb moisture, causing them to swell, and on sunny days, the moisture evaporates and the logs dry out. Because of this process, cracks form in the timber, which contribute to rotting and drafts. However, these phenomena can be prevented by high-quality sealing of the joints and crevices of the material. When the logs dry out, the lower beams (crowns) of the house are sealed.
