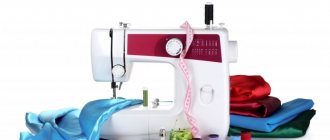
What you will need
To sew a cap yourself, you will need thick fabric that can hold the correct shape. True, summer models intended for children can be made from lightweight, breathable materials. It is best to resort to using the following:
- drape;
- linen;
- thick cotton fabric;
- suede leather;
- felt.
The material should also be selected taking into account the purpose of this accessory. If this is a military headdress, then it is recommended to give preference to canvases with a gray-green tint. Stewardess caps can be made from suede. In order for the product to keep its shape well, it is additionally recommended to use an adhesive backing. With its help, several tasks are performed at once:
- make the edge clear and contoured;
- glue the bottom parts together and form folds;
- increase the density of the edges and thus help maintain shape.
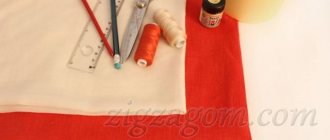
A cap for a child and an adult is made using the same set of tools. In this work you will need soap or chalk, scissors, a measuring tape and a sewing machine.
What fabric is better to sew a military cap from?
The result of sewing a military cap directly depends on the choice of material and the correct pattern. The main guideline is density; the material should not be too soft and airy. In wartime, caps were sewn from cotton fabric or wool blend cloth, but this is not the only option. When choosing, you need to take into account the weather; if the May days turned out to be warm, then choose light, breathable fabrics:
- thick cotton;
- thick linen;
- cloth;
- thin felt;
- drape;
- suede leather.
Measurements and pattern creation
The first step is to create a cap pattern. It's quite simple to do. The drawing should consist of the following elements:
- the basis;
- band;
- bottom.
In order to create a pattern, you will need to find out the circumference of the head and determine how tall the finished product should be. As a rule, it does not exceed 11 cm.
Initially, the first detail is drawn. It is a rectangle, the length of which should be equal to half the volume of the head. It is additionally recommended to add 0.5 cm to this parameter. The side parts must correspond to the desired height. The second part of the base is made rounded. The result is a trapezoid with a rounded top.
The band is built according to a similar pattern. The only difference is that its height should be a couple of centimeters smaller.
The bottom is created by drawing an oval, pointed at the ends. One of its sides should be equal to the length of the top element.
All that remains is to cut out the finished pattern and transfer it to the fabric. Using this principle, you can design a cap with your own hands, regardless of its type. You just need to take into account the features of each model.
Selection of materials and tools
The main criterion for selection is matter density . Soft, flowing material will not give clear, laconic folds that are inherent in any cap style, so we sweep them away right away.
Suitable for us:
- cloth;
- dense linen, cotton;
- felt;
- drape;
- suede leather.
Required tools:
- sewing machine;
- scissors;
- measuring tape;
- chalk.
In addition, you will need an adhesive pad.
Reference! The headdress is a slightly flattened cap; it was part of the uniform of the armed forces of different countries. At the moment, part of the uniform of flight attendants of many airlines and restaurant chefs. Headdress of some children's organizations.
Features of tailoring different models
There are several types of caps that you can sew with your own hands. True, the process of their manufacture, taking into account the model, will differ. Step-by-step instructions will help you cope with the work.
For flight attendants
For sellers
For the police
For chefs
Pionerskaya
The process of making a pioneer cap model is as simple as possible. There is no bottom here at all. Accordingly, sewing is greatly simplified. It is made with your own hands from fabric with a red tint. The reverse side in this case should not be pronounced.
The first step is to take measurements and thus determine the circumference of your head. A couple of centimeters are added to this figure for allowances. Then you need to start creating a pattern. In this case, the product consists of a pair of rectangular elements, the length of which corresponds to the half-circumference of the head. The sides are equal to the height of the future accessory. You also need to add 5 cm to the planting depth so that the headdress fits as beautifully as possible.
The pioneer cap is sewn according to the following pattern:
- The created templates are transferred to the canvas. They are outlined with chalk. In the lower part, be sure to leave about 3 cm for lapels.
- The fabric is being cut. In this case, a pair of elements is cut out with scissors.
- The edging is done and the parts are sewn together. Allowances must be taken into account.
- The lapels are carefully ironed.
- The lining is attached to the lower edges.
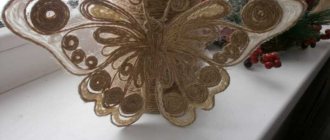
The finished accessory can be decorated at your own discretion. For example, emblems of different countries can serve as decoration. Icons that were relevant many years ago are appropriate. An excellent solution would be stripes.
Soldatskaya
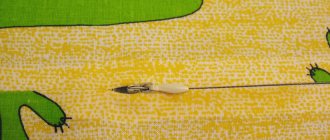
This kind of cap is created most often with your own hands. When making it, the first thing you need to do is create a pattern.
The resulting template is cut out and fixed to the canvas with pins. They are traced around the office and immediately cut out. As a result, we manage to get four elements of the band, a couple of base parts and the bottom.
The reverse side of each element is marked with chalk or soap. After this, the base and bottom are basted, placing these elements inside out on the inside out.
The workpiece is stitched along the basting line. In this case, a longitudinal seam is made on the bottom.
The sides of the future accessory are sewn together. After this, the product is ironed. Particular care must be taken to iron the area of the longitudinal seam created on the bottom.
The side parts of the bands are stitched in pairs. After this, you need to unscrew one of these elements and fold the resulting parts so that they are facing each other with their front sides.
Then the upper sections are attached. In this case, turn the element out. All that remains is to make the front stitch.
Using pins, the base and the band are connected to each other. The design is stitched and the cuffs are overcast.
After this, the product is turned inside out and ironed. The work on its tailoring is completely completed. All that remains is to add a few finishing touches in the form of original decor.
If you are making a children's model, you can decorate it with a red star. An excellent solution would be to use original icons. They are fixed at the front. In their absence, the accessory is decorated with embroidery. An applique can also be made. For example, you can cut a star from a piece of red felt. The easiest way to fix this decoration is with a glue gun.
Air hostess accessory
The flight attendant's cap has a shallow fit. It is literally fixed on the top of the head. The band in this case has a special design. At the front, this detail is narrowed and that is why it gently hugs the forehead area.
The first step is to select the appropriate material. It is recommended to give preference to fairly dense fabric. Its shade should match the tone of the suit. In this case, you should not select the most accurate combination. The tone can be the same as the trim on a shirt or a neckerchief. An excellent solution would be to use drape and suede.
Once the material has been selected, you should begin creating the diagram. The pattern in this case is in many ways similar to the soldier’s model, but still different. Here the parts have a different size. In addition, you will not need as many of them. The base and band need two parts each. One element of the bottom is also required.
With a head circumference of 52 cm, the base will have a size of 21x8 cm. You should also make indents in the upper part of the workpiece of one and a half centimeters. The band in this case will be longer and is 26x6 cm. In this case, on one side there should be an angular bevel equal to 1.5x1 cm. The bottom is drawn in the form of the most common oval, the diameters of which are 11.5 and 6 cm.
When the template is ready, it should be transferred to the canvas and cut. It is extremely important to remember that you need to leave allowances.
After this, the base and bottom along the upper edge are stitched. There is no need to touch the sides at this stage.
Now the band is sewn to the bottom of the base with the bottom cut. The top is then turned and the side parts are sewn together. Upon completion of such actions, the product is turned inside out and carefully ironed.
Decoration is done by sewing an edging of a contrasting tone onto the cap. You can also decorate the accessory with silver wings, which are the pilot's badge. You can also use the Aeroflot emblem. Simply print it out on self-adhesive paper and fix it on the side of the product. Thanks to this, the image will be completely completed.
We sew different types of caps
Pioneer cap
According to this pattern, the cap is sewn from double-sided fabric, without a pronounced reverse side. If you have a different material, then we make the lapel stitched.
Progress:
- Determine the head circumference.
- Select the height of the cap.
- We build a rectangle with a width equal to the circumference of the head, plus 0.5 cm for fit. The height is equal to the height of the cap, plus the height of the lapel.
- We cut out, not forgetting the seam allowances.
- We decorate with emblems and badges as desired.
- Sew the side seams up to the lapel.
- Turn over the bottom edge, fold it in and sew a stitch.
- We perform a lapel.
- Iron it out.
Soldier's cap for May 9
The main cap is for Victory Day.
We build the pattern based on the circumference of the head:
- No. 2 – main part – 2 pcs.;
Progress:
- After cutting, we mark the wrong side on each part, this will be more convenient.
- Using a needle, we connect the second and third pieces in the middle. Front to front.
- We sew, in addition, we lay a line in the center of the bottom.
- Sew the side seams.
- Turn it right side out.
- Steam using an iron.
- We put the first parts, we have four of them, in pairs and sew the sides together.
- Let's iron it out.
- Turn it inside out.
- We insert one of them inside the other, face to face.
- Sew along the top edge.
- Turn it inside out.
- We sew a line on the front side.
- We turn the top piece inside out, then put it inside the bottom piece.
- We fasten the seam on the wrong side, inside the lapel.
A simplified version of the cap
Sequence of work:
- We fold part C face to face, iron it, so we get a fold.
- Sew along the top of A and C.
- We sew the side seams of blanks A in pairs.
- We fold parts B right sides together and sew them together. The lower sections are open.
- Turn blanks B inside out and iron. We sew the cuts.
- We sew the blanks B at the edge and iron them.
- We put the sides into the main part and sew as in the previous model.
- Sew in the round.
- Turn it inside out.
- Ironing.
Stewardess headdress
The pattern is given for a head circumference of 52 cm.
Cutting elements:
Progress:
- We cut out the details.
- We sign the wrong side.
- We sew part C to parts B, having previously secured them in the center with pins.
- Turn it inside out and iron it.
- We sew the A-pieces together in pairs along the rounded upper edge.
- Turn it inside out and iron it.
- We sew parts A to the central part.
Turn it inside out and iron it. Ready!
A cap can be an excellent addition to an image and will help create a laconic and solemn look. It’s quite easy to sew, but if you use other fabrics, such as velvet, you can get an excellent version of an “adult” headdress.
Additional recommendations
Creating successful decor often causes problems. It is very difficult to find emblems and badges that were widely used during the Soviet era. They are not sold in craft stores, but in online stores they are quite expensive. There are several ways to solve this problem:
- If you have the appropriate skills, you can embroider the emblem yourself. For example, by using red threads, decorate an accessory with a red star;
- You can apply the hammer and sickle to the product using appliqué. To do this, just cut out a star from red fabric and create a tiny hammer and sickle from yellow fabric. These elements are glued together and fixed on the finished headdress;
- The simplest decoration method is to use a can of spray paint. To do this, just create a stencil in the form of a star and Soviet symbols and paint over the necessary elements. To ensure that the paint does not fall off in the future, it is sprayed with hairspray.
Even beginners who do not have sufficient experience can sew an original cap on their own. The process of making it is incredibly simple and fun. In order to achieve an excellent result, you just need to choose the right fabric and strictly follow the instructions. In just a few hours you will be able to create a unique accessory that will certainly attract attention.
Pioneer cap: size, description, pattern
The pioneer hat is one of the most interesting symbols of the USSR era. If you urgently need it, then there is no need to run to look for it, because it is quite easy to make a pioneer cap yourself.
The pioneer hat is one of the most interesting symbols of the USSR era
You need to follow this plan:
- First you need to take measurements of the future product. The length of the arc is measured, going from the back of the head to the forehead. Next, the height of the cap is measured, or rather the arc going from one ear to the other. By taking these measurements you can make a rectangular pattern. All sides of the pattern must be equal to the above parameters.
- Now the resulting drawing must be transferred to red fabric. The Pioneers have red caps, so the fabric will need a corresponding red color. The drawing should be outlined with a pencil or chalk so that it is clearly visible. You also need to remember about allowances, because without them the product will sit very tightly on your head. Also, before pinning the fabric, it should be folded with the wrong side up.
- At the last stage, the product is stitched on each side. Then you need to try it on so that, if necessary, you can alter one side or the other. Each seam is sewn on a sewing machine; the edges can be finished by hand.
- The cap should be turned right side out and then ironed.
The bottom cut is also turned over and ironed.
Product Features
This cap, flattened on the sides, was originally used as a spare headdress by pilots from the officer corps of the aviation forces of the Russian Empire. Hence the name, derived from the word “pilot”. It is a compact hat made of soft material. There is a fold in the middle to give it a flat shape. There are many decorative options: signs of belonging to the Armed Forces of a certain country, colored piping, corporate badges.
Caps are also used in the uniform of military cadets, police schools, as well as representatives of the following professions:
- police officers;
- flight attendants;
- sellers;
- cooks
In addition to being purely practical and decorative, caps have an informative function: the badges, main color and shade of the edging make it clear which branch of the military the owner of the headdress belongs to. The idea was adopted by large airlines and supermarkets - corporate colors and logos adorn this element of the uniform.
Often such a headdress acts as a prop in school amateur performances, especially at celebrations dedicated to the Great Victory. And in masquerades, at children's matinees, and concerts for Defender of the Fatherland Day, the cap is so popular that it becomes difficult to get one on the eve of the holiday. Then the solution that saves you is to make it yourself. Numerous master classes on thematic resources will help you figure out how to sew a cap yourself. The complexity of the process largely depends on the selected material, which can either significantly complicate or facilitate the work.
Cook Police Sellers Stewardesses
How to fold a cap from A4 sheet according to the diagram
Above, we specifically calculated the size of a headdress for a child and for this we had to glue together several sheets of paper. But, if you need a soldier’s cap as a souvenir or craft, then a regular A4 sheet will do.
In the photo I will show how much smaller the bottom craft from A4 sheet turns out to be.
We will fold according to the scheme described below. It is very similar to the master class that we have already reviewed. Only the blank format is much smaller.
The process of making paper is as follows:
This scheme was used as a basis.
This craft is not big and can be used as a gift for veterans or as a decoration for a postcard.
DIY military cap pattern for May 9th for children and adults
First, prepare several A4 sheets. If possible, it is better to print the pattern on a printer. If this is not possible, then simply draw it on sheets of paper and cut it out.
You will also need the following materials:
Here is a pattern with actual measurements for a child. If you are sewing a cap for an adult, then allow an allowance of 1-15 cm for the seams, otherwise it will be too small for you.
Military cap pattern Military cap pattern
Cut out each piece from paper, and then you need to transfer the pattern to the fabric. To do this, spread the fabric on the table and pin the pattern to the material with pins. Cut out the parts again, but from fabric.
Remember: If the cap is intended for an adult, then add another 1-1.5 cm on each side for the seams and to add size, otherwise the hat will be too small. This cap pattern is for a child 5-15 years old.
Important: The number of parts that should be made from the fabric is indicated on each individual paper element of the cap. As a result, you should have 7 fabric blanks.
Mark the wrong side of each piece in advance so that you don’t mix it up during the process. This can be done using chalk.
Mark the reverse side on the details of the future military cap
Now start sewing. Below are detailed instructions for performing the work.
Tips for sewing caps:
- All internal seams should be done when the product is turned inside out, since if you sew on the front side, each seam will be obvious. Sewing on the front side of the product is also not allowed because the threads will stick out. This kind of work looks ugly and unattractive.
- Caps must be ironed after sewing. Before this they should be given shape.
- Any cap can always be decorated with beads or buttons. It will be enough to sew them on and the product will become more beautiful.
What you should not feed cats: list of prohibited foods