How to make beautiful outfits from a pareo, scarf or piece of fabric.
Share on Facebook Tweet
Summer is vacation time! Are you already sitting on your suitcases or are you still deciding what to take with you on your trip? Then these tips will definitely come in handy for you. Did you know that just one piece of fabric can replace half of your summer wardrobe? You just need to know how to properly tie a pareo, a large scarf or a piece of fabric. After all, you can make several cool outfits from a scarf or pareo: a pareo can be worn as a skirt, as a cape, as a top or as a dress. Let's see.
1. Poncho
To make a poncho from a large scarf, wide scarf or pareo, twist it and tie it around the waist, holding the middle on each side. Then we tie the loose ends. Turn the knot over backwards and thread the arms through the holes.
2. Sleeveless top
For an evening out in hot weather, a sleeveless top is perfect. Fold the scarf and wrap it around the chest, twisting it at the front. We tie a knot at the back.
3. Sundress
Ideal for going to the beach: wrap the pareo around the body, twist the top corners and tie it in a knot at the back of the neck. Beautiful and loose sundress!
4. Top over the shoulder,
We wrap the pareo around the chest again and throw one end over the shoulder and tie it at the back.
5. Backless Top
Fold the pareo in half to make a square. We tie two corners at the back of the neck, and two at the back of the waist. A great option for a walk on the beach.
6. Cape
It's simple: we tie together two corners on the long side of the pareo and the middle of the same side. We get a light cape.
7. Dress with a ring
For this option we will need a metal ring. For example, an ordinary metal bracelet. We wrap the pareo around the body, pull the upper corners through the ring and tie it with a knot at the back.
8. Criss-cross top
Throw a folded scarf around your neck, cover your chest with a crust cross and tie it behind your back.
9. Skirt
The simplest and most obvious option: fold the scarf in half lengthwise and wrap it around your waist. The skirt is ready!
So, when going on vacation to a hot country, don’t take a bunch of things with you: a couple of large scarves will replace your entire wardrobe.
Source
www.ilovehobby.club
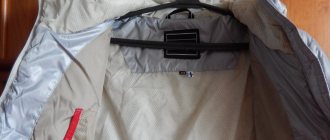
Stage four: performing edging
The dress is almost ready, all that remains is to shape the edges of the cutouts and reinforce the rough seams.
The work is worth it, but the deadline is ticking. Let's remember the unique Alexey Smirnov in his phrases
Germans are massively refusing the AstraZeneca vaccine: what is the reason
Speed 4 meters per second: Roscosmos published photos of tornadoes on Mars
You need to do the following:
- Sew the shoulder and side seams again using the zigzag attachment;
- cut long strips from the remaining knitwear;
- trim the edges of the cutouts with them.
Of course, the edging can be done using braid or a beautiful ribbon.
How to make a dress from a pareo?
Pareo is an accessory that has recently become more and more an integral element in a beach look. After all, such an addition will always emphasize the originality of style and the uniqueness of its owner. And if previously the pareo was used only as a cape from the sun, today fashionistas create amazing and stylish items of clothing for the beach from this accessory. Surely, you have more than once seen a girl who has adorned herself with a beautiful scarf as a skirt, top, or even a jumpsuit. But the most popular and widespread element of the wardrobe is considered to be a pareo dress.
The most fashionable ways to turn a pareo into a dress
To make a dress for the beach from a pareo, you need a large accessory of a square or rectangular shape. To do this, it is not necessary to purchase a ready-made model on the market or in a store. An existing scarf in your arsenal made of chiffon, silk or thin cotton and knowledge of how to make a pareo from it is enough. But since our article is devoted to a beach dress, we will talk about the most popular ways to create it.
So, you have already chosen the appropriate color and size of the accessory. Now let's talk about how to make a dress from a pareo?
Hawaii. This method is the simplest and most convenient:
- Tie the pareo in a knot above your chest. In this case, the incision should be in the front.
- Spread the ends of the knot nicely. If desired, you can make a bow.
Tahiti. This model can be tied with a belt or worn loose. But to make a pareo in the form of a dress add sexiness and attractiveness to your image, use this method:
- Wrap the accessory twice around the waist to create a skirt.
- Tie the top ends into a knot so that they remain quite long.
- Now lift the resulting harnesses up and tie them around your back. You have a style with an open back.
For this method you will need a very long scarf. However, its width may vary. The length of the dress will depend on this.
Bahamas. This method is considered one of the most original:
- Place the pareo behind your back and bring the ends forward.
- Place the left end in the area of the right chest over your shoulder.
- Wrap the right end around you and place it behind your back.
- In the area of the right shoulder, tie both ends into a beautiful knot.
Related articles:
| How to make a jumpsuit from a pareo? Pareo clothing is a popular solution for a stylish beach look. And today, comfortable and light summer overalls made from a beautiful accessory are in fashion. Don't know how to make this outfit? Nothing could be easier! | Beach cover-up for a swimsuit Cover-up for a swimsuit is an essential attribute of a beach holiday. Among the wide variety of similar accessories, you can easily choose the one that is best suited for each specific situation. |
| Women's summer hats for the sea Like it or not, on the beach you have to cover your head to protect yourself from sunstroke. But women's summer hats for the sea are not only a way to hide from the hot rays of the sun, but also to look luxurious, attracting the glances of vacationing men. | How to make pareo shorts? If you don’t know how to make pareo shorts and how to choose their model according to your own figure, this article is for you. Don't forget that this accessory should be in harmony with the swimsuit. Enjoy your holiday and enjoy yourself! |
womanadvice.ru
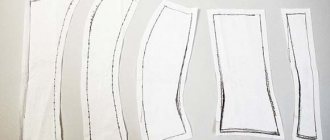
Stage one: cutting the material
The dress is cut in a similar way to a simple ancient Greek tunic. That is, there is not a single complicated detail in the product; you don’t even have to deal with the design of darts.
Step-by-step recipe for making tender cakes with caramelized pineapple
Street style lessons: how to wear sneakers for women over 50 in spring 2021
Nausea, swelling and acne: 6 vitamins without which the female body suffers
The dress consists of two parts - long and wide rectangles. The full width of the material must be used. If the length of the fabric cut allows you to simply fold the flap in half, that’s what you need to do. In this case, the dress will not have shoulder seams.
In the presented project, two long identical rectangles are cut out of fabric. The detail size is the length and width of the dress. In the presented project, the length of the rectangles is equal to the distance from the shoulders to the ankles.
Patchwork products
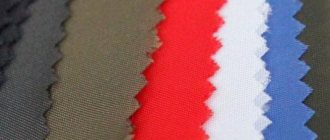
Before you sew your intended item from scraps, you need to get acquainted with the types and techniques of needlework. It will become clear which method of creating a particular craft to choose. The right choice of material is half the success. The fabric is used depending on its properties:
- rugs, blankets and bedspreads are made well from drapery pieces;
- linen is suitable for creating patterns from small fancy details because it fits well and does not slip;
- cotton is used as a base for towels, tablecloths, blankets;
- Silk is difficult to process, but the result is worth the effort - clothes and paintings made from it look gorgeous.
Color combinations play an important role in patchwork. They combine both trimmings that are similar in tone and contrasting ones that are different in pattern.
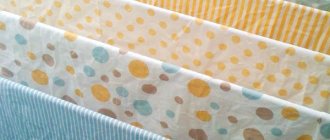
In the kitchen they use juicy fruity shades - yellow, green. Calm, muted tones are appropriate in the bedroom. In the nursery - cheerful, bright. A good start would be to sew from scraps for the kitchen. Potholders, towels, and hot pads are useful practice before creating more complex items.
Traditional way
The most popular and simplest method of patchwork creativity. The canvas, assembled from colored pieces of any size and geometric shape, is placed on a thick lining on the reverse side. The edges are edged.
This is how small kitchen items and large bedspreads and blankets are sewn. This technique is a godsend for beginners. It allows you to get acquainted with patchwork art and improve your skills for the next work.
Quick squares
For this option, at least three long pieces of different colors are sewn together. The result is a wide strip, which is folded lengthwise, face to face, like a sleeve, and stitched and ironed. Apply a triangle ruler first to the upper bend of the sewn pipe, then to the lower one. Measure out 45 degree angles and draw the contours of future squares along the entire length of the sleeve.
The result is triangles folded in half. They cut it, unfold it - the workpiece turns into a striped square. Fragments are combined at the request of the master.
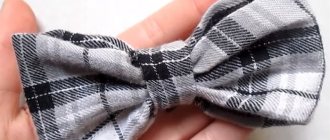
This method is used to create a checkerboard pattern. The pieces are laid out in a checkerboard pattern and sewn together. When unfolded, spectacular diamond shapes are obtained.
Simple types
Stripe to stripe pattern: multi-colored ribbons of different or equal widths, solid or sewn from horizontal sections, are connected. They are laid in different ways, the seamstress’s imagination dictates - zigzag, ladder, diamond.
Home ideas
Bright crafts will decorate your home and bring cheerfulness and good mood to your family’s life. Beginning craftswomen learn from relatively simple things. It’s easy to sew a tablecloth, blanket, rug. Success depends on the desire and talent of the needlewoman.
Colorful pillowcase
Cozy pillows made of colored squares will appeal to all family members. Take any material, calculate how many quadrangles are needed on one side of the pillowcase. If the housewife likes large squares, they make up a canvas of 9-16 elements. A pillow made of small parts looks more contrasting and brighter. Cut the parts, iron them and start assembling:
- The fragments are sewn into strips and the seams are ironed.
- The resulting ribbons are connected according to the pattern and ironed.
- If the pillowcase is unlined, the edges are stitched.
- Leave about 20 cm for the hem or sew in a zipper. The fastener is sewn in when three sides are not yet sewn.
- You can lay a layer of synthetic padding under the canvas and stitch it with curly patterns.
- Connect both parts of the cover, process the seams, and iron.
- Place it on the pillow and check the fit. If the pillowcase is larger, it is sutured. A small one is corrected by inserting additional strips on the sides.
Quilt made from patches
A tempting idea is to make your own blanket. The task is not as difficult as it seems at first glance:
- You will need scraps of at least five colors: the more, the better, with approximately the same texture and thickness. In order not to make a mistake with the selection of shades, they lay out the details and see which option is better.
- Synthetic winterizer, cotton or wool filler is used as insulation. The lining is made of a single color, from natural material.
- The patterns are very different, consisting of rhombuses, triangles, squares, stars, flowers. Collect the front side and iron it.
- Sweep away the layers, laying the blanket out evenly with the lining facing up. Baste by hand from center to edge. This is an important stage of work: how the product will behave during stitching depends on the correct estimate. Lay as many seams as possible to avoid distortions and unnecessary gatherings on the surface.
- They grind one side of the border, it fixes the correct position of the layers. They quilt the blanket, finish finishing the edges with edging - tucking and stitching.
Once you get acquainted with the world of patchwork, you will never want to part with it. This art is evolving, surprising with new possibilities and the boundlessness of human imagination.