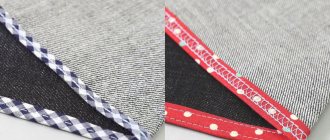
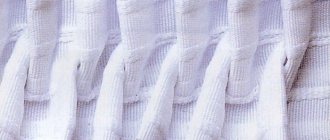
An elastic band (elastic band) is attached to the waistline of those dress models that need to be fitted. A belt (cut-off or one-piece) is not used in this case. The density of the folds on both sides of the elastic is preserved.
The elastic is attached to the product using a sewing machine or by hand. You can narrow the dress at waist level using elastic threads (rubberized threads), which are used to sew the fabric on a machine.
cujournal.ru
Sewing rules
Regardless of the type of rubber belt, it is necessary to attach it to the base by following the basic rules.
- Do not pierce the rubber veins of the tape with a needle. Punctures can lead to deformation of the elastic - once damaged, it stops stretching. When stitching by hand or by machine, it is recommended to stick the needle between the rubberized veins of the tape. In this case, the zigzag stitch is considered safer.
- During operation, the tape should be evenly tensioned. If the degree of tension of the rubber band changes, the folds at the model’s waist in different areas will be different in thickness.
blogspot.com
Sew an elastic belt
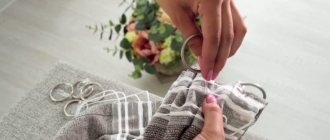
I dedicated today's master class to sewing a belt. In a woman's wardrobe you can often find about a dozen different belts, and sometimes more. But it is not always necessary to buy a belt - you can sew it yourself at home. Yesterday I sewed a summer dress from a piece of fabric without darts and a belt to go with it, but I still had a strip of fabric left, from which I decided to make another belt. This time the wide elastic belt will be fastened with a metal buckle.
To work you need to have the following materials:
- strip of fabric - wide elastic - metal buckle - thread
There is nothing complicated about sewing a belt. You need to be able to make an even stitch on a machine, sew an elastic band to the material and sew a buckle to a belt. The degree of difficulty is minimal.
It won't take much time either. It takes 30-40 minutes to sew such a belt. This is if you do everything slowly and carefully. Those with experienced hands will cope faster.
So, in order to sew a belt, you need to take one measurement - your waist size (I have 72 cm). The length of the elastic should correspond to the waist size (- a few centimeters, based on the selected buckle). We choose the width of the elastic band as desired and based on the size of the “ears” of the buckle (mine are 4.8 cm).
The length of the fabric strip is chosen arbitrarily, based on the fact that the larger the strip, the more decorative folds will appear on the belt. There is no need to overdo it and take more than 2 lengths of elastic, since you will not be able to sew a beautiful belt - the elastic will not stretch well.
The strip of fabric should be 2 times wider than the elastic band plus 1-1.5 cm seam allowances (mine are 12 cm).
You can use any buckles. The wider the buckle, the more you need to cut off the length of the elastic, leaving seam allowances. We begin by pinning the edges of the elastic and strips of fabric together, leaving a seam allowance on the right side. Gently stretching the elastic, we evenly connect it to the fabric with pins. We sew the seam and secure the second side of the elastic with pins.
We make a second seam, connecting the second edge of the elastic to the main fabric. Fold the waistband in half horizontally, secure it evenly with pins, and machine stitch it to secure the two ends of the main fabric. Do not catch the elastic in the seam (!). We turn the “pipe” onto the face. Now all that remains is to sew the belt to the buckle. To do this, we place the belt between two layers of artificial leather on the buckle, and sew straight “U-shaped” seams. You can use regular buckles, then the belt must be threaded into the “eye” of the buckle and the end of the belt sewn to its base. That's all the work! Now the belt can be worn under pink, black, blue and yellow clothes.
My elastic belt is ready! I wish you successful sewing and wonderful new things!
To receive the best articles, subscribe to Alimero's pages on Yandex Zen, VKontakte, Odnoklassniki, Facebook and Pinterest!
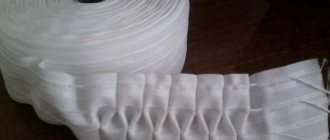
Sewing methods
There are three main and two additional ways to sew elastic tape to the waist of a dress. The methods differ from each other in the type of rubber material (elastic tape, elastic thread), the type of seam (simple, zigzag), as well as the technique of applying the seam (manually, using a sewing machine).
Basic
Manually or with a simple machine stitch
When manually “fitting” a dress model onto an elastic band, preference is given to loose, easily stretchable elastic bands, about 6 mm wide. If there are several rubber layers, the top one can be made in the form of a wider strip.
As a result of using this method of fastening the elastic, the model will be equipped with soft folds.
- Mark a line on the fabric along which the rubber belt will go.
- When stretched, according to the waist circumference measurement, cut off the rubber fragment. The elastic band can be measured by wrapping it around your waist without too much tension (it should touch your body, but not sag).
- Connect the segment into a ring. Another version of this operation involves dividing the tape in half. One part will be attached to the front of the model, the second to the back.
- Pull the rubber ring evenly and sew it into the waist area of the dress. In the second option, sew on a rubber strip, pulling it tight.
- To ensure that the elastic is evenly distributed throughout the fabric, you need to divide the rubber ring into 4 equal parts using pencil marks. Similar marks are made on the fabric. If the rubber belt is attached in parts, each fabric and rubber section must be divided into sections.
- The resulting marks are stitched together. Machine stitch by pulling the rubber strip under the presser foot. Pull the elastic with two fingers of one hand and simultaneously straighten the fabric fragment.
- If the tape is sewn by hand, the initial distances between the stitches are divided again and stitched again. The operation is repeated until the entire belt is inside the product.
blogspot.com
Using a zigzag seam
- Cut the elastic band into two equal pieces and set them aside.
- Use another piece of elastic equal in length to the width of the product itself.
- A long rubber fragment is placed under the machine foot. A zigzag type of seam is used, with a wide zigzag step. The fabric should be pierced with a needle 1-2 mm from the edge of the tape.
- Press the elastic line to the fabric with a curly stitch. In this case, the tape can remain movable. Afterwards it can be tightened.
- After the entire rubber fragment is under the stitching, next to it place half of the elastic that was cut at the beginning of the work.
- Two marks are applied to the elastic underneath the stitching, corresponding to the edges of the short section.
- Tighten the long rubber band until the previously made marks are aligned with the edges of the model.
- Secure the edges of the elastic tape to the edges of the fabric.
rukopedia.ru
Drawstring assembly
- Measure the length of the seam along which the rubber band will be sewn.
- A fabric strip of similar length is cut. The width of such a strip should be equal to the width of the elastic, taking into account the additions for making seams.
- A piece of fabric (drawstring) is sewn into the area where the belt is located.
- Pass a rubber band through the formed channel, attaching a safety pin to one edge.
- First, it is recommended to fasten the back edge of the elastic to the fabric, and after threading, the front edge.
magazineindex.org
Belt with drawstring for elastic band
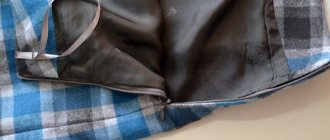
For skirts or trousers without a fastener, the waistband has a drawstring for an elastic band. It is not reinforced with a gasket and can be one-piece or stitched.
If only one elastic band is threaded into the drawstring, then the finished belt should be 2 mm wider than the ribbon. With a wider waistband, the elastic band will twist. If several elastic bands are threaded into the drawstring, the belt must be delayed the corresponding number of times. For each elastic band, 2 mm is added to the width of the belt.
One-piece belt.
The width of the skirt or trousers at the top should be equal to the circumference of the hips plus 5 cm for freedom of movement. Sweep the top cut along the fold line to the wrong side and iron. If the fabric is thin, roll up the seam allowance; if the fabric is thick, overcast and pin.
On the right side of the fabric, stitch the edge of the drawstring waistband to the width of the elastic band plus 2 mm.
To thread the elastic band through, open a small section of the seam on the wrong side. To prevent the end of the elastic band from slipping into the drawstring, secure it with a pin (1). Sew the ends of the tape (2). Sew up the open area in the seam.
Stitched belt
is a strip of fabric, the length of which is equal to the circumference of the hips plus 5 cm for freedom of movement. If the top section of the skirt or trousers, to which the belt is attached, turns out to be longer than the belt, then the product must be gathered or folded. The width of the belt depends on the width of the elastic band.
Sew short sections of the waistband and press the seam allowances. Sew one section of the belt to the top section of the product face to face. Turn the waistband up and press the seam allowances onto the waistband. Iron the seam allowance on the other side of the waistband to the wrong side.
Fold the waistband in half lengthwise with the wrong side facing in and pin the inner edge of the waistband to the stitching seam (3). From the front side, place a stitch exactly in the seam of the belt, taking the inner half of the belt. Thread an elastic band into the drawstring.
Additionally
Additional methods concern securing a certain number of rows of elastic threads in the waist area of the product.
kupivip.ru
Simple stitch
- The sewing machine is threaded from below with elastic thread. We place a regular thread on top with a loosening of tension, which will allow, if necessary, to tighten the bottom thread after laying the stitch.
- The “face” of the product is stitched with a slightly weakened top thread.
- A tension stitch is placed on the wrong side.
- Having laid a line from one edge of the base to the other, tighten the rubber thread to the desired limit. The rubberized thread should “walk” freely inside the loops formed by a simple thread.
Zigzag stitch
- Elastic threads are applied to the corresponding lines drawn on the fabric.
- A zigzag seam is laid on top.
- The threads are stretched until the desired degree of fitting is achieved.
Recommendations for performing work
- Before starting work, you can draw a waist circumference on paper, mark on it the centers of the back and front of the product, and then divide the resulting fragments in half, marking the side points. Divide the resulting parts in half several times. A circle with a smaller radius is drawn inside the first circle - this is an elastic band. The outer circle marks are transferred to it.
- Divide the fabric base (to which the rubber belt will be attached) into equal parts by successively folding the fabric at the waist line. Marks are made as the folding fragments decrease.
We sew elastic into the collar
Using a typewriter
To sew in elastic, the easiest and fastest way is to sew a zigzag stitch. This stitch will help you sew elastic into a piece of stretch fabric.
This could be a camisole or blouse that you want to wear strapless. The elastic band sewn into its collar will prevent such a blouse from falling off your shoulders.
- To begin, take a linen elastic that is slightly shorter than the cut of your product. This is done so that the sewn-in elastic tightens the fabric, preventing the item from slipping off your body.
- Then you wrap it around your chest, grabbing your arms. If the blouse will be held with an elastic band only on the chest, then wrap the elastic band only around the chest area. Feel the tension of the tape and cut off what is unnecessary.
- Then we cut the finished piece of tape in half and start stitching:
- Take a long piece and sew a zigzag seam behind its edge.
- On a section of the finished item, you need to choose a stitch so that it has a large pitch and does not touch the elastic ties of the elastic band itself.
- We sew the entire piece, and then take the second piece and make a couple of marks on it.
- We tighten the part of the elastic under the seam in such a way that the marks meet the edges of the product itself. Sew the edges.
Don't miss: Why your right arm/palm itches
Manual method
In the manual sewing method, you repeat the actions of the machine, imitating a zigzag seam.