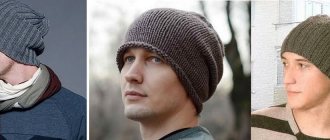
Is it difficult to crochet a hat? Is it possible to do this faster and easier with knitting needles? Let's figure this out today.
Can you crochet? Publish your work on kru4ok.ru
Recently, more and more crochet patterns have appeared that imitate knitting. And it often becomes impossible to distinguish which tool is used to connect the item.
Are you familiar with this situation when, when you see a new model in your mind, you figure out how to knit it? But in reality it turns out that this is a hook.
We see similar work many times.
Why do they come up with such patterns?
It has already become the custom that hats are mostly knitted. This is due to the fact that ordinary knitting fabric is much more elastic than hook fabric. Just tie a simple elastic band and your hat is ready.
But what should those who like to knit only with crochet do? Of course, come up with new patterns that are not inferior in simplicity and elasticity to knitting.
Benefits of crocheted hats
- They can be openwork and dense.
- It is easier to crochet complex elements.
- Crochet hats are more creative and interesting.
- Berets are easier to crochet.
- Lots of interesting unusual embossed crochet patterns.
- You can try your hand at something unusual.
What kind of hats can be crocheted?
Any shape of hat for women, men and children can be crocheted; there are no restrictions on crochet, this has been proven more than once.
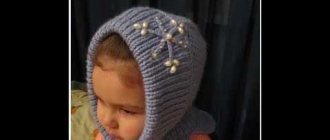
- hat with ear flaps
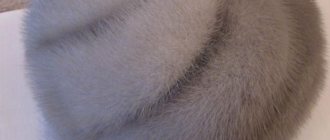
- beret
- hat - cat
- crochet hat with ears
- Viking pilot's hat
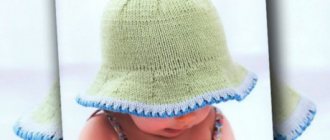
- openwork hats and panama hats
- hats of any shape are all hats!
How to take measurements for crocheting a hat
Look carefully at the diagram and take the same measurements:
- AB - this segment is called the depth of the cap, measured from the forehead to the neck.
- CD – cap height – measured from the right ear to the left through the crown. It must be divided in half.
- Circumference or girth of the head is measured along the line of the forehead and the protruding part of the back of the head. This measurement determines the size of your hat (for adults from 54-62 cm).
When you have taken the basic measurements, you can start crocheting the hat.
Although, if you knit for yourself, it is easier to do several fittings while knitting. There are such descriptions for which it is still necessary to take some measurements!
Table for calculating hat sizes
For those who cannot try on a model, we suggest using the average table.
Look at what a simple and dense pattern you can use to crochet a hat.
The video should load here, please wait or refresh the page.
Crocheted hats, ideas from the Internet
Crochet hat Murano paints
.
Hat size: head circumference 54 cm.
You will need:
- Kid Royal Missisipi yarn (62% kid mohair, 38% polyamide, 500 m/50 g) -100 g section-dyed,
- hook No. 1.5,
- brooch clasp.
Attention! Crochet the hat with thread in 2 folds.
Cast on a chain of 6 chains. p., close it in a ring. Next, knit according to pattern 1 to the desired depth of the hat. Then tie the bottom edge of the hat according to pattern 2. Using patterns 3, 4 and 5, tie 3 flowers and connect them together. Sew a brooch clasp to the flower. Attach the flower to the hat.
Crochet hat patterns
Crochet lapel hat
It has long been known that you can knit a simple hat with a lapel in garter stitch using knitting needles. You can also knit such a hat with a lapel diagonally. You can also take advantage of interesting ideas from designer Martina Böhm and start knitting a hat with a lapel
Read more…
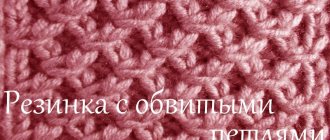
Crochet elastic hat for men
Do you want to please your beloved man? Knit him a hat. My man, after such a gift, now wears only hand-knitted hats.
You will need: yarn - PEKHORKA Crossbrand Brazil; 100gr - 500m; 50% merino wool, 50% acrylic. Hook - No. 2. Size (OG) - 58cm. Knitting duration: 2 pm.
Hat - crochet hat
Work by tiklim from the Country of Mothers.
The hat is knitted from Turkish yarn “Alize” superlana klasik 280m in 100g, 75% acrylic and 25% wool, in 2 threads. Yarn consumption -106g. I used hooks size 3 and 3.5.
The fit is perfect, because... There are certain “tricks” when knitting this “Simple” model. I am sure that in a strong wind it will not fly off your head and will even insulate your neck and back of the head. And it also turns out to be suitable for young and older girls! The hat is knitted for size 52-54.
Just a men's hat, crocheted
This hat is actually crocheted and this online is created to introduce you to the technique of knitting such hats. Before you start knitting, I suggest you take a closer look at the pattern. Simple but cute, very reminiscent of 1x1 ribbed knitting needles.
1x1 elastic band is crocheted.
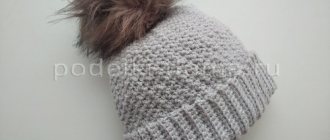
Winter double crochet hat for girls
The task was to combine colors suitable for overalls in one hat, while making something original. This is how this hat was born. It's double, there's no other way.
Crocheted 3.5. Russian yarn, wool mixture. I don’t remember the name, because the essence was in the color and there was nothing suitable in Turkish yarn.
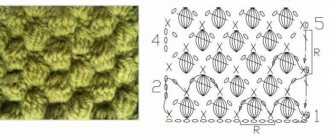
Pattern diagram for a crochet hat
Step-by-step description of a crochet hat
Crochet hat for Minecraft fans
The hat is crocheted using the Tunisian technique, but with a SHORT crochet!
The threads are Turkish, for the lining Alize Puffy Fine is black, for the top Alize Baby Wool is green and black.
Both yarns contain a viscose component, and viscose threads, as is known, stretch during use. And besides, the wool that makes up Baby Wool is apparently treated to prevent shrinkage.
Fabrics made from Turkish wool threads treated with superwash also stretch during the washing process.
This must be taken into account when calculating density and knitting.
Hooks are short 2.5mm for the lining, 3.5mm for the top of the hat.
Step-by-step description of the header
Crochet hat with a relief pattern and just a scarf
Yarn Gazzal Baby Wool. The hat is crocheted with a relief pattern based on a blanket in three threads using 4.5 crochet, it took 153 g.
The scarf is the simplest, I knitted it in one thread with a 2.5 crochet hook, it took 123 g, but I could knit another 25 g, because... my scarf is about 1 meter, not long, under clothes.
If someone likes the hat, I’ll help you knit it according to the MK motif with some changes.
I'm attaching the diagram.
More detailed description of knitting
Crochet beanie hat from Polina Kuts (original description)
In this example, the yarn is 240 m 100 g, the hook is 5 mm. Vertically 45 loops. Horizontally 72 rows, multiples of 6. That is, in each section I have 12 rows: 10 shortened rows (from 35 to 44 sc in a row) and 2 more full rows (45 sc).
Two crochet hats
Two more interesting and simple hats were previously free on Polina Kuts’ blog. Whoever managed to do so tied it up. I have my first hat. And whoever didn’t have time can buy the description on the author’s blog.
Warm crochet women's hat
I knitted the hat using my favorite leaf pattern. And then the scarf came up.
I crocheted the hat with number 3 and the scarf with number 4. Yarn “Naco Bambino Marvel” 50g/130m.
Pattern diagram for a crochet hat
See more details
Warm hat - crochet beret for women with “bumps”
Crochet hat for women in green tones
Any soft yarn for the beret, no more than 300m/100g. Hook 4.5-5. The knitting density is average. The beret is knitted with half double crochets and raised stitches. The basic calculation (general principle) of adding and forming the beret itself in the diagram:
LiveInternetLiveInternet
Let me start by saying that the word “lining” is incorrect in this application (and I apologize to those for whom such a designation brings discomfort). There is a word “lining” (it corresponds to this meaning), which is used in many areas and in relation to clothing in particular. But in all the time I have been knitting hats, in 95% of cases I come across exactly the “lining”.
Lining is: - (from the Internet) a material that is sewn, attached to the inside (not the front) side of clothing or any product. - (from Wikipedia) a part of outerwear used to protect the underside of the main fabric from abrasion, stretching and contamination, giving the product thickness, shape stability and aesthetic qualities.
For hats, the word lining will mean the additional inner part (layer) of the cap, which most often serves to insulate it, as well as to seal the fabric (excluding holes between the posts) and, accordingly, protect the head (ears) from the wind, and also to improve tactile qualities (to eliminate the thorniness of the yarn, for example) or to create a dense sublayer (background) with loose (lace) knitting. In my lessons I will also call the hat itself base, top, upper part . At its core, the lining is the same cap (or some part of it) placed inside the headdress being created.
If I knit a hat for the cold season without a lining, I always use sc, because it’s tighter. But if I add a lining, then there is no such need - I almost always use CH. Indeed, in addition to the fact that they knit faster, the fabric is also softer and more flexible. And two layers cover possible holes. I am not a supporter of double linings (the more layers, the more difficult it is for them to fit correctly on the head) - if necessary, it is better to knit one, but thick and from warm yarn.
For custom knitting, it is advisable to make linings only for winter hats (although I follow this principle for myself). Since the presence of a lining significantly adds work and, accordingly, the price of the product (especially if you knit a thin lining). Therefore, for late autumn I simply knit a hat with thick yarn.
Size If you knit the top (the hat itself) without taking into account the lining, consider that it is no longer possible to fit it in there, unless the hat stretches very well. The lining is knitted exactly according to the size of the head (because it is put on the head first, and then the hat). But the upper part is larger so that both the head and the lining fit in it - without problems or discomfort from the tightness of the hat. Therefore, if you have doubts about the size of the top, it is best to first knit the lining, put it on your head (a mannequin, a ball, a ball of a suitable size) and re-measure the circumference and height for the hat. It happens that both the top and the lining are knitted in the same size. But in crocheted fabric, for me personally, this is acceptable only for a well-stretched fabric and can only be justified by the fact that the hat will be worn on both sides (either on top or with the lining out).
It is impossible to give an absolutely standard and exact figure by which the top is always larger than the lining in centimeters. Depends on the thickness of the lining and the size of the head. But on average, in terms of head circumference, this is a difference of one size (i.e., two centimeters). If you knit both the lining and the top in one thread from medium-thick wool, then the difference is usually about 2-2.5 cm (this is about four to five stitches in a row - add them for the top to the number of stitches in the lining). If, nevertheless, the lining is noticeably thinner or thicker, it is better to play it safe by trying it on (for a thick fabric made from terry yarn, I added as much as 5 cm to the 52 cm of the head).
In height (from the top of the head to the bottom edge of the hat), the lining should be equal to the height of the head minus half a centimeter from the bottom. When connecting the top and the lining next to each other, a row of binding will add this half-centimeter (with an average thread thickness of 0.5 cm, this is equal to one row of sc). When sewing, this distance will allow you to hide the lining somewhat deeper and sew it not directly along the edge. The upper part, when sewing in the lining, is knitted half a centimeter more than the height of the head, since the lining adds approximately that much height to the head (but it is better to measure according to the lining that is on), respectively, 1 cm more than the lining. But if the top is tied with a lining connecting a row of RLS, then its height should be equal to the height of the head (well, if the binding is 0.5 cm) and, accordingly, 0.5 cm greater than the lining. You can put the lining in the hat as you knit it to the edge to see how much more is needed. When tying RLS, the edges should be aligned; when stitching, the lining should be slightly recessed. But as my personal experience has shown, it can be very difficult to distribute the lining inside a hat that is not worn correctly. It often seems that there is a lot of excess, especially in height. Although this is more about soft, shapeless fleece. Knitted fabric holds its shape better and, accordingly, fits better with the hat, laying along its walls. But still, the best option is to put a lining on the mannequin and a hat on top, then everything will be visible.
If the top of the hat is smaller than the required size, it will tighten the lining, folds will form inside, the hat will put pressure on the head or will not fit at all. If it is much larger, it will not lie flat/smooth on the head, and careless dents and folds will form. And at a higher height, it will still fidget and slide, and the fabric may sag above the edge of the cap. It is, of course, problematic to fit everything exactly by millimeters, but we are still working with knitted fabric, and its stretchiness will hide some errors.
The lining can be used to save a hat that was knitted unsuccessfully and is a size too large. But the truth will have to be worn in another season, because it will become warmer. And if the lining was planned, but the top still came out somewhat loose, then we can assume that everything is acceptable - a lining of the required size will hold the hat well on the head, and the columns of the top (well, if the difference is, of course, up to a couple of cm) will fit more closely on the head . If the top is knitted too much, then you can knit a band of the planned size on it, add a lining - and it will be like a mini beret. In other cases, the bottom of the lining can be knitted in several rows of RLS - then there will be less stretch along the edge and it will wrap around the head more tightly (and the top will already hold its shape along the edge of the lining).
Shape The lining in its shape can either completely correspond to the headdress or not. In a standard cap hat, the full lining (that is, covering the entire head) is of exactly the same shape and is knitted according to the same rules. For a rectangular hat, the easiest way to make the lining (and in principle everyone does this) is to make it also rectangular in shape. But you can also make it with a cap, then the hat will fit neatly on the head and the corners will not be pulled down from the ears, making the hat deeper. In voluminous berets, caps, caps and other headdresses that do not follow the shape of the head, it is most often advisable to make a lining in the form of a regular cap according to the size of the head. Then neither their pomp nor the extra height will prevent the headdress from slipping over the eyes and the lining will fit the head well, warming it better. But if, for example, we hide our hair under the beret (whether it’s a braid/ponytail or just to wrinkle the hair less), then it’s better to knit the lining with a beret. In earflaps, it often makes sense to make the junction of the lining and the top visible (i.e., along the very edge) or even turn the lining over the cap along the edge - so the height of the lining will increase accordingly. It is better to sew the flap of the earflaps over the face to the lining (or tie it on it), and then sew this line with the fabric of the upper part. If the headdress has a visor, then the lining is knitted before the beginning of the visor, i.e. to the bottom line of the cap.
The lining can be partial to insulate some part of the hat. For example, to prevent the ears from blowing (with the same thickness of the cap), ovals (as well as any other shapes, including those with a decorative role) can be sewn on the inside of the cap in the form of overlays - tightly knitted or made of warm or windproof fabric. Such pads can also be sewn on/under the lining for additional insulation of the ears (you can even glue double-lined leather). Sometimes just a wide strip of lining along the bottom of the hat is justified, which is very easy to knit and sew in, but at the same time completely covers the ears like a bandage. But in the described cases, it is necessary to take into account whether the sewn elements will stick out through the fabric - i.e. on the front side of the hat they should be visually invisible or hidden decorative elements.
If the hat has ears for ties, there are two options - the same lining with ears or a cap with a flat bottom. The ears are made in the same shape as the ears of the top (if the yarn is of different thicknesses, then the same shape must be achieved by applying it to the finished ears of the top part during knitting, and taking into account that there will also be a binding). We determine their placement according to the same principle as in the header itself (most often according to the 1/5 part rule). At the same time, on the ears (they are more visible, and the cap of the lining is always hidden) you can change the color and composition of the yarn if desired and have a specific design intention. If we connect the lining to the top next to the RLS, then the edge of the ears should coincide with the top part not only in shape, but also clearly in size (you can actually knit them on a stitch narrower to compensate for the difference in the number of stitches around the circumference). If we sew on the lining, then on the ears on all open sides we retreat approximately 0.5 cm from the edge. Since ears, in principle, warm the neck more than ears, double insulation is not particularly important. Therefore, the lining can be made up to the bottom line of the cap - it’s easier. And the ears will already be single-layered. If additional secret ears are made on the hat, then the upper decorative ones come mostly without lining, and the inner ones are optional.
It must be said that the lining evens out the ears, especially long decorative ones - i.e. If the edges of your hat ears curl up, then by attaching a lining to them, in most cases you will avoid this (they will become denser and smoother).
Composition I won’t go deep into the names of the yarn - it’s all individual at will. But I will write down the general principles that guide me - the season and region of residence, the thickness and warmth of the fabric of the hat itself, the hotness of the child, sensitivity to the thorniness of the yarn. We should not forget that outerwear often has very warm hoods. And if you wear it all the time in windy weather, then this increases the possibility of your head sweating in a hot hat.
Most often, for the winter, both the top and the lining are knitted from medium-thick wool mixture. Usually this is enough. Naturally, the more wool it contains, the warmer the hat is. But what percentage to take depends on tastes and personal preferences, nothing more. You can also use pure wool; now there are completely non-scratch options. But it breathes even without synthetics. In this case, the thread may be thinner, but it will produce no less heat. I read that the merino lining keeps the head very warm and does not sweat.
If the top is thick and hot, then you can knit the lining with thin yarn or replace it with cotton. It’s the same and vice versa - for example, if you knitted the top from wool-free yarn, even summer yarn (well, there wasn’t a suitable color or the look was more suitable), then you can put warm wool yarn inside.
I have a hot child; a wool-blend hat with a stretch cotton lining is enough for us for an average winter. This lining is also quite soft, comfortable and stretches very well. I also knitted other not warm yarns - cotton with viscose, cotton with acrylic (they are very pleasant to the body). If you take cotton, it is better to use a softer, weaker strand, because mercerized cotton is coarser and less comfortable.
I used to love acrylic for lining, but then I stopped using it for this purpose altogether. According to a client, wearing such a hat (and the top was 80 percent wool) made her head sweat. Later I read that acrylic does not have hygroscopicity (i.e., the ability to absorb moisture) unlike wool and cotton. Those. if you knit a lining made of acrylic, it will be pleasant to the body and will not prick, but if the child runs around and sweats, the lining may not remove moisture from the head and it will remain for a further walk. Although recently I came across exactly the opposite review, that in cotton the head is wet, but in acrylic it is dry and comfortable.
Pouf/terry yarn is, of course, very attractive in appearance and feel for linings. In addition, it gives a certain feeling of the fur of the hat, that it is truly winter. But I must say that when crocheted, this fabric comes out very thick, even rough, and not plastic. But this is still synthetic. I wouldn’t be able to wear mine, we would definitely get lost in it. This is more suitable, in my opinion, for walking in a stroller without the child's mobility. I've seen a lot of good reviews about such pads.
So there are no standard rules - it is a matter of taste and specific conditions (region, child). One thing - you don’t need to overdo it with the overall warmth of the hat, otherwise your head will sweat no matter what the lining is. It’s difficult for me to say for sure about the qualities of different compositions, because my children are not wearing my hats. And in general, I think that until you personally wear a hat, you probably won’t know what it’s like to wear it.
Alternatively, you can make the top of the lining from cotton, and the bottom strip covering the ears from wool blend. If the lining is not made for the purpose of insulation, but for a better fit of the headdress on the head, then you can tie it with a mesh, even a very, very large one - just to fix, for example, a voluminous beret. And you can use the finest cotton yarn for this.
Color To prevent the holes in the hat from showing through between the stitches of the top layer (mainly for dc, since sc is denser), it is best to knit the lining in the color of the hat. It can be made from a different yarn, but very close in shade. Strongly contrasting colors, especially with light colors on the top, often visually add an unnecessary, even dirty, tint to the main color. But if the hat is dark or bright, tightly knitted, then the contrasting color makes the product even more interesting and fun. Especially if it echoes the colors used to decorate the hat itself. You can, for example, knit the lining with strips of different widths and at the same time attach the remains of yarn of different colors. The ears should be given a color that matches the external design of the hat, especially if the ears are decorative without ties (flat-out). It is necessary that the lining fits into the overall composition (and even complements it) - i.e. or from the warp yarn or color used to trim the hat.
In fact, almost any summer openwork pattern can be used for a warm headdress (if, of course, it fits the thickness of the thread to the desired size). All you have to do is add a lining! And from a successful choice of color, the pattern will either be clearly visible (of course, with contrasting colors) or will create something like a relief on the canvas (if the lining is made of the same color or a very similar one). Naturally, here it is necessary to take into account not only comfort and warmth, but also the visual compatibility of the yarns of the upper part and the lining - not only in color, but also in matteness, and maybe even in the structure of the thread. In such hats, making a melange lining, in my opinion, is absolutely inappropriate (well, maybe as an exception, if the plain thread is very different from the melange), because it will blur the pattern on the openwork, making it indistinguishable. But on the contrary (the top is melange, the bottom is plain) it will even turn out to be particularly interesting (the melange will stretch beautifully along the openwork chains, and will not just form into specks). Long section yarn dyes can be used with a greater likelihood of excellent results. We should ensure that in the transitions of colors the same shades do not overlap each other - otherwise we will lose the pattern in this place (from a distance it will simply merge with the lining, but in other places it will be visible).
Fastening You need to place the lining inside the hat with the more beautiful side towards the head (usually this is the front side of the fabric), because the other side will generally hide. When turning rows, if possible, leave the front side of the last row of lining open.
There are two ways to attach the lining - sewing and joining the two layers together with binding. But with any of these options, it is advisable to first tie the lining next to the RLS - it’s more careful and easier to work with it later. And this harness must be taken into account when measuring height. Without it, the stitches of the thread when sewing or the bases of the posts when tying do not look so uniform in depth (this applies most of all to the sides of the eyelets for ties), especially if we are working with a thread of a different color. In addition, this row somewhat tightens the canvas, i.e. holds the edge shape better. At the end of knitting the lining, you can leave a long thread for sewing or do not tear the thread off the ball at all if the same color will be used for the cap.
The connection of the layers next to the RLS looks a little neater to me, and the lining seems to be aligned in the same plane with the edge. It's faster and more convenient, too. You can slightly adjust the edge size of the finished product. But the knitted lining cannot be removed without unraveling the edge of the hat (which the client cannot do when knitting to order, for example). When knitting a binding (a row of RLS), the hook is inserted into the loops of two layers at once, while the knitted post connects them. You can tie it with a thread that matches the color of the top, or with a different color that emphasizes the finish of the hat. You can use terry yarn or other decorative yarn for this row, but take into account the ratio of the thickness and number of loops with the rows of the cap and lining. You can tie the edge not only with sc, but also with a crawfish step. If decorative cloves are needed along the edge, then it is advisable to first knit a row of RLS connecting all the loops.
Sewing makes it possible to cut out the lining at any time and wear the hat as a lightweight one, but in a larger size - i.e. extend the service life. This is important when a baby’s head grows quickly, especially if the hat is custom-made and not cheap. Sewing also helps when the thread on the lining is much thinner than the thread on the top. In this case, due to the large difference in the size of the loops, it is inconvenient to tie the layers together - a thick hook for the top does not fit into the small loops of the lining, and a thin hook does not pick up the working thread (and it is generally difficult to pull a thick binding thread through the loops of the lining). Another advantage of sewing is that the needle can be inserted into any part of the column and it seems easier to distribute the difference in the number of top and lining loops without counting them. You can also adjust the location of the bottom lining line in the hat. But not everyone can make all the stitches perfectly even (it’s easier to knit the stitches the same way). When sewing in the lining, the edge of the hat may move slightly away from the head, since the lining is not knitted all the way to the bottom, and the top is larger in size. You can initially take this into account when tying the hat and remove a couple of columns there. You can insert an elastic thread into the row of binding. You can sew on the lining using both the yarn from the lining and the yarn from the upper part (it is convenient to work with yarn with a needle with a blunt end). If the yarn is very thick, you can separate the twist and take a thinner one. You can sew with regular sewing thread in color or with monofilament (thin transparent sewing line). When stitching, the needle is inserted under some part of the binding post or deeper from the inside of the hat and under the loops of the lining binding.
To ensure that the lining crumples less inside when removing the headdress and does not move around when putting it on your head, it is better to sew together the beginning of the knitting of both layers (the bottom of the first row and the ring). If the hat is rectangular, then it’s a good idea to sew the corners. For linings of voluminous hats, this is not necessary, since the heights of the layers will not match.
Finishing the Hat and Ties Before sewing on the lining, you need to sew all the trim (flowers, faces, ears, beads, embroidery, etc.) onto the hat. And not only so that the seams from the inside, the ends of the threads and all other ugliness are hidden between the layers of the hat - it’s just much easier to sew one layer at a time. After all, when sewing trim on top of the lining, it is difficult to distribute it perfectly over the hat when removed - and you may end up with distortions, ties and creases in the fabric. There are two exceptions to this rule - if you have doubts about some finishing (and perhaps you will rip it off and re-stitch it), or it is heavy (like a large flower, then you should also grab the lining for fastening strength). But in this case, be sure to evenly distribute and secure the lining over the hat before sewing it on (it’s best to put it on a mannequin/ball of the required size and pin it with needles at the places where the trim is attached). The laces from pompoms or tassels on the sides of a rectangular hat can also be sewn onto a product with a lining.
Ties on the hat ears can be done both before and after sewing in the lining. If the ties are attached with a grip on both the top and the lining, then they should only be made on a finished hat. If they are sewn between layers, then of course before joining the layers. If they are attached only to the upper part of the cap (i.e., capturing only the strapping posts), then it makes no difference. Although it’s still more convenient to use a ready-made one - they won’t interfere with your work once again.
Source
Crochet hat, ideas from our website
Crochet a hat with earflaps
Ushanka hat size: 57. Materials for knitting earflap hats: cherry-colored yarn (70% wool, 30% acrylic, 300 m/100 g) 100 g, for finishing yarn of the same quality, green color 10 g, hook No. 2.
Read more…
Crochet a hat with a STAR pattern
Before you start knitting a hat with a star pattern, you need to select a thin wool blend yarn, preferably with a small mohair content, because The star pattern is very dense. We recommend using Alize Angora Gold yarn 550m/100g, 20% mohair, 80% acrylic. Or another
Read more…
Crochet hat. Work by Irina Promashkova
Crocheted hat, knitted for myself. Yarn Alize Superlana Klasik 100 g. 280 m (75% acrylic, 25% wool). Hook No. 3.5. The set of loops was made using an elastic set of loops. I got 69 stitches, closed the loops in a circle. The hat is made according to
Read more…
Set of bactus and crochet hat. Svetlana's work
Bactus + hat set. Knitted from Yarn Art Jeans yarn (50% cotton, 50% acrylic), powder color. Yarn consumption is 9 skeins. The hat is double, the top is crocheted, the inside is knitted. The hat is knitted with embossed columns for this reason
Read more…
Crochet beanie hat
Author of the WhiteTesh model. Hats in the now fashionable beanie-cockerel style. I've been looking at this model for a long time, but everything was knitted with knitting needles and I'm too lazy to knit with them. But I really wanted a hat, so I had to take a hook and thread and try it. Yes, threads
Read more…
Crochet hats with 3D pattern. Anna's works
Spring hats crocheted with a 3D pattern Knitted from “Alize Superlana TIG” yarn, 570m per 100g, 3.5mm hook, 2-ply thread. The design is voluminous, lush, light, openwork and airy. Therefore, a lilac hat with a lining,
Read more…
Crochet hat WavyCat (Wavy cat)
Happy holidays to everyone! I want to wish you the warmest and most positive emotions, goodness and peace! And of course I don’t come to you empty-handed! In this post I want to show my new creation, a crochet hat WavyCat
Read more…
Crochet Viking hat. Ksenia's work
On the eve of the New Year holidays, I want to please my family and friends with an unusual gift, made by myself and with practical application. A Viking hat is perfect for solving this problem - it’s creative, warm, and connected.
Read more…
Crocheted hat. Work by Anna Chernova
Hat size: 54-55 cm. Materials: Yarn: YarnArt, SHETLAND, 45% VIRGINWOOL, 55% ACRYLIC Hook No. 5. Basic knitting: convex and concave stitches with 1 crochet (inc 1n, inc 1n) Legend: Chain loop – ch Single crochet - sc Double crochet - d1 Convex double crochet
Read more…
Crochet hat. Work by Anna Chernova
The hat is crocheted from Vita Unity Light yarn 100g/200m with a crocodile skin pattern. Yarn consumption 130g. Size 54-55 cm. Hook No. 4. The pattern has long attracted the attention of needlewomen and does not seem “hackneyed”. The pattern looks especially beautiful when
Read more…
Crochet owl hat. Work by Olga Arikainen
Owl hat is knitted from mohair ANGORA GOLD yarn (10% mohair, 10% wool, 80% acrylic), 550 m, 100 g. Knitting in two threads, hook 3 mm. The eyes are an incomplete circle of concave and convex columns with
Read more…
Crochet hat and snood. Roxana's works
A warm set for a girl consisting of a hat and a snood, knitted from Alize Burcum Nokta+ Kartopu Firenze Tiftik. It took almost 3 skeins of Alize acrylic, a little more than one skein of Kartopu mohair. Crocheted 3 mm. Beanie hat with
Read more…
Warm crochet hat. Work by Maria Casanova
Dear needlewomen, I want to show you a hat that I came up with as a gift for the New Year. It knits quite quickly because the threads are quite thick at 100g/100m, I used hook No. 7. First, tie a ribbon lace according to the volume of the head (I
Read more…
Hat and scarf for a girl - the work of Marina Stoyakina
Set for a girl or girl “Rainbow”! Autumn is just around the corner. Simple to implement, accessible even for beginners, but incredibly positive and convenient!!! The stocking cap is knitted with a double stitch (one third longer than a regular hat) according to any of the proposed patterns,
Read more…
Crochet hat and snood. Works by Nina Kolotilo
A set consisting of a beanie hat and a snood is crocheted from Alize Lana Gold Fine yarn 100g/390m in 2 threads. Yarn composition: 49% wool, 51% acrylic. In total, the set took 3 skeins. The lining of the cap is knitted from another
Read more…
Spring crochet hat - the work of Efimiya Andreevskikh
Hat size: 54-56. Knitted to order with crochet No. 2 from wool blend yarn 340m x 100g. in two threads. Consumption about 50 g. If you add a lining to it, you can wear it in winter. I already knit and wear this pattern
Read more…
How to crochet a BERET hat for women, a selection of patterns
According to the dictionary, a beret is not just a hat without a visor, but a stylish accessory that does not go out of fashion. There are many types of berets, they can be thin and dense, glamorous and casual, colorful and plain, striped.
Read more…
Learn to crochet great HATS - BEANIES for the whole family
The beanie hat has long been popular for its versatility: it is suitable for boys and girls, men and women, and even kids. _postrf The beanie hat has long been popular for its versatility: it suits both boys and girls and
Read more…
We knit a cat hat with a crochet hook, a selection of descriptions and master classes
For spring or winter, we suggest you knit unusual and bright cat hats. Such hats are worn by both adults and children/ _postrf Our article contains 12 patterns, using each of them you can easily knit a new accessory. Start
Read more…
Evil eye on health
Damage to health is the most severe type of negative magical program using a lining. Description of items used:
- birch branches or leaves - serious illness, death;
- beads, necklace, individual beads - gynecological diseases, infertility;
- bottle - alcoholism, drug addiction;
- pomelo, broom - migraine, fever;
- killed crow, meat (beef), fish - a fatal disease;
- teeth - mental, nervous diseases;
- mushrooms - diseases of the kidneys, genital organs.
Take a closer look at the little things:
- needle, hairpin, nail (not rusty) - heart attack, heart attack;
- children's toy, baby doll - infertility, miscarriage, illness of the child;
- frog - bulimia;
- chicken egg - long-term illnesses, infertility, impotence;
- fur - diseases in pets;
- lard is an oncological disease;
- hat - infertility.
A negative health program is also transmitted through an apple, an egg, or living or dead worms.
To send serious, ongoing illnesses, a pin is used. It is closed so that the negative goes around in circles.
Crochet hat video - master classes
Crochet hat Galaxy, video from Elena Kozhukhar
Hat size: 52-54 cm. Hook No. 3. The yarn is thin, cotton.
The video should load here, please wait or refresh the page.
Autumn crochet hat, video from Oksana
In this video, Oksana will show how to crochet an autumn hat for a head circumference of 48-50 cm. The yarn used was “Krokha” from the Pekhorskaya factory in 50 g = 135 m. Nako bambino in 50 g = 130 m. It took half a skein. Hook No. 3.
The video should load here, please wait or refresh the page.