We pay attention to the raw materials for the future hat
The material should always be selected according to the time of year. In winter frosts and winds, wool or its threads will be especially useful and warm. For your baby, you need to choose a material that does not cause allergies.
Attention!!! Those who are just beginning to comprehend the art of knitting want to do it only with natural raw materials (wool). This error can “crawl into the light” when knitting a hat with only wool. Later, such a headdress will lose its shape, lumps and depressions will appear on it, and the wool itself will darken. For a hat, it is better to use mixed yarn.
Which yarn to choose for knitting a baby hat
Boys' hats can be knitted from any yarn. The main thing is that the baby is comfortable, warm and free. When selecting material for knitting a headdress, the age of the child, the season and the purpose of the item must be taken into account.
The basic requirements for choosing material for a knitted hat include:
- wear resistance;
- hypoallergenic;
- softness;
- heat preservation, as for winter models.
The most suitable material is a combined one, consisting of natural and synthetic fibers.
Moreover, the yarn composition must have at least 50% natural raw materials. For knitting children's products, it is not recommended to use synthetic yarn, fleecy threads, or mohair.
Before knitting, you should decide what shape of the hat you are interested in and for what time of year the headdress will be used. Winter hats are mainly knitted from wool yarn. For spring and autumn models, wool blends are perfect. And on hot summer days, you can please your baby with a hat, which contains cotton with the addition of flax or acrylic.
Table 1. List of raw materials included in children's yarn.
| Name | Compound | Advantages | Flaws |
| Acrylic | Synthetics | The products are soft, easy to wash, do not wrinkle, do not cause allergic reactions | Moisture is poorly absorbed, products become electrified |
| Merino wool with additions | Withers of fine wool sheep | Absorbs and removes moisture, does not cause allergies, retains heat | |
| Wool | Alpaca and camel | Keeps you warm | It pricks |
| Cashmere | Goat undercoat | Softness and lightness, heat retention | Without combining with other yarn it becomes deformed |
| Cotton | Natural fibers | Moisture is well absorbed and breathable. Wear-resistant, alkali-resistant | Weak elasticity |
| Linen | Plant fibers | Moisture is absorbed, no allergic reactions | Minimal color palette, not resistant to washing and wear |
| Wool mixture with different composition | 50% wool, 50% acrylic thread | Softness, no deformation when washing and wearing, smoothness | Problems with ironing |
The optimal raw material for yarn used in clothes for babies and teenagers is wool with a slight addition of synthetic materials, which is processed. This treatment makes the wool softer. A small amount of synthetics makes it more resistant to wear and deformation.
In any knitted item, the thickness of the thread is taken into account. The thicker it is, the faster you can knit the item. If the thread is thin, then the density of the product is ensured by the size of the knitting needles and knitting in several layers of thread.
We choose knitting needles according to your wishes
First you need to find out the diameter of the thread, because we will select knitting needles based on it. They come in 3 types:
- Wooden.
- Plastic.
- Metal.
For the hat you need 5 knitting needles with fishing line. If we work with two, we will get a cloth that needs to be sewn to get a headdress. In this case it will have a seam.
Crochet Patterns for Thick Yarn
The most common pattern for thick thread should be considered a bump.
The second most popular pattern is
fancy and with lush columns.
Very simple with a simple alternation of curved columns .
A variant from the fantasy series.
Some craftsmen are happy to come up with their own designs. Therefore, creative inspiration to everyone. Maybe soon you will be able to come up with something that all other masters will use.
Earring for the whole ear, what is it called?
DIY curtain clips
Knitting methods
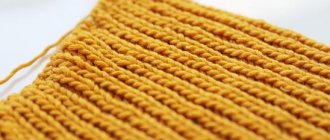
There are three simple patterns that anyone who starts knitting should master: rib stitch, stockinette stitch, and purl stitch.
- The elastic band is simple. The simplest pattern. Used by beginners to make simple products. Perfect for a headdress.
- Purl stitch. The basic method of knitting a hat. Easy to do. It will always be modern for all kinds of masters.
- Facial surface. Very popular among English fashion designers.
- English gum. This pattern is used to knit almost everything: from scarves and socks to sweaters.
Measuring the head, calculating the amount of yarn for a hat based on the number of knitting needles
Boys' hats are knitted, starting with measurements. A successful work result is ensured by correct measurements taken.
You must first knit a sample from prepared yarn. The sample is needed to calculate the loops and decide on the patterns. This method will protect the knitter from disappointment and additional rework.
If the hat model consists of several patterns, it is better to knit a sample from each of them. It is correct to wash the finished control sample to ensure that its structure is preserved after soaking.
The next stage is taking measurements, of which several are the most important:
- Head circumference (from the eyebrows to the back of the head in a circular line).
- Cap depth.
- The diameter of the bottom of the product.
Based on the measurements taken, a pattern for the future product is constructed. The styles of hats can be different, which significantly affects their size. An important step is the selection of knitting needles, of which there are many varieties.
For a beginning craftsman, it is recommended to use straight knitting needles with a tip made of metal, bamboo or plastic. The thickness of the knitting needles is selected to be 2 times greater than the thickness of the thread. If the knitting is tight, then the knitting needles are thicker. If your knitting style is loose, you will need thinner knitting needles.
How to calculate the number of threads and product size:
- Buy a skein of yarn.
- Knit a sample, wash and dry it.
- Calculate the number of loops and rows in the pattern.
- Unravel and calculate the footage.
- Knowing the size of the head, calculate the area of the product.
- Multiply the number of squares needed by the footage of one of them. Convert the resulting figure into skeins, based on the length of the thread.
- Add 20% to stock.
How to find out the required number of loops before work?
The thickness of the yarn does not often coincide with ideals. Either the size is too small or too narrow. In order not to make mistakes in measurements, you need to make a blank of 10 cm. Next, you need to close the loops in it and measure its thickness.
If we need a hat of 40-50 cm, in order to find out the required number of loops before work, we should measure the first sample (cast-on loops). If it comes out 7-13 cm, then there will be 23-28 loops.
Thick merino wool hat
Merino wool is a unique yarn that does not require knitting needles. It is knitted using the palms. You can knit a hat on your palms in literally an hour, even if you have not had such experience before.
A coarse knitted hat made of thick threads will reach the desired height as soon as 14-16 rows of knit stitches are knitted (the number of rows depends on the thickness of the threads). You will have to try to ensure that the rows are even and the loops are the same size.
It is important to organize yourself a comfortable place for knitting with enough space for the movement of your arms and good back support. The balls must be laid out carefully so that the thread does not twist during operation.
Instructions for knitting a merino wool hat step by step
- Taking measurements from the head and knitting a sample are the first stages of knitting a hat.
- Having calculated the required number of loops, you need to cast it on your hand. Some knitters use large diameter sticks instead of hands.
- Having knitted the required number of rows, use 1 row for decreases - knit 2 loops each. Next, you can drop the loops onto the working thread, but do not tighten them yet.
- Hand knitting does not involve knitting in the round, so the parts of the hat need to be carefully connected. After the large knitted hat made from thick threads has been assembled, you can tighten the top loops and secure the end of the thread.
DIY hat for a woman
If you have a good command of the knitting tool, it will not be difficult for you to knit any hat of different styles and colors. Women's hats are the leader in terms of choice of colors, styles, and patterns.
Knitting method "braid"
This method will be both easy and difficult, depending on your skill or style. Making such an elm for a beginner will not be particularly difficult, because it is easy to perform.
The many options for this style will amaze many beginners in knitting, but if you can choose the right colors, you can end up with a real masterpiece. A hat with a graduated effect is a great option. To work you will need purple and pink threads. You can add purple, it won’t spoil the color.
If you knit first with lilac and then with violet thread, you will get a beautiful effect of pouring one color into another without delineating the boundaries.
Progress:
- We cast on 80 purple or pink loops. It is important to ensure that they all remain the same thickness.
- We knit in a thickness of 5-6 cm, this stage is best done with a simple elastic band.
- We make a “braid” pattern with purple yarn.
- We knit the next 6-9 cm with pink thread, later we begin to add purple yarn. The result is a graduated cap.
We knit a hat for women and men
Before knitting, you need to choose the right yarn and knitting needles. Yarn depends on the season and model. Winter hats are knitted from yarn with a high wool content, spring hats are knitted with acrylic. Bulky yarn is suitable for models with large patterns and coarse knitting. Thinner yarns are well suited for tight knitting with small patterns.
Hats are usually knitted on circular needles - this way the product will be smooth , without seams. The elastic band is knitted on thin needles for density. When moving on to knitting the base, you need to change the knitting needles to thicker ones and add loops.
In addition, you will need markers to mark the beginning of the row and the loops needed when working, as well as a needle, hook and an additional curved knitting needle for braided patterns.
Before you choose and start knitting a suitable model, you need to understand a few general rules that will be needed when knitting any hat.
Knitting a turban hat for beginners
Beauty is a deadly force. This was proven by singer Kylie Minogue, a beauty queen. She completed her look in a brown coat with a cute turban hat, which she later admitted she made herself from a simple knitted scarf. After such a tremendous success of the turban, craftsmen from all over the world hastened to add their own twist to this headdress.
Knitted turban
The sequence of steps in the work is simple, but requires some preparation.
- We measure the dimensions of the head, write them down (or remember them).
- We knit the fabric according to the received numbers.
- We wrap the resulting fabric around the head and sew it together.
Do-it-yourself voluminous hat made of yarn
A voluminous hat is a modern headdress. Little tricks will help you create a work of art.
- To make the hat as warm and voluminous as possible, you need to take thick yarn (or fluffy). You can also make your own fabric from 2-3 layers of regular thread. You need to knit with thick plastic or wooden knitting needles.
- The elastic band of the hat or its edge should be knitted with smaller diameter knitting needles. If we initially knitted with sixth needles, we need to take fourth ones to the edge.
- For a large hat you need textured and bright patterns: cones;
- braid (or tourniquet);
- English gum.
Knitting hats: models and patterns for free
In the educational video below you can see how to knit a hat.
Knitting patterns for women's, men's, and children's hats with descriptions are shown in detail in the following video clip. Look.
The presented models are a few of the many possible options for hats. Each needlewoman can come up with her own original model, draw a diagram, or combine two models into one. The main thing is to start knitting , and then the Internet, patience and acquired skill will tell you.
Flap hat made from regular yarn
This style of hat suits absolutely everyone.
How to make your own lapel
- If you are going to start knitting a cap with a lapel with a simple elastic band, you need to make it as wide as possible. For an ordinary hat, the length is 6-11 cm, but we need 19 cm. You can wear such a hat without a lapel.
- If you knit with one of the elastic bands and plan to make a hat with a lapel, then the hat needs to be made longer - up to 8 cm. This is a kind of “transformer”, because you can always remove the lapel and wear the hat as usual.
- You need to make sure that the pattern or pattern on the front of the cap and the back should not be different.
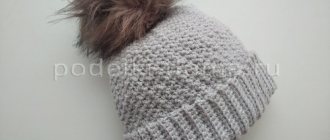
Large knit hat made of thick threads with a pompom
- To knit a hat with a pompom using a 2x2 elastic band, you need to cast on the knitting needles the required number of loops (plus 1) and complete the circle. The loops should be calculated in such a way that the tracks of the front and back loops alternate, without matching anywhere (for example, the first 2 loops are knit and the last 2 are knit - you get a track of 4 knit loops, and the pattern is broken). Start knitting with a 2x2 rib from the 1st row and knit to the desired height of the hat.
- A coarse knit hat made of thick threads with a lapel is knitted taking into account the height of the lapel, i.e. you need to knit as many additional rows as necessary to create a lapel of the desired height.
- Decrements are made as follows: in the knit stitch tracks, knit 2 knit stitches, 1 purl stitch in the purl stitches. Thus, you should get a 1x1 elastic band. Next, 2-3 rows are knitted without decreasing, then all the loops are knitted 2 together. The remainder is dropped onto the working thread and tightened. The tail of the thread must be hidden and carefully secured.
How to make a pompom with your own hands
The pompom can be of two types - made of thread and made of fur.
A fur pompom can be purchased at any craft store. They either simply sew it to the hat, or buy a large button for pompoms, one part needs to be sewn to the top of the hat, the other to the pompom, then the pompom can be unfastened while washing the hat. It is very comfortable.
Sequencing:
- As for a thread pompom, this is how they make it. The most common and easiest way is by winding threads on “donuts” made of cardboard. To create such a pompom, you need to take thick cardboard and cut out 2 absolutely identical donuts from it.
- The diameter of the template depends on the size of the pompom you need. The beginning of the pompom - the thread - needs to be placed in a loop between the 2 templates (around the inner circle), then combine them and begin to wind the threads around the donuts in a circle.
- After the blanks are completely wrapped with thread, the outer side is cut, the parts are carefully pulled apart and the initial loop is tied to secure the pompom. Now you can remove the bagels from the threads and fluff the resulting pompom. All that remains is to sew it to the hat.
DIY hat for a man
A hat (especially a knitted one) is a very common item among men. If his other half knows how to knit, she can sew an excellent hat for her husband right at home, and it will be no worse than brand models. There is practically no difference between men's and women's hats, except perhaps the color and design.
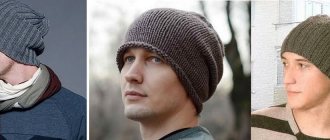
Winter hat for men
In order for a hat to really warm you in winter and not be a decoration, you need to find warm and high-quality yarn. It could be:
- Sheepskin (sheep's wool).
- Angora.
- Llama wool.
- Mixed yarn, where there will be half synthetic, half hare or goat down.
When choosing sizes for a future product, a beanie hat would be an excellent option; it can easily fit in your pocket. More suitable for cold autumn-winter. The winter version can be knitted from regular yarn and two knitting needles, sewn, and later insulated with a special material.
Accessories for successful work:
- Knitting needles, you can take two pieces, sew the resulting fabric.
- Black and white threads. White yarn will make a beautiful ornament, black yarn will be the basis.
You need to knit from the top of the hat. You need to make Turkish loops, not ordinary ones, so that you can knit in all directions at once. You can simply knit the insulated fabric and sew it.
We cast on several loops, taking into account the size of the head. We knit to the middle and begin to make patterns (ornament). If you have a rich imagination, then this will not be a problem. Next, our product needs to be finished. We decrease 8 loops one by one until there are 10 left. We collect the rest on the needle and simply sew it together.
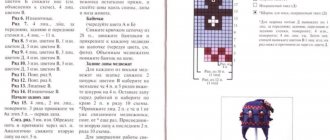
Stay on topic! Volume hat with braids
The most popular pattern used to decorate all knitted products today is braids. A cute voluminous knitted hat, the diagram of which is presented below, is decorated with just such a motif. It is suitable for both young girls and older women.
Necessary materials:
- bulk wool - 2 skeins;
- knitting needles No. 10, No. 12;
- thick auxiliary needle;
- marker;
- knitting needle.
Step-by-step description of the process:
- Measure the circumference of your head.
- Knit a sample of the pattern (to ensure accurate measurements, we recommend knitting 2 - 3 repeats) and elastic (if you have one). Measure it to determine the tightness of your knitting.
- Cast on the stitches on size 10 circular needles (according to your measurements) and mark the place where the circle will close with a marker.
- Knit 5 cm with an elastic band, following the following pattern: from rows 1 to 6 - k2. x 2 p.
- Let's say you scored 40 pets.
- In row 6, evenly increase 8 stitches. You will get 48 stitches.
- Then move on to the pattern. To do this, transfer the knitting to needles No. 12 and prepare an additional knitting needle (pin or hairpin) to transfer the loops of the pattern onto it.
- To knit a simple braid of 12 stitches. (the rapport will be 8 rows high), in every fourth you should make a cross, as shown in the diagram - row 4: knit 4, crossing of eight stitches (in this case, an additional knitting needle will be located behind the fabric). 8th row - crossing of 8 stitches. (auxiliary knitting needle in front of the fabric) and 4 persons.
- Between the braids, knit 4 loops using purl stitch (knit even rows according to the pattern).
- Knit 3 weaves.
- Decrease in purl stitches three times on each knit row.
- Reduce stitches in this manner until 42 stitches remain.
- Pull the thread through all these loops and pull it tight.
Based on this model, you can knit an original hat - with vertically positioned voluminous classic braids with 8 loops.
Advice! It is always better to knit rib using knitting needles at least half a size smaller than the one you use for the product itself.
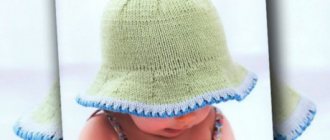
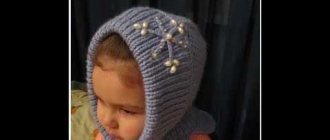
Hat for a child from 3 months to 3 years
You can also make a cute and beautiful hat for your child that will protect him from inclement weather. For the pattern, you can take a simple cat.
We will need:
- Black yarn, we need a small skein.
- Knitting needles with fishing line 3.5-4.
- A needle to sew the resulting fabric.
Progress:
- For a baby (or toddler) from 5 months to a year, a hat with 40 stitches will fit, for a 3-year-old - 45. We knit it like a regular hat, in the round. It is preferable to knit in stockinette stitch. In the end, you just need to close the yarn and sew the resulting fabric.
- Ordinary ears will work perfectly for the pattern. To make the pattern, you need to stitch each corner with black threads. Next, we simply embroider the pattern on the front side of the hat.
If you are a beginner, we advise you to take a hat that is easy to make. This hat will do its job perfectly, keeping your baby warm on winter days.
Youth model of a cap made of voluminous threads
To work you will need:
- 36-40m bulk yarn;
- straight or circular sp. No. 15.
Pattern – stockinette stitch: when knitting in the round – all knit stitches;
Scheme
We will knit in the round: on straight sp., distributing the loops on 4 sp. or on circular sp.
We dial 18p. and knit 9p.
10p.: make a decrease, knitting 2 stitches in 1 stitch;
We break the thread, thread it through the remaining loops, bring it to the wrong side and fasten. You can decorate the hat with a creative pompom.
Hat with flower
Natalya Vereziy's story on how to crochet a women's hat (with a flower):
“I want to share my experience of crocheting a women’s hat. I bought two types of thread, one angora and the other cotton.
So, let's start knitting a hat. For me, it’s better to start knitting a hat from the headband; to do this, I cast on a chain with a length equal to the circumference of the head. Next, I connect the chain into a ring, while making sure that the chain does not twist. Having connected the chain, we continue to knit in a circle with single crochets until the headband of the hat reaches approximately 8 - 10 centimeters in width. Next we proceed to knitting the pattern, which we knit according to the following pattern.
We knit according to the pattern until the hat reaches the desired height. I determined the height by regular fitting. Having put on the hat, we try to connect its edges on the top of the head; if everything is connected, then the height is sufficient.
The result of the work is like this.
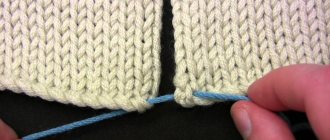
Next, turn the hat inside out and sew its edges together in the shape of a star, as seen in the photo.
When the hat is turned right side out, the seam will look like the following photo.
The hat is ready, all that remains is to decorate it a little, you can sew on buttons or decorate it with stones, I decided to knit a flower.
Flower diagram.
In the pattern, you need to take into account that the sixth row is knitted in the second layer, tying from the wrong side to the third row. As a result, the flower turns out to be voluminous.
Using a needle, sew the flower to the hat.
This is how I crocheted a hat with a flower. It turned out to be a very budget option.
See also:
Spring-autumn crochet hats
In order not to forget the page address and share with friends, add it to your social network:
More interesting:
Tags: Knitted hats, DIY hats
Attention! It is better to write urgent questions in the comments on the website (form at the bottom of the page) or, better yet, directly by email. There are no notifications about comments from the VKontakte form! This form is more for feedback. 
Discussion: 5 comments
- Lydia:
January 15, 2015 at 2:25 pmOnce upon a time I crocheted, I’ll try to remember, maybe I can knit a hat for my daughter, thank you.
Answer
- Tatiana:
January 15, 2015 at 6:46 pm
What a gorgeous flower!!! Very beautiful. I also really love hats with large flowers on the side.