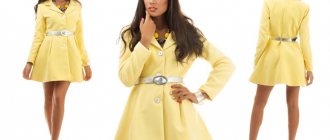
An elongated vest is a versatile and practical addition to a woman's wardrobe. Firstly, vests are always in fashion, secondly, they are perfectly combined with different styles of skirts and trousers, and thirdly, sleeveless vests are suitable for women of any age and build. By visually correcting the silhouette, an elongated vest makes the figure slimmer. And one more important plus - sewing an elongated sleeveless vest using a pattern is very simple! To do this, it is enough to have basic sewing skills. Our article is intended for dressmakers with different levels of training. Choose the option that suits you best and get to work!
Creating a pattern for an elongated vest
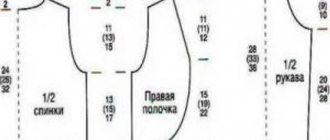
The basic pattern of a straight silhouette dress with darts is used as a basis.
We transfer the chest dart into the side seam. To do this, mark a point on it, stepping back 4 cm from the armhole. Then we connect it to the top of the chest dart. Cut along the drawn line. Closing the chest dart. In this case, the side one opens along the incision.
Back modeling
At the waist, set aside 1 cm from the middle of the back and draw a perpendicular straight line to the bottom line. Draw a pattern curve upward, connecting the point at the waist with the point in the center of the segment between the bottom of the neckline and the armhole line.
We increase the size of the rollout. We deepen it in the center of the back by 5 mm and expand it along the shoulder line by 2 cm. Draw a new neck line along the pattern.
We expand and deepen the armhole. To do this, set aside 15 mm along the shoulder seam, and 20 mm down the side line.
Front modeling
We deepen and widen the armhole as described for the back.
For the fastener, set aside 2 cm along the waist level to the right and draw a perpendicular line down. We extend it upward to chest level. We deepen and widen the rollout on the front part, setting aside 2 cm along the center and shoulder lines.
Our vests have a straight silhouette, so we will not make waist darts and will make the side seam straight.
How to choose vests
A new wave of popularity for long vests began two or three years ago. This is a repeat of the success that the Yves Saint Laurent fashion house brought them in the seventies. And now this item of clothing takes its rightful place both in expensive collections from famous fashion designers and in stores selling economy class clothing. This state of affairs also has its downside: it is difficult to choose “your” sleeveless vest among such a huge variety of options. You need to choose a sleeveless vest taking into account factors such as:
- height;
- age;
- body type
In addition, an elongated sleeveless vest will emphasize the elongated vertical lines on the sides , which visually makes the figure taller and greatly adds to its slenderness, so such a sleeveless vest is well suited for plump or short ladies, but those who are tall or naturally thin should be careful with it. When choosing elongated vests of large sizes, you should give preference to models whose length allows you to cover your hips, since this area is often problematic.
For women with short stature, not particularly elongated vest models , approximately up to the middle of the thigh, are more suitable, otherwise the figure may visually become even lower. If there is a need to elongate the silhouette even more, you can, in addition to a sleeveless vest, wear a long narrow skirt or trousers. Those with wide hips are better off opting for models that widen at the bottom, while lucky women with a very thin waist can emphasize it with a wide belt or a belt in a contrasting color.
Pattern of an elongated sleeveless vest
For this model, we shorten the main pattern to the desired length (usually about 20 cm). If it is too long for your height, you can shorten it by a larger amount. We leave the rest unchanged. To mark the pockets, set aside 20-25 cm from the side dart and mark the upper boundary point. We place the second one along the same straight line 10-15 cm lower. Then we model the burlap.
We retake the resulting patterns.
Pattern of an elongated vest with a dropped shoulder
We decide on the length of the product. On the basic vest pattern, we reduce the armhole by moving the extreme points to the left/right by 2 cm (see drawing).
Please note that on the front part this distance is laid out along the slope lines of the darts.
To build a new shoulder line, extend it by 5 cm and lower the end point by 1 cm. We build new pattern lines for the armhole.
From the top point of the roll-out we build a convex neck profile, matching it with the center line of the front. We remove the indentation for the fastener modeled on the basic vest pattern.
The model includes a welt pocket with a flap.
If you wish, you can not complete the pocket, but limit it to the valve. In this case we will get a false pocket.
To construct the valve pattern, we build a rectangle with dimensions of 9 by 15 cm. Then we move the lower points 3 cm to the left. We get a pattern in the shape of a parallelogram. We outline the location of the pocket on the front part.
We draw a frame-slot for the pocket 2 by 13 cm and mark its location under the flap.
All we have to do is outline the location of the buttons. The first will be at a distance of 10 cm from the bottom point of the rollout, the second - 15 cm from the first.
How to sew an elongated vest from a men's jacket
From a men's jacket you can sew a stylish women's vest with a wrap and an asymmetrical zipper.
For sewing we will need:
- jacket - single or double breasted;
- fasteners - short zippers - 2 pcs.;
- fastener - long zipper - 1 pc.;
- threads and sewing supplies.
How to sew a vest with your own hands
We rip off the buttons of the jacket.
We outline the armhole line along which we will cut off the sleeves.
Cut off unnecessary sleeves.
Try on the product and adjust the width to your size. We select the excess in the side seams and pin them. We first chop off the front flanges to avoid asymmetry. We cut off the excess and process the cuts with a facing.
We process the armhole sections with binding.
Using a basting stitch, we sew a zipper to one side of the jacket - vest.
We fold the shelves overlapping, overlapping the loops of the second side, and pin them together.
Sew on the second side of the zipper.
We try it on and try to fasten the zipper. If adjustment is not required, attach the zipper.
We decide on the location of two short zippers and sew them on.
DIY women's vests, photo models
The fashion for vests has filled the catwalks and has not gone away for several years. Depending on the style and material, they are worn, combined with any style of clothing in the spring-summer and autumn-winter seasons, worn on their own or over T-shirts, T-shirts, dresses, pullovers, sweaters, jackets, or even replacing jackets and coats with them. Women's vests are made from various materials and decorated with embroidery, fur, fringe, rhinestones, sequins, appliqué, quilting, and decorative stitching. Often, vest models are complemented with pockets, hoods, lapels, small sleeves, a detachable lining, a belt and other functional elements.
How to sew a vest from a women's jacket
For sewing we need to prepare:
- jacket for alteration;
- jewelry for decoration.
Description
We repeat the first steps from the previous description.
We replace buttons.
We decorate as you wish.
Vest with shawl collar
Patterns are made for sizes 40 to 52.
The model is quite complex to make and requires mastery of outerwear sewing skills.
To work you need:
- main fabric: 1.7-1.9 m (depending on size);
- dublerin: 1.1-1.8 m (depending on the width of the dublerin and the size of the product);
- lining fabric - 1.3-1.6 m (depending on size).
You can more accurately calculate the fabric consumption by performing a preliminary layout of the patterns.
For sewing, it is recommended to use thick woolen fabrics, usually used for making coats: drape, cloth, bouclé. Lighter versions such as suit fabrics are also suitable. An elongated vest made of velvet, jacquard, velor, or heavy suit silk will look great.
Patterns
We must make patterns for the back, front, and hems. The facing patterns for the armholes and lining are not shown separately; they are made according to the patterns of the corresponding parts.
The increase in exhaust gas is 12 cm, since this model has free volume. You can wear a thick sweater under the vest or wear the vest as a double-breasted vest.
Description
When marking patterns on the material, it is important to take into account the direction of the grain thread. Accurate adherence to the dimensions of the allowances, especially on the collar and sides, is also of great importance. Such care will ensure that the collar fits correctly and will simplify its processing.
In addition, be sure to transfer design lines and notches onto the fabric. For example, notches at the waistline and at the bottom of the lapel bend serve as a guide when assembling a vest.
In order to save material, the selection can be cut from several parts. The main thing is that the joining seam does not fall above the level of the fold of the lapel. If we sew from thick material, then the seams at the joints of the right and left hems should not overlap each other.
Allowance values:
- seams on the shoulders, sides, central seam, on the dart, pocket entrance, seams on dots and facings - 1.0-1.2 cm;
- lower cut - 3.5-4.0 cm;
- departure of the side and collar - 0.7-1.0 cm;
- the lift-off of the edge is 1.0-1.2 cm.
There is no need to provide allowances for the sprout, armholes, collar sewing lines, or the inner edge of the hem.
For allowances on the flange and hem, it is important to maintain a difference of 0.3-0.5 cm. For thick materials it should be maximum.
If there is a vent along the central seam of the back, then the allowance for these seams should be 5-6 cm.
Layout of patterns on material for small sizes - see below.
Larger patterns are laid out differently.
Sewing
We duplicate the back part below the shoulder blades with doubler material, cutting out the cut in a large zigzag. The front halves, hems and facings are duplicated in their entirety (except for allowances).
We process the sides and start working on the lining.
We cut out the lining according to the same patterns as the main parts, reducing them by the amount of facings and facings.
We provide allowances:
- seams on the shoulders and sides - 1.0-1.2 cm;
- central seam of the back if there is a vent - 5-6 cm;
- along the central seam of the back we place an allowance - a fold on top measuring 2 cm;
- armhole and hem sections - 2.0-2.5 cm.
We sew a vest, like all products with a lining.
Original do-it-yourself women's vest
You can sew an original women's vest from almost any artificial or natural material:
- fur;
- velvet;
- leather or suede;
- jeans or corduroy;
- linen, cotton or silk, knitwear, mixed fabrics;
- guipure, tapestry, jacquard, wool and other materials.
In addition to fabrics for sewing a vest, you can use your favorite things that are no longer worn, as well as scarves, stoles and even just beautiful rags. Thanks to the use of patchwork and quilting techniques, they produce exclusive models. Examples of sewing vests from various materials can be seen in the video below.
Ready-made patterns for a stylish vest
An elongated sleeveless vest with a sewn-in side is suitable for slender girls and plump ladies from sizes 42 to 62. Simple free patterns made for several sizes:
- 36 (euro) (chest-waist-hips) 82-66-88 - 42 (Russian);
- 38 (euro) (chest-waist-hips) 86-70-92 - 44 (Russian);
- 40 (euro) (chest-waist-hips) 90-74-96 - 46 (Russian);
- 44 (euro) (chest-waist-hips) 98-82-104 - 50 (Russian);
- 46 (euro) (chest-waist-hips) 102-86-108 - 52 (Russian);
- 48 (euro) (chest-waist-hips) 106-90-112 - 54 (Russian);
- 50 (euro) (chest-waist-hips) 110-94-116 - 56 (Russian);
- 52 (euro) (chest-waist-hips) 114-98-120 - 58 (Russian);
- 54 (euro) (chest-waist-hips) 118-102-124 - 60 (Russian);
- 56 (euro) (chest-waist-hips) 122-106-128 - 62 (Russian).

