Pattern and sewing of a kimono blouse
When sewing it is used:
- material;
- interlining;
- fabric for finishing edges;
- buttons;
- awl;
- threads
The basis of the finished pattern is a straight cut dress.
Instructions:
- Mark the yoke, cut the material along the line.
- Make cuts on the yoke.
- Continue the shoulder line.
- The back is already cut out with shelves.
- Mark the back yoke - the right side is longer than the left.
- Make seam allowances of 1-3 cm, for the bottom edge of the product 3 cm, for the sleeve 1 cm.
- Strengthen the parts inside with non-woven fabric.
Thin interlining
- Sew the shoulder seams of the yokes in pairs.
- Fold the yokes with the outer and inner sides facing each other and secure.
- Fold the bottom sections and sweep them away.
- Do machine stitching.
- Iron the product.
- Sew seams on both sleeves, trim allowances.
- Finish the cuts with tape.
- Sew the yoke to the bottom of the product, pin it together.
- Sew side seams.
- For the lower sections of the sleeve, perform a double fold.
- Make a loop on the back and sew on buttons.
- Decorate with beads, decorative stitching, and braid.
Kimono blouse pattern
Kimono dress pattern
How to sew a kimono dress? The pattern of a dress with a kimono sleeve requires the presence of fabric, cardboard with a width of 110 centimeters. For plus size girls, it is recommended to provide a supply of fabric in advance. In this case, the wedge is sewn into the side seam of the product.
Procedure for constructing a diagram:
- Cut the back - consists of 2, 1 parts;
- Measure the diameter of the neck.
- Cut in front in the same way as in point 1.
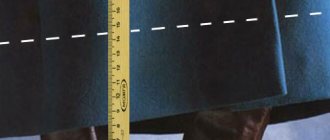
- For the sleeves, measure out rectangles. The oblique sleeve will be made using 100x100 centimeter squares, measuring 30 cm from the top of the square. After this, cut off the rectangle.
You might be interested in “Bat” sleeve patterns for dresses, blouses and sweaters
Sleeve pattern
- Connect the cut point to the main part of the pattern along the shoulder line.
- Below the sleeve, continue the seam that will connect the back to the front.
- For the collar, fold the 12 cm wide material in half, then connect it to the back neckline, sew to the triangular cut.
- Measure the belt - a rectangle 5 m by 0.3 m.
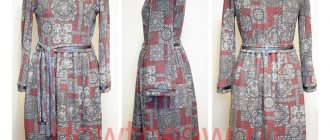
Kimono dress pattern
Taking measurements
Before you start sewing, you need to take basic body measurements. For kimono it is: Ssh, St, Sg, Sat, Di, Ds, Do, Dpt, Dr. The drawing of the future product can be immediately completed on the canvas. Further instructions are as follows:
- It’s worth starting with a grid - auxiliary lines;
- The lower cut of the canvas is inscribed “Bottom”;
- Di is laid upward from the “Bottom” perpendicular to the fold;
- Dc + 2 centimeters is measured down from the original - the level of the waist;
- Also, Cr * 1/3 + 10 centimeters is measured from the original downwards - chest level;
- From the fold along the chest level, measure Cg * ½ + Pg. It is important to remember that Pg should not be less than 6 centimeters, and the value of Cg * ½ + Pg should be no less than Sb + Pb. PB can be made minimal - up to 2 centimeters;
- Along the canvas from the fold, measure the width of the sprout equal to Ssh * 1/3 + 1.5 centimeters. From the resulting point, which is indicated by a cross in the picture, set aside Dr according to the original one;
First part of the product
- Measure the depth of the sprout along the fold of the fabric downwards from the original. It is equal to 1/3 of the width;
- Connect all points of the sprout with a smooth line;
- Tilt the shoulder cut, measuring 3 centimeters down from the original on the vertical;
- Shorten the one-piece sleeve by 3 centimeters at the side seam;
- Draw a bisector from the corner of the armhole by 5-7 centimeters and smoothly bring out the bottom of the sleeves and the side seam;
- Cut out the back with minimal allowances and put the shelves in place;
- Cut out a shelf along the back.
Second part of the product
Features of the kimono base pattern
Kimono is an oversized robe that will suit any figure. The standard width for the back of a kimono is 60 cm. It is draped on the figure with the help of a belt and the product does not seem too big. If more volume is required, wedges are added to the base.
Important! A traditional kimono is made from fabric 30 cm wide. This requires cutting out a stitched piece for the back, but if the fabric is wider than 30 cm, then this is not necessary, unless, of course, you need to exactly replicate a traditional kimono.
You may be interested in this: Sewing a beautiful robe without a pattern and sewing
When cutting, only simple geometric shapes are used. The back is a rectangle with a width of 60 cm and the required length. The shelves are 45 cm, and the edge of the waist is cut 15 degrees towards the throat. The throat treatment is made from a fabric shelf 10 cm wide. Another feature is the length of the entire product. Usually it is made 20 cm larger than needed.
Features of sewing in the pattern
Features of sleeve patterns
The sleeves are also cut out in rectangles. Unlike adapted robes with thin and tight sleeves, the traditional kimono has very wide sleeves sewn at the corner. The kimono sleeve is sewn into the base not along the full cut, but only along its half. Most of the sleeve, folded in half, falls not onto the arm, but onto the hanging edge. The open edges that remain are sewn at an angle. It is thanks to this that this type of kimono is obtained, distinguishing it from other similar robes.