DIY drawings on T-shirts with acrylic paints
Step 5:
Blur the Background
If you want a blue background on a white T-shirt, you can achieve this without pouring a ton of blue paint all over it. After all, too much paint, even with decoupage glue, can make a T-shirt hard and rubbery.
The following method can make a watercolor drawing soft, as if you had used watercolor
, not acrylic paints.
However, be careful because the paint bleeds more on a T-shirt than on watercolor paper. It is indeed difficult to control the process and direction of the paint. It will take a lot of patience and attention.
Dilute the chosen color (remember to mix the paint with decoupage glue) with plenty of water. Make sure the previous layers of paint on the T-shirt are already dry.
Start with translucent strokes, but before they dry, dip the brush into water and use a firm hand to stroke the surface of the T-shirt, applying slight pressure.
The water will spread across the surface and dampen the acrylic paint. Continue dipping the brush into the water and applying it to the area of the T-shirt you are interested in to create a blurred background effect.
.
This will take a lot of time and require maximum attention and accuracy. However, if you are a creative and enthusiastic person, you will undoubtedly enjoy this activity.
the color will remain darker where the stroke was.
.
Step 6:
Using a stencil
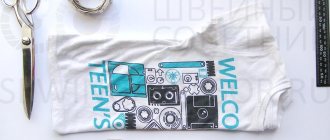
Some drawings are very difficult to reproduce even on paper. Therefore, if you are not a great artist, resort to using a stencil.
Draw or print a design that you like.
When the sketch on paper is ready, cut it out with scissors or a thin blade. Then place the resulting stencil on top of the T-shirt where you want the design to appear.
Holding the stencil with the fingers of one hand, use the fingers of the other hand to make strokes over it so that they extend beyond the outline.
Using this method, you can get a general shadow outline. If you have the desire, you can continue to draw and transform the drawing.
Step 7:
Expose the T-shirt to high temperatures
To fix acrylic paints, it is necessary to expose the item to high temperatures.
.
You can place the finished product in the oven, steamer or microwave. Make sure the surface where you place the item is clean.
Heat the oven to 140 degrees
keep the T-shirt in it for about
10 minutes If the item is made of delicate fabrics, such as fine silk, wrap it in special baking paper.
Acrylic paints also adhere well to a steam bath. It is worth noting the advantages of a steam bath: the material of the product treated in this way will not crumble or fade when washed.
Now your T-shirt is ready to wear.
To make your new item last longer, do not wash it immediately after applying the design.
How to paint a T-shirt with gouache?
How can you dye a T-shirt? The first thing that comes to mind is fabric dyes. But if they are not at hand, then ordinary gouache will do the job perfectly.
So, to dye a T-shirt in different colors, you will need a few simple items:
- White T-shirt;
- jars of gouache;
- PVA glue;
- brush;
- palette.
First of all, combine glue and paint in proportions 1:1. If you need a color that is not included in the gouache set, then mix the paints first and only then add PVA to them. Then, armed with a brush, apply paint to the T-shirt. Don't know how to draw? No problem! Abstract prints are in fashion now more than ever. Do not forget to wash your brush in clean water from time to time so that your art does not turn out dirty and untidy. And remember, if you want to get a flat design, try to lightly rub the paint into the fabric. If you need three-dimensional images, then apply gouache to the material in a thick layer.
The biggest disadvantage of this method is its fragility. After the first wash, the painting will be erased instantly. But the T-shirt will become white again and ready for new transformations.
Is it possible to dye a Bolognese jacket?
Before painting the jacket, it must be soaked in hot water. This is necessary to ensure that the paint is evenly distributed throughout the product. You can soak it in the bathtub or in a basin. After this, take out the jacket and smooth out all the creases so that the paint adheres correctly. Heat water in a large saucepan; there should be enough water to completely cover the item.
Important! The jacket should float in the water so that the pigment is evenly absorbed. It is advisable to choose a very large pan
Over medium heat, boil water. Next, pour water into a large basin and put the jacket there.
Painting a nightgown
The water temperature should be approximately 70 degrees. Add paint to boiling water and stir quickly. One package of pigment requires at least 10 liters of liquid. For a less vibrant color, less water is needed. The paint is dissolved in a separate container. Pour 250 ml of boiling water over the powder packet and stir. Even liquid dyes are first diluted with water. To make the color more saturated, you can add a spoonful of vinegar to the water. Dye the jacket for about 2 hours.
How to dye a T-shirt at home?
Many hardware stores sell special dyes for clothing. If there are none, then they can easily be replaced with improvised means: natural fruits and vegetables.
So, in order to dye clothes yourself, you will need:
- Paintable product.
- Protective gloves.
- Capacity.
- Water.
- Dye.
- Wooden or plastic sticks.
Strictly following the instructions, proceed to painting the product. Pour the dye into a small container. Slowly pour in the water and gradually, stirring constantly, add the dye. The paint should completely dissolve. Strain the resulting solution and pour it into the container in which you will paint.
Next, let the container heat up. Dip the T-shirt into the dye until the dye completely covers it. Stir the product with prepared sticks to achieve a uniform color. When the T-shirt becomes a shade darker than desired, take it out. After drying, the fabric will definitely lighten. If you want to get simple streaks on your product, twist it as if you were squeezing it out and secure it with rubber bands or follow other techniques.
How to Remove Clothes Dye from Clothes
If you inadvertently stained clothes with paint that you did not plan to dye, try to remove the stain as quickly as possible. Otherwise, the dye will become embedded in the fibers, and it will be almost impossible to remove it.
If you couldn’t notice the stain right away, but it is still wet:
- do not apply heat to the mark: do not rinse with hot water, do not place the product near heat sources;
- try to collect excess paint so as not to spread it further across the fabric;
- wash off the mark under running cold water, directing the stream from the inside;
- Wash the product by hand and then machine wash it in cold water.
To clean dry paint:
- carefully remove excess paint from the material;
- Using an alcohol solvent and an old toothbrush, try to scrub the stain;
- wash the product in a machine.
If the stain cannot be removed, contact the dry cleaner, or decorate the problem area with a patch or paint the product in the appropriate color.
Painting the product at home is quite simple. The main thing is to choose the right dye, dilute it correctly and use it according to the instructions. Using individual paints, such as acrylic paints, you can not only change the color of your clothing, but also apply your own print to the surface.
The most popular dyeing methods
Full coloring.
The use of synthetic dyes simplifies this process as much as possible. The easiest option is to buy a special machine washable dye. This will take a little time and will not require any effort. If you do the dyeing in a basin, do not forget to stir constantly so that the paint lies evenly on the fabric.
But painting with natural decoctions will take longer. First you need to brew a few tablespoons of crushed raw materials. The richer the color you want, the more raw materials you need. Cool the brewed paint and strain. Experts recommend adding 1 teaspoon of table salt per liter of water. You can put a T-shirt in the finished infusion and boil for an hour. When everything has cooled down, rinse well in warm water. It is recommended to squeeze it carefully, without twisting it. And dry it by laying it out on a horizontal surface. This way you can update any thing.
Ombre or gradient effect.
T-shirts with partial coloring look very original - painted in layers with a smooth decrease in the brightness of the shade. Usually a more saturated color comes from below, although this is a matter of taste and imagination. To make colors smoothly transition from intense to less saturated, different methods are used. The simplest is when the color is picked up by immersing the product in the dye. The same can be achieved using a brush or spray bottle.
In order for the distribution of paints to look successful, you should think through everything in advance. And make marks on the T-shirt - guidelines for shade transitions. The paint is diluted in accordance with the instructions in the instructions. Dip your product into the solution for a minute on the side that should be the darkest. Then you need to lift the thing and let the paint drain. So we lower it to each next mark as many times as there are shades. At the same time, we constantly increase the immersion time. The finished product must be rinsed in cool water acidified with vinegar.
For “spraying” we choose paint for coloring in cold water. We lay the T-shirt on oilcloth and apply color using a spray bottle. Paint preparation has its own characteristics. First, take less water than recommended in the instructions. Apply paint to the darker edge. Then you need to add water to the spray bottle to dilute the color and apply the next layer. So, we gradually reduce the intensity of the dye and get the desired shades.
And finally, an original method of painting with acrylic paints. It turns out very original, because... The paint adheres perfectly to the fabric. The color palette includes both pearlescent and glow-in-the-dark. You can create unique designs on your T-shirt. The drawing is drawn with a simple pencil and then painted. Experts recommend choosing synthetic brushes for this task. Place cardboard between the front and back layers of the T-shirt to make it more convenient to work.
Tie-dye technique
Lovers of colorful, intricate images can take inspiration from traditional Indian craftsmen or hippies. Most often these are chosen by ladies. The ancient technique of tie-dye allows you to show wild imagination. Everything is quite simple to do. To paint, you need to twist or fold the product in a certain way. We carefully roll the T-shirt in a spiral - with one hand we take the central part, and with the other we take the collected edges. We fold and tie with threads so that the pattern does not break. The paint is applied with a brush or syringe. So we leave the T-shirt until it dries so that the design is fixed. Then rinse in salted water and dry.
You can also simply dip the fabric in different colors, or fold it in certain shapes, securing it with clothespins. A bright spiral lies over the entire area or in the center. You can create multiple color layers. To do this, the fabric is dipped in one paint for 15 minutes, and then you need to make another spiral and dip it in a different color for an hour. After rinsing and drying, the T-shirt looks great.
Painting a T-shirt with streaks
Making stains on a T-shirt at home is very easy. Fill a basin with warm water, prepare several colors that match each other and drip them into the water. You will get a beautiful abstract pattern on the surface of the liquid. Dip the T-shirt without stirring the paint and leave it in this position for a couple of hours. Chaotic interesting and bright patterns formed on the product. Dry the item and iron it to secure the design.
Don't throw away old things, give them a second chance at life by decorating them yourself!
1. T-shirt
The T-shirt should be made of natural material, since synthetic fibers do not absorb paint well. Usually a white T-shirt is used for artistic painting, because white does not distort the color of the paint, but on dark fabric, when the paint is absorbed, the design is less visible, and in order to give it a rich color, sometimes you need to apply the paint several times, or pre-paint it with white. Even a new T-shirt must be washed first so that the factory impregnation is removed from it, which prevents the paint from being absorbed. You can also iron it for convenience.
2. Drawing
It is advisable to initially know how and what you want to draw. If you do not have the skills of an artist, it will be easiest for you to use a drawing like a children's coloring picture without smooth transitions, in which you just need to paint over each area with the appropriate color. In any case, it will be easier for you to use a drawing with clearly defined contours, even if you know how to draw.
3. Transferring the design to a T-shirt.
In order for the pattern to be in the middle, you need to measure the same distance - from the top you can measure from the seams of the sleeve, from the bottom from the edges of the T-shirt.
A design can be transferred to a T-shirt in several ways. In the case of white and light T-shirts, you can simply transfer it as a carbon copy or with a simple pencil, or with a special marker for fabric in the light - by placing the T-shirt, with a picture underneath, on the glass, under which there is a bright lamp, or by gluing the T-shirt with tape to the window. In the case of carbon paper, the drawing must be on paper thick enough so that it cannot be pierced by a pencil. You should not make the line too thick, otherwise it will be difficult to paint over it if you plan to use light paint. The drawing itself should also be secured to the T-shirt with tape so that it does not move while you transfer it.
If the T-shirt is dark and a pencil or carbon mark is not visible on it, and the drawing cannot be seen in the light, then you can use another method. By attaching a drawing, for example, to a window on its reverse side, repeat the outline with chalk. After this, you can transfer it to the T-shirt, just as in the case of carbon paper - attach the side outlined in chalk to the T-shirt and trace along the front side with a pencil. Instead of chalk, you can use a regular metallic gray marker. The fact is that the dye of this marker consists of very fine metal dust, and it will be imprinted on a T-shirt in the same way as chalk, but at the same time the design can be repeated more accurately than with chalk. You should use metallic gray, because a colored one can distort the color of the paint, and a regular marker can fade when washed and leave streaks. It’s worth tracing the drawing with a marker a couple of times to be sure that it will appear everywhere.
4. Securing the T-shirt before painting
In principle, you don’t have to attach the T-shirt, but simply lay it out on the table, but you must put some kind of board inside so that the paint does not leak through and end up on the other side of the T-shirt. The board itself should be smooth enough so that after drying the T-shirt can be peeled off from it more easily.
You can secure the T-shirt for convenience by attaching it with pushpins to the edges of the board. Personally, I use a thin laminated piece of fiberboard and secure the T-shirt with clothespins. I wrap the reverse side of this system in a plastic bag so as not to get it dirty.
5. Paints and brushes
To paint T-shirts, use acrylic paints for painting on fabric, which are available in all art supply stores. Before painting a T-shirt, the paints should be diluted so that they are well absorbed into the fabric. It is advisable to dilute the required amount of paint of the desired colors in separate jars. You should make sure that there is enough paint to complete the drawing, especially if you are mixing colors, since if you run out of paint, it will be difficult to find the right color. You can use water for dilution, but it is advisable to purchase a special thinner for acrylic paints in the same store so that the drawing is more durable. If the thinner is thick and the paint does not come out liquid enough, you can add water to it. Under no circumstances should you pour water into a full can of paint, as this may cause the paint to deteriorate over time. The thickness of the paint is determined by the effect you want to achieve. If the paint is too thick, then you will get the effect of rubberized fabric that will not bend well, which in turn is not very pleasant. If the paint is liquid like water, then it will saturate the fabric well without laying down in a layer, but then it will spread beyond the edges of your image and you will not be able to make fine lines. Therefore, the paint must be made liquid, but not quite like water. Or you can combine it, for example, by making a blurred background with liquid paint, and painting fine details with thicker paint.
It is better to use synthetic brushes, as they are stiffer and better allow you to rub the paint into the fibers, and the lint does not fall off from them. But for small details, you can use a squirrel tail because it retains the fine tip well. If the paint has dried on the brush, you can clean it with a solvent such as nail remover. It will not be possible to remove paint from a T-shirt without a trace, so if there is a blot, the easiest way is to finish painting something.
6. Applying paint.
First of all, you need to put something under your hand, such as a piece of paper or a napkin, so that your hand does not stick to the drawing.
In the case of a simple coloring drawing, you first need to draw the outlines with a special “contour”, which should also be in the store, or simply with black paint. Once it has dried, you can apply the remaining colors, starting from the middle if possible, so as not to touch the fresh paint.
If the drawing is more complex, then you should always start with light tones, because the dark will not normally be painted over with light, although small details can be applied with light paint later, giving a little more layer.
Smooth transitions must be done immediately and quickly, as the paint dries quickly. The transition can be made by applying one layer to another, since liquid paint is translucent and somewhat reminiscent of the watercolor technique, although in the case of thick paint it is more like oil.
After the drawing is ready and dry, the T-shirt can be peeled off from the board. Then you need to let the paint dry for another 2 days, and then you need to fix it by ironing it well on the back of the drawing or through gauze. Moreover, if the T-shirt is simply turned inside out, you need to put something under the design, otherwise it may leave a mark on the other side.
That's all. As a result of all these actions, you will get an original designer T-shirt with artistic painting.
Tags:
master class with photos, how to decorate, update, paint, transform, design, decorate a simple black T-shirt, how to make it, drawing, inscription, print, patterns on a T-shirt, picture on an old T-shirt, decor, design, decoration, transformation of a T-shirt , draw, apply pictures with acrylic paints, site about painting T-shirts, fashionable T-shirt, new life of an old T-shirt, original, creative, funny, interesting, designer T-shirts, ideas for T-shirts, paint, decorate, paint, change, decorate a T-shirt, acrylic paints, ideas for drawings on a T-shirt, making a T-shirt with your own hands
26/03/2018
Food coloring cannot be called super-resistant, but it is absolutely safe, which makes it the best choice among all types of paints for joint creative activities with young children. In addition, the durability of food dye on fabric can be slightly increased by using salt water.
Drawing on a T-shirt with acrylic paints
Step 1:
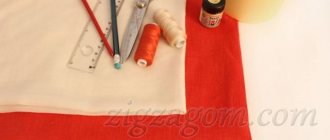
Prepare all necessary materials for work
Cut the cardboard to fit the size of the T-shirt. Place it on the cut out cardboard “silhouette”.
First cover the cardboard with wax paper and secure it to the cardboard using tape. Now your T-shirt is ready for further transformation.
Prepare paints, a glass of water, brushes, a palette and glue for decoupage on fabric. Carefully read the instructions in what proportions you need to mix the ingredients.
As a rule, it is recommended to add 1 part acrylic paint to 2 parts of decoupage glue.
. Decoupage glue in the resulting mixture makes the paint more flexible and prevents the fabric from becoming woody.
Thanks to it, the texture of the fabric becomes resistant to creases and crumbling of paint at bends, and the fabric is dyed uniformly.
Step 2:
Sketch the drawing
Think about what kind of drawing to create. Get inspired by interesting ideas and ideas.
To make the task easier, you can rummage through Google, or you can just use your imagination and come up with something original, but simple.
It's best to try drawing a picture on paper first. Place the piece of paper nearby, add fabric decoupage glue to the paint that serves as the color for the outline of the design and, using a thin brush, lightly outline the outline on the T-shirt.
If your drawing skills are less than perfect, it is recommended to start with simple organic shapes
. For example, try drawing a mushroom.
Find in the search engine the most optimal option for the drawing. Mushrooms in the pictures look beautiful and, as a rule, asymmetrical.
Apply the paint with light movements. The lines don't have to be perfect and clear.
They can even be a little careless. Such carelessness will give a special flavor to the drawing.
The advantages of this type of freehand painting are obvious: you can control the thickness of the lines you draw, making them thinner or thicker, darker or lighter.
Play with a brush. The drawing should not look as if it came out from under the stencil. A T-shirt with a clear sketch visually looks very bright.
Drawing an outline will help you get a feel for the fabric. The texture of a T-shirt varies depending on the weave of the fibers of the materials. Based on these features, each T-shirt will take on colors differently.
Important tip: if you don't have much experience in design and drawing, practice on paper first.
How to dye white fabric using brilliant green and other dyes?
Tulle and curtains are accessories that people notice when they enter your room. Fabric curtains can both decorate and hopelessly ruin your entire interior.
Painting curtains a different color quickly and without any special effort is one of the acceptable options for transforming the appearance of a room. By changing the color scheme of clothes for windows, as well as choosing cute things to match, you can get a new solution for your home or work environment.
Do-it-yourself painting of tulle and curtains can help you if you don’t have the funds or time to update the interior and make repairs, but your soul is asking for something new. The painting process is very economical in every sense, because:
- no significant cash outlay is required to purchase dyes;
- it is not necessary to waste your time waiting, and also listen to the designer’s recommendations;
- there is no need to walk for a long time from store to store in search of new materials;
- There is a possibility of re-painting.
Home conditions are suitable to give your window wardrobe a new look on your own. Let's take a step-by-step look at the process of how to paint fabric with brilliant green and other equally interesting means at hand. Moreover, this fabric can be the basis of both interior decor and your clothing.
How to paint a T-shirt with acrylic paints?
Acrylic paints penetrate perfectly into fabric and are available in a wide range of colors. That is why you can use them to dye a T-shirt in different colors. You will need:
- White T-shirt;
- acrylic paints;
- brush.
Everything here is extremely simple. First you need to apply a pattern of the design to the clothing, and then paint it with acrylic paints. If they are quite thick and difficult to apply to the fabric, simply dilute them with a little water. Make sure that the paint layer is not too thick. This way it will stay on the fabric longer. After everything is ready, let the drawing dry for a day. And then iron the T-shirt through cheesecloth at maximum temperature. And remember that after such manipulations the item cannot be washed for 48 hours.
How to paint a T-shirt with wax crayons?
How else can you dye a T-shirt at home? Ordinary wax crayons can come to the aid of self-taught designers. Ready to experiment? Then prepare:
- white T-shirt;
- wax crayons of different colors;
- grater;
- several sheets of white paper.
How to dye a T-shirt? Very simple! First of all, grate the wax crayons of the colors you need on a fine grater. Then take a T-shirt, lay it out on the ironing board, put several sheets of paper inside so that the paint does not get on the back side. Then apply chalk shavings to those areas of the item that you want to have prints on. After this, cover the T-shirt with paper and begin ironing until it comes off the fabric. This will mean that your designer item is ready.
How to dye a T-shirt black?
In this case, you can’t do without fabric dyes. To dye a T-shirt black, you will need:
- White T-shirt;
- a bag of black dye;
- salt;
- enamel basin.
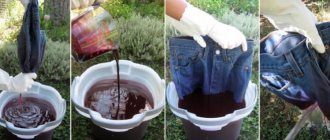
Where to begin? From preparing the solution for staining. Pour the coloring powder into a saucepan and slowly add water until you form a paste-like mixture. After this, add cold water to it in proportions of 0.5 liters per 1 bag of dye. Mix everything well and strain through cheesecloth. Then pour the solution into an enamel bowl and add water again, the temperature of which should not exceed 50 degrees.
Dip a T-shirt into the prepared mixture and place the bowl on the fire. Once the solution boils, remove the fabric, add 2 teaspoons of salt to it, and then immerse the T-shirt in it again. Once the entire contents of the basin have boiled again, remove it from the heat and leave the T-shirt to dye for about half an hour. Then rinse the item first in hot and then in cold water. Just like that, with a slight movement of the hand, the white T-shirt became a rich black color!
How to dye a T-shirt different colors?
Using fabric dyes, you can dye a white T-shirt in different colors. There are special techniques for this. For example, to get bright and unusual stains on clothes, you first need to twist the T-shirt in a spiral, and then wrap it around its axis several times and secure it with threads or rubber bands. Then dilute the dyes of the selected colors according to the instructions. Take a brush and apply paint to the T-shirt. After a day, unwrap the item and admire the resulting extraordinary patterns.
Another method of staining is nodular. Just tie a lot of different knots on your T-shirt using elastic bands. Then use a brush to apply special dyes to the fabric. The essence of this technique is that the areas tied with rubber bands will remain white, and mixing different colors will give fancy and stylish stains.
To stand out from the crowd, you don't have to buy expensive branded items. You can create unique outfits with your own hands using available materials. To do this, you don’t need to have any special artistic skills, because designs on clothes can be made abstract. How to dye a T-shirt different colors?
How to dye a T-shirt
To do this, take:
- white cotton shirt;
- dyes;
- water;
- paint container;
- an elastic band.
Typically, T-shirts are made from cotton fabrics, so they can be easily dyed.
Dyes are sold in any hardware stores.
You can use natural dyes: instant coffee, birch leaves, blackberries, onion peels, tea, blueberries and others. Over time, they do not lose color and keep the T-shirt fresh.
To dye fabric, grind plant material and then boil it in distilled water. After this, boil the solution to the desired concentration, then strain. Soak the T-shirt in the resulting broth. When dyeing items, you can use various fabric binding techniques to create interesting patterns.
Wring out the shirt and lay it right side out on the desired surface. On this side in the middle, take the fabric and twist it clockwise, securing it with elastic bands. The result should be a ball. If you choose artificial dyes, dissolve them with the desired color in water, as written in the instructions. Leave the coloring pigment for an hour. After the time has passed, remove the item and place it on some cloth to dry. Do not take it outside, sunlight will absorb the brightness of the T-shirt.
Dyeing a T-shirt at home
To do this, take the item, dip it in a container, and use a syringe to apply paint in the desired shades. For convenience, you can apply it first with a syringe and then distribute it evenly with a brush.
After the design is applied to one side, come to coloring the second. At the end of the process, the T-shirt must be thoroughly rinsed in water, dried and ironed to fix the image.
How to paint a T-shirt using acrylic paints
Acrylic colors are the best option for these works, since the substance penetrates perfectly into the fabric and has a wide range of colors.
They produce samples that glow in the dark, as well as pearlescent and matte paints.
When purchasing a tone, pay attention to what fabric it is intended for. Choose brushes depending on the complexity of the work. It is better to use synthetic bristles as they shed less and apply colors better.
So, the materials have been selected, you can begin the painting process. Place a layer of paper between the front and back of the item to secure the fabric.
This way, the design will be easier to wear and will not move.
First you need to draw a drawing template using a simple pencil, and then color it.
If during the painting process a drop of paint falls in the wrong place, don’t be upset. It will not be possible to remove the stain without affecting the main pattern. However, you can show your imagination and paint the damaged area so that random drops appear as elements of the image.
It is often difficult to work with acrylic paints due to the thick composition. In this case, dilute the paint with water. Its layer should be uniform and not thick, then the painting will hold up better. The finished design must dry for 24 hours, after which it must be fixed with an iron through gauze at the maximum temperature allowed for the fabric. After this, the item cannot be washed for 48 hours.
Dyeing a T-shirt using the tie-dye technique
Tie-dye is a technique that allows you to create bright psychedelic patterns on things. This technique was used in ancient India and China, and in the 20th century it became very popular thanks to the hippie movement. Currently, this method is used by famous brands such as Stussy, Vans and others.
You can create such a beautiful tie-dye T-shirt at home.
- ordinary paint;
- white T-shirt;
- water;
- plastic containers;
- threads;
- salt.
You can get paints at a hardware store. Salt is necessary for the paint to adhere better. Now you need to tie the shirt.
Twist it in a spiral from the middle so that you end up with lines emanating from the center to the edges. After this, carefully fold the item several times and wrap it with thread.
Now dilute the paint in plenty of warm water and add a tablespoon of salt. Apply paint to the item using a syringe or brush. Leave to dry.
When painting has been done, put the shirt in a dry place. It is not advisable to unfold the drawings at this time, otherwise they will not stick. After a day, unwrap the item and enjoy the result.
How to dye a T-shirt deep black
To do this you need to take:
- black shade of paint - 1 sachet;
- enameled basin.
First, place the dye packet into the pan, gradually adding water and stirring to form a paste. Then fill the paste with water at a ratio of 0.5 liters of cold water per paint. Mix everything and strain through cheesecloth. Pour the mixture into an enamel bowl. Add water at 50 degrees. The amount of the resulting solution must match the weight of the fabric being dyed within 10:1.
Place the fabric in the prepared solution and put it on fire. After 20 minutes, when it starts to boil, add 2 teaspoons of table salt. Place the fabric back into the solution and wait until it starts to boil. This will happen in about 30 minutes. After this, carefully remove it from the heat and place it in a safe place. Do not remove the shirt for another 30 minutes. When the time has come, take out the item and rinse, first in hot, then in cold water. Then carefully squeeze out the water and dry.
Dyeing a T-shirt in different colors
- a regular T-shirt;
- dyes;
- clothespins;
- elastic bands;
- salt;
- bucket;
- latex gloves.
First you need to wet the T-shirt, then take it with your fingers and twist it clockwise, secure with an elastic band.
If you want to dye a T-shirt with an accordion, you need to fold the item into this form and secure it with clothespins.
Make a dye solution following the instructions.
Soak your T-shirt in it for an hour. Remove, untie and rinse in cold water until it runs clear.
The process of painting a T-shirt with stains
This is a very interesting and simple method. To do this, pour warm water into a basin. After that, take several colors that match each other and start dripping them into the water. There should be some kind of pattern on the surface. Now take your shirt and dip it in water. Keep it there for a couple of hours, then take it out. You will notice that bright and chaotic stains appear on the fabric. All that remains is to dry it and iron it.
If you have an old white shirt, don't throw it away, but give it a bright new life.
Your favorite curtains have faded and become faded - and you want to update their color at home. How to dye fabric? There are many options, you just need to choose the right method. If you master this procedure, your clothes will always look new and fresh. Not every housewife will look at the label on jeans or a T-shirt before washing. A new item that can only be washed by hand in warm water flies into the washing machine and loses its appearance. Don’t rush to take good clothes to the countryside - if the structure of the fabric is not damaged, the color can be restored.
How to choose a dye
There is a wide choice of coloring compositions available for free sale. There are powdered, crystalline, liquid and paste forms. The effect of chemistry gives a lasting result, provided that the procedure is carried out correctly. If there are doubts about obtaining a positive result, it is better to use natural coloring agents. They may be less intense, but they are environmentally friendly and safe for health.
Options for natural fabric dyes:
- They give a brown tint to light-colored fabrics: tobacco, onion peels, weak coffee or tea, oak bark, henna, basma, cinnamon.
- Green color is obtained with the help of: spinach, bird cherry, juniper berries, sorrel, elderberry leaves.
- Strong natural coffee blackens well.
- Red: elderberries, beets, blueberries, wolfberry.
- Blue range: red cabbage, blackberries, sage, Ivan da Marya inflorescences, quinoa seed.
- Orange: turmeric, apple bark, celandine, sea buckthorn.
- Yellow: cumin, turmeric, wormwood, fresh carrots, nettle roots, poplar buds, orange peel, birch bark and leaves.
You need to select a dye depending on the degree of restoration, original color and type of fabric. The material is determined by separately pulled out and ignited fibers. Rayon, cotton and linen are highly flammable. Wool and natural silk begin to smolder.
For variegated colors, it is recommended to choose deeper tones, then the contrast difference will be smoothed out. A similar rule applies to faded fabrics. For example, it is ideal to dye blue jeans blue.
It is important to consider the purpose of home restoration. Heavily washed and faded items need a higher concentration of dye than white ones
In the latter case, it is enough to take a natural or chemical dye in small quantities so that everything works out the first time. Sometimes you need to repeat the procedure again. So, even a white T-shirt will not immediately turn black.
Preparation and methods of staining
To paint a product with high quality, you must first place it in cold water for 1 hour, then wash it by hand with powder, rinse, dry and iron it with a not hot iron.
There are several types of painting, depending on the pattern obtained on the T-shirt:
- solid;
- with ombre or gradient effect;
- Tai-Dai technique;
- tying knots - Sibari.
Full painting
To repaint a T-shirt with chemical compounds, follow the detailed instructions that come with the purchased paint. When using natural dyes, follow the following sequence of work:
- Boil water in a container and throw in a certain amount of the selected raw material (depending on the desired color saturation).
- Remove from heat and let sit for 30 minutes;
- Strain the mixture through a strainer and add table salt (1 tablespoon per liter of liquid).
- Immerse the T-shirt in the liquid and simmer for 1 hour.
- Let the infusion cool and remove the product.
- Rinse thoroughly.
- Place the item for half an hour in a specially prepared 1% solution of tin chloride or other mordants to fix the paint.
- Rinse in a weak vinegar solution, then in clean water.
- Squeeze lightly and lay out to dry.
Ombre effect (gradient)
You can achieve a smooth transition from a saturated shade of color to a pale one using two methods - immersion and spraying. For the first method:
- Mark the transition points of shades.
- Dilute the paint in a special container (according to the instructions).
- Dip the product into the solution up to the top mark for a minute and let the liquid drain.
- Lower the product again, but to level 2 mark and for 2 minutes.
- Repeat the process several times, increasing the time the T-shirt is in the solution and each time moving away from the colored layer.
- Rinse the product in vinegar water.
How to spray paint a white T-shirt:
- Lay down a clean cloth and place the product on it.
- Dilute the paint in a spray bottle as indicated in the instructions.
- Spray onto the bottom/top of the t-shirt.
- Add water to the sprayer (the color of the paint will become less intense).
- Spray a second layer, add water again, etc.
Tie-Dye technique
A fantastic method of dyeing fabrics. T-shirts are folded, crumpled and curled in a variety of ways and then dyed. The output is intricate, bright patterns, which looks very impressive. It's easy to become the owner of an exclusive item. You need to do the following:
- Place the item on a slippery surface, press your fingers into the center and twist the item in a spiral.
- Tie the resulting bundle with threads.
- Dilute the paints according to the instructions, each in a separate container.
- Apply dyes with a brush alternately from each container.
- Dry without unfolding.
- Rinse the product in cold water and dry.
As a result, a multi-colored spiral should appear on the T-shirt.
Sibari
The secret of this dyeing technique is tying different knots on fabrics using pebbles, elastic bands, and threads. How to do:
- take several round pebbles;
- place them under the front of the T-shirt and secure them with rubber bands;
- soak the product in paint for an hour;
- remove the stones and rinse the item in slightly salted cold water.
Using different types of dyes, it’s easy enough to turn an ordinary white T-shirt into a unique thing. The recommendations given above will help you paint products in any color. Don't be afraid to experiment!
How to entertain your child and update his wardrobe?
To dye a white children's T-shirt you will need:
- food coloring of one or more colors;
- bowls;
- water;
- salt;
- plastic bag;
- medium sized basin;
- empty bottles with a sharp spout for ketchup or mustard;
- elastic bands;
- vinegar.
Soak the T-shirt in a vinegar solution in a 1:1 ratio (water/vinegar) and wring it out after the fabric is completely soaked.
Tie different parts of the T-shirt into knots or tie them with rubber bands so that they do not come undone during the dyeing process. This will create original stripes and spiral patterns on the fabric.
In bowls or spice bottles, mix food coloring with water until desired shades are obtained. If you are using bowls, simply dip different parts of the t-shirt into them. If you diluted the dye in bottles, pour it on the T-shirt from different sides. (Kids love using bottles to dye fabric!)
Wrap the baby's T-shirt tightly in a plastic bag and place it somewhere for 8 hours.
Fill a bowl with cold water, add half a glass of table salt and stir until it is completely dissolved.
Place the dyed T-shirt in cold salt water for 5 minutes to increase the fastness of the food coloring.
That's all. Now simply wash and dry your baby's T-shirt as usual.
By the way, if you don’t have the time or desire to do your own dyeing, here is https://kesoo.shop/catalog/ a collection of children’s clothing, where you and your child can quickly and easily choose high-quality items in the colors you like.
- Food dye colors food well, but fades a lot and quickly disappears from clothing. In addition, it can only be used with certain fabrics. Therefore, if you set out to dye a children's T-shirt not for fun, it is better to take a good fabric dye.
- You can use food coloring to dye silk, wool, or nylon. However, the synthetic coating of nylon sometimes prevents paint absorption. As for cotton fabrics, food dye does not stick to them.
By the way, here is one of our previous publications, where we told how to beautifully dye a white wedding dress. Perhaps this information will also be useful to you.
And in addition to the above, we suggest you learn how to make natural food coloring at home. Don't miss the interesting video below!
It happens that a good T-shirt lies idle in the wardrobe, since its color does not quite suit the owner. It’s a shame to throw it away and not interesting to wear. And sometimes you want to find some special thing that will definitely be one and only. And so that it fully meets your preferences in terms of color, shape, length, etc. The easiest and most fun way to solve this problem is to dye this t-shirt at home the way you like.
On one of your free evenings at home, stop watching the series and engage in the creative process. Use the technique of twisting and tying fabric, with which patterns are created with one or more dyes in different shades of the same color. A creative approach to business will help turn an ordinary thing into a real exclusive. You will have a lot of fun and save money on buying expensive new things. In addition, by independently changing the color of slightly boring clothes, you will have a lot of fun. Try one of several methods offered by experienced housewives at home.
Coloring of various materials
You can paint a product with the highest quality if you take into account the properties of the material being painted.
Cotton
Cotton perfectly absorbs dyes of various origins, but quickly loses color and can fade. To dye cotton material, use melt or rain water as correctly as possible. During the procedure, add a pinch of calcined salt to the dye mixture, and after dyeing, rinse the item in cold water with a dissolved spoon of vinegar.
Linen
The dyeing process for linen fabrics is the same as for cotton. After rinsing the product in water and vinegar, wring it out and lay it out to dry on a horizontal surface. Do not speed up the drying process by ironing, otherwise streaks will appear.
Wool
An aniline dye is most suitable for dyeing wool. Pigments made from natural substances also work well for coloring. During the procedure using aniline dye, add a little vinegar to the dyeing liquid at the rate of 150 ml per 1 liter of water. After painting, hang the product over the bathtub or sink so that excess paint liquid runs off. After this, rinse the item in water 2-3 times, adding a little lemon juice to it on the last rinse.
Jeans
Denim material can be dyed with both purchased aniline dyes and blue. When painting with special paint for clothes, you can use any processing technique: manual or in a washing machine.
To stain blue, dilute the substance in cool water and add 1-2 tbsp. spoons of table salt. Leave the material in the dye mixture for 3-6 hours, and then rinse thoroughly and fix the color with a vinegar solution.
Silk
Before dyeing, be sure to wash the silk material, as various impregnations are often added to its fibers. To speed up the process during the procedure, add calcined salt to the coloring liquid at the rate of 1 tbsp. spoon per 1 liter of water. Do not remove the item from the paint immediately; let it sit in the container with liquid for another 30 minutes. After this, rinse the material with hot water, and at the last rinsing stage - with cold water.
Synthetics
When dyeing synthetics, add a little formic acid (85%) to the liquid at the rate of 2 ml per 1 liter of water. The coloring mixture should not be too hot, the temperature should not exceed 45 degrees. After dyeing, leave the item in the composition for another half hour, and then rinse with cold water.
Polyester
For polyester, use only a special dye, diluted exactly according to the instructions. Before the procedure, soak the product in warm water with washing powder for 30 minutes, and then rinse in clean water with a few drops of ammonia.
Viscose
It is better to dye viscose products as follows:
- At the first stage, combine the dry dye with soda ash and only then dissolve it in water.
- Pour half of the dye base into a pan, heat it and place the viscose product in the liquid.
- Keep the item in the solution for 15 minutes, then remove it, add the rest of the dye solution and place the item back in the container.
- Boil the clothes in the solution for 30 minutes.
After treatment, rinse the item thoroughly, and if stains appear on the surface, wash with powder.
Dyeing a T-shirt at home
In order to paint a T-shirt at home, you should carry out several manipulations:
- Place the T-shirt in a bowl or other container.
- Use a syringe to apply dye to one side and then to the other.
- Rinse the item several times in clean water.
- Dry the painted product.
- Iron the item to secure the pattern.
Important! To make the design brighter and more colorful, spread the dye over the surface of the T-shirt with a brush.
Paint a T-shirt with acrylic dye
Acrylic paints are considered one of the best dye options for clothing. They penetrate perfectly into fabric fibers and have a wide range of shades. In addition, now in the markets you can find pearlescent colors and shades that glow in the dark.
To paint a T-shirt with acrylic dye, you will need:
- Acrylic dye of the desired shade.
- Synthetic brushes.
- Sheets of cardboard.
- A simple pencil.
Let's start dyeing the T-shirt:
- Place a sheet of thick cardboard inside the T-shirt. This is necessary for high-quality drawing.
- Using the template, draw the outlines of the design on the front side of the T-shirt with a simple pencil.
- Dilute the acrylic dye with water, as its consistency is too thick.
- Start coloring the drawing with dye using brushes.
- Leave the item to dry completely.
- Iron the T-shirt through cheesecloth to secure the design.
Don't worry if you drip paint outside the outline of the design. Show your imagination and make an interesting pattern out of colorful spots.
Important! After applying acrylic paint, the item cannot be washed for two days.
Making a T-shirt using the Tie-Dye technique
The Tie-Dai technique has gained popularity since ancient times in China and India. It represents bright extraordinary patterns on things. Today it is used by many global clothing brands.
In order to dye clothes using this technique, you will need the following materials and tools:
- White shirt.
- Plastic containers.
- Water.
- Dye.
- Strong threads.
- Salt.
After you have acquired all the necessary materials, start creating:
- Twist the T-shirt into a spiral and wrap it around its axis several times.
- Secure it with threads.
- Pour warm water into a plastic container.
- Dilute the dye and a tablespoon of salt with warm water.
- Apply paint to the T-shirt using a brush.
- Leave the item for a day to dry thoroughly.
Important! The T-shirt should be dried in a dry place away from moisture, as the pattern may not stick.
Dyeing a T-shirt black
One of the easiest methods for dyeing old T-shirts is to dye them a uniform (black) shade. To freshen up an old black T-shirt, you will need:
- Enameled bowl.
- Black paint.
Let's start painting:
- Place the paint packet in a small saucepan and add a little water.
- Stir until a paste forms.
- Pour 500 ml of cold water into the resulting paste.
- Mix everything and strain through a fine cloth.
- Pour the entire solution into a bowl, add water (temperature at least 50 degrees).
- Place the jersey in a bowl and place over low heat.
- After boiling, add one tablespoon of salt.
- When the water with the dye boils for the second time, remove the container from the heat and place it in a dark place.
- Rinse the T-shirt several times with hot and then cool water.
- Dry the product and iron thoroughly.
Important! The product must be kept in water with dye for at least 30 minutes.
What you need for painting
Before painting, you need to prepare all materials and tools so as not to be distracted during the process. You will need:
- special paints for textiles;
- White T-shirt;
- containers for diluting paint and fixative;
- dishes for painting;
- salt;
- latex gloves;
- retainer
Only clean 100% cotton items are suitable for dyeing. If there are greasy or oil stains on the fabric, they must be removed.
At home, industrially produced paints and natural raw materials are used. Artificial dyes have brighter and more varied colors, but they can cause allergies. The use of natural-based coloring pigments is safe, but the choice of shades is limited.
On a note. You can use iodine, onion peels, turmeric, tea, coffee, brilliant green, field chamomile, and berries as dyes.
What paint is suitable
For painting, different dyes are used, which are selected depending on the type of fabric, length and type of product. In this case, it is necessary to take into account the complexity of the staining procedure:
- to paint a white plain T-shirt, a small amount of paint is enough;
- To repaint a T-shirt in a different color, you need more durable paint;
- To create different shades on one product, colors are used and dyes of different types are added.
Acrylic
Acrylic dyes are suitable for working with natural fabrics; they work well on cotton T-shirts. Acrylic is used when altering products made of silk, wool, and linen. With their help, inscriptions are applied and lines are drawn.
After the T-shirt dries, the acrylic is fixed to the fibers and does not wash off when washed. Acrylic is distinguished by its bright colors and ease of use.
Aniline
This type of dye is suitable for working with natural fabrics, but leads to shade distortion and does not adhere well to fabrics containing more than 60 percent artificial threads. Aniline dyes are applied to the fabric using the batik technique. Batik involves heating the product in hot water with an aniline solution. After boiling, the paint is fixed by immersion in a saline solution.
Aniline is suitable for gradient dyeing. With the help of aniline dyes, an ombre effect is created on T-shirts, and when dyeing a folded or twisted item, you can get beautiful stains with color transitions.
Plastisol
Plastisol dyes are called PVC dyes. These are the only thermoplastic types used for coloring. Using solid pigment, prints are made using the silk-screen printing technique. Plastisol dyes are used to create patterns on different types of fabrics: mixed, completely synthetic and natural. Special elements are added to solid bases:
- the “stretch” additive helps to increase the elasticity of fabrics;
- the “fluorescent” additive helps create a print that glows under the influence of ultraviolet rays;
- The “3D” additive helps create a three-dimensional image effect.
Plastisol dyes are highly resistant. The disadvantages of using this raw material may be the presence of a film that remains after painting. It is difficult to care for the altered item. The film does not react well to heat treatment, which means that T-shirts with plastisol-printed designs cannot be ironed or washed at high temperatures.
Aerosols
The advantage of using aerosols is that they can be used on any type of material. Aerosols are applied according to a specially created stencil pattern. Application using an aerosol can fixes the paint on all layers of fiber and does not rub off after repeated washings.