Chain stitch pattern
The chain stitch is very recognizable. On the front side the stitches form a chain, and on the back side there is an even and neat stitch. Scheme:
Very often the chain stitch is called “chain”. Less known, but very interesting names: “mouse trail”, “pigtail”, “loop”, “braided”.
For reference. The tambour seam is over 2 thousand years old.
Previously, it was performed with a special tambour needle, very similar to a thin and long crochet hook. With it, the chains always turned out smooth and continuous. Today such hook needles are also sold. But more often, a simple needle and floss thread are used for embroidery.
Universal chain stitch: master class
This method is very similar in appearance to the previous one and is just as easy to implement.
We make two stitches with a “forward needle” seam. We grab 2-3 threads from the front side of the fabric, and 4-5 from the back side. The length of the “forward needle” stitch should correspond to the size of the loops. After knitting, insert the needle into the fabric from the front side.
Now we pick up the 1st stitch with a needle, but do not insert it into the fabric. We pass the working thread under the stitch, then the needle enters the beginning of the loop. The next stitch should be made on the wrong side of the fabric.
On the back side we get “forward needle” stitches, and on the front side we get loops.
We continue to sew with a seam according to the given pattern.
How to learn to embroider with chain stitch?
First you need to select materials for embroidery.
- Threads. For classic tambour embroidery, floss threads are used. The chain stitch can also be made with knitting threads, metal threads, decorative cord, and thin ribbons.
- Needle or hook. It is recommended to embroider with an embroidery needle. It differs from the usual sewing one by the larger width of the eyelet. In addition, some embroidery needles have a blunt tip, which is very convenient when embroidering on canvas. If you plan to embroider on mesh or fabric, you can use a thin hook: Luneville, Indian or other.
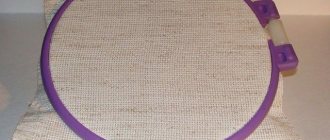
- Hoop. Allows you to stretch and secure the material. It is more convenient to embroider on a hoop, and the work is more accurate.
- Pattern (drawing). Chain stitch is usually used to embroider according to a sketch. You can use carbon paper. Place the carbon copy on the fabric, attach the printed design on top and trace along the outline. To prevent the design from moving, pin it in a circle.
You can choose embroidery patterns from a selection of coloring pages. For example:
You can transfer the design onto the fabric with a water-soluble marker. A “sandwich” made from a template and fabric is attached to the window. Then all the lines are outlined with a marker.
Handicraft stores also sell special embroidery templates on thermal paper. Thermal paper is placed on the fabric with the rough side down, and a hot iron is passed on top.
For reference. The name of the chain stitch comes from the round hoop on which it was made in ancient times. They looked like a large drum - a “tambour”.
Tambour embroidery lesson: video
Of course, it is difficult to describe tambour embroidery in words, much less in writing, in a way that is completely understandable. However, like any other embroidery. It would be great to learn this “live” - from an experienced craftswoman. However, this is not always possible. But there is always an opportunity to watch a professional work (manually, as well as on a typewriter). In the era of the Internet, you can find anything online. Therefore, we offer you several detailed video lessons in which you can consider the nuances of the work of experienced embroiderers:
Step-by-step instruction
Children and adults who have never embroidered before should be shown how to perform a chain stitch step by step. There are training videos for beginners:
Embroidery begins on the left side, smoothly moving to the right.
Detailed instructions:
- First you need to make a tack and bring the needle and thread to the front side.
- We insert the needle into the same hole from which the thread comes out.
- Lightly tighten, leaving a 3-5 mm loop on the outside.
- We insert the needle (from the inside) inside the loop at a distance of 1-3 mm from the first puncture.
- Carefully tighten the loop.
- We insert the needle again into the point from which the thread comes out.
- Pull the thread, leaving a small loop.
- We insert the needle inside it. We tighten the thread. You will get a chain of two links.
- Then they embroider according to the same principle, observing the rule: each loop must come out of the previous one.
- At the end of the embroidery, the last loop is secured with a mini stitch.
Important! If any loop-link of the “chain” is missing (not fastened), the chain stitch will unravel.
Rope chain stitch: master class
This version of embroidery differs from all previous themes: between pet. we get a small jumper, by hooking another row of this vestibule onto it, we can imitate a metal mesh.
Vvyv. slave. n. on faces side and insert it into the same place again. Needle pin on the LS at point 2, as shown in the photo below.
We wrap the thread once around the needle...
We pull out the twisted knot, pressing it at the bottom. finger, ig. input. into fabric (3), vyv. it on the LS at point 4, tighten it.
We continue to sew alternate stitches. w. and connecting stitches.
Types of chain stitch
“Chain” is the basis of the chain stitch, and its simplest variety. When the initial technique is mastered, you can learn more complex and beautiful embroidery:
- With fastening. Make a large loop and secure it with a small stitch. Place a flower out of the loops. Loops can be of different sizes.
- Wide loops. To obtain pronounced links of the “chain,” when forming a loop, the needle is inserted not into the hole where the needle comes out, but nearby (a few millimeters below).
- Alternating loops of different sizes. You can diversify the seam by alternating small loops with large ones.
- Wrap seam. After finishing the embroidery, wrap the chain with thread of the same or a different color. The thread can be laid in different ways, resulting in a beautiful and voluminous seam:
- Zigzag. To perform it, loops are formed not on a horizontal line, but above and below it (every 1-3 loops).
- With overlapping loops. Quite a difficult seam. The first loop stitch is secured with a fastener. The element of the second loop is performed under it. All subsequent loops are attached to the base of the loop located 2 higher.
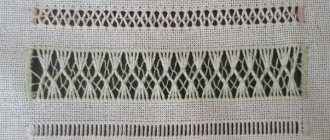
There are about 20 varieties of chain stitch: weighted, double, rope, rosette, herringbone, lace and many others. Each of them is interesting in its own way. Tambour embroidery is often combined with other techniques. A striking example is protective embroidery with a cross and a chain stitch:
Tambour embroidery:
Step-by-step training in chain stitching with a needle
We bring to your attention a master class for beginning needlewomen, from which you will learn how to make a chain stitch step by step; photo illustrations and recommendations from the master will make learning easier.
- Spread a piece of embroidery fabric on the work surface, in our case it is white “BLITZ” canvas. Thread a needle with black embroidery floss. Tie a knot at the end of the thread.
- The chain stitch will be sewn horizontally. Pierce the canvas with a needle, passing it from the bottom of the fabric through the hole between the threads.
- Insert the needle into the hole next to it, through one thread down.
- Use the fingers of your left hand to hold the loop formed from the floss thread.
- Bring the needle to the front of the fabric for embroidery in the same row horizontally where the first puncture was made from the wrong side through four vertical threads to the right. Gently pull the loop up until it forms a nice teardrop shape. Do not tighten the thread too much, as the seam will turn out unsightly.
- Pierce the fabric again on a thread below the puncture site vertically, and make a loop again.
- This way, make a stitch of the desired length. The stitches should be the same length and width.
The chain stitch is considered simple. This stitch is used to embroider stenciled patterns on natural fabrics made from linen or cotton. It can be used as a contour or edging stitch; it can be used to sew individual parts of embroidery, for example, leaves or stems.
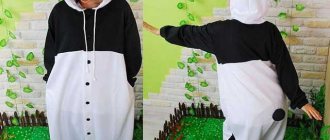
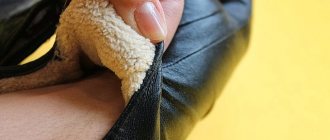
The name of the seam comes from France, from the French word “tambour”; a drum is called a tambour. In Russia, this style of embroidery has been known since ancient times; in different parts of the country it was called by different names: loop stitch, stem stitch, chain stitch (looks like a real chain), needle stitch “in a cape”. Sheepskin coats, leather items, and felted items were embroidered with chain stitch. They can be used to sew knitting step by step and embroider a variety of patterns.
For embroidery, you can use cotton, wool, and silk threads. From the Internet you can download and print embroideries and pictures suitable for chain stitch. You can create a pattern yourself; a floral pattern or pattern is more suitable for a chain stitch.
How is a chain stitch crocheted?
Using a hook, they embroider “chain” mainly on knitted items. The seam is performed in the following order:
- We fasten the thread at the beginning of the embroidery.
- Insert a hook under several knitting threads.
- Grab the embroidery thread.
- We stretch it out. A loop is formed on the hook.
- Insert the hook under the knitting threads again (next stitch in the direction of embroidery).
- We hook up the embroidery thread.
- Pull the loop through the knitting threads and the first loop.
- We tighten the thread.
- Repeat steps 5-8.
How to sew with a herringbone stitch
Vvyv. needle with working thread on the LS at point 1 and immediately insert it into the fabric. Vvyv. On the LS at point 2, thread behind the needle, tighten the loop.
Vvyv. And. into the canvas at point 3 (points 1, 2, and 3 create a straight line). Vvyv. n. on the LS at point 4, located on the same line as point 2.
Enter. And. into the fabric at point 4 and pin. on LAN in vol. 3, no. fold it into a section under i., tighten it.
Enter. And. into the canvas at point 5 (points 4, 3 and 5 create a line). Vvyv. n. on the LAN at point 6, which is on the same line as point 3. Repeat.
We need to make loop stitches with long tails and place them alternately left and right.
Luneville embroidery
A very popular type of embroidery, which is based on the chain stitch. Luneville embroidery came to us from France (17th century). Its peculiarity is the use of beads, sequins and bugles. It is most often performed on a mesh using a special Luneville crochet hook.
The chain stitch in this technique is performed slightly differently:
- The Luneville hook must be held strictly vertically. The screw should be directed towards the embroidery.
- The hook is inserted into the mesh, and a thread is placed on it from the bottom of the mesh.
- Then the hook is rotated 180 degrees around its axis. The thread must rotate 360 degrees.
- The hook and thread are brought out to the front side.
- Return it to its original position.
- Perform the next stitch.
Step-by-step execution of a chain stitch in Luneville embroidery is shown in the video:
Types of chain embroidery: crochet and needle, machine embroidery
Tambour chains can be sewn with both a needle and hooks (regular elm, Luneville). The latter is even simpler. But it has its own subtleties. For example, the head of the hook should be sharper. And you will only get basic seams. It will not be possible to create something more complex.
Luneville embroidery technique
The technique of this “hook” seam is simple:
- cl first remove the hook from the hp;
- Next you need to hook the rabnit with it;
- pull the slave thread onto the is - and get a loop;
- and then insert the hook into the fabric again;
- hook the thread and pull it onto the is, but already through having a st on the hook.
You need to continue embroidering in the same way according to the design used.
The Luneville hook is a special handmade embroidery hook. Named after the place where beads and glass beads were first used in tambour embroidery. This is the French city of Lunéville, where the residence of the Dukes of Lorraine is.
The Luneville hook has a thin hook needle and a handle equipped with a locking screw protruding from the side. The hook, thanks to the screw, can be removed and changed (they differ in width, as well as in the shape of the head), selecting the desired size of the handicraft tool.
The design of such a hook gives the embroiderer the opportunity, focusing on the “beard,” to correctly bring the thread to the hook under a stretched fabric (thin, transparent or translucent, on which Luneville embroidery is used).
The Luneville crochet is also used using the du point de Beauvais technique. And here everything is much more natural, since the embroiderer sees everything on the upper side of the fabric.
They embroider with such crochet hooks, usually with silk threads. Moreover, the process is simple, even small needlewomen can do it.
Questions and answers
How to embroider with a chain stitch beautifully and accurately?
Tambour embroidery has its own secrets. You need to make small stitches of the same length, stretch the fabric well and place the loops on the same line. At the same time, do not tighten the thread too much, otherwise wrinkles will form on the fabric. If the loop lies unevenly, correct it correctly with a needle.
Where can chain stitch come in handy?
In finishing clothes, decorative pillows, napkins, interior items. Using a chain stitch, you can sew knitted parts, strengthen the shelves and the neckline (from the inside out). It is also used for tying knitted items (protects against deformation and stretching).
Embroidery is an entirely creative process. To fully immerse yourself in it, you need to hone your technique. A few lessons on a rough piece of fabric, and you will be able to embroider without thinking about where to insert the needle (hook) or how tightly to tighten the thread.
Detailed technique
Tambour needle embroidery is performed as follows:
- The needle is brought out at point 1 on the front side.
- A loop is made from the thread, then the needle is inserted into point 1 again and withdrawn at point 2 over the working thread.
You can make a chain stitch in another way . A small stitch is made only at the beginning of the seam so that the loop can be hooked onto it.
For
a zigzag chain stitch, you need to draw two parallel lines on the fabric - punctures will be made in them so that the loops lie at an angle.
Mixed chain stitches are performed in two approaches . First, a simple seam is made, then it is stitched again, as if twisting the threads. This allows you to make stitches tighter and thicker.
Purpose
The purpose of the seam is decorative. The classic chain stitch looks like a braid made of identical links. It doesn't matter whether you embroider just the outlines or do a full hem, the embroidery looks very impressive. Based on the seam, you can create petals, flowers, complex patterns, and three-dimensional embroidery elements.
Chain stitch seams are used for finishing clothes, tablecloths, and napkins.
The chain stitch goes well with the appliqué. The connection of the parts is quite strong.
The seam is also used to repair clothing.
The chain stitch is great for joining knitted pieces made from fluffy yarn.
A chain stitch can be used to reinforce the edge of the neckline or armhole to prevent stretching.
Embroidery options for children
Due to the fact that this is one of the simplest, it is suitable not only for beginning craftswomen, but also for children. An example for children's embroidery can be found from the coloring book. Children can embroider with one thread or with several multi-colored threads. When choosing any children's design, you can embroider with one thread. To make the line thicker, you can sew another seam next to it. Once you have gained some skills, you can try to embroider the entire design with a chain stitch, and not just the outline. For convenience, you can choose a fabric on which the mesh will be visible.
Children's version
Embroidery designs
You can choose a pattern for a chain stitch on the Internet or draw it yourself. Some craftswomen maintain their own forums, where they present a large selection of drawings for both beginners and experts.
Drawing for fantasy
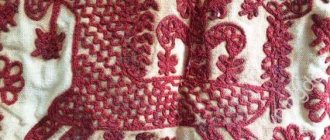
It is important to note that the ancient Egyptians used such embroidery for amulets. That is why it is also called protective embroidery.
In Rus', every woman had to be able to embroider. The process of embroidery itself was a symbol of the ritual. The family in which the girls grew up forced them to prepare a dowry in this way. It is also worth noting that depending on the region in which a person was born, art was determined. Embroidery in Rus' was distinguished by a variety of patterns. Also, each had its own specific execution scheme. Birds and geometric patterns were most often embroidered.
You might be interested in this. Cross stitch lessons: MK on a hoop for beginners
Materials and tools
This type is very common and simple; it does not require special tools. However, to make it easier to work, you still need to have the necessary set of tools. This inventory includes:
- hoop. If in the old days there were only round and large hoops, now their variety is amazing.
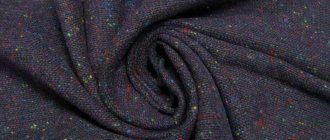
- textile. Absolutely any fabric is suitable for this type of embroidery: dark material, silk and velvet. But for beginner craftswomen, it is better to hone their silk organza skills.
- hook and needle. Any needle is suitable for tambour embroidery, but it is better to choose a special hook.
- threads You need to choose the thickness and composition of the threads based on the work that will be performed. You can use silk, cotton and even wool threads. Basic requirements for thread are imposed when you work with crochet. They need to be strong and easy to tie knots.
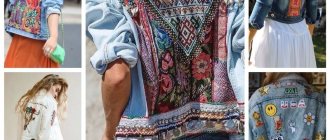
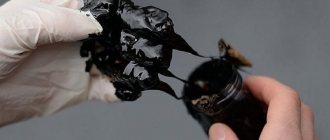
- tambour embroidery is most often used to decorate fabrics, so there is no way to do without decorative elements. Such materials include: rhinestones, sequins, beads and stones. In general, you can use any decorating materials that you like.
This will be interesting to you All about volumetric satin stitch embroidery for beginners
Interesting! Currently, the chain stitch is used for decorating bedspreads, pillows, clothing, accessories, panels, as well as for finishing toys.