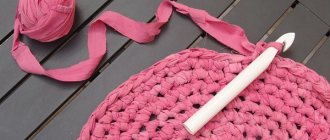
Sachet made from scraps of fabric
A sachet is a craft with a flavored filling. It can be of any shape. Cinnamon, vanilla, lavender, mint, lemon balm can be used as a fragrant filler... If you want to get rid of moths, then you should make a sachet with wormwood and put the craft in the closet.
You will need: scraps of fabric, thread, scissors, sewing machine, pins, a simple pencil, satin ribbon, scented filler, decorative elements, glitter, beads...
Master Class
- Cut 4 identical squares from fabric.
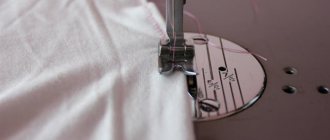
- Pin 2 squares together, then stitch along the edge. It should be a rectangle.
- Repeat step #2 with the remaining two squares.
- Pin 2 rectangles together and sew along the edges to create a square.
- Redraw or print out the heart pattern.
- Place the heart pattern on the square and secure with pins.
- Cut out a heart from the fabric, taking a couple of centimeters for allowance. The front of the heart is ready.
- Make the back of the heart in the same way.
- Make a loop of satin ribbon and sew it inside to either side of the heart.
- Sew the heart pieces together from the wrong sides, and do not forget to leave a gap for the filling.
- Turn the heart inside out and fill it with flavored filling.
- Sew the hole closed with a blind stitch.
- Decorate the sachet to your taste.
The fabric scrap sachet is ready!
Potholder made from scraps of fabric
You will need: scraps of fabric, plain fabric, non-woven fabric, scissors, pins, thread, sewing machine, iron, ribbon.
Master Class
- Cut a circle from a plain fabric, leave half a centimeter for allowances.
- Cut out identical triangles from the scraps.
- Place the triangles on the circle tightly to each other.
- Place each triangle on the interlining and iron until the fabric adheres.
- Sew two adjacent triangles and iron the seam.
- Make a circle of triangles in the same way. Be sure to smooth the seams every time.
- Cut a circle of interlining the same size as the circle of triangles.
- Place the circles together and iron until they stick together.
- Sew the edge of the circle using a sewing machine.
- Make a circle of interlining for the top of the future potholder.
- Decorate the upper part of the potholder in this way: place the ribbon along the edge, secure with pins and sew on a machine.
- Make a loop from a piece of ribbon and stitch it to the circle.
- Place a circle of non-woven fabric (item No. 10) on the wrong side of the potholder.
- Sew the circles together, leaving an opening.
- Turn the pot holder out and stitch the hole.
- Add strength to the project by making circular stitches throughout the potholder.
The tack made from scraps of fabric is ready! I recommend watching the video master class!
Master Class. The best step-by-step patchwork
Pincushion made from scraps of fabric
You will need: two types of scraps of fabric, scissors, needle, thread, cardboard, cotton wool, sewing machine, pins, button, pencil, iron.
Master Class
- Cut a square of cardboard to the desired size.
- Trace a square of cardboard onto a piece of thick fabric. Take a 5 mm allowance for allowances.
- Divide the cardboard square into 4 parts.
- Place the square on a lighter fabric, then cut it out.
- Fold the seam allowances on thick fabric inward on each side of the square and iron them.
- Bend each corner of the square towards the center, securing with pins.
- Flip the square over so it takes on a diamond shape.
- Place a square of less dense fabric in the center of the diamond.
- Fold the corners of the diamond toward the center, securing with pins.
- Sew the corners together in class=”aligncenter” width=”700″ height=”523″[/img]
- Bend the edges of the corners, forming folds.
- Sew the edges of the thick fabric with a blind stitch.
- One square is ready, make 3 more squares in the same way.
- Sew 4 squares together.
- Sew one large square of thick fabric to fit the size of 4 squares, then fill it with cotton wool.
- Sew a button into the center of the needle bed between 4 squares.
The pincushion made from scraps of fabric is ready!
Patchwork products
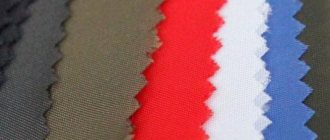
Before you sew your intended item from scraps, you need to get acquainted with the types and techniques of needlework. It will become clear which method of creating a particular craft to choose. The right choice of material is half the success. The fabric is used depending on its properties:
rugs, blankets and bedspreads are made well from drapery pieces;- linen is suitable for creating patterns from small fancy details because it fits well and does not slip;
- cotton is used as a base for towels, tablecloths, blankets;
- Silk is difficult to process, but the result is worth the effort - clothes and paintings made from it look gorgeous.
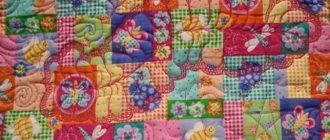
Color combinations play an important role in patchwork. They combine both trimmings that are similar in tone and contrasting ones that are different in pattern.
In the kitchen they use juicy fruity shades - yellow, green. Calm, muted tones are appropriate in the bedroom. In the nursery - cheerful, bright. A good start would be to sew from scraps for the kitchen. Potholders, towels, and hot pads are useful practice before creating more complex items.
Traditional way
The most popular and simplest method of patchwork creativity. The canvas, assembled from colored pieces of any size and geometric shape, is placed on a thick lining on the reverse side. The edges are edged.
This is how small kitchen items and large bedspreads and blankets are sewn. This technique is a godsend for beginners. It allows you to get acquainted with patchwork art and improve your skills for the next work.
Quick squares
For this option, at least three long pieces of different colors are sewn together. The result is a wide strip, which is folded lengthwise, face to face, like a sleeve, and stitched and ironed. Apply a triangle ruler first to the upper bend of the sewn pipe, then to the lower one. Measure out 45 degree angles and draw the contours of future squares along the entire length of the sleeve.
The result is triangles folded in half. They cut it, unfold it - the workpiece turns into a striped square. Fragments are combined at the request of the master.
This method is used to create a checkerboard pattern. The pieces are laid out in a checkerboard pattern and sewn together. When unfolded, spectacular diamond shapes are obtained.
Simple types
Stripe to stripe pattern: multi-colored ribbons of different or equal widths, solid or sewn from horizontal sections, are connected. They are laid in different ways, the seamstress’s imagination dictates - zigzag, ladder, diamond.
Cosmetic bag made from scraps of fabric
You will need: scraps of fabric of 2 types, washable fabric for lining, zipper 34 cm long, zipper pendant, interlining, threads, scissors, iron, thick cardboard, ruler, pins.
Master Class
- Iron the fabric.
- Prepare templates from thick cardboard: a circle with a diameter of 16.5 cm, a circle with a diameter of 14 cm, the square of whose sides are 10 cm.
- Cut out the blanks: 19 circles from fabric with a diameter of 16.5 cm, 19 non-woven pieces, 19 squares from another fabric.
- Gather a large circle, stitch fine, edge allowance 3 mm. Leave the thread tails long to tighten the pattern.
- Place a small circle of cardboard in the center of a large circle basted on the wrong side.
- Pull and tighten the ends of the basting evenly, then iron.
- Cut the basting, pull out the template and iron the piece.
- Place the square piece on the wrong side in the center of the circle.
- Iron the edges of the circle.
- Combine a square of another fabric with non-woven fabric, place it in the blank and iron it.
- Secure with stitches, leaving 2 mm from the edge.
- Assemble a cosmetic bag from blanks, as shown in the diagram.
- Cut a rectangle measuring 42x52 cm from the fabric for the lining, take 1 cm allowance.
- Fold in half and sew the side seams. You should get a piece measuring 40x26 cm.
- Measure 7 cm from each edge, then form folds and sew.
- Fold the cosmetic bag inside out.
- Fold the top 1 cm flush with the front side.
- Secure with pins and re-baste.
- Sew the zipper in by hand.
- Attach the pendant to the zipper.
The cosmetic bag made from scraps of fabric is ready! Using the same method, you can sew a wallet, a phone case, or a handbag. I recommend watching the video master class!
How to make a cosmetic bag in patchwork style
Patchwork tablecloth
We cover the table with such a tablecloth and serve it with glee!
This master class will help us easily sew a patchwork tablecloth: cutting and sewing it is not difficult if we use one of the proposed patterns for arranging the patches.
Note! All patchwork patterns will add attractiveness and neatness to our product, and help avoid annoying wrinkles and other flaws due to the mismatch of the shape of one patch to another. By the way, we can draw such a diagram ourselves.
Tools, materials
- 10 squares of multi-colored shreds 25x25 cm;
- threads according to the color of the fabric;
- template 21x21 cm;
- chalk;
- iron;
- pins;
- sewing machine.
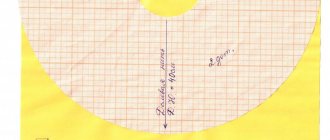
Step by step guide
Scheme for cutting flaps
- We cut out 9 squares of 21x21 cm of prepared flaps under the plexiglass template.
- We cut them according to the EF and GH lines of the diagram.
- From the resulting parts we form squares.
- We fasten them with pins, sew and iron all the seams.
- We cut these squares along IJ lines.
- From the formed flaps we combine the squares and sew them together.
- We make a tablecloth from sewn squares.
- Sew the border to the fabric (its width is approximately 8 cm).
- We bend the edge of the edging inward by 1 cm and stitch it.
- We cut out the lining and sew it on.
DIY patchwork fabric
If you have accumulated a large number of small scraps, then create an original fabric with your own hands.
You will need: scraps of fabric, fabric for the base, tulle or organza, threads, glue web, baking paper, iron, sewing machine, ruler, floss.
Master Class
- Decide on the size of the fabric.
- Place the adhesive web onto the fabric backing.
- Place the fabric scraps on the glue web in a chaotic manner.
- Lay out the floss threads as decoration.
- Place tulle on top.
- Cover with baking paper and iron thoroughly so that all pieces of fabric stick to the adhesive web.
- Decorate the fabric with many stitches using a sewing machine.
- You can use different colors of thread.
At the moment there are a huge number of different fabrics. But this fabric is unique, and you will not find anything like it anywhere else. You can use it to sew pillowcases, covers, tablecloths, rugs and whatever you want. I also recommend an interesting article on how to make a rug from scraps of fabric with your own hands.
Home ideas
Bright crafts will decorate your home and bring cheerfulness and good mood to your family’s life. Beginning craftswomen learn from relatively simple things. It’s easy to sew a tablecloth, blanket, rug. Success depends on the desire and talent of the needlewoman.
Colorful pillowcase
Cozy pillows made of colored squares will appeal to all family members. Take any material, calculate how many quadrangles are needed on one side of the pillowcase. If the housewife likes large squares, they make up a canvas of 9-16 elements. A pillow made of small parts looks more contrasting and brighter. Cut the parts, iron them and start assembling:
- The fragments are sewn into strips and the seams are ironed.
- The resulting ribbons are connected according to the pattern and ironed.
- If the pillowcase is unlined, the edges are stitched.
- Leave about 20 cm for the hem or sew in a zipper. The fastener is sewn in when three sides are not yet sewn.
- You can lay a layer of synthetic padding under the canvas and stitch it with curly patterns.
- Connect both parts of the cover, process the seams, and iron.
- Place it on the pillow and check the fit. If the pillowcase is larger, it is sutured. A small one is corrected by inserting additional strips on the sides.
Quilt made from patches
A tempting idea is to make your own blanket. The task is not as difficult as it seems at first glance:
- You will need scraps of at least five colors: the more, the better, with approximately the same texture and thickness. In order not to make a mistake with the selection of shades, they lay out the details and see which option is better.
- Synthetic winterizer, cotton or wool filler is used as insulation. The lining is made of a single color, from natural material.
- The patterns are very different, consisting of rhombuses, triangles, squares, stars, flowers. Collect the front side and iron it.
- Sweep away the layers, laying the blanket out evenly with the lining facing up. Baste by hand from center to edge. This is an important stage of work: how the product will behave during stitching depends on the correct estimate. Lay as many seams as possible to avoid distortions and unnecessary gatherings on the surface.
- They grind one side of the border, it fixes the correct position of the layers. They quilt the blanket, finish finishing the edges with edging - tucking and stitching.
Once you get acquainted with the world of patchwork, you will never want to part with it. This art is evolving, surprising with new possibilities and the boundlessness of human imagination.
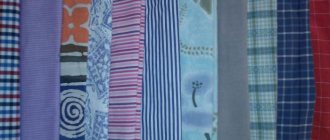
Craft ideas from fabric scraps
I recommend viewing a photo gallery of paintings made from scraps of fabric.
With the help of scraps you can wonderfully decorate furniture, the decor of your home will sparkle with new colors. You can also sew cute toys for children. Look through the photo gallery of ideas for patchwork crafts, get creative and create a masterpiece with your own hands.
Crafts made from scraps of fabric will not only be useful in the household, but also a wonderful decoration or a delightful gift. There are no limits to your imagination, create and surprise those around you.