Information on how to calculate pleats on a skirt will be truly useful not only for seamstresses, but also for girls who want to independently sew themselves a trendy wardrobe item today, without being professionals. Folds are one of the signs of a romantic and light style in the wardrobe, which pleases with variety and mischief.
Folds are fertile ground for real masters of sewing art, because they can be wide or narrow, located asymmetrically or stitched in even groups.
Is it possible to sew a pleated skirt yourself?
Probably the most popular question on the Internet is the question of how to calculate the pleats on a skirt at the waist without a pattern. After all, many fashionistas, in pursuit of that must-have, decide to sew their favorite wardrobe item themselves. Experts boldly share their secrets - there is a way to sew a perfect pleated skirt, you just need to use the method of solving puzzles.
The width of one fold will have to be calculated in several stages:
- First we measure the circumference of the hips.
- Determine the amount of allowance.
- We determine the number of folds we need.
- We sum up the circumference of the hips and the size of the allowance, and then divide the resulting number by the number of folds. The result is the width we need for 1 fold.
Experienced seamstresses say that the fabric will need three times the circumference of the hips, without taking into account the number of folds and their width. You will also have to add about 4 cm of allowance for freedom of movement.
Skirt with counter pleats pattern
You don't need a pattern to make a skirt with counter pleats!
The main thing here is to make the correct calculation of the folds. Our model has 12 counter pleats, evenly spaced in a circle. The fabric is soft and fits nicely into folds. The unusual lemon color makes the skirt (and its owner) the number one object of attention! But this, of course, is a matter of taste.
Skirt pattern with counter pleats
We will do all calculations based on the following measurements:
- waist circumference From = 72 cm
- skirt length Di = 40 cm
Fabric width – 145 cm.
| There is no pattern as such. We cut out two rectangles across the entire width of the fabric, and in height equal to the length of the skirt (140x40 cm). Don't forget to add seam allowances and hem allowances. For the belt (3 cm wide) we cut a strip of 8x80 cm (this is already with allowances). The total fabric consumption for a given width is about 1 meter. At this point, the cutting of the skirt with counter pleats can be considered complete and we can begin marking the folds. |
Stages of work
After deciding how to calculate the folds on a sun skirt at the waist, and carrying out the basic calculations, you can get to work. After the fabric is cut out, the panels of the skirt should be carefully pinned together along the side sections. It is important to ensure that the fabric is facing inward.
Next you should stitch the seams. Experts recommend making one seam from the very bottom to the hip line, then stitching it to the line where the edges of the fold meet (they are needed to sew in a zipper).
Carefully place a belt on the top section of the skirt. After this, you can try on the skirt, evaluating the work done. After this, we cut the depth of the fold directly at the rear edge (in this case, you should deviate from the line where the edges of the fold coincide by 0.5 cm.
Now let's move on to the other edge of the skirt. Here you need to baste a fold to the zipper so that the edge of the fold itself aligns with its line.
If you need to decide how to calculate the folds on a skirt, it is recommended to use the algorithm described above.
How to sew a skirt with counter pleats, master class with photos, step by step
THE MASTER'S WORK IS AFRAID!
How to sew a skirt with bow pleats without a pattern
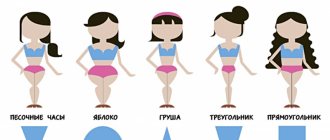
The style we will be talking about visually increases the volume of the hips, gradually expanding down from the waist, which means it is ideal for owners of narrow hips, complemented by wide shoulders and ample breasts. But this model has no age restrictions. Well, except for its length. It is also important to note that for girls with curvy figures it is better to choose wide folds, as small ones make them look fat.
Skirt with soft bow pleats
How to sew a pleated skirt without a pattern
There is no need to create a special drawing for this skirt. The folds are marked directly along the face of the fabric with chalk or a piece of soap. That's where they are laid. To calculate the width of the required material, you need to multiply the waist size by 3, add 4 cm for a loose fit and 15 cm for adjustments according to the figure and seam allowances.
Consider the option of size 44/46 with the following measurements: waist size - 72 cm, skirt length 72 cm. The width of the fabric from which the skirt will be created is 120 cm. We cut the product strictly along the warp thread, otherwise distortion may occur in the process.
Let's find out what lengths we need. To do this, add 6 cm to the length of the skirt, of which 5 cm will be spent on hemming the bottom, and 1 cm on sewing on the belt. We get a length equal to 78 cm. So, you need two identical pieces of fabric 78 cm long and 120 cm wide, which we combine into one. The seam should be overcast and ironed. After this, lay the fabric face up and draw a chalk line indicating the waist. To do this, step back 1 cm from the top. Folds are marked along this line.
Skirt pattern with pleats. Cutting fabric and folding folds
The bottom of the future skirt is processed by stitching and bending the material, not reaching 5-6 cm to the edge. Now you need to decide on the width and depth of the folds on the skirt for the case when their number is 8. The waist circumference should be divided by 8 and we get a value equal to 9 cm. Now from the total width of the fabric - 240 cm, subtract seam allowances - 4 cm and divide result on the number of folds. We get the size of the fold depth - 20 cm.
The markings are made from right to left along the front side of the future skirt. First, you should set aside 2 cm - this will be the so-called seam line. Then mark a segment in length equal to the depth of the opposite fold divided by 4 - 5 cm. From this point, mark the width (9 cm), and then the depth (20 cm) of the fold. A segment equal to the depth should be divided by 2 and mark the middle of the opposite fold. Alternating width and depth, the entire canvas is marked. At the end of the marking, ¼ of the depth and 2 cm for the seam are again set aside. Through all the designated points we draw lines vertically down. The outer fold should be placed in the middle of the depth exclusively along the grain thread. Having finished marking, we draw folds along the same line. At the end of the basting, the resulting width is measured, from which the waist measurement is subtracted and the resulting result is divided by the number of folds. The figure obtained during the calculation is added to the size of the depth of each fold, along the segment indicating the waist.
Having finished working with the formation of folds, you should stitch the side seam. It is not completely stitched; a section equal to the length of the zipper used for the fastener is left unsewn. Now you should finish processing the bottom of the skirt. Then sew the fastener into the side seam. Sew a belt and a button to it to the product. Or make a loop on the belt and sew on a button. Iron the finished skirt. When ironing, do not forget that the folds of this model are soft, which means there is no need to iron them. Now you know how to sew a pleated skirt without a pattern, and you can easily sew wonderful skirts for any occasion.
Model with a circular fold: how to make a pattern?
The circular fold is a favorite of fashionistas from all over the world, which is why sewing workshops regularly receive orders to make just such a wardrobe detail. If for some reason you do not want to give the order to professionals, but want to complete it yourself, then you can use our recommendations.
A lot has been written about how to calculate pleats on a circle skirt or a simple skirt with circular pleats. After studying several guides from experts, you can easily cope with this task.
Before creating a pattern, you will certainly need to take the following measurements:
- OT (waist circumference).
- OB (hip circumference).
- Skirt length.
How to calculate pleats on a skirt for a waist of 64 cm? The final result will depend on the chosen model. The fabric for the pattern should be calculated so that its width is equal to the circumference of the hips multiplied by 3.
We sew a skirt with circular one-sided folds
A wide, flowing, pleated skirt is always in fashion. It is appropriate in any situation and can be easily combined with all sorts of things. Suitable for women of any age and any figure who adhere to a classic style. The length of this skirt can be chosen according to your wishes (naturally, a short pleated skirt is not suitable for women of the middle and older age group).
This model can be made from various fabrics, excluding those that are too dense and rigid, otherwise the folds will not retain their shape. The skirt will look good if it is sewn from thin fabrics, for example: rep, wool flannel, gabardine.
To calculate and construct a drawing of a skirt with circular warehouses, the following data is required; St = 38 cm, Sat = 52 cm, Du = 70 cm, Fri = 1 cm, Pb = 2 cm.
BUILDING A STRUCTURE DRAWING
1. Determine the distance between warehouses (this value depends on your desire). We take 4 cm.
2. We determine the quantity of warehouse, it is calculated according to the formula
(C 6 + Pb/4 x distance between warehouses) to 2. In our case we get: (52 + 4/4) to 2 = 56/4 x 2 = 28 cm.
3. Determine the depth of the folds along the hip line. It is equal to the distance between warehouses multiplied by two:
4 x 2 = 8 cm.
5. Multiply the number of warehouses by the distance between warehouses:
28 x 8 = 224 cm.
6. If the width of the fabric is 140 cm, then add 12 cm to the hem.
Now we calculate the required amount of fabric for the entire skirt:
112 + 224 + 6 = 342 cm.
The number of canvases for a width of 140 cm is 3, the number of seams is 3, the number of cuts is 6.
7. We begin by marking the skirt in the fold with an allowance of one centimeter for the seam and half the depth of the fold, then set aside the distance between the folds, the depth of the fold, etc.
8. The distance between the warehouses at the bottom should be 1 cm greater, therefore, this distance is equal to: 4 + 1-5 cm.
9. The depth of the fold at the bottom is 1 cm less than along the hip line (the division of the skirt in the fold on the fabric is shown in Fig. 154).
PROCESSING TECHNOLOGISTS
1. Before you start grinding the warehouse, you need to sew down the weight of the panel, leaving one seam unstitched, overcast the edges of the seams,
hem and iron the bottom well
2. If the markings are made on the wrong side of the fabric, then the fold lines are sewn with interfacing stitches (the folds should be laid on the front side).
3. If the width of the entire panel is greater than the measurement of the waist circumference with an increase for a loose fit, then the excess is equally distributed to the depth of each fold along the waist line.
4. Swept folds are ironed on both sides (on the front side - through the fabric (with ironing), on the wrong side without fabric,
5. The upper section of the skirt is treated with a stitched belt, having previously stitched a gasket onto the under-belt or glued an adhesive interlining with an iron.
LAYOUT PLAN AND FABRIC CONSUMPTION
Depending on the length of the skirt and size, with a fabric width of 150 cm, you will need from 180 cm to 250 cm. Source
I think you will be interested:
>
- Methods for making homemade wine
- Fragrant and rich bulgur soups - a warming autumn lunch
- Hit parade of dishes from the school canteen
There is 1 comment on this post
| 12 08 2021 | N. | |
| Hello! Is it possible to put a hidden zipper on a skirt in a circular fold, including on the waist? Thank you. Answer | |
leave a comment
Click to cancel reply.
How to mark up correctly
The markings are made directly on the fabric . And this is great because you don’t need to waste time creating a pattern.
We connect all the panels of fabric into a single piece. Lay out flat on the table face down. We place all marks at a distance of 18–20 cm from the top.
Circular folds
Set aside 1 cm from the side edge - it will go into the seam. It's 1/2 deep. Then we alternate width and depth. You need to finish 1/2 of the depth and plus 1 cm for the seam.
Bow pleats
For this option we mark in the following order. From the edge 1 cm - for the seam, from it ¼ depth, then alternately width and depth. We finish marking ¾ depth plus a 1 cm seam.
Important ! It is necessary to apply marks so that the seam runs along half the depth of the fold. Along its inner fold. If it does not fall in the middle, then the seam needs to be moved and, leaving 1 cm, the excess should be trimmed.
Shutdown
Next, you need to adjust the fold size at the waist. To do this, reduce the depth at the bottom by 1 cm on each side. Through the new points at the bottom and marks on the hips, draw a line to the waist. This will be the fold line.
We sew folds from the hip to the bottom of the skirt. We pin from the hip line to the waist. After this, we measure the width of the top of our skirt and find the difference with the waist measurement. We remove the difference evenly into the depth of each fold.
For example: the width of the panel at the hips is 102, at the waist it should be 74. The difference is 28 cm. Divide it by the required amount: 20 circular or 10 bow. This means we need to increase each waist depth by 1.4 or 2.8 cm, respectively.
We sweep the fabric according to the received marks. Be sure to double-check the width of the product at the hips and waist.
Having laid out the cloth on the table, we lay the folds in the desired direction and stitch it on top using a typewriter. After this, you can sew in the clasp and stitch the belt. The skirt is ready!
Calculation of a belt for a skirt with pleats
For example, the desired belt width is 3 cm.
When cutting, the width will be = (3 × 2) + 2 cm for allowances = 8 cm.
Belt length = 78 + 1 cm allowance on one side of the belt + 4 cm for the fastener (3 cm fastener + 1 cm allowance) = 83 cm.
When calculating the fabric, we allocated 8 cm for the width of the belt; out of 160 cm of fabric, 152 cm was used for the length of the skirt - the remainder is the cut for the belt. We measure the required length of the belt, cut it out and glue the belt with an adhesive pad so that when wearing the skirt the belt does not stretch.
Usually the belt is cut out along the grain of the fabric, i.e. the lobar thread runs along the waist, as in this photo:
But in this model it was inconvenient for us to cut out the belt along the grain, since the entire width of the fabric for the skirt goes into folds (150 +150), and in order not to reduce the width of the skirt, we cut out the belt not along the grain, this is not critical, since we still have to duplicate it with a double.
We sew on the belt, process the fastener on the belt, as in this skirt. Insert a hidden zipper.
We process the bottom allowance that was left unfinished.
Iron the skirt with bow pleats , iron the folds if you do not leave them soft.
Peculiarities
In one of the articles we talked in detail about skirts with bow pleats. In fact, bow and counter folds are the same thing. Counter folds, when viewed from the front side of the product, are folded towards each other.
If you turn the product over and look at it from the wrong side, the folds will be directed in opposite directions - such folds are called bow folds. So counter pleats are the other side of bow pleats.
A skirt with counter pleats can be of absolutely any length - from mini to maxi. The styles are also very diverse.
Not only wide fluffy skirts, but also narrowed or straight models are draped with counter folds. For example, a pencil skirt decorated with folds along the hem, or a tulip skirt with two or three deep counter pleats, looks very interesting.
To form beautiful, stable folds, it is important to choose the right skirt material.
For winter models, dense, warm fabrics, such as wool or tweed, are used. For the spring-autumn season, denim or classic jacket fabric is often chosen. In summer, preference is given to lighter materials - chiffon, cotton, lace, viscose, etc.


