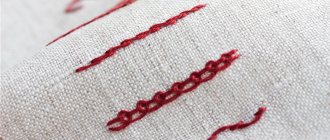
Several ways to hem a product
Double hem
The most common way is to fold the bottom edge, fold it again to the required width and sew with blind stitches.
Hemming with hem facing
Hemming is a fairly common way to hem a product. A separately cut strip of fabric makes it easier to hem products with a figured bottom edge (for example, scallops) or in case of insufficient length when cutting the product.
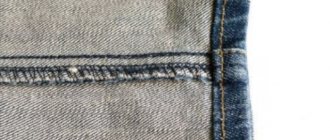
Hemming with cut edge
This method can be used for transparent fabrics or for double-sided products. It can be made using a ready-made edging or a strip of another material.
How to correctly mark the bottom line of a product
Before hemming the bottom, the product should “hang” for 24 hours, especially if the bottom cut is on the bias. After this, the product is tried on, making sure to wear shoes with heels, and the correct fit and fit are checked. To mark the line of the bottom of the skirt, you need the help of a third party who will measure the distance from the edge to the floor in a circle with a ruler. The bottom line is marked with chalk or pins along the entire circumference at the same distance from the edge to the floor. Then pin up the resulting seam allowance and check the hem while standing in a natural position in front of the mirror. The bottom of the product and the floor should be parallel.
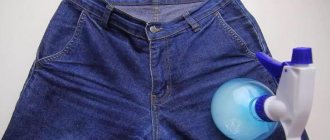
Using adhesive tape
Adhesive tape or web is a godsend for those who do not know any sewing techniques and who do not have a sewing machine. With its help you can hem trousers, curtains, dresses, skirts. Suitable for thicker fabrics and non-flared items. The method is quite easy.
- Prepare the dress by measuring the desired length. Leave 2-3 cm for hem. Cut off the excess edge.
- Pin the hem with sewing pins and iron.
- Take the adhesive tape and measure the required length. You can cut it into small pieces or take a long one at once.
- Place the web inside the hem, and fold the raw edge and secure with pins. Make sure that the adhesive tape does not show through.
- Iron well, pressing the iron against the fabric using steam. Hold the iron for a few seconds to release the glue.
- Remove the pins and go through the iron again.
In this technique, the main thing is not to overexpose the iron so that the adhesive tape does not overheat, otherwise it will deform the fabric.
Disadvantages of using adhesive tape:
- not suitable for thin fabric, because the web adds rigidity due to the hardened glue, and on thin clothes it will bulge;
- When ironing, a tape mark will appear on the front side;
- This method is short-lived; after washing, the tape will come off over time.
Hemming and cutting the hem allowance
- Inside the hem, trim the vertical seam allowances to half the width to avoid excess density.
- Fold the hem along the marked bottom line and pin it across with pins at a distance of 5 cm from each other. Baste close to the fold.
- On the folded fabric, mark the width of the hem evenly. Trim away excess material. Along the edge of the hem, place a landing stitch 6 mm from the cut.
- Pull the ends of the threads, adjusting the hem until the edge lies flat. Finish the edge, press lightly and topstitch or hand baste.
Finishing the edge of a dress with a hem
When preparing the dress, do not forget to leave 3-4 cm for the hem. This is the standard length needed to finish the edge.
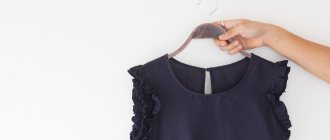
Double hem
A double hem is an easy way to finish the edge of a dress. Suitable for almost all types of fabric. It can be done either manually or on a sewing machine.
- Turn the dress inside out. Measure the height of the hem and add 1 cm.
- Fold 1 cm from the edge and iron.
- Fold the hem height and iron again. If you doubt that you will be able to sew evenly, then additionally sew the hems with thread.
- Sew from the inside with an even stitch on a sewing machine, retreating 1 mm from the edge of the hem.
If the hem height is large and the hem edge is wide, then make two lines. The distance between them must be at least 5 mm.
Video:
Using the “Moscow seam”
The Moscow seam is well suited for flared items, chiffon fabrics, and thin silk. It can only be done on a sewing machine. The technique is not easy, it requires skill and patience. The line must go straight.
- Use a machine to select a seam of 1.5-2 mm, no more.
- Fold the fabric from the wrong side by 3-4 mm, as little as possible.
- Sew with an even stitch 1 mm from the edge.
- Using small scissors, carefully trim off the excess hem.
When stitching, do not pull the fabric or pull it in front of the machine foot; it should flow freely. Otherwise, the product will go in waves.
Video:
Seam "Blind stitch"
A hidden stitch or a hidden hem helps to beautifully and accurately finish the bottom of the product so that the seam is not visible from the front side. The work is not easy, you will need a special foot for a sewing machine, but the effort is worth it.
- Prepare the dress, measure the required length, leaving 3-4 cm + 1 cm for the hem height.
- Overcast the raw edge or stitch with a zigzag stitch.
- Iron the hem and turn the edge on the wrong side so that the overturned part of the hem protrudes 4-5 mm.
- Machine stitch from the wrong side along the very edge of the fabric.
Video:
Hemming with open cut
One of the most common seams. Performed on a sewing machine.
- Measure the required length, leaving 2-3 cm in reserve.
- Sew the raw edge using an overlocker or zigzag machine.
- Make a fold and iron. If you are not sure that you can stitch evenly, secure with pins.
- Sew an even stitch over the finished edge.
- When finished, remove the pins and iron again.
Hem seal
To ensure that the hem line does not stand out from the front side of the product, the hem can be made denser. This technique maintains the shape of the hem and is often used on professionally tailored clothing. The seal is cut out on a bias 5 cm wider than the hem allowance and fixed before folding the hem.
- Mark the bottom line with a basting line. Trim the allowance and finish the cut. The sealant strips must be cut so that the ends overlap diagonally.
- Use pins to secure the seal and the wrong side of the product. The bottom edge of the seal should be 2.5 cm below the marked hem line.
- Fold the hem along the marked line. Pin it. Baste close to the cut. The seal should protrude 2.5 cm above the edge.
- Sew the hem with a goat seam, catching only the seal with stitches.
How to hem a dress by hand
"Blind stitch" by hand
Above we described how you can make a “Blind Stitch” on a sewing machine, but there is an option to do it manually. Start at the seam of the dress to secure the thread and hide the knot.
- Prepare the dress, measure the required length, leaving 3-4 cm + 1 cm for the hem height.
- Make a hem, iron and baste with thread.
- Turn back the edge of the hem by 3-4 mm.
- Insert the needle under the hem, catching 1-2 threads.
- Make the next stitch on the hem.
- Take a step forward and stitch under the hem again, catching no more than 2 threads with the needle.
- Repeat steps along the entire hem.
- Do not tighten the thread too much, otherwise the fabric will wrinkle.
Video:
"Goat" for knitted fabrics
Not all sewing machines are capable of stitching knitwear evenly; the “Goat” technique is perfect for this fabric. The work is done from left to right, but the needle should be inserted from right to left.
- Fold the edge of the dress, secure with pins, and iron.
- Prepare a needle and thread. It is better to start from the seam of the dress to hide the knot of thread.
- Fix the needle from the edge of the hem by 3-4 mm.
- Taking a step to the left, insert the needle under the edge from right to left, hooking 2 threads.
- Then we take a step to the left again and, retreating 3-4 mm, insert the needle from right to left.
- In this way, go along the entire edge of the hem of the dress.
- The seam should look like a cross.
- Do not pull the thread or take a large step so that the seam is elastic.
Video:
Processing the bottom of dresses and blouses
Shallowing and trimming the bottom. The product is turned inside out, laid out on the table, bending the front and back in the middle, side seams, darts, and bodice-skirt seams are connected on the right and left sides of the product. Then, having specified the length of the product, the features of cutting and hemming the bottom are outlined with chalk using an auxiliary pattern. Excess materials are trimmed. In products made of thick fabrics, the side seams and seams connecting the skirt panels are cut at a distance from the bottom equal to the width of the hem plus 2-4 cm, and the seams in the area from the bottom to the notch are ironed.
Processing the bottom using a stitching machine. In products made from cotton and linen materials, the bottom of dresses and blouses is processed on a stitching machine (Figure 87, a) with a device that provides a certain width of the hem. When processing the bottom without a device, the bottom is folded along the intended line towards the underside, the cut of the bottom is folded inward by 0.7-1 cm and stitched at a distance of 0.1-0.2 cm from the folded edge. When processing the bottom on a stitching machine with a device, the hem line is not marked.
The bottom of dresses and blouses widened at the bottom, which are worn under a skirt, is processed on a sewing machine with a narrow hem seam with a closed cut with 2 lines or using a special device - a switch (Figure 87, b). The width of the seam in the finished form is 0.2-0.3 cm.
Processing the bottom of a blouse using a special machine. The cut of the bottom of the blouse is bent to the side of the wrong side by 0.5-0.7 cm; when making items for individual orders, the folded edge is ironed. Then the folded edge is stitched on a special machine (Figure 87, c). Excess materials around the stitching are trimmed.
Processing the bottom of products made of dense materials. In products made from thin wool and silk fabrics that fray easily, the cut of the bottom is overstitched using a special machine. Then it is folded towards the underside along the intended line, folded inward and basted.
In products with an even silhouette, the bottom is covered with 1 line.
In products that are slightly widened downwards, the bottom is covered with 2 lines: 1 at a distance of 1 cm from the fold of the bottom, and 2 are attached to the folded edge.
In products that are widened downwards and have a hem allowance, the bottom is basted in 3 lines: first, the cut is folded and basted at a distance of 0.5 cm from the fold, and then the bottom is folded along the hem line and basted at a distance of 1 cm from the fold of the bottom and the last line attach the folded edge.
The swept bottom is hemmed using a special secret stitch machine. In products with a straight silhouette, it is allowed to hem the bottom using a special machine without preliminary basting. When manufacturing to individual orders, the swept edge is hemmed manually with hidden stitches (Figure 87, d), inconspicuous from the front side. In products made from dense woolen materials, from thick cotton materials (such as corduroy and corduroy), as well as in skirts with folds, pleated and corrugated, the cut of the bottom after chamfering and trimming the parts is stitched using a special machine. Then the bottom is folded toward the underside along the intended line and hemmed using a secret stitch machine without folding the edge inward (Figure 87, e).
In products made from dense, easily crumbling materials of high groups, it is recommended to edge the bottom cut (Figure 87, f) or decorate it with a special braid (Figure 87, g).
For edging, grab a strip of thin silk fabric, place it on the front side of the product, aligning the cuts, and grind it at a distance of 0.3-0.5 cm from the cuts. A strip goes around the seam, forming an edging. The edging is secured with a stitch into the stitching seam of the strip. Afterwards, the bottom is folded towards the wrong side along the intended line, basted and hemmed using a special secret stitch machine or manually using stitches that are invisible from the front side.
When processing a cut with braid, it is applied to the front side of the hem allowance with an overlap of 0.7-1 cm (subject to the width of the braid) and adjusted at a distance of 0.1-0.2 cm from the edge of the braid. Then the bottom of the product is folded to the side on the wrong side along the intended line, basted and hemmed using a special machine with blind stitches or by hand, the basting threads are removed. The processed bottom of the product is ironed.
Processing the bottom of blouses with a stitched belt (Figure 88, a). Before connecting the belt to the blouse, darts or gathers must be processed along the bottom of the blouse.
If the belt according to the model is closed, then it is bent across the middle and folded with the front side inward. The cuts are leveled and the belt covers are ground down. The width of the seam is 0.7-1 cm. The seam is laid out, the belt is turned right side out, folded along the middle with the underside inward and ironed.
If the belt has a fastener according to the model, then the processing of the belt is similar to the processing of stitched cuffs in the ducts. In the side seam of the blouse, a cut along the continuation of the seam can be processed.
The belt is placed on the wrong side of the product with the lining down and stitched on the side of the blouse, evenly distributing the gathers and connecting the control notches. The width of the seam is 0.7-1 cm. The belt is folded back, the seam is directed towards the belt, the cut of the belt is folded by 0.5-0.7 cm and adjusted at a distance of 0.1 cm from the folded edge. In this case, the stitching from the underside of the blouse should pass along the main details at a distance of 0.1 cm from the seam of the belt (Figure 88, b).
When making products from woolen materials according to individual orders, it is allowed to stitch the belt, and fold the section of the under-belt and hem it with secret hemming stitches, covering the seam of the sewing of the belt (Figure 88, c).