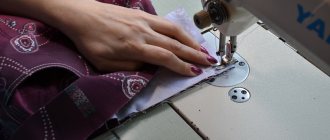
The skirt's belt is the final element, but at the same time the most difficult. And considering that the belt often has to be sewn on at the end of the work, the quality of its processing can be quite low. Therefore, I recommend using a simple technology for making a belt, and most importantly, sewing a belt for a skirt or trousers onto a “fresh” head. Put the skirt aside; you don’t need to sit up until 2 am to sew it faster.
In this article you will learn the technology for processing a stitched belt without belt loops. This type of processing of the upper cut is suitable not only for a skirt, but also for women's trousers. And if you install belt loops when sewing on a belt, then such a belt can also be used for men's trousers.
Processing belt loops for women's trousers.
Exactly the same processing is used to make belts for skirts with elastic, Tatyanka skirts, circle skirts and others.
In this video you will learn how easy it is to make a skirt pattern for a girl directly on the fabric. The technology of sewing a children's skirt with an elastic band instead of a belt is also shown.
Brief step-by-step instructions
- Using a measuring tape, you need to measure the top cut and add another 1.5 cm to the obtained parameters. This is necessary for the allowance.
- Afterwards you need to chop and process the top cut. Then you need to duplicate the actions on the bottom of the cut.
- Then you can sew the zipper to the skirt. It is necessary to distribute the zipper along the belt and skirt.
- To sew, you need to secure the zipper with pins and make notes.
- Then you can start stitching using a sewing machine.
- Then you need to stitch the edges with a bend in the part of the fabric where the zipper will be sewn.
- The corner with a deflection must be even. And therefore, any excess tissue must be cut off.
- On the front side you need to make a securing stitch. To make a stitch, you need to align the cuts and pin them.
- The stitching should be located on the seam line of the skirt and waistband.
How to sew a zipper into a skirt?
Good day, dear sewing lovers!
A zipper is the most common type of fastener for a skirt.
Today, there are several options for making a zipper on a skirt. The choice of method depends on the stylistic features of the model, on the place on the skirt where the zipper is planned, sometimes depends on the properties of the material from which the skirt is sewn, but in no case is the choice of method carried out according to the principle “here it’s easier, simpler, faster - I will choose this method.” The methods are not equivalent.
These are the methods:
- A closed zipper in the seam where the edges of the product are positioned end to end.
- Closed zipper in the seam where the edges of the product are positioned end to end, hand sewn.
- A closed fastener in the seam, where the zipper is moved under one of the edges of the fastener.
- Open in-seam zipper.
- The open zipper is not in the seam.
- Concealed zip fastening.
A closed zipper in the seam where the edges of the product are positioned end to end.
Until recently, this method of making a zipper on a skirt was the most popular and most used. Nowadays, the hidden zipper fastener is hot on its heels (see below in the article).
From a technological point of view, there is nothing complicated in making a zipper in a seam, where the edges of the product are located close to each other. I placed the zipper under the pressed seam allowances and stitched it down. “That’s the whole story.”
However, in making a zipper fastener on a skirt using this method, there are several subtle components that, nevertheless, greatly influence the result. As popular wisdom says: “The devil is in the details.”
The most, not that difficult, no, rather vulnerable “section” in this whole process is the implementation of the last and most important line - delaying the frame around the zipper. Regardless of how it is made, the fastener will definitely work. Well, the fact is that there, around the zipper, the material can be very pulled together, the stitching is not even... Many people can live with this, I can’t.
Today I want to offer you, dear sewing lovers, this method of making a closed zipper in a seam, where the edges of the product are positioned end-to-end to each other, which will allow you to make such a fastener, even if it’s imperfect, but at least get closer to the ideal.
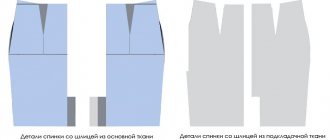
The zipper fasteners, which will be discussed later in the article, on the skirt are made in the middle seam of the back panel (in the center of the back panel). Both sides of the finished clasp, left and right, look the same.
First of all, since another, more convenient opportunity will no longer present itself, the cuts of the seam allowances on both parts (on the left and right halves of the back panel) are processed from fraying.
And we immediately determine the location of the snake (the cut for the zipper).
At the top we take into account the seam allowance (from 0.7 cm to ∞ (according to the model)). And yet, the upper zipper stops should be 3 - 5 mm below the waist seam line.
From below, the end of the cut for the zipper should be below the lower stopper of the snake and even below those, albeit insignificant, but still remnants of the zipper teeth below the stopper that we inherited from its production.
Only by moving 0.5 cm away from obstacles do we give the sewing machine freedom of movement. After all, it will be much easier to sew a stitch on a woven ribbon, while it will be more difficult to “crawl” over metal or plastic parts.
Up to the bottom mark, we connect both sides of the back panel with a machine stitch (threads in the color of the main material).
We finish the stitching at the mark with a bartack.
From label up
We also stitch the parts using a machine, but with a temporary auxiliary stitch (the threads are contrasting with the main color tone of the product). The stitching is done without bartacks along the edges.
If the material from which the skirt is made is not obedient, and you already understand that it will not allow you to lay an even and beautiful stitch, you will have to stabilize it with a suitable adhesive interlining material. For this purpose, strips of non-woven fabric 1 cm wide are suitable, and the length is the length of the zipper cut to the mark, plus 1.5 - 2 cm.
We use strips of adhesive pads to reinforce the material of the main parts (butt to the line of the auxiliary stitch).
If the fabric is even more “obstinate”, you can also strengthen the seam allowances along the cut.
Iron the completed seam.
Place the zipper in the space allocated for it, face down on the pressed seam allowances between the main parts.
First we baste with a hand stitch. The zipper can be glued to the allowances with textile glue, using a special basting adhesive tape, using a special adhesive pencil, etc.
Then, if there are no needle puncture marks left on the fabric, the zipper can be “basted” with a machine stitch. The stitch is placed at the edge of the zipper strips, randomly, using contrasting threads. The main thing is that it keeps the material from wrinkling.
The last and most important thing left is to stitch the frame around the zipper. To make the line even, it needs to be laid using some kind of guide. For example, a stitch line can be marked with marking tools, a basting stitch, either by hand or by machine. You can use the parts of the foot and the sewing machine itself as a guide. Etc.
How to shorten a zipper?
It is impossible to lay a line along the zipper at the zipper lock. When making a frame around the zipper, the sewing machine will need to be stopped to move the lock higher or lower along the chain of closed teeth. Since the cut remains stitched, you can easily move the zipper lock when the lock handle is turned up. It does not block the lock and it moves easily along the zipper.
The sewing machine needle should remain in the material (in the down position), and the presser foot should be raised.
The stitching around the zipper is laid at a distance of 0.4 - 0.7 cm (depending on the properties of the fabric and the size of the zipper links) from the middle seam line on both sides. The width of the stitches must be at least 3 mm. The wider the stitches, the better the zipper stitching will end up looking. The stitching is done with threads matching the color of the material. Unless, of course, the opposite is intended as finishing.
The stitching is done using a special foot - a foot for sewing in zippers. Such a foot, as a rule, comes in a set of mandatory sewing tools for almost all sewing machines. Presser feet from different sewing machine manufacturers differ significantly in structure and shape. But they all work on the same principle. They allow the sewing machine to lay a stitch along those places on the product that, for one reason or another, rise above the working surface of the sewing machine.
First, the stitching is laid along the left side of the back panel from top to bottom.
Then, at the mark (end of the cut), leaving the sewing machine needle in the material, and lifting the presser foot, turn it 90⁰
and make a small section of the bottom of the frame to the desired width.
The width of the seam on the other side of the frame should be exactly the same as on the first. Therefore, the last stitch of the line laid along the bottom of the frame may have to be increased or decreased (depending on the situation) in order to “fit” into the required parameters. For example, my previous cross stitch is 4 mm long, and the next one is already 3 mm long.
To accurately get to the desired size, when performing a cross stitch, you should stop, leave the needle in the material, lift the presser foot, turn the product 90⁰ and thus check the distance.
Having completed the transverse stitch, we finally turn 90⁰ and now from bottom to top we continue to sew the right side of the frame.
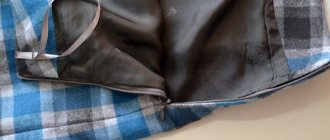
We remove all auxiliary hand and machine stitches. And here it is in front of you, the finished closed zipper in the seam, where the edges of the product are located end to end.
View from the inside.
View from the face.
All “secrets” can be neglected if the fabric is obedient and easy to sew off. For example, medium density and very dense cotton fabrics, linen, denim, twill, gabardine made from natural fibers, etc.
Closed zipper in the seam where the edges of the product are positioned end to end, hand sewn.
On many complex fabrics, for example, such as satin, or on fabrics with pile, brushed, etc., for example, velvet, velor, panvelvet, corduroy, fleece, etc., adjusting a zipper is associated with enormous difficulties. Machine stitching around the zipper on such fabrics spoils the appearance of the item being sewn too much, crushing unsightly pile (combing, etc.) or making the material too heavy.
When sewing a skirt from such fabrics, the zipper for fastening can be sewn on by hand.
First, as in the first case (see above in the article), we use stitching stitches to connect two parts, in the seam between which the zipper will be made. Up to the line of the “cut for fastening” mark, the stitching with a tack at the end is made with threads in the color of the material, higher in contrast.
The completed seam is ironed.
We put the zipper in the place allotted to it,
baste (glue, etc.)
and sew by hand.
The stitch with which a zipper is sewn to a product is a hand stitch with loop stitches, in other words, a “back needle” seam.
From the front side, 1-2 threads are picked up with a needle; from the back side, the stitch length should be no more than 6 mm.
In principle, any of the options for making a zipper on a skirt provided in this article can be done by hand stitching. If, of course, there is a need for this.
The fastener is closed in the seam, but the zipper is moved under one of the edges of the fastener.
By doing a zipper on a skirt in this way, we seem to hide the zipper under one of the folds of the fabric. The zipper most often moves under the left side of the clasp, although this is not a strict rule.
A closed fastener in a seam, where the zipper is moved under one of the edges of the fastener, is performed either in the side seam, which happens more often, or in the middle seam of the back panel of the skirt.
We begin the implementation of the “zip fastener in a skirt” project with: 1) processing the cuts of the allowances of the parts in the seam, between which the fastener will be located, 2) by marking the length of the cut for the fastener (marking features can be seen in option No. 1 of the zipper fastener on the skirt (see .above in the article)).
Again, if the fabric is slippery or very plastic, etc., we stabilize its mobility with a suitable adhesive pad. On the left side the width is 1.5 cm, on the right - 1 cm. On the right part of the back panel we stabilize only the material of the main part, on the left the entire area, including allowances.
If the fabric is very unobedient, we “glue” the allowances together.
To obtain an even fastener, we “draw” several auxiliary lines with a sewing machine. (Threads contrasting to the main fabric).
Seam line on both pieces
and seam allowance hem lines on the right piece.
The last line should be 3mm from the seam line on the right side.
Seam allowance on the right side along the “end of the snake” line
cut, not reaching the seam line in which the fastener is made, 1 - 2 mm.
Having folded the allowance along the hem line, we sweep part of it to the wrong side.
Iron the resulting fold.
We put a zipper under the right part
and we baste it like this,
so that the fold of the allowance along the entire cut line on the right part lies exactly butted up to the chain of teeth on the zipper.
At a distance of 2 mm from the fold, we lay a machine stitch, which adjusts the zipper to the edge of the cut on the right side. (Threads in the color of the fabric).
At the bottom edge of the cut, the stitching must end with a bartack. It is better to make the fastener just opposite the cut. Then she will keep him from further, possible breakup.
After all this, we place the left side of the product on the right, combine the cuts, seam lines and up to the mark (lower point of the cut)
We connect using a machine stitch with threads in the color of the fabric. The stitching at the mark should end with a bartack.
Further. From the wrong side 1) iron the seam allowances.
2) Iron the seam allowance on the wrong side along the cut on the left side of the piece. (Here is an auxiliary machine line to help us).
3) Finally iron the seam at the edge of the fastener.
Now, on the front side of the product, aligning the “drawn” seam lines end-to-end, we baste the left part over the right and over the zipper. We fasten everything with a temporary hand basting stitch.
Periodically moving the zipper lock, with the handle raised up, along the chain of closed teeth,
At a distance of 1 cm from the cut line in the seam, we perform a delay of the zipper.
View from the inside.
View from the face.
The “bottom” of the frame can be decorated in different ways. For example, like this (according to the model, optional).
In the seam line, the delay should be completed with a bartack.
From the inside out, it would be good to “close up” the cut to the seam line and sew it to the edge of the zipper so that it does not diverge further.
Skirt zippers can be made open. They can be in the seam or on a solid part. You can get acquainted with the options for making open zippers by clicking on the appropriate links.
How to sew an open zipper into a skirt?
How to sew a zipper into a skirt without a seam?
Making a hidden zipper for a skirt is absolutely no different from doing it on other types of clothing. And in order not to repeat myself, I propose in the next article to get acquainted with this method.
How to sew a hidden zipper into a skirt?
All the best to everyone! Sincerely, Milla Sidelnikova!
How to sew a belt to a skirt with a zipper
Before sewing the belt to the skirt with a zipper, you need to carry out preparatory work. After all, a belt with a lock is not the simplest element. Quality sewing requires effort and patience. The process of sewing a zipper to the belt and skirt is carried out step by step.
Cutting out a belt
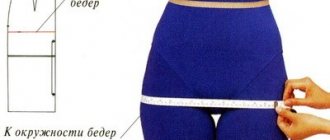
Draw a rectangle on the fabric. To do this, measure the waist size (length) with a centimeter tape and add an allowance of three centimeters (one and a half centimeters on both sides). And the width is calculated as the width of the belt multiplied by two. And don’t forget to leave a small two-centimeter allowance. Cut it out.
Gluing and duplication
During prolonged wear, the belt stretches. To avoid this, you need to glue the adhesive fabric to the piece using an iron.
The belt is cut out and needs to be duplicated. Dubbing is a rectangular strip of adhesive fabric (dublerin, non-woven fabric). To give the desired density and rigidity. When used, such a belt will not stretch or lose its shape. The dubbing copies the prepared belt in size. The adhesive side is distinguished by its roughness. So, take the adhesive fabric and apply it to the underside of the belt. Using an iron, glue it using damp gauze.
Top cut processing
With the right side facing inward, the belt is applied to the skirt. It is fastened with pins along the entire length, leaving allowances for the seam and fastener. Can be basted with threads by hand. Both parts are sewn with a straight stitch on a sewing machine, stepping back about a centimeter from the edge. The allowances are carefully trimmed. Turn out and iron right side out. Overcast the bottom edge.
Connecting a belt with a skirt
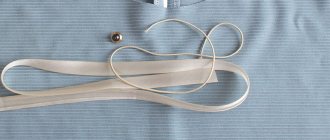
After all the details are prepared, you can start sewing. Make sure the seams are tucked inside. Cover them with a belt. We pin along the entire length with pins. We turn the belt and seam allowance up. Ironing. We are preparing satin ribbon for two hangers. Fold in half. We insert it into the side sections of the belt. We sew on the front side using a sewing machine. As a result, the folded belt is stitched from the inside out. We perform the securing stitch with special care.
Attaching a zipper
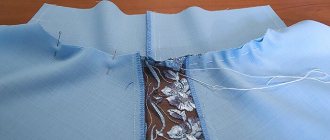
First we mark where the lightning will be located. Apply to the ironed seam and waistband of the product. Finish the edges of the seams with an overlocker.
From the inside, attach the lock with the slider facing up. We pin the zipper along its entire length with pins. And then, armed with a needle with a thread contrasting with the fabric, we baste the details. We remove the pins as we go so as not to interfere.
Using a machine, we stitch on one side of the product. We fasten the lock on the skirt. The edge of the zipper and the seam allowance should match. You need to make sure that the cut along the stitched seam on the left side is folded in the direction of the waistband. Unfasten the clasp. The left side of the belt is turned inside out. The edges are secured using safety pins.
Close the lock and apply it on the other side. The belt being sewn must be the same on both sides, so the zipper is pinned, taking into account the distance from the edge of the fabric. We check that there should be no curved lines or various distortions on the front side. Unzip the zipper and sew it on the other side. Fasten and check that both ends match.
The final part of processing a stitched one-piece belt
The final part of sewing on the belt begins with basting work, and this work cannot be done with pins, only with threads.
Baste the hem of the waistband along the wrong side so that when laying the securing stitch (along the front side), the seam runs at the same distance from the edge of the hem.
We begin to sew the finishing stitch along the top of the waistband, from the left edge (where the button will be sewn).
The securing stitch (bottom) is done with care. Firstly, you should not allow the fabric under the foot to shrink; you need to pull it a little with your hands, while at the same time being careful not to stretch it. Otherwise, the waist size may change and the skirt will be either narrow or too loose at the waist.
Secondly, “look” constantly at the wrong side. Make sure that the thread catches the hem and the seam runs exactly along the edge of the hem or at least at the same distance from the edge.
Do not cut the threads at the very seam; it is better to thread them into a hand needle and “hide” them, stretch them inside the belt.
This is what the finished belt on the skirt will look like. All that remains is to sweep out the loop on the sewing machine and sew on the button.
Video on how to make buttonholes on a sewing machine in four steps.
Sewing a belt to a circle skirt
To calculate the length of the belt, you need to calculate the waist measurements and add 2 cm to them for an allowance. You will also need 3 cm for stretching. All edges of the segments must be processed with an overlocker.
Instead of an overlocker, you can sew on a machine. To prevent the skirt from tearing, it is necessary to make the seams in a zigzag shape. Sometimes you need to glue the adhesive backing to the middle of the belt. It is also recommended to make a side seam for the zipper.
Afterwards you can start sewing the belt. The front side should be attached to the waist line. Next you need to sew in a zipper. The edges of the lock are secured with thread. The excess parts must be cut off. Afterwards, the skirt must be ironed.
How to sew a belt and zipper to a pencil skirt?
Marking a belt from skirt fabric
The belt is sewn from the same fabric as the pencil skirt. Next, you need to measure your waist circumference and apply the measurements to the fabric. On the segment you need to mark the middle and pin it to the skirt with pins.
Cut out the belts
For proper fixation, the fabric must be folded. The first mark should be applied to the zipper. You will need a pin to secure it. The second mark is fixed on the other side.
Serging the belt
Next, the skirt needs to be folded in half so that the joints are on the same line. The mark should be located in the middle of the belt. You need to attach all the parts one by one and pin them.
Sewing a belt to a skirt
It is important to know that all darts are pinned on only one side of the belt. The allowances should be directed in different directions, and the darts should be directed towards the middle of the back. The front dart needs to be fixed to the middle of the front part.
One-piece skirt belt
As has already been said, a one-piece skirt belt must be reinforced with adhesive fabric, and not just one half of the belt, but the entire part along with allowances. True, if you sew a skirt with an elastic band, then you do not need to glue the belt with adhesive fabric.
Before sewing a one-piece belt to a section of a skirt or trousers, it must be ironed in half.
Now you need to check whether the length of the belt matches the length of the skirt.
We pin the belt to the edge of the skirt so that the edge of the belt is flush with the edge of the skirt. For beginners, it is better to perform this operation with threads, sweeping by hand.
Video on how to make a counter pleat for a skirt.
The easiest way
The easiest way to sew on a belt is with an elastic band. It is recommended to use soft decorative elastic as a material. The length of the strip is selected according to your waist circumference. But the rubber band should be 3-5 cm shorter. You need to connect the sections of the rubber band and sew them on the back and front sides. Next, you need to insert the elastic into the skirt and secure it with pins. Then you can start sewing on the elastic using a machine. When sewing, it is necessary to straighten the fabric.
In this video, a short master class on how to cleanly sew an elastic waistband, so that all seam allowances are inside. This method is suitable in many situations when you need to sew an elastic belt, for example, in tulle or silk skirts, trousers, and even in underwear, for example, in men's boxer shorts.
A skirt is an indispensable attribute in a woman's wardrobe. She is loved for her femininity and versatility. Skirts are worn by girls in kindergarten, schoolgirls, business women, older ladies... Long, short, fluffy, narrow, summer, winter - there are no restrictions on use for this item. It is not surprising that needlewomen want to sew such a popular type of clothing on their own.
Beginning craftswomen wonder how to sew a belt to a skirt. After all, this is a very important element. The belt will favorably emphasize the waist, or vice versa, hide figure flaws. We hope you found the tips presented here helpful.
Belt size calculation
It is worth putting aside accuracy and scrupulousness, because by measuring everything in millimeters, there is no chance of correcting errors during work. Clarity in measurements does not guarantee that the skirt will fit your figure; all measurements are taken as you go. If everything is strictly in millimeters, it will not be possible to adjust the belt or the product itself. Everything should be done in moderation.
To avoid a situation where the belt is shorter than the cut of the skirt, there should be an error in the larger direction in the calculation of sizes. Especially if it concerns how to sew a belt to a skirt with a zipper, then the size requires a special careful approach.
Do-it-yourself sewing
Another reason why accurate measurements are harmful lies in the subsequent processing of the fabric. It is customary to glue the wrong side of the belt using adhesive fabric. Due to its properties and texture, it is capable of shrinking when exposed to high temperatures, which occurs when the product is ironed.
When processing the codpiece, you should be more careful, because the waist line can shift and change. The margin for the belt should be left not only in length, but also a little added to the width. Excess fabric can always be cut off. Do not forget that after trying on you may have a desire to change your waist circumference by making the belt narrower or wider.
