Clothing patterns for Baby Born
All Baby Born dolls are of a similar size, so you can safely take patterns on the Internet. There are a lot of clothing options on forums and blogs. You need to find the most interesting patterns and then print them. Due to the small size of the items, printed patterns can simply be traced onto fabric.
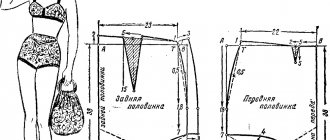
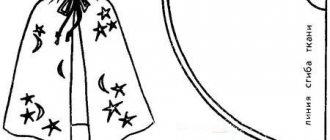
There are several types of patterns for Baby Born - life-size, those that need to be enlarged to scale, as well as patterns that you can build yourself according to size.
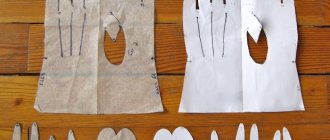
The simplest pattern is life-size. You will need to print it out, glue the sheets together if necessary, cut out the parts, and you can immediately start cutting and sewing.
Patterns with scale are more difficult to work with. You will need to take measurements of the doll's chest, waist and length, calculate the scale (how many times you need to enlarge the pattern) and build a life-size pattern.
You can create patterns according to size yourself. With enough experience, you can cut out parts directly on the fabric.
For those who have never sewed before, it is better to start by making simple hats and T-shirts. And only then you can take on dresses, pants, jackets and even overalls with pockets.
Common mistakes
When sewing clothes for a doll, it is important to remember that all details need to be ironed. This is necessary so that the finished clothes fit better on the baby. It is worth paying special attention to this.
What mistakes are most often made when sewing clothes for a baby boy:
- One of the most common mistakes is complex patterns. For example, when using checkered or striped fabric, you need to carefully align the pattern on all the details so that it looks natural;
- When using ready-made patterns, you should carefully transfer everything onto the fabric to avoid annoying mistakes;
- Often, when we knit baby clothes with knitting needles, a situation is possible when the fabric suddenly begins to narrow or expand. This means that the loops were accidentally reduced or added. It is worth calculating the number of loops in the rows, and then finding the place where the error occurred. Then dissolve to this point and continue from there;
- In order to carefully knit clothes for a baby boom, especially things with an openwork pattern, it is advisable to knit another stitch for sewing the parts together.
Creativity is a pleasant process in itself, and if it also pleases a little person, it is doubly pleasant. Sewing and knitting is not so difficult, and children will definitely be pleased with the result of their work and will happily dress up Baby Bon in new clothes.
What fabrics are best to make clothes for Baby Born and what other materials will be needed for sewing?
To sew clothes for such a doll, you can use almost all types of fabrics. But for beginners in sewing, it is better to start working with materials that do not fray when sewing. Cotton jersey, interlock, French jersey, footer, velsoft are ideal. If such fabrics are available, great! If not, don't be upset. You can start sewing clothes for a doll from old things. T-shirts, tights, old skirts and sweaters - all this is quite suitable for sewing Baby Bon clothes.
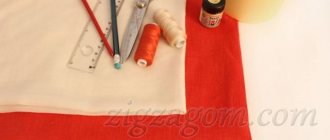
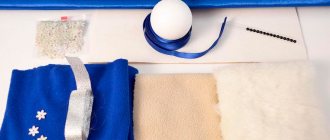
You need to prepare threads of several colors, needles, pins, measuring tape and scissors. Those who have a sewing machine can use it. But tiny doll clothes can also be sewn by hand. If you wish, you can buy fabric in the store. Sometimes they have scraps left over from rolls, which they sell for pennies. Sequins, buttons and frills are suitable for decoration.
Costume for girls
If only pants and blouses are suitable for a boy, then the wardrobe of a girl doll will be much more diverse. Let's take, for example, a cute suit of a sundress and pantaloons. Patterns for a life-size Baby Bon will help you sew it.
Knickers are sewn in almost the same way as trousers, only shorter and wider. The extra width allows for beautiful gathers. The elastic should be sewn in 12 mm from the edge to create beautiful ruffles. The pantaloons look even nicer with lace around the edge.
To sew a sundress, we first sew the side seams. The bottom and armholes are finished with bias tape. The trim from the neckline is not cut, but stitched further, turning into ties. Not everyone can make bias tape on their own; this work is painstaking and delicate, so it’s easier to buy a ready-made version. The suit can be worn as is or complemented with a blouse under a sundress. So the clothes for Baby Bona girl are ready. Patterns can be supplemented and modified at your discretion.
How to sew a simple skirt
To sew a skirt for such a doll, you will need to cut out a rectangle from the fabric. In order to find out the dimensions of this rectangle, you need to take two measurements - the waist circumference and the length of the product. The waist circumference needs to be multiplied by 2, and added 3 cm to the length of the skirt. We get the width and length of the rectangle.
We cut out a rectangle of fabric and sew it into a ring along short sections. We overcast the top of the skirt, fold an allowance of 1.5 cm to the wrong side, sew a line, leaving a small hole for threading the elastic. We hem the bottom of the skirt with a closed hem seam. We cut off a length from the elastic equal to the circumference of the doll’s waist, insert it into the drawstring, and secure the ends of the elastic. The skirt for Baby Born is ready. Such a product can be decorated - sew on lace or frills, stitch pockets, make appliqué, etc.
LiveInternetLiveInternet
Doll height 43 cm. Waist circumference approx. 29 cm. File name:
d9_pattern.zip
File size:
228.56 Kb
(The folder with patterns also includes a list of symbols used in the work. It is advisable to print patterns using Adobe Photoshop on A4 sheets. Before printing horizontal sheets, do not forget to set the “Landscape format” option in the Page Properties menu ) You will need: For the blouse: approx. 80 x 30 cm white cotton fabric; 0.50 m blue satin ribbon 1 cm wide; knitted blank for cuffs; Velcro contact tape. For overalls and beret: approx. 70 x 80cm printed cotton fabric; knitted blank for a beret cachepin; 0.85 m of bias satin binding 2.5 cm wide; 2 small push buttons; 1 thermal decal; a piece of gasket with an adhesive coating. Cutting: Blouse: 23 Front, one-piece with sleeves - 1 piece with a fold 24 Back, one-piece with a sleeve - 2 pieces 25 Collar - 4 pieces 2 cuffs from a knitted blank, each 8 cm long and 2.5 cm wide (finished width 1.2 cm) Jumpsuit: 26 Front - 2 folded pieces 27 Back - 2 folded pieces 28 Front half of the trousers - 2 pieces 29 Back half of the trousers - 2 pieces 30 Upper part of the bootie - 2 pieces 31 Bootie sole - 2 pieces Beret: - crown = circle with a diameter of 26 cm - cachepin from a knitted blank 30 cm long and 3 cm wide (finished width 1.5 cm)
Important: cut out the parts with a seam allowance of 0.75 cm.
Gasket: strengthen the front and back of the overalls under the button markings by ironing a piece of gasket from the wrong side.
Description of work:
Blouse: Use a single stitch to sew the shoulder seams and the top seams of the sleeves. the cuffs in half lengthwise and stitch, stretching them under the presser foot, to the lower edges of the sleeves. Use a single stitch to sew the side seams and the bottom seams of the sleeves. Sew the sleeve seam allowances to the inner cuff halves. Hemming the bottom of the product: turn the hem allowance to the wrong side and topstitch. Collar: fold the collar parts in pairs, sew cleanly along the outer contour and stitch to the edge. Taking both sections together, sew each half of the collar into the neckline from the control number 3, joining them end-to-end along the pin in the middle of the front. Turn the stitching seam allowances towards the front, respectively. backs, stitch the last ones close to the seam. Fastener: turn the one-piece facings of the back fastener to the wrong side and, tucking the cut, stitch. Under the right edge of the clasp, respectively. For the allowance for the fastener, sew 2 pieces of Velcro contact tape (size 1*2 cm). a satin ribbon in a bow, sew the bow to the front (see photo of the product).
Jumpsuit: Sew the side seams of the outer and inner bodice of the jumpsuit. Trousers: sew side and crotch seams, front and back middle seams. Gather the trousers along the top edge to the length of the bottom edge of the bodice. Waist seam: sew the trousers to the outer bodice, press the seam allowances up. Processing the bodice cuts: insert the inner bodice into the outer bodice (wrong side to wrong side); baste the details along the outer contour close to the allowances. Folding the bottom edge, sew the inner bodice into the stitching seam of the outer bodice. Cut off the allowances along the outer contour of the jumpsuit bodice, edge the sections with bias tape (the width of the finished edge is 0.5 cm). Booties: sew to the front halves of the trousers along the top of the booties (control number 7). Sew the soles to the lower sections of the overalls (control numbers 8 and 9). the buttons on the front and back of the bodice of the overalls according to the markings, the upper parts of the buttons on the front. the decal onto the front (see photo).
Beret: Gather the crown along the cut to a circumference of approx. 45 cm. Sew the knitted piece for the cache-pin into a ring and fold it in half lengthwise with the wrong side inward. Stitch the chestpin, stretching it under the foot, to the lower edge of the crown.
Source - "Burda Special: Fashion for dolls, 1995." Processing for publication on the Internet - www.dollplanet.ru
How to sew a simple dress
You can easily find a dress pattern for Baby Born on the Internet, print it out and transfer it to fabric. Before cutting out the fabric pieces, you need to make a 1 cm seam allowance on each side.
If you are new to sewing, it is better to choose a one-piece dress style (the bodice and skirt are not cut at the waist) without sleeves and with a minimum of details.
Be sure to provide a fastener - front or back, so that it is easy to take off and put on clothes. To fasten the front or back pattern, you need to cut it along the middle line and when tracing the part on the fabric, allow an allowance of 2 cm.
The process of sewing such a dress is elementary. First, the shoulder and side sections are ground down. The fastener is processed - it can be loops and buttons, Velcro tape (Velcro) or a zipper. The neckline, armhole and bottom of the dress are finished with a hem seam (with an open or closed cut) or edged with fabric in a matching or contrasting color.
Using the same principle, you can sew a blouse, sundress or blouse for Baby Born.
If the dress or top is not elegant enough, then frills or sequins are sewn on. You can also make an applique. If you try, you will end up with clothes that look indistinguishable from those bought in a store. The main thing is to follow all instructions and take your time.
Clothes for baby doll girl
A Baby Born girl has more variety in her wardrobe than a boy.
You can sew a lot of interesting dresses for a doll, and coats based on them. Models of doll dresses do not differ from children's ones: flared, cut at the waist or with a yoke, with a fastener in the front or on the back, a sundress and a tulip dress, with or without long sleeves. Depending on the model, the dress will require a cut of 30-35 cm in height and 80-140 cm in width. If a dress pattern is used as the basis for constructing a drawing of a jacket or coat for a doll, then it is worth considering the thickness of the fabric. For a model with insulation or simply thick material, all allowances should be increased for a loose fit. The front of the coat consists of two parts; in the center of the front, you need to calculate the increase in the fastener to overlap one front to another. The neck of a jacket or coat is processed with a hem, the hem is cut out together with the front or separately.
The jacket or coat can also be equipped with a hood or collar. The hood is a rectangle, one side of which is the length of the neckline between the extreme points of the shelves. And the second side is equal to half the circle passing from the chin to the top of the head. Fold the rectangle in half and stitch, stitch the opposite side into the neckline.
Pants for Baby Born
For those new to sewing trousers and panties for Baby Born, it is better to start sewing from elastic fabrics. You can make pants patterns yourself or find them on the Internet.
Sewing panties is elementary. The side seams are sewn first, then the step seams and the seat seam. The seam allowance for the top of the pants should be folded to the wrong side, stitched at a distance of 1 cm from the fold, leaving 1 cm unstitched for threading the elastic band. Then you need to measure the doll’s waist circumference, subtract a couple of centimeters from this measurement and cut off the resulting value from the elastic band. Insert the elastic into the top of the pants and sew the ends together.
Hem the bottom of the pants with a hem seam.
New tights from old ones for Baby Born
Making tights for your favorite doll is not at all difficult and quite quick. The main thing is that everything is at hand. And sewing a hat is even easier and faster. But that’s all later, but first let’s sew some tights.
So, to sew tights for Baby Born you will need:
- children's small tights or tight women's tights;
- scissors, chalk, thread and needle or sewing machine;
- thin linen elastic or decorative elastic.
The process of sewing tights for a baby doll is very interesting and fast.
We take tights. We cut off one leg of the tights and also cut off the heel and put it aside, we will need it later.
We attach the baby doll and measure the length of the tights, cutting off all excess.
We cut one part of the tights in half not completely. There should be a reserve of 2 centimeters of tights in the belt, since we will also sew on the elastic.
We cut off the feet and make them semicircular. Now all that remains is to sew our part.
When we sewed the tights, all we had to do was measure the required length from the elastic band and sew it into the waistband of the tights.
This is how we quickly and easily sewed tights for Baby Born.
How to sew a bodysuit for a baby Bon doll
What is a bodysuit? This is a modern variation of the old vest, a joint set of T-shirt and panties, with buttons (Velcro, buttons) between the legs. Fasteners make it easy to change diapers without taking off excess clothing. The bodysuit is quite tight-fitting, comes with or without sleeves, with a collar or simply with an open neckline. So, a bodysuit for a baby Bon doll.
You can sew a bodysuit for a doll together with your daughter
Let's take a piece of knitted fabric. This thing will be without fasteners, so choose knitwear of any color that you and your child like. For the fastener we will use Velcro. The holes for the arms, legs and neckline can be covered with knitted tape (silk tape will not work, since it will not be possible to put such a bodysuit over your head without a fastener). We cut four parts:
- front end;
- back;
- 2 sleeves.
We take measurements like this: length from shoulder to groin, length at the back. To draw a pattern, you need a base - the cut of a blouse and panties. We lay out both patterns, combining one with the other, put the panties on the blouse and place them in pairs. We observe the dimensions of the doll. We outline the pattern.
Lay out the pattern on the knitwear, cut off the pattern and fabric. Trace with chalk with seam allowance. We cut it out, remove the pins, tape around the desired edges, and baste. Then we need to do a fitting and, if necessary, adjust our details. If everything is in order, we sew together the main parts of the new thing and do another fitting. Remove the basting and sew on the Velcro. Let's try our work on the doll again.
If you want some decorations on the body, you can sew on an applique or do embroidery on the chest, you can sew on sequins and small beads.
That's all the tricks, the main thing is to be careful and respect the dimensions. You can involve your child in this activity and then playing with these clothes will be doubly interesting - after all, they are sewn with your own hands!
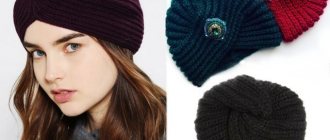
cap
For winter, the doll will need warm clothes. Knitted materials and old sweaters are suitable for the hat. Sewing a headdress is so easy that you don't even need a pattern. You need to measure the circumference of the doll's head with a measuring tape and cut a circle out of the fabric, leaving room for the seams. Then a lace or elastic is sewn along the edges so that the hat stays on the head and does not slip off. If desired, you can make garters from threads. You can decorate the fabric with sparkles, beautiful buttons and rhinestones. Unusual embroidery will also be a decoration. You can make a small triangular pattern along the hat. A soft pompom at the top of the hat will also look beautiful.
It’s even easier to sew a hat from the above-mentioned tights. We take a sock with a heel from tights and form a hat out of it. There is no need to sew anything here anymore. The hat is ready, all that remains is to decorate it. You can sew a bow from colored ribbon, decorate it with a bead and sew it to the hat. This is how we easily made a beautiful hat for a doll.
Subtleties of self-tailoring
To create outfits for a baby born, you just need to show a little imagination and prepare everything you will need for the job. You should ensure that you have the following materials:
- textile;
- scissors;
- tape measure;
- paper and pencil for creating clothing patterns for baby Bon;
- threads with a needle.
It is best to sew on a sewing machine. True, you can cope with this work even in its absence. All actions can be performed manually.
To sew clothes for a baby boy, it is not at all necessary to purchase fabric. You can use old dresses and T-shirts, scraps left over from sewing. The outfit can also be knitted. In this case, you need to prepare the yarn, as well as a hook or knitting needles. After this, you can start creating doll wardrobe items.
Skirt
After selecting the appropriate material, you can begin to create a pattern for the baby boom. For this purpose, you need to take measurements and determine half the circumference of the hips and waist, as well as the length of the future skirt. In this case, add a centimeter to the length and width of the product for the seams. Ideally, the width should be twice the actual waist circumference. Due to this, folds will be formed.
At the next stage, a yoke pattern is created. In this case, a couple of centimeters are added to half the waist circumference. At the bottom, the yoke should correspond to half the circumference of the hips. The drawing should also indicate the additions and round off the contours of the resulting structure. In this case, the pattern should be aligned with an arc that extends slightly downwards.
Based on the pattern for the baby boom, blanks are made.
The edges of each piece are finished to prevent fraying.
The belt blank is folded on each side.
The belt is connected to the base of the future skirt.
The base is pulled together and fixed with pins.
Tulle is sewn to the resulting workpiece.
All that remains is to fix the Velcro on the skirt and the baby born outfit has already been created on your own. You can try it on a doll and evaluate the result.
Trousers
Based on the basic pattern of baby clothes, you can sew a wide variety of pants models. This is due to the fact that dolls of this type have the same sizes. Therefore, there is no need to take measurements.
Simply select the fabric, transfer the pattern details onto the canvas, cut out all the elements taking into account seam allowances and process the cut areas. After this, all that remains is to connect all the elements into a single whole. It will take a minimum of time and effort to sew clothes for a baby boy. Additionally, the pants can be decorated with all kinds of decor. For example, beads or rhinestones, all kinds of ribbons. Such trousers will look much more attractive and original.
Shoes
In addition to clothes for Baby Bon dolls, you can also make your own shoes. For the summer period, sandals are an excellent solution. To make them, you need to prepare soft leatherette. Initially, a blank is made, which is an insole. Its length is determined by the doll's foot. In this case, you should cut a couple of wide strips, the width of which is about one and a half centimeters, a couple of long strips, only 2 mm thick, as well as several short ones of the same thickness. With their help, the sandals will be fixed on the foot.
Thin strips are then threaded into wide ones. They should be glued or sewn directly to the sole. All that remains is to fix the heels on the future shoes. Thanks to their presence, the sandals stay securely on the foot and do not fall off.
Ready to use
If this process of making shoes seems complicated, there is an easier way to go. For example, knit socks or booties for a doll. This is quite relevant, because a toy is a small baby. Naturally, in this case, the use of full-fledged shoes is not at all necessary.
Overalls
DIY clothing can be made using the life-size pattern below. True, in this case it will have to be lengthened a little. For this purpose, you should determine the length of the leg by taking measurements along its inner side. This parameter is transferred to the drawing in the step line area.
The fabric should be cut with allowances. They are about a centimeter. Then it remains to sew the side and middle seams from the back side. The front one is stitched only a couple of centimeters. This is due to the fact that there will be lightning in this part. All that remains is to sew in this fastener, attach the sleeves, sole, as well as the toe and hood. After this, the armholes and lower part of the product are processed. If desired, the overalls can be additionally equipped with a lining.
Clothes can also be knitted using this pattern. You just have to choose the right yarn. Instead of a zipper, it is allowed to use regular buttons. Such a jumpsuit is sure to delight your child. It will turn out to be very original and attractive. You can even use several shades of yarn to get the most vibrant and interesting product.
Sundress
To sew a sundress yourself, just print out the pattern below and choose the appropriate length. Further work is carried out according to simple instructions.
The pattern is applied to the fabric and three parts of the base and the same number of lining parts are cut out. In this case, it is advisable to process the edges with bias tape or overlock.
All the resulting elements are connected in the neck area and secured with pins. After this, the resulting structure should be stitched on a typewriter.
Now the lining and main fabric are joined separately along the side seams. These elements are secured with pins and then stitched.
At the bottom, the lining is connected to the base by making a hidden seam.
Buttons are sewn on the back so that the sundress on the doll can be fastened.
A decorative pocket is sewn into the front part. It can also be decorated with fringe and all kinds of decorations.
A similar pattern can also be used when knitting a sundress. True, in such a situation it is not at all necessary to equip the product with a lining. You can safely experiment, use all sorts of patterns and colors to make the outfit even more original and attractive. In this case, there is a huge scope for imagination and experimentation.
Shoes
Shoes for Baby Born are ordinary baby booties that can be sewn or knitted. The bootie patterns are very simple. Felt is an ideal material for sewing doll shoes. The edges of the parts do not crumble, the material is dimensional stable.
Sewing clothes for a doll yourself is always fun and interesting, especially with a child. You can not only replenish your doll’s wardrobe, but also teach children how to use a needle and thread. In addition, there is no need to buy expensive dresses and suits.
