Fabric drawstring
- Fold A along the waist circumference of the product and iron it to the wrong side of 6 mm of fabric and again to the required depth of the drawstring. Pin across.
- Sew the bottom edge of the drawstring, leaving a free area for threading the elastic. Topstitch the top edge of the drawstring very close to the fold.
Drawstring in hem
Another option for creating a drawstring is the hemming method. To create it, you do not need a separate strip of fabric, since all the work is done using the main material. You can also use an elastic band or rope.
It is suitable for trousers, jeans, hoods and sleeves. The method will also help to form an elastic band at the waist of the skirt.
- Sew the edge of the product with a simple stitch. Then wrap it to the distance that corresponds to the width of the elastic plus 3-4 cm for free passage. Iron this hem.
- Sew the hem with a straight stitch, leaving an opening for the elastic to enter.
- Use a pin or special tool to insert the elastic into the hole. It should go through the entire drawstring and come out the other end.
- Stretch the elastic and machine stitch it to finish it off.
- Straighten the fabric and elastic along its entire length.
- Close the hole with a simple machine stitch and turn the product inside out.
HOW TO SEW IN AN ELASTIC BAND - FOUR WAYS (in step-by-step master classes). HOW TO SEW IN AN ELASTIC BAND - FOUR WAYS (in step-by-step master classes).
In this article I have posted all FOUR methods of sewing in elastic. And for those who have a modern machine. And for those who have an old hand-made Singer from their grandmother, and even for those who do not have a sewing machine, I will tell you how to sew in an elastic band by hand. A NOTABLE METHOD for uniformly sewing in elastic (for those with a machine without a zigzag stitch). Manual method of sewing in an elastic band (for those who do not have a machine) ZIGZAG METHOD of sewing in an elastic band (without pulling it during the sewing process, but only after sewing) PUSH METHOD of sewing in an elastic band (for any machine) BOBBIN METHOD (will help sew in an elastic thread on a regular sewing machine typewriter) I already talked about some of this in the article about beach dresses with elastic. But I wanted to consider all possible cases of using elastic bands in clothes. And give a more detailed and understandable method of sewing them to clothes. But before that, we will proceed directly to our lesson. I want to inspire you with beautiful pictures of clothing models using elastic bands. You can sew stitching into all these clothing models yourself following the lessons from this article. So let's admire, and therefore let's learn. Elastic on the shoulders. This is the most common use of elastic on tunics and off-the-shoulder dresses. The pattern of such a product is always a modification of a truncated pattern - when the shoulder line and the top of the sleeve cap are cut off. HOW TO SEW IN AN ELASTIC BAND - FOUR WAYS (in step-by-step master classes).
Elastic on the hips. Serves to provide a slight allowance for free-flowing fabric above the hip line and wavy fabric below the elastic line. HOW TO SEW IN AN ELASTIC BAND - FOUR WAYS (in step-by-step master classes).
Elasticated waist. It is used when you need to fit a product without a belt while maintaining the splendor of the folds both above and below the elastic line. HOW TO SEW IN AN ELASTIC BAND - FOUR WAYS (in step-by-step master classes).
Elastic band under the bust. More often found on loose, fluffy tunics, and serves to emphasize the chest, while maintaining freely flowing pomp in all other places. HOW TO SEW IN AN ELASTIC BAND - FOUR WAYS (in step-by-step master classes).
The elastic is sewn vertically. Ideal for creating horizontally directed draperies. HOW TO SEW IN AN ELASTIC BAND - FOUR WAYS (in step-by-step master classes).
Elastic band on the chest. Most often, it is used to rubberize the entire upper part of the tunic - both on the front and on the back. HOW TO SEW IN AN ELASTIC BAND - FOUR WAYS (in step-by-step master classes).
Elastic on the back. Or sometimes only the back area and (if available) sleeves are treated with elastic thread. HOW TO SEW IN AN ELASTIC BAND - FOUR WAYS (in step-by-step master classes).
Elastic on the sleeves. The sleeves are also partially rubberized for decorative purposes - in the cuff or shoulder area. HOW TO SEW IN AN ELASTIC BAND - FOUR WAYS (in step-by-step master classes).
And, of course, sometimes in all of the above cases, fashion designers can replace the elastic with ordinary non-elastic twine pulled into a simple drawstring. The fabric will also gather and fit, but such gathering on twine, of course, will not give elasticity. HOW TO SEW IN AN ELASTIC BAND - FOUR WAYS (in step-by-step master classes).
Well, now let’s proceed directly to our master classes on sewing in elastic. You and I will often model a tunic, dress, hat or swimsuit that will have an elastic band. And we will need to sew it in. There are two types of elastic bands... 2 types of elastic bands Ordinary elastic bands (that is, simple underwear elastic bands) They come in different tight and soft ones, with lace or frilly, figured, etc. Elastic bands can be sewn on by hand or by machine. Elastic threads (elastic threads) - they are sold in the form of spools (the same as threads). The thread itself is a rubber fiber wrapped in a spiral with a hebesh thread. Such elastic threads can only be sewn on a machine. Although…. if the fabric has a small hole, then they can be sewn into the dress even with a regular crochet hook. Or manually thread it through the holes. No matter what elastic bands we sew in, in any case we will need to follow 2 rules. 2 rules for sewing elastic bands:
Rule 1: when sewing on an elastic band, you should try not to tear the rubber veins inside the elastic band with a needle. Otherwise, the elastic band may become deformed and lose its elasticity over time. This happened in one of my daughter’s purchased dresses and I had to change the elastic. In order for the needle to pierce the rubber veins of the elastic band to a minimum, you must try to ensure that it passes between the rubber veins of the elastic band as much as possible. Or a zigzag stitch - it is more gentle, because... The stitches jump over the central elastic fibers of the elastic.
Rule 2: The elastic must be sewn with uniform tension along its entire sewing length. Otherwise, we may end up with a dress that is tightly gathered in one place, and only a couple of folds in another. How to ensure uniform tension of the elastic along the entire length of the sewing? There are several ways. We will now look at all these ways to evenly sew elastic bands into clothes.
STITCH METHOD - for those who only have a simple stitch on their machine. or for those who will sew the elastic on by hand. I called this method “basting” because we will divide the elastic and the dress into equal sections, and each section of the elastic will be basted along the edges to its own section on the sewing line - this is necessary for uniform sewing of the elastic. I will display this method in the picture so that everything is clear. The whole stage of work is based on the example of this dress with an elastic waist.
You can see that the dress is loose-fitting and has an elastic band sewn into it at the waist level. Not in a very tight stretch - but to give the dress soft folds. It looks beautiful on flowing fabric. The detail of the dress (the pink part) into which the elastic is sewn is shown in Fig. 1. Now we will see all the stages of work on UNIFORMLY sewing elastic under tension. Step one - draw a sewing line for the elastic band. Find the elastic sewing line - draw it directly on the fabric with chalk or a pencil (Figure 1). Step two - find the desired length of the elastic band. We take an elastic band and wrap it tightly around our waist. Not a tight stretch, but a comfortable one, so that it presses but does not squeeze. Cut off this piece of elastic. And immediately divide it in half - half will be sewn to the front part. The second half goes to the back detail.
We see (in Fig. 3) that when relaxed, the elastic is much shorter than its sewing line. That's how it should be. Because we will sew it under tension (Fig. 4) and after sewing, it will shrink and pull the fabric into uniform gathers. Step three - divide the sewing line into sections that are convenient to hold with two fingers. Now let’s remember the ancient Russian measure of length - span. This is the distance from the protruding large dress to the index. It is in this two-fingered way that we will stretch the elastic under the machine foot when we sew it on. Therefore, we divide the sewing line for the future elastic on the dress into spans. Directly with your hand - we walk along the line with spans and mark the boundaries of the spans with chalk.
Step four - transfer the marks to the stretched elastic band. Now we stretch the elastic next to our sewing line and transfer the same marks with a pencil to it. It is convenient to do this on the carpet - press one edge of the elastic with the heel of your foot, pull the second edge of the elastic with your left hand, and use your right hand to draw strokes with a pencil.
Step five - sew the marks on the elastic to the marks on the dress. Now we release the rubber bands with marks. We sit down on the sofa and calmly sew the elastic to the sewing line IN THE PLACES OF THE MARKS - that is, manually using a needle and thread we fix the mark on the elastic with a similar mark on the line of the dress with 3-4 stitches.
Step six - attach the elastic to the sewing line. We have fixed all the marks and now you can put the product under the presser foot. We stretch the first piece of elastic between the marks with two fingers of our right hand - the fabric is aligned, the elastic is in tension - and we sew with a regular line or a zigzag stitch. We sewed one section - we stopped the machine, the needle was down in the belly of the machine and the foot was lowered (so as not to move from the line) - we pulled on the next piece of elastic and sewed again.
An easy way to sew an elastic band BY MANUAL (without a machine) is to stretch it on the edge of the table.
Yes, yes, elastic bands can even be sewn in by hand - if the fabric is variegated or bouclé, that is, it is not afraid of crooked stitches, for the reason that they are simply not noticeable on it. Moreover, after sewing the elastic, the fabric at the sewing site will wrinkle greatly and all the stitches (no matter how crooked they may be) will be hidden in wrinkles and folds. I sewed my first peasant blouse with elastic at a time when I was still afraid of a sewing machine. I used the same method of drawing marks on the elastic and on the fabric that I described above. The only difference is that when sewing, I did not put the fabric under the machine foot. I simply stretched the fabric with a span on the edge of the table (to make it easier to pry with a needle and thread) and sewed it tight with ties. The fabric tightened and hid the crooked stitches. In one evening I had an exclusive item, absolutely handmade.
ZIGZAG METHOD is the simplest. Suitable for both regular elastic and elastic thread. This method is generally the easiest for those who have a zigzag stitch on their machine. And it can even be done manually - after all, a zigzag stitch can be done manually. This method can be used to sew on both elastic thread and elastic tape. It is remarkable in that even an ordinary underwear elastic will be sewn evenly - and there is no need to make any fixation marks. I’ll show you how this happens in pictures.
Step one - create a sample of the ideal piece of elastic. We also start by wrapping the elastic band around the waist, choosing the optimal tension for us. Cut off this rubber girth. And we cut it in half - but we will not sew on this particular half. She will serve as a model for us later. Now you will see and understand everything.
Step two - sew a wide zigzag behind the edges of the long elastic band. Take a new piece of elastic the same length as the width of the product or longer. We place it under the machine foot and select a zigzag stitch such that the zigzag step is wide enough, and the needle never touches the elastic itself, but makes a zigzag, piercing the fabric a few millimeters from the elastic - Fig. 13. That is, as you may have guessed, we need the elastic to move freely inside the zigzag.
Step three - try on the sample elastic band to the elastic band under the zigzag. And when the entire elastic band is under the zigzag, we put our sample next to each other and make 2 marks on the elastic band under the zigzag - at the same distance as the edges of the sample segment - fig. 14.
Step four - tighten the zigzag elastic band to the desired length. Now we pull the ears of this “zigzag” elastic band until the marks are near the edges of the product. There they need to be fixed - that is, manually sewn to the edges of the product with several strong stitches. All is ready. By the way, you can do this zigzag manually - it’s very convenient and fast. Under such a zigzag - but with a smaller stitch pitch, of course - you can also place elastic threads. You also put an elastic thread on the elastic sewing line. And in the same way, you cover it on top with a zigzag stitch - without piercing the elastic thread itself anywhere. And then we tighten the elastic thread inside this zigzag to the degree of tightness we need.
You can also place the elastic not under the zigzag stitch, but under a specially sewn strip of fabric - that is, a drawstring. Here is this method: STICK METHOD - very simple and suitable for any machine. We measure the length of the elastic sewing line with a centimeter (Fig. 17). We measure a strip of fabric (Fig. 18) of the same length. The width of the strip should be sufficient for our elastic to be hidden in the future drawstring - that is, the width of the elastic + seam allowances is equal. We sew the drawstring to the line where the future elastic will pass - Fig. 19. And we pull our elastic into the resulting “tunnel” - that is, the drawstring. We pull it in using a safety pin - we pin it on one end of the elastic and pull it through, feeling the pin inside the drawstring with our fingers, pushing it forward, wrinkling the fabric along the pin. The pin is slippery and fits well under the fabric, and pulls the elastic along with it.
To prevent the back end of the elastic from slipping inside the drawstring, it is better to first sew it to the entrance edge of the drawstring. And then, when the forward tip of the elastic appears on the other side of the drawstring, it will also need to be sewn firmly to the outlet hole of the drawstring. Then the elastic will be firmly fixed at both ends of the drawstring and will never pop out.
WE SEW IN RUBBER THREADS - on a regular machine with a simple line.
We will talk about the BOBBIN METHOD OF SEWING in elastic threads. This method is suitable for any machine. You need a spool of regular non-stretch threads and a spool of elastic threads.
We wind the elastic band onto the bobbin with a slight stretch (then we will tighten it at the line, if necessary). And we thread a regular thread on top - and make sufficient relaxation in its tension. Practice on a piece of fabric - we need to select the tension of the upper thread so that it forms small loops on the wrong side. That is, the elastic thread from the shuttle will not be pressed into the fabric by the top thread, but will lie freely inside the loops.
When the stitching is completed from edge to edge, you can safely tighten the elastic thread to the desired tightness. It will move calmly inside the loose loops of regular thread. As you can see, there are a lot of ways to quickly and easily, and most importantly correctly, sew elastic bands into your product.
Today I want to talk about how to sew on a drawstring. I’ll tell you using this example. For it, I took a pattern from a regular shirt, but I didn’t make waist darts. First, you need to decide where the drawstring will be, either at the waist or just below. This already at your request. I make a basting mark in this place, tighten it to the required width, and see in the fitting how the product looks on the figure. If necessary, I adjust the height of the drawstring. Then I will definitely duplicate the place where the loop will be on the wrong side.
We make loops on both sides.
We cut out a strip of the required length (measure the length from loop to loop + 1.5 cm). 4 cm wide, 2 cm in finished form. Iron the allowances to the wrong side. Adjust the drawstring on the wrong side of the product. I have a checkered fabric, it’s very convenient - we pin it by cell. We adjust along the entire perimeter with a seam width of 1 mm
To make a tie, if necessary, you can sew several parts into one piece. Fold the ties in half with the right side inward. Lay a stitch, turn it inside out. Or you can immediately fold the seam allowances inward and sew a stitch along the front side, as I did in this case. Cut the loops. Pull in the tie. Important: after each operation performed we perform a WTO.
The drawstring is a fabric channel for making a tie. Just like a dress with it in the neckline, the model often does not require darts, a cut-off belt, a set-in sleeve, or a fastener. A dress with a drawstring is usually called a product with a straight cut, with dropped sleeves or batwing sleeves.
blogspot.com
Tuned drawstring
- Cut a strip of fabric along the length of the elastic and add plus two cm; if necessary, stitch it together from several fragments. Lay and iron six mm, first on short, then on long sections.
- Pin the strip of fabric with the edges pressed right side up along the drawstring stitching line.
- Sew the drawstring right side next to the fold of each long edge. Iron, then insert elastic or cord (see page 134).
Elastic on sleeves
The sleeves are also partially rubberized for decorative purposes - in the cuff or shoulder area.
And, of course, sometimes in all of the above cases, fashion designers can replace the elastic with ordinary non-elastic twine pulled into a simple drawstring.
The fabric will also gather and fit, but such gathering on twine, of course, will not give elasticity.
Well, now let’s proceed directly to our master classes on sewing in elastic.
You and I will often model a tunic, dress, hat or swimsuit that will have an elastic band. And we will need to sew it in. There are two types of rubber bands...
Drawstring on trousers or skirt
- Cut out a strip of the required length and width, taking into account 6 mm allowances on each side. Fold and press the seam allowance to the wrong side. With the right sides facing, pin the entire drawstring to the product.
- Make sure that both ends of the drawstring meet at one of the vertical seams of the product. Sew along the pressed fold of the drawstring and fold it over to the wrong side. Iron it.
- Sew along the bottom edge of the drawstring and then stitch along the top fold of the drawstring. The ends at the junction of the drawstring must be left open; an elastic band will need to be inserted into them.
Drawstring skirt
Then measure the length of the skirt down and draw a second line. After this, we cut out our skirt and it is almost ready, all that remains is to sew it. All we have to do is make a hem at the bottom and a drawstring as a belt. When cutting, it is important to correctly calculate the length of the skirt so that the width of the belt is the desired height. Usually they make it according to the width of the elastic band and add a couple of millimeters to make it easier to insert it into the belt. You need to leave a hole to insert the elastic; you can simply leave a small area without a seam, and then carefully sew it up.
Assembling the drawstring on a cord or elastic band
You can insert a cord or elastic band of suitable width into the drawstring. It is necessary that the elastic band is new and durable. It is better to take a braided elastic band - it almost does not wrinkle in the longitudinal direction. To calculate the length of the elastic, measure the required circumference of the figure and subtract it by a few centimeters.
Elastic in a stitched drawstring
Working with a circular drawstring stitched from the wrong side of the product, at the junction, bend the ends of the strip of fabric, but do not sew them. Thread an elastic band through this gap and connect the ends. Then sew the shelve on the drawstring with a hidden seam.
If the drawstring is located on the front side of the product, then the hole for threading the elastic is left in the side seam. Before stitching the drawstring, sew the side seam allowance near the opening with a goat stitch. Sew the drawstring according to the basting. Insert the elastic and connect the ends.
How to make a drawstring? (part 1)
Hello, friends!
The “heroine” of my article today is the drawstring. What is a drawstring, in what places on finished products can it be found, the features of its implementation. These are the questions the answers to which you will find in this article and several subsequent ones dedicated to the drawstring.
You will know everything about the drawstring. And you can easily make a drawstring on a dress, skirt, trousers, blouse and even a fur coat.
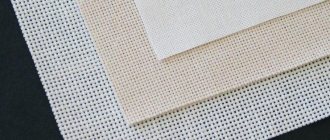
A drawstring is either a strip of fabric stitched onto the product, or part of the product - a folded section (neck section, bottom of the front and back panels of the skirt, bottom of the sleeves, etc.). On the finished product, the drawstring is a fabric tube into which elastic bands (elastic bands), belts, cords, ties, rolls, leather and wicker ribbons, ribbons, etc. are threaded.
The drawstring on finished products can be found in completely different places. Along the neckline, on collars, on hoods, along the waistline, above the waist, below, along the hips, in any part of the sleeve, etc.
The drawstrings are placed on the products vertically, horizontally and at any angle to these lines.
Types of drawstrings.
Settings.
“Ring”, “almost a ring”, “arc”
- on a solid piece (under the bust, at the waist, above or below the waist, at the neckline, on the sleeves (anywhere))
- along the edge of the product or at some distance from the edges.
Drawstrings from hems, drawstrings in seam allowances.
- along the edges of products and near seams.
You can read about all types of drawstrings by clicking on the following links.
Drawstring - general information about holes for ties and elastic bands (today's article).
Adjustment drawstrings: “ring”, “almost a ring”, “arc”.
Drawstrings in hems of products, in seam allowances.
Drawstrings for elastic bands: part 1 and part 2.
Of course, on the finished product the drawstrings “play the role” of a certain finishing element. But much more important is the functional load that the drawstring “pulls on itself”. After all, the part of the product where the drawstring will be located can be reduced in volume (for example, fitting) or gathered, thereby changing the shape and silhouette of the model.
Even if the product being sewn is not made using a pattern from a serious fashion magazine, then, as they say, this does not negate the fact that the drawstring on the finished product must be accurately and accurately made.
And for this, the place where the drawstring will be placed on the product and the holes for threading the tying parts must be clearly marked.
It is best to apply lines - marks under the drawstring at the pattern stage. Depending on what type of drawstring will be made and where it will be located on the finished product, either all the lines (contours) of the future drawstring are applied to the pattern, or partially. But the “coordinates” of short transverse sections that are not connected into a ring, as well as the intersection of the drawstring with the seams (for example, side, in the middle of the back, etc.) must be marked.
And then, using marking tools, exactly all the lines and marks are transferred to the main, one or several, parts.
The most difficult thing in making a drawstring is to apply precise markings to the product for the holes through which the tying parts will be pulled.
Here we need to work very clearly. Without exception, all holes (of different shapes and methods of execution) should be located in the place where the central longitudinal line of the drawstring will pass.
And since the holes are always made in pairs, at least two, they should be located symmetrically (except for the holes for threading the elastic).
The peculiarity of performing the drawstring is that before you take on the drawstring itself! , you need to make holes for threading it, if, of course, they are provided for by the type (type) of the drawstring.
Drawstring holes.
Holes for threading elastic bands, belts, ties, rolls, ribbons, ribbons, etc. can be done
In the seam.
When sewing, leave a hole in the place where a belt, elastic band, tie, braid, etc. will be threaded into the drawstring. It should be as wide as the width of the parts that will be threaded into it.
And in order for the width of the hole to remain unchanged while stitching, its ends, at the intended edges of the hole, need to be reinforced with bartacks.
For elastic drawstrings, the entrance to the drawstring can be made through an unsealed hole in the seam.
Overcast holes.
The entrance (exit) from the drawstring, for threading the tying elements into it, can also be made using stitched holes. They are made both on the drawstring from an additional part (adjustment strip), and on the main part (bodice, bottom of the sleeve, bottom of the skirt, etc.)
But before making a hole, the place where it will be located needs to be strengthened.
The area under the hole, on the wrong side of the future drawstring, can be strengthened by placing and sewing a piece under it (square, rectangle, circle, oval, etc.)
- some durable non-woven material;
- or from the main fabric;
slightly larger than the hole.
A piece of non-woven fabric can also serve as a reinforcing material. It is attached to the desired place with a hot iron.
Overlocked holes can be round (for narrow rolls, ties, etc.), oval, or like a regular loop for a button fastener.
Overlocked holes can be made by hand, using loop stitches or using a sewing machine.
Overlocked holes, both on the drawstring itself and on the parts of the product, can be located both vertically and horizontally.
After making the overstitched holes, the excess from the auxiliary piece of material must be cut off.
Webbing holes.
Holes for threading tying elements can also be made in the form of a facing hole.
Holes on the drawstring or main part, made using 1) eyelets (metal or plastic frames), 2) blocks.
You can make such holes yourself by purchasing a set of the necessary parts and tools for their installation at a specialized store. Or use the services of workshops and ateliers for repairing and sewing clothes.
Very often, when making such holes on outerwear, they are additionally reinforced with pieces (squares, triangles, diamonds, circles, etc.) of non-woven materials. And they are placed on products, both on the front and on the back side (according to the model).
The entrance (exit) to the drawstring is from its short, transverse edges.
If the drawstring is located only on part of the product and is not a ring, then the exit (input) for the tying parts can be made from the side of its short transverse edges.
When the drawstring is adjusted to the product, it is “attached” to the product only with the long longitudinal sides, and the short, transverse, folded sides remain unattached and are used for threading belts, cords, elastic bands, ties, etc. into them.
How to make a drawstring into which non-elastic ones will be threaded! cords, ties, rollers, belts, ribbons, braids, etc.
A drawstring made of an additional part (tuning strip) stitched over the marked line on the product.
An additional detail (tuning strip) for making drawstrings can be
- Strips made of main, lining or additional fabric (companion fabric, contrasting in texture or color);
- With sealed longitudinal edges, ribbons, lace;
- Strips of non-woven fabrics or lightweight knitwear.
The drawstring detail in the cut should be:
1. The required length (according to the model), plus allowances (1 - 1.5 cm) on the short, longitudinal sides for making hems on them or for joining them with a seam.
2. And width. The width of the strip under the drawstring should be equal to the width of the tying element that will be threaded into the drawstring (for example, an elastic band, cord, etc.), plus 0.6 cm for freedom of pulling. And also, on each longitudinal side, you need to add 1 cm of hem allowance or 0.5 - 0.7 cm of allowance for processing the cuts from fraying.
The strip of fabric for the drawstring must be cut along the bias thread. Those sewing lovers who sighed heavily when reading this information, that, they say, again on the bias, what a waste of fabric, I hasten to reassure you, any, even very tiny, deviation from the grain thread is considered bias.
If, at the same time, the length of a piece of fabric is not enough to cut out one whole part for the drawstring, then it can be made up of several separate ones.
But so that the allowances of the connecting seams, such a prefabricated drawstring, on the finished product, end up inside the drawstring.
For drawstrings located on the reverse side, it doesn’t matter what these parts of the drawstring that make up a single whole will be.
For drawstrings that will be located on the front side, the length of the parts to be connected must be such that the seams on the composite drawstring coincide with the seams on the product.
In the next part of the article we will talk about the preparatory work on the details of the drawstring cut, before “attaching” it to the main parts of the product.
That's all for today! Good luck to all! Sincerely, Milla Sidelnikova!