How to hem jeans correctly? First of all, you need to correctly mark where to cut your jeans. To do this, you first need to align both legs of the jeans, baste the double hem seam and then hem the jeans using a sewing machine. If your jeans are very worn out and have holes in the knees, you can easily turn these jeans into shorts.
In this video you will learn how to hem jeans while maintaining the original seam.
In this video you will learn how to hem jeans using a sewing machine.
Don't forget to add a double hem width to your jeans shortening line.
Hemming jeans or hemming men's trousers is a reason to get the sewing machine out of the closet and try making a jeans hem yourself. Cutting jeans seems to be easy, but hemming them by hand is outdated, especially when you have a sewing machine at home. All you need to do is cut the jeans evenly, make two lines, and the jeans are hemmed. And why do the studio charge that kind of money? However, everything is not so simple. Only experienced and trained professionals can hem jeans correctly and accurately Moreover, it is possible to hem jeans “without problems” only on a special industrial machine capable of sewing thicker areas of denim seams.
Before hemming the jeans, you need to accurately mark the bottom line of the jeans shortening and add the width of the double hem to this mark. There are many “folk” ways to determine the hem line. Including such a unique method as in this photo. Although why not? Perhaps it’s more convenient for you, and most importantly, it’s clearer how to mark the hem line of your jeans.
The bottom line of the jeans leg should touch the floor
In the atelier they mark the hem line for jeans something like this. You, in jeans and without shoes, stand on the mat near the mirror with a lower view. The “extra” sections of jeans (usually one leg) are folded inward and the folded sections are pinned. On the back of the jeans, mark the hem line with chalk. From the heel side, the lower part of the trouser leg must touch the floor. If jeans are worn with high-heeled shoes, then even if it is slightly longer. After that, you put on the shoes you will wear jeans in, and the specialist adjusts the hem line, already focusing on the height of the heel of the shoe. Be sure to bring the shoes you will wear with jeans to the studio. This especially applies to women.
The hem length of jeans is adjusted according to shoes
After this preliminary determination of the hem line, you need to put on the shoes with which the jeans will be worn, and the final length of the jeans is adjusted according to the shoes and your wishes. Strongly tapered women's jeans can form an “accordion”, so they must be adjusted “individually”, taking into account many factors and your wishes.
Measuring the crop line of jeans is done one leg at a time, mainly the right leg, since the right leg is usually longer than the left. The adjusted hem line is marked with chalk along the back side in one or three places. There is no need to mark anything on the front of the jeans.
There is no need to bevel the hem line of jeans at the front.
The next step is to accurately mark the hem line on both legs. To do this, first cut off the side marked on the fitting (right). There is no need to bevel the hem line in the front and do not ask the tailor to do this, since the technology for hemming jeans does not provide for this. Next, from the mark that was made along the back of the leg, draw a line (under the ruler) parallel to the factory line of the bottom of the jeans. And most importantly, before cutting your jeans, don’t forget to add an allowance (3-4 cm) to the double hem. Often, this requires “disassembling” the factory hem, clearing the seam of thread and ironing it. You can cut jeans only after marking an additional line, with an increase for the hem of the jeans.
Belt belt
To be able to wear a belt, you need to sew belt loops on your jeans. Do not make them too wide, as this will make it difficult to insert the belt into the belt loops. The parts are located at a distance of 8-10 cm from each other along the entire belt of the model.
The belt loops must be ironed in such a way that the allowances are inside. Then you only need to lay one line. Next, the belt loops are fixed on the model using safety pins and sewn on both ends.
Aligning both jeans legs
Half the job is already done, just one more leg of jeans left. But here, it seems, everything is simple. In fact, it is precisely in order to accurately mark the hem line on the second leg of jeans that the qualifications of a master are required. Inexpensive jeans are often sewn in semi-handicraft conditions, without particularly worrying about matching the length of both trouser legs. However. This also happens with factory tailoring. This is due to the technological features of mass production of jeans. That's why half of the jeans have different leg lengths, albeit slightly, but they do. Fold the jeans with the legs inside, align them neatly on the table, and you will see for yourself.
In order to accurately determine the hem line on the second leg of the jeans, you need, of course, to fold both trouser legs together and mark a line along the already cut-off trouser leg. It’s just that when you notice, everything seems to be perfectly straight, but when you hem the jeans and put them on, for some reason the legs of the jeans turn out to be different lengths. To avoid this, jeans folded and laid out on a flat table must be carefully aligned.
You need to check and match all the lines of the jeans: side seams, inner crotch, waistline, pockets, etc. You need to smooth out the existing wrinkles on the jeans with your hand so that there is no distortion and “wrinkles”. And only after you are sure that all the lines match, mark the second leg. To do this, you just need to draw a line with chalk along the edge of the already cut right leg. To this line you need to add (now above it) the width of the increase and mark the main line - the hem line of the jeans. This is approximately how marking the hem line of jeans is done in the studio. It’s not difficult, but without experience it’s very difficult to do it accurately, especially for some reason when jeans cost 7-8 thousand rubles.
You may not be able to mark it accurately the first time. So don't be surprised when you put on jeans. In this case, you can “disassemble” the hem and do it all over again. Well, after the first hundred jeans everything will work out perfectly.
How to shorten jeans correctly?
Hi all!
It happens that new jeans fit perfectly on the figure in volume, but in length, to put it mildly, not so much. No big deal, you can hem your jeans.
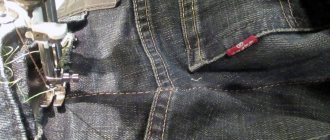
It's very easy to hem plain jeans.
Along the bottom of the jeans, the most common hem stitch with a closed cut (double hem) is re-sewn. And then the jeans are re-stitched along the bottom.
Denim threads, the threads with which finishing stitches are made along the hem and along the seams of denim trousers, can now be purchased in any, even the most “poor” store that sells sewing supplies.
And if there is no ideal thread color for finishing the finishing seam along the bottom of the jeans, the stitching can be done in a different color (according to the model).
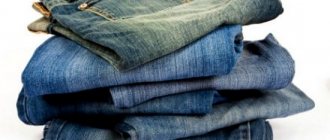
Having hemmed the bottom of the jeans again, we get exactly the same jeans, but a little shorter, just like we need.
When shortening jeans, measurements should be taken from the waistband of the trousers to the bottom. And you need to make changes based on these numbers, and not vice versa, changing the length from below. Initially, trouser legs can be of different lengths.
Jeans manufacturers pay almost no attention to the shape of the trouser leg, whether it is straight, tapered or flared. The hem is done without any “sentiment” or “lisping”. They simply fold and adjust, even if the trousers or hem shrink a little. But this is even a plus for jeans.
After all, the peculiarity of denim trousers is a certain wear and tear of the material at the seams, inherent only to them, the original, “worked” in production. This is the highlight of denim trousers, so to speak, the most “taste” of jeans, the most “tsimes”.
There are such models of “worn” jeans,
re-hemm them,
and it, unworn, will also look organic there. This directly depends on the material, the number and type of abrasions along the seams, etc. (according to model).
You can try to fix abrasions on a new hem yourself, using sandpaper or pumice. (Pumice is a porous natural material of volcanic origin. Sold in pharmacies). However, this “path” is long and does not guarantee success.
Still, when you shorten your jeans, there are ways to maintain their authentic hem.
How to hem jeans while maintaining the factory seam?
The first step is to decide how much leg length will need to be removed and mark the new hemline.
It should be remembered that the hem of the hem with abrasions is also included in the final length of the trousers.
On the wrong side of the jeans, we place the excess material in the fold.
Place it so that the line is directly under the fold on the hem
coincided with the newly drawn line higher on the trouser leg.
It is better to secure the folded fold with pins
or hand running stitch.
After this, along the fold,
along the line passing directly under the fold of the hem
we lay a machine stitch. The stitching is done with threads matching the color of the trousers on the front side.
After the stitching has been laid along the entire circle of the trouser leg, and the ends of the stitching are secured with bartacks, we trim off the excess material of the laid fold. Leave 0.7 - 1.0 cm allowance.
We process the open cut to prevent fraying (overlock, zigzag stitch, hand-stitched loop stitches).
Iron the seam allowances away from the hem.
The direction of the seam allowances upwards from the bottom line is secured with stitches into the seam, laying them along the lines of the step and side seams.
If you look at the bottom of jeans hemmed in this way at eye level, you can clearly see that the method described above in the article to shorten trousers while maintaining the factory seam is somewhat rough and clearly visible.
But fortunately, the bottom of the trousers on the human figure is at the very bottom, almost to the ground. And if this type of shortening is considered from above, as it will be during the use of jeans, then this “processing” looks quite acceptable.
And yet, such shortening of jeans in length causes disgust among “gourmets”, and they call it disparagingly - for the lazy.
Well, now let’s look at how to shorten jeans while maintaining the factory seam in more “refined” ways.
How to hem the bottom of jeans made of thin material, while maintaining the factory seam?
Again, we decide how much length of trouser leg needs to be removed. L + L1 is the finished length of the trousers. We also add allowances on both sides to the lines of the future seam. The width of the allowances is 0.7 - 1.0 cm.
After cutting the trouser leg along the marked lines, we remove excess fabric.
Now, on a separate part (the hem of the jeans), we rip out the line, which was also a kind of finishing detail of the jeans and “held” the hem along the bottom of the trousers.
Place the hem and the bottom of the trouser leg with right sides facing each other.
Depending on whether the trouser legs are flared or tapered, we fit either the bottom of the trouser leg or the hem of the jeans we process (according to the model).
Side
and the step seam of both parts must align exactly.
If it is possible to place side or crotch seam allowances in different directions on both parts, you should use it. (The thickness of the layers of parts will decrease slightly due to the different directions of the seam allowances).
Sweeping away the details
and then we lay a machine stitch with bartacks at the ends.
Line No. 2 is laid along a line 1 mm closer to the cuts of the parts than line No. 1, the one that was opened on the hem.
Jeans models are very diverse, as well as the types of seams on them. And if it is possible to slightly reduce the thickness of the layers of stitched parts, we trim, where possible, the allowances of the side and step seams to 1 - 2 mm.
Then we iron the seam allowances of the completed seam (the seam of fitting the old hem onto the trouser leg of the new length) onto the stitched hem.
We fold the part along the old folds on the hem, giving it its previous shape.
And then along the line of the old stitch we lay a new one, using denim threads of a suitable color.
How to hem the bottom of jeans made of thick material, while maintaining the factory seam?
Hemming the bottom of thick jeans while maintaining the factory seam is very similar to hemming the bottom of thin jeans.
Marked in exactly the same way
and the excess on the trouser legs is cut off.
But unlike the previous method, the cut of the seam allowance on the trouser leg is treated in one of the ways to prevent fraying.
Next, just like in the previous case (see above in the article), we sew the hem detail to the bottom of the trouser leg.
The line, in this case too, is laid 1 mm closer to the cuts than the first.
Only here is the seam allowance, in this case, by ironing.
Fold the hem back along the previous folds.
and adjust it to the trouser leg along the line of the previous line.
The allowance with the cut treated to prevent fraying is secured with stitches into the seam along the lines of the step and side seams.
This is how a stitched hem looks at eye level.
And so from above.
To significantly reduce the thickness of the layers of all newly acquired hems along the bottom of the jeans, you should iron them well on the wrong side of the trousers.
That's all for today! See you in the next article! Sincerely, Milla Sidelnikova!
Not every sewing machine can sew hems on jeans.
You can “safely” hem jeans on a sewing machine only on old grandmother’s machines, such as the Podolsk sewing machine with a manual or foot drive. With such a machine you certainly won’t break anything, except maybe the needle. We strongly do not recommend sewing rough jeans, especially seam joints, on modern household machines. If you don’t have another machine, then it will probably be cheaper to have your jeans hemmed at a tailor.
This video shows a way to hem jeans using trouser tape. This method allows you to maintain the length of the trouser leg and reliably protect the hem of your jeans from rubbing out.
Are you still throwing away your jeans? Ideas, tips and DIY master class
Cool things can be made from denim. Thanks for the ideas, I'll definitely do something. She dragged everything into her hole. Just my old jeans are too small, I’ll also create something!
Every person at home probably has a favorite pair of jeans, worn out by time and various adventures. You don’t wear them anymore, but you don’t even dare throw them away. Your favorite item can get a second life.
Jeans are a casual item of clothing made of thick cotton fabric, with riveted seams on the pockets. First made in 1853 by Levi Strauss as work clothing for farmers.
Initially, jeans were made from English or American-made hemp canvas, which became significantly cheaper due to the decline of the sailing fleet. It is thanks to this material that jeans have gained fame as exceptionally durable clothing. Subsequently, hemp was replaced by cotton, and by the beginning of the “jeans revolution” in world fashion (1960s), hemp fabric was no longer widely used in their production.
Every person at home probably has a favorite pair of jeans, worn out by time and various adventures. You don’t wear them anymore, but you don’t even dare throw them away. Your favorite item can get a second life. We've found 30 great ideas for upcycling denim.
- Butterflies
Butterflies are a stylish accessory, relevant for both men and girls. From one pair of old jeans you can make a dozen different butterflies for yourself and your friends.
- Bags
Old pair of jeans + belt = lunch bag or large tote.
- Wall and table organizers
- Denim cup holder
You can make such a cute cup holder even with children. It looks nice and protects your hands from getting hot.
- Pillow
If you have a brutal bachelor interior at home, then such a pillow will come in handy. Pockets can be used as storage for the remote control.
- Rug
If you have a lot of old denim clothes, you can use them to make a rug, like the one in the photo.
- Holster bag for tools
A great option for men is a holster made from old jeans, which can be used to carry small tools and parts when performing various tasks. Making a holster is very simple. It is enough to cut off the top part with pockets and process the cuts.
- Table napkins
Dedicated to lovers of casual style: a table napkin with a cozy pocket for cutlery.
- Apron
If you take a pair of jeans, connect the legs and trim off the excess, the back pockets will turn into breast pockets, and the jeans themselves will turn into a comfortable apron.
- Earrings
On the eve of Valentine's Day, such a simple decoration is very relevant. Recommended for adults and very young fashionistas, as well as those who are in love with life.
- Gift packaging for wine
A pair of jeans can also be turned into a wine gift box with a functional corkscrew pocket.
- Frame for photos or drawings
Are you tired or stressed? Take your scissors and cut, cut, cut your denim into long strips. You can roll them into rolls of different diameters and use them, for example, to decorate a frame.
- Covers for paper and e-books
- Hot coasters
Another option for the practical housewife is to recycle jeans into oven mitts.
- Necklace
- Upholstery
If you have accumulated a lot of old denim clothing, it may be enough to upholster several pieces of furniture.
- Mask
- Cup holders
Every part of your jeans can be useful to you. For example, the seams make excellent cup holders and hot pads.
- House for a kitten
A few cans of paint, glitter and a love of space are the main ingredients for turning ordinary jeans into galactic ones.
- Decorating jeans with prints
- Lace patches and inserts
Large holes in jeans can be decorated with lace inserts. You can also decorate the edges of shorts, pockets and other parts of the product with lace.
- Gradient jeans
Remember that it is almost impossible to achieve a very smooth transition of colors and the first time the result may not be very happy. Gradient coloring is a matter of practice. By the way, a gradient can also be made using bleach.
- Decoration with rhinestones
- Painting with felt-tip pens
An interesting way to transform jeans, which will require lace fabric and special fabric markers.
- Ripped jeans
You can also cut jeans with a blade many, many times - you get something in the style of one of the Chanel models.
Don't throw away your old combat jeans. Give them new life! We hope that these ideas will be useful to you and will inspire you to start your own handmade projects.
Source
The new video contains many transformation ideas:
For a long time I looked with admiration from the sidelines at all the variety of transformations of boys into girls, shirts into dresses, but did not particularly encroach on my husband’s wardrobe for this purpose. Until, once again, while sorting out the closet, I discovered a denim shirt there from the time of our student days (and that, scary to think, was already... a very long time ago, in general.
Remaking things
Actually, here it is, this trophy of mine: Surprised that I didn’t get rid of it during the last revision, I was determined to do it this time and put it in a bag with things “for moving” (“things for moving” are those I have) things that are still quite excellent, but are already completely boring, so I don’t throw them away, but look for new owners for them, sending them to various charity events or simply taking them to church).
Well, as often happens to me, it was not possible to transport this bag right away. Luckily this time. I don’t remember exactly how this idea (not new to me at that time) came to me, but I eventually decided to remake this shirt into a summer dress-sundress for outdoor activities and add to the already diverse collection of Internet ideas on this heart-warming topic . But jokes aside. Let's get down to business. It is logical that first you need to decide on the model (otherwise it will turn out to be “go there, I don’t know where” and so on in the text). I wanted a loose bag dress that was close to a sporty style. As a basis for this I took the pattern of model 121A from Burda 8/2015: Sleeves immediately to the side (I have a summer dress planned!). Insert with folds too. I divided the front pattern into two parts, mercilessly cutting it above the darts in accordance with my idea and based on the geometry of the parts of the source material (shirt). Well, now you can go all out, that is, start cutting! Yaba-da-ba-doo!.. Since I got the “trophy” quite large (as much as size 54!), I didn’t bother with undoing it, but simply cut the seams (for those who have undressed a smaller man, I recommend After all, it is necessary to rip the seams apart - a couple of centimeters when cutting out can play an important role). The layout of the pattern turned out like this: From the front of the shirt I decided to keep all the details of the front of the shirt due to the fact that everything torn off on the jeans is clearly noticeable. From the front of the shirt, cut out the lower front part of the dress, aligning the waist line (on the dress) with the middle height of the shirt pockets. I cut off one layer of the yoke (usually on men's shirts it is double).
From the back of the shirt From the back, accordingly, we cut out the lower part of the back of the dress, aligning the upper cut with the seam along which the shirt yoke is sewn.
From the sleeves of the shirt, from the sleeves we cut out the upper parts of the front and back with a fold in the middle of each part. In order to “shove” the patterns of the new parts into the frames of the sleeves, I had to cut them upside down (in the photo, the lower cut goes beyond the border of the sleeve, but this is the original pattern, I ended up cutting it along the dotted line, which is visible on the pattern). If the shirt has a pattern or is made from a fabric for which the direction of the cut is important, this number may not work.
Optional step: cut out burlap pockets from the leftover sleeves (I made pockets in the side seams).
Having successfully “wedged” all the parts and sighed with relief, we happily cut out and start sewing. If you don’t make pockets, the algorithm turns out to be completely simple: darts, connect the upper part of the front with the lower part, do the same for the back, then shoulder and side seams - a total of 6 seams! PS I had one more nuance related to the nature of the fabric. In order to hide the difference between my seams and the factory denim ones, I covered the new seams and cuts with leather piping:
Jeans conversion
1. Original phone case.
2. You can make sandals from old jeans. Surely no one will have anything like this.
3. Lace patches and inserts will decorate your jeans and make them more unusual.
4. Denim sock for storing small toys, kitchen utensils and anything else your heart desires.
5. No more putting your phone on the floor while it's charging and being afraid of stepping on it. Make such a cute handbag.
6. Only for experienced needlewomen: a great dress made from jeans.
7. Jeans + strap = handbag.
8. Denim pillow for the cottage.
9. An apron or apron made of jeans is a very practical thing for a housewife.
10. Gift packaging for wine, you can put a corkscrew in the pocket.
11. Wall organizer is what you need!
Take note of these creative ideas, use them or come up with something of your own. You shouldn't keep old clothes in the closet, but rather use them wisely.
This idea will be useful to many women, not only expectant mothers. The method is easy, practical, and will also allow you to save a lot of money. Using this technique, you can fit jeans that have become too tight at the waist.
Jeans don't meet at the waist
You will need:
- jeans that have become tight at the waist;
- scissors;
- elastic band;
- threads with a needle;
- pins.
The resulting item will not only be comfortable, but also very stylish!
You don’t have to go to a special store and buy exclusive jeans at exorbitant prices: you can change your clothes with your own hands. Just a few simple steps and the cute thing is ready!
It is unlikely that there is a material so universal! Having learned what can be done from old jeans, having looked closely at each idea, it is impossible to force yourself to send precious raw materials to a landfill.
What can be made from jeans
Read the most beautiful and fashionable skirts here
I guess now I definitely won’t throw away my worn jeans...
Cup stand! It’s easy: just glue a thin denim tape together.
Braided camera cord and artist organizer!
We will need 121 squares of size 25x25 cm (that's about 12 pairs of jeans). The size of the blanket turned out to be 2.2x1.5 m.
How do you like these bags?
Fun creativity: funny appliques from denim
Inspiring master class! I liked this video the most!
Old jeans are most often used for alteration. There are many things that needlewomen and simply creative people can come up with to prolong their life.
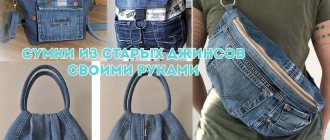
We offer you several models of beautiful women's handbags made from old denim and hope that you will like them and serve as a guide for you to sew such a necessary accessory.
Save so you don't lose.
Source