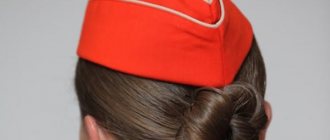
Sewing a scarf with a visor
Sewing a scarf with a visor is no different from creating a model without it. First, head circumference measurements are taken, then a separate scarf with an elastic band at the back is created according to existing developments. Then take the visor, overcast it using a piece of fabric according to the parameters given below and attach it to the product. More detailed information can be found in any handicraft manual or master class. The visor may be fabric, but it will not hold its shape.
You might be interested in this: How to quickly sew a dress on your own with and without a pattern
Scheme for creating a visor
Therefore, a plastic model is used, which can be bought at any craft store.
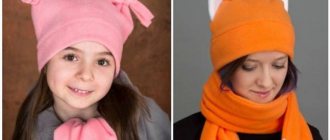
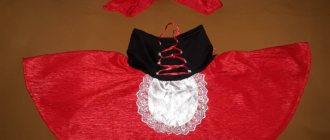
Finished headscarf with visor
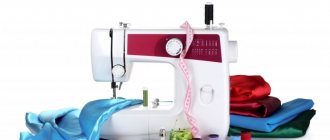
Materials and tools
It doesn't take much time to sew a scarf with an elastic band. Even a novice needlewoman can handle this. To work you need the following tools:
- sewing machine;
- threads of a suitable color;
- basting needles;
- chalk or pencil, ruler for creating a pattern;
- sharp scissors.
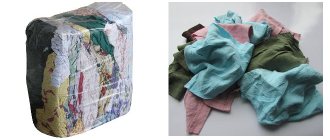
It is important to choose the right material for the job. Headscarves are most often sewn from natural fabrics. Batiste, chintz, calico, satin, and linen are materials that are well ventilated, absorb moisture and do not cause allergies. Therefore, children's scarves are often made from them. Viscose, as well as mixed fabrics with the addition of artificial threads, are good because they do not wrinkle, have bright colors, and do not fade for a long time. To create a romantic and elegant look, silk or chiffon is more suitable.
It will be difficult for a novice craftswoman to work with silk and chiffon. These fabrics slip and fray at the edges, so it is better to choose cotton.
Knitwear is also a suitable material for sewing a scarf. This fabric is convenient because it has all the advantages of natural materials, but is elastic and does not wrinkle. It is because of this that it is more difficult to work with knitwear. An unprofessional sewing machine often breaks the thread or skips stitches.
In order for the headdress to be comfortable, not to press or fall off, you need to choose the right elastic band. It is recommended to take a wide one (2-3 cm), but it should stretch well. You can take two strips of regular narrow elastic. The comfort of wearing a headscarf depends on its elasticity. This is especially important for children.
Fabric selection
Today, a scarf pattern for girls with an elastic band is a functional and design attribute. This is a wardrobe element with which you can decorate a bohemian-casual, hippie, boho outfit, emphasizing femininity and sophistication. Designers often complement the canvases with sun visors, fabric braids, decorative flowers and appliqués.
You might be interested in this: Simple patterns and rules for sewing women's jackets and jackets
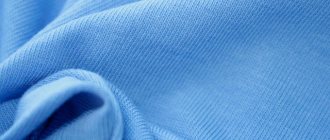
As for the material, it is better to use cotton or linen to sew a scarf with an elastic band for a girl. These are 100% natural, ventilated, hypoallergenic fabrics that will not irritate the child’s scalp. In the sun they will protect him from sunstroke and serve as a charming addition to any outfit.
Cotton as main material
Viscose, polyester, chiffon and other synthetic fabrics are not the best idea for composing a model for a child or for an adult who wants to protect their head from the sun. This is a decorative model that has only one function - aesthetic. Can become a part of any boho style wardrobe.
Chiffon as a common sewing material
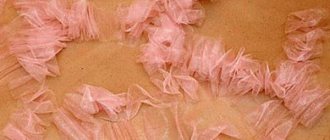
Natural or artificial silk, like satin, belong to the previous models. They can only carry an aesthetic function. Despite the fact that silk cannot harm a child’s scalp, this fabric should not be used to create a decorative item from it.
Satin as a common sewing material
How to take measurements
In order for the headscarf to be comfortable and fit beautifully, you need to take the measurements correctly. The head circumference is equal to the total length of the product including the elastic band. To determine the size of the main part (kerchief), you need to measure the distance from one ear to the other across the forehead. To the resulting figure, add 3 cm on each side. This is necessary so that the seams are not located on the ears and do not rub.
The difference between the head circumference and the size of the main part will be the length of the elastic. The drawstring needs to be made larger so that it gathers in beautiful folds. To do this, you need to add 4-5 cm to the length of the elastic band. The width of the scarf can be determined without taking measurements. Depending on the model and size, it can be from 20 to 50 cm.
Accessory modeling
After measurements have been taken and all materials have been selected, you need to decide on the choice of model. Scarves with elastic inserts come in two varieties: headbands and scarves. They differ not only in width. The headband is made of two layers of material; it can easily be twisted into a rope and used as a hair accessory. That's why girls often choose this model. The scarf is sewn in one layer. Its purpose is to protect your head from the sun.
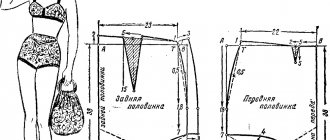
The elastic element can be sewn in different ways. Most often, the elastic is sewn into the drawstring and carefully attached to the ends of the scarf. There is no pattern for this accessory as such. You can draw it directly on the fabric. It consists of two rectangles. One wide one is the scarf itself, the other narrower one is the jumper for the elastic band. This is the simplest option that even an inexperienced needlewoman can handle.
The dimensions of the rectangles depend on the measurements taken. For a girl 2-3 years old, the scarf itself is made 20 cm wide, its length will be 25-30 cm. For an adult, the length starts from 35 cm, depending on the volume of the head, and the width can be up to 40-50 cm to cover the entire head . The rectangle for the elastic will be approximately 10 x 14 cm. When cutting, you need to add seam allowances (1-2 cm on each side).
The scarf can be made triangular. To do this, take a square piece of fabric and fold it diagonally. Then you need to measure the required length of the main part, the excess is cut off from the sharp corners, and a drawstring will be sewn in this place.
We sew a scarf-bandage
This master class describes in detail how to sew a wonderful scarf with an elastic band in the form of a headband.
Let's prepare the fabric and matching threads, scissors, 2.5 cm wide elastic band, measuring tape, ruler, and chalk.
Since we will be sewing in the form of a bandage, the main fabric will have a rectangular shape. We take measurements and determine the length of the rectangle.
Related article: How to quickly clean up your entire apartment
Subtract 13 cm from the length of the head circumference for the jumper. To the resulting value add 2 cm for seam allowances (1 cm for each side). This is how we got the length of the rectangle. 44 - 13 = 31 cm. 31 + 2 = 33 cm.
The length of such a scarf can be from 24 to 30 cm. Select the length of the scarf we need, add 2 cm to the seams and get the width of the rectangle. 24 + 2 = 26 cm. We get a rectangle 33 × 26.
Now let's move on to the jumper. The length of the rectangle for it is chosen to be rectangular. It should be longer than the elastic band. The width of the elastic is 2.5 cm. This means that the fabric needs to be calculated as two widths + seam allowance + a few millimeters for fit. We build a rectangle 34×7.5.
Now, using a chalk and a ruler, draw two rectangles on the fabric and cut them out. We will also cut 15 cm (13 cm in finished form and 1 cm for the seams on both sides).
We sew a jumper.
Fold the rectangle lengthwise face to face. On the fold side, place an elastic band 1-2 mm from the edge. And we begin to sew together the edges of the rectangle a couple of mm from the edge of the elastic band.
The workpiece must be turned right side out.
Then you need to insert the elastic into the jumper blank and gather it so that 1 cm of elastic is visible.
Let's move on to the fabric of the scarf.
The long sides of the rectangle need to be hemmed. Fold the edges twice, 0.5 cm on each side. Now we rebuild the folded part 0.3 mm from the edge.
We also rebuild the twice-folded second edge of the rectangle.
Sew on the jumper.
Place the rectangle with the wrong side up. Place a jumper in the center of the raw edge so that the edge of the elastic (1 cm) overlaps the edge of the canvas. The jumper should lie seam up.
Related article: Weaving baubles from floss threads for beginners with photos and videos
You need to carefully form folds over the elastic. We do this alternately on each side.
Then you need to very tightly fix the folds on the elastic with several lines.
We bend the raw edge of the jumper fabric inward by 0.5 cm.
We put it on the sewn edge of the scarf up to 1 cm from the stitching.
We rebuild one side of the jumper 1-2 cm from its edge.
We sew the other side of the jumper in the same way. And you get a scarf-bandage with an elastic band.
If there is a desire, we attach the decor.
This is how easy it is to sew a wonderful scarf.
Sewing stages
Sewing a scarf with an elastic band is very simple, so you can easily make several of these accessories for the summer. Following the step-by-step guide for the first time, in the future you can do everything without instructions:
- First you need to cut the fabric. Two rectangles are cut out, the wide side of which must be placed along the longitudinal line of the fabric. Their size is determined by the measurements taken. Be sure to allow for seam allowances.
- Finish the edges of a large rectangle. You can simply fold the fabric twice. Sometimes a decorative stitch is made or lace is sewn on the front edge.
- The second rectangle needs to be folded with the right sides along the long part and stitched. Then turn it out. If the elastic is wide, it is simply inserted. If you use two narrow elastic bands, you first need to stitch the part in the middle. You will get a double drawstring.
- After inserting the elastic, the drawstring must be sewn on both sides. First, you should stitch one side, not forgetting to grab the elastic itself. Then, having gathered the part into folds a little, you need to sew it up on the other side.
- Now you need to make folds on the scarf itself. You can simply gather the fabric onto a thread or make arbitrary folds. To make the headdress look more beautiful, it is advisable to make them the same on both sides, the width of the drawstring. Next you need to stitch the folds, sewing on the elastic at the same time.
- Do the same on the other side. After this, the finished product must be turned out and ironed.
For a scarf, you should take brightly colored fabric
Pattern of parts
All sides of the parts must be processed
An elastic band is inserted into a small rectangle
The scarf parts are ready, now they need to be assembled and sewn
Sewing methods
Before sewing a children's headscarf, you need to decide on the style of the product. For a small child, it is best to create a product that has an elastic soft knitted insert around the entire head surface. The thing is able to hold on well, not slip, and absolutely not put pressure on the child’s skin.
The second sewing option is a simple cotton scarf with an elastic band at the back, which is inserted into the fabric with the main part. At the same time, it is sewn into the material, and the fabric strip with an elastic band is gathered.
Note! Older girls can wear a bandana. Today this is a popular type of scarf with a knitted elastic band. You can gather the material and wear it as a bandage. When the fabric is straightened, you get a knitted type of scarf that covers the entire crown of the head. An elastic band of this type is sewn in a larger size.
Options for sewing a scarf
The easiest option
If the child is not used to wearing a scarf in the summer that has knotted edges, like a French scarf or hat, and the mother does not have a sewing machine, then the easiest option is to insert an elastic band. All you need to do is take a purchased model and cut off the sharp edges evenly. Next, attach an elastic band that would connect several ends together.
You may be interested in this: Making a terry robe with personalized embroidery
Pattern of the easiest option
To do this, you can simply sew it on by folding the scarf edges several times from the inside out. You can simply hide the tape in a fabric tube. The seams go inside.
Ready product
Summer scarf with elastic band
To step by step create a light summer scarf with an elastic band for a year old girl, girl and woman, you need to take cotton fabric, cut the fabric with a size of 25 by 25 centimeters and fold it diagonally. Iron for evenness. Next, cut the part into several triangles. The leg of one of them needs to be treated with braid. Then place both parts facing each other. From the wrong side, sew lines with braid.
Diagram of a summer model with an elastic band
Then turn the fabric inside out. Next you need to work with the elastic band. Measure a strip of fabric 6 centimeters wide and fold it in half from the wrong side. Then stitch the edges and turn the fabric back right side out. Sew the parts to the fabric and the scarf is ready.
Finished summer product
Sewing scarves for kids
The smallest ones can have such a model, which can be sewn according to the drawing below. To make it, you need to take a thin cotton main fabric and a knitted strip for the elastic band near the headband. The main one is divided in half. A pattern is formed from this part. A lapel can be made or tailoring can be done without one. Then the product will be lighter and thinner. The length and height of the pattern can be changed depending on the circumference of the baby’s head.
After cutting, it is necessary to process the fabric edges using an overlocker. Using a soft centimeter, the head part near the forehead and the back of the head should be measured. A rectangle is cut out, the length of which corresponds to the measurement, and the width is twice as wide as the future elastic band.
Scarf pattern for kids
After this, you need to fold the rectangle in half and sew the material lengthwise. Then turn right side out and iron well. All you have to do is try it on and adjust the size if necessary.
Ready-made model for a child
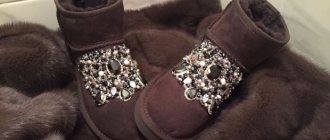
How to decorate
The right color of a scarf can highlight a woman’s individuality, her elegance and attractiveness. Usually this accessory is an accent, so it is made of bright colored fabrics. The shape of the scarf can also be different. A narrow strip decorates and supports the hair, a wider one covers the head. The headdress may have a sun visor. Such models are more in demand for girls.
Adult headscarves are usually made without decorative elements; they themselves are a decoration due to their unusual shape and high-quality materials. It is usually recommended to color match them with other accessories or shoes. For children, it is appropriate to additionally decorate the headdress. If the scarf is sewn from a plain fabric, the decor can be bright. Rhinestones, beads, sequins, embroidery are suitable. Three-dimensional decorations are popular – felt appliqués, knitted flowers. A colored headscarf can be decorated with plain lace or braid.
A headscarf with an elastic band is a comfortable and stylish headdress for girls. But recently this accessory has become fashionable among women. With its help you can create a unique image. Moreover, sewing such a scarf is very simple, even a beginner can do it.