by Alexey | Crafts Vintage For Friends Gifts For Loved Ones Decor For Men For Women Workshop Cheap Accessories | Sunday, March 30, 2014
| Follow Make-Self.net on Facebook and be the first to read our articles. |
Leather is a rather interesting and elegant material. We have collected 15 original decor ideas using old leather. All of this can be done yourself, so if you have enough leather belts or leftover leather, you should consider creative remodeling: making a handbag, plant pots or door handles. It's pretty simple! Enjoy...
Leather bag
Interesting idea for a leather bag from Matt. Can be used to store second breakfast, cosmetics or other things.
How to install fittings on leather products
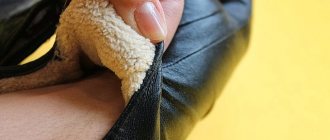
Any handmade leather item must be decorated with fittings. Large metal rivets and buttons, buttons, blocks, locks greatly decorate leather goods. Buttons are sewn to the skin only if there are buttons on the wrong side. Before punching holes for the buttons, they are strengthened either with pieces of leather or with thick adhesive fabric. Installing buttons requires a special tool.
You can get by with homemade devices, but this installation method produces a lot of waste, then purchase more buttons than required. Before installing a zipper into a leather product, you should secure it. Instead of basting with thread, adhesive tapes or glue are used. Sometimes even ordinary paper clips can “help”. The edges of the cut skin areas are glued with special skin enhancers (tapes). On one side, a weak adhesive is applied to such a tape. The puncture with a needle leaves holes, so the seam is done only once. As a last resort, a seam is laid along the old holes.
Leather plant pots
Designsponge told us how to make our own leather plant pots. Download the template and follow the steps shown in the photos.
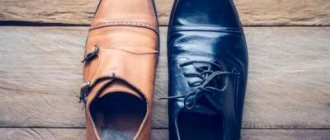
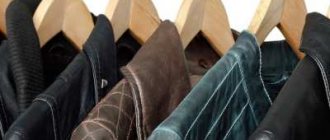
What can be made from old leather clothes?
An excellent question, because not everyone would risk getting rid of a good quality leather item. And why? Customization is becoming more and more in demand and popular every year. And I perfectly understand those people who, for various reasons, cannot part with their old, but very beloved things.
Leather items are a completely separate topic. In my opinion, a quality leather item will last longer than we could ever imagine. To do this, it is enough to simply redo this thing slightly, breathing into it a new, fresh note, so to speak.
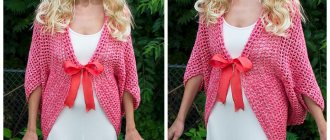
For example, from a very large leather jacket you can sew a women's jacket of a smaller size, or a vest of any length, or a children's jacket, or even a small jumpsuit. To do this, just take any pattern you like. We carefully rip off the sleeves, work on the shelves, remove the lining, and then you can apply the pattern to the material. By the way, if a thing has a not very pleasant aroma (over time this can happen with leather products), then first you should remove the contaminated areas, dry it, and then put it in a tight bag and place fresh tangerine / orange / lemon peels there (but not the zest ). Keep the bag closed for one night. I assure you, the skin will acquire a unique smell.
**
You can also make quite a lot of gloves from leather items. The most varied styles - long, short, without fingers. You can decorate them to your taste. We will receive ultra-fashionable and stylish accessories, also original ones, that will serve you for several more years. For example, you can use this pattern:
Transfer it to the skin, do not forget to add a little to the allowances and cut it out. Lay the lines on a machine - it’s difficult and not so beautiful by hand.
*
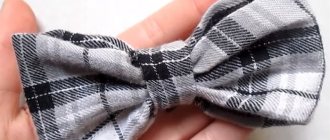
Leather belts and bracelets would be great. Amazingly beautiful flowers can also be made from leather. To do this, you will need to prepare any leather item by ripping and removing the lining.
Next, from cardboard, for example, we make a pattern of petals (if we are making a rose, chamomile, sunflower, etc.), the middle, then we transfer it to the material, cut it out and assemble all the parts using hot glue. Such flowers can be used to create brooches and bracelets. And they are also suitable as decorations for bags, berets, and hats.
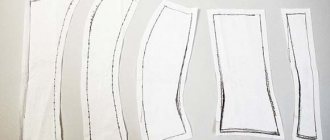
I like to use leather jackets or trousers and even leather boot tops to make bags and clutches.
In fact, there is nothing easier than sewing a clutch from unwanted old leather items. To do this, you need to select the optimal pattern, transfer it to the fabric, cut it, and sew it. By the way, if, for example, you are using an old raincoat or jacket, then you can not rip off the lining fabric, which will reduce time and make the work easier.
The seams on the clutch can be done by hand. Use some decorative stitch that you are good at to make it beautiful. The decor is at your discretion.
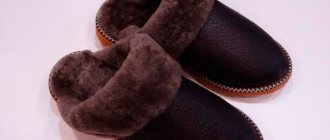
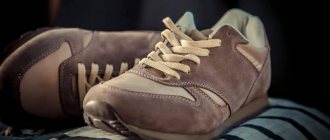
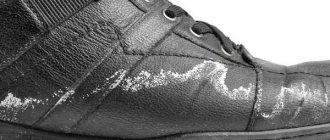
I think you've seen leather slippers on sale. So what’s stopping you and me from making such slippers from old leather things)?
It's simple. We need to print the pattern. There are a lot of them on the Internet, and you can easily choose the size you need by simply enlarging the picture. Next, use a piece of chalk or a piece of dry soap and trace the pattern onto the skin. Next we carry out the usual work.
*
Well, and, of course, you can make wallets of different sizes and designs, purses, and cases for smartphones/phones from leather items. And this product is even suitable for a gift if everything is done carefully.
Budget fittings. Leather handles
Tips for sewing genuine leather products
Some tips on how to sew and cut clothing items made of leather or suede. 1. Select patterns that do not require planting. Complex shapes in this case are easier to create using construction seams than using darts. In the past, tailors tried to use as few stitch lines as possible on leather goods. Currently, leather production has become thinner and softer and leather products have more seams; often even leather clothing or accessories are sewn from small scraps of leather.
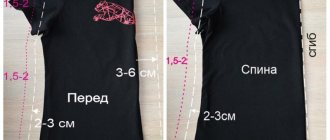
2. Kimono and raglan sleeves are easier to make when sewing leather clothes than set-in sleeves. If you are making a set-in sleeve, measure the increase in fit. It should be no more than 1.5 cm. It is better to make a sleeve cut like a shirt, as it has a looser armhole.
3. You must be sure that your patterns are correct. Therefore, it is good to use the pattern that you have already worked with. Or the prepared pattern should be checked on a mock-up made of non-woven material (non-woven fabric without glue) or inexpensive fabric, and only after that it should be marked on the skin and cut.
4. Before cutting the leather, mark holes and thin places on the wrong side of the leather so that you can avoid them when cutting. Carefully lay out the patterns, make sure that the paired parts (right and left shelves, right and left sleeves, etc.) are cut out in a mirror image. Mark contours, lines and marks on the underside of the skin with a ballpoint pen or soft pencil, or a special marking pen. Mark seam and hem allowances. Some marks can be made using notches or adhesive tape. The seam allowances should be the same width, which makes it easier to sew together the cut pieces.
5. Leather stretches in different directions in different ways, so when cutting it is necessary to maintain the same direction of paired and mating parts. When cutting suede, you must follow the direction of the pile. The pile should be directed from top to bottom.
6. The needle leaves puncture marks on the leather, so leather parts are not swept away and stitching seams are not ripped out. To pre-connect the parts, use adhesive tape or paper clips. There is also a special pencil for fixing seams. The pencil does not leave a mark on the sewing machine needle. By the way, glue is a certain problem when sewing. It clogs the eye of the needle, causing gaps in stitches and even thread breaks.
7. Use overstitched, overstitched or covered stitches. You cannot press or press seam allowances like you would on fabric. Instead, they can be glued with rubber glue or another, which remains elastic even after polymerization (drying). There are special adhesives, as well as NT 2 glue. If you don't have glue, machine stitch the seam allowances in position.
8. It is recommended to use a special interlining for leather LE 420 as a gasket, which is glued with an iron.
9. The fastener is made with a zipper, loops (stitched, overcast and hinged) and buttons. The buttons must be riveted. They are installed in hardware installation workshops.
10. If you do not have such a convenient tool as in this photo, then smooth the seams with the handles of scissors. First, place the seam allowances from the inside out using short taps and smooth them out. Then do the same on the front side with the seam groove.
11. Working with leather involves ironing the leather with a non-hot iron without steam through a dry cloth from the inside of the product. Before ironing the item, try it on a small piece of leather. Ironing leather is not recommended because the hot sole of the iron can cause the leather to change its properties, become stiff and shrink in size. But sometimes when working with leather it is necessary to put an adhesive pad. Then you need to iron very carefully and always only on the wrong side, placing an iron pad under the sole of the iron.
Leather bracelets
Master Class
Master Class
Master Class
Master Class