What colors are used to paint on clothes? What material is suitable for working with them? Acrylic paints are ideal for applying to fabric and leather. How to fix a drawing? How to draw and paint on clothes correctly so that the images do not fade longer and retain their original appearance? To do this, you need to learn about the techniques and features of working with such paints on fabric.
Advantages
Many artists decide to paint with acrylic paints based on their advantages, which include:
- rich assortment, availability;
- safety in use;
- the ability to use water as a diluent;
- water resistance of the coating of patterns on fabric (can be soaked and washed);
- Resistant to machine wash.
In addition, acrylic paint is suitable for creating multi-colored patterns because the pigments mix easily, allowing you to create new shades.
The technology for drawing on fabric looks like this:
1. Wash and dry the item thoroughly, iron it - it’s easier to draw on clean clothes, and the design will be more durable.
2. Stretch the piece of fabric on which you will draw onto the base. The main thing is not to tighten too much, otherwise the pattern will turn out wrong (we usually wear T-shirts loosely, not tight, and, moreover, not pulled tightly over the torso).
3. Cut out a layout of the future drawing from thick cardboard (note that the size of the base should be larger than the size of the future drawing). Cover the base with fabric and secure it in the desired position with pins. This technology is also convenient because the paint will not be printed on the second layer (for example, if you apply a design to a T-shirt only on the front or only on the back).
As you can see, everything is not so complicated. Choose an item, prepare it for work, buy brushes of the desired softness and diameter (their choice is a matter of taste) and start creating a unique decor. It’s easy to feel like a real master artist. You may not be able to create a unique masterpiece the first time, but mastery will definitely come with experience. However, the technique of drawing on fabric is not particularly difficult - just do everything in accordance with the instructions, then the result will not disappoint you. Learn to draw on clothes - and you will no longer want to buy factory-made products with ready-made designs, like everyone else. Go for it, and everything will work out for you!
Back Next
Fabric for work
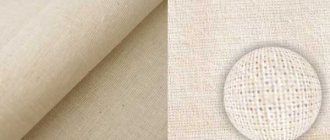
Is it possible to paint with acrylic on different fabrics? If we talk about choosing material for beginners, then it is permissible to use various textures for working with ordinary acrylic.
You can draw on any materials: thick textiles, denim, thin silk, cotton or linen.
But it should be remembered that the structure of the painted areas will have a denser texture than the rest of the canvas.
Acrylic wonders
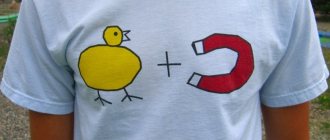
How to make a print on a T-shirt yourself if you don’t have a printer to print the design? In this case, the second method of creating exclusive images on clothes is suitable. Artistic skills or a special stencil will help you. If you are not particularly skilled at drawing, it is unlikely that you will be able to create a complex sketch, but everyone can add a dose of creativity to their wardrobe.
Do-it-yourself fabric printing can only be done with special acrylic paints. Working with them is not entirely easy, since you need to maintain a certain speed and technology:
- the paint dries within 15 minutes, later it will be impossible to fix anything;
- You need to apply a thin layer, otherwise the design will not dry and may smear.
If you strictly follow the instructions, then there should be no difficulties in this process.
How to make a print:
- it is necessary to prepare a stencil with an image or text;
- carefully iron the T-shirt or other item you plan to decorate;
- lay a solid foundation;
- fill the stencil with acrylic paint using a sponge;
- if necessary, correct the drawing with a brush;
- After 24 hours, iron the item through a thin cloth.
If you have talent and are passionate about creativity, then you can make an original drawing using a regular painting brush.
Preparatory work
Painting on fabric with acrylic paints requires some preparation. Before you paint, you need to do the following with the base material:
- immerse in cold water for one hour, then rinse under the tap;
- dry and iron with a warm iron.
If you paint on fabric with a fine texture (cambric or silk), it is advisable to stretch it on a wooden frame until it dries.
If you decorate a piece of clothing and draw on clothes, it is recommended to separate one layer from the other with cardboard or thick paper.
Painting clothes
I will try to tell you in as much detail and as clearly as possible how I draw on clothes. What materials will be needed?
- Acrylic paints for fabric. I use Decola brand paints.
- Brushes of different numbers
- Palette
- Container with water
- Napkins
- Thick paper
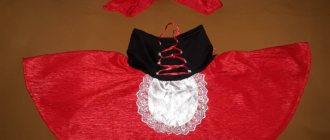
When choosing a product on which you want to make a design, pay attention to the quality of the fabric. The paint works best on thick cotton, various types of wool (with elastane), and smooth knitwear. It is important that the fabric is not “porous”, otherwise the paint will be absorbed too well and the design will not lie evenly. In this master class, I decided to make a drawing on a dress made of thick knitwear. The question immediately arises: at what stage should the drawing be applied? It depends on the type of product. If you want to draw something on some complex thing, then it makes sense to apply the drawing in advance to make it more convenient to work. In any case, you need to cut out the item of clothing on which you are going to draw and sew the darts (if any). I applied the design to the front half of the dress. That is, I had a cut out part, and not a finished item. Before you start drawing, place a sheet of thick paper under the material. Paint may bleed through from the reverse side. This is more relevant if you are already drawing on a finished product (for example, a T-shirt).
Next, select a drawing. You can draw anything, really))) I really liked the photo of autumn foliage... beautiful colors, and it won’t be very difficult to draw!
Draw the outline of the future drawing with a pencil. The main thing is to mark the position of the main elements; there is no need to “hang” on the details! If your fabric allows it (it’s transparent enough), you can print out the design, put it on the back side and trace the outlines with a simple pencil (like on a cotton T-shirt).
Decide which colors you need and pour a little of each paint onto your palette. In my opinion, red, yellow, blue, green, black and white (the most used) paints are sufficient. Shades can be obtained by mixing primary colors.
I think everyone is concerned about the question: Why do we need napkins!!! See that drop of paint on the can? If you don't get rid of it, then next time you won't be able to open the jar!
Start drawing from top to bottom. This way you won't get your hands and fabric dirty.
Draw the lower layers of the drawing first. For example: a green leaf lies under a red one and needs to be drawn first.
When you have painted the base, move on to drawing the details. Please note that the paint dries quite quickly, this can make it difficult for you to apply the design carefully and achieve soft transitions between shades of colors.
Traces of paint may be visible on the reverse side of the product. In my opinion it's not scary)
When you're done, let the painting dry for 3-4 hours (the paint can says much longer, but in reality you don't need to wait that long). To fix the design, you need to iron it through a layer of fabric. I use a thin towel.
We select the ironing mode according to the type of fabric. Time about 1−2 minutes.
After ironing, the pattern turns out soft and somewhat voluminous. This is the final option! Good luck to you!
Types of painting
There are the following techniques for painting with acrylic on fabric:
- hot and cold batik;
- free painting (with and without saline solution);
- shibori or folded batik;
- knotted batik.
Silkscreen printing
This method is essentially similar to the previous one. Only a special photographic emulsion is used as a dye. The paint penetrates the fabric through a screen mesh, dries, and then is exposed to light. The next step in creating your personal masterpiece is to rinse the stencil with water. In this case, the unexposed areas of the grid are cleaned, which become the printing element.
The advantage of this method of image transfer is that there are no restrictions on working with materials. You can use it not only on clothes, but also on dishes or plastic products.
Printing a T-shirt with your own hands will help you create a unique image and stand out from others. This is a fashionable and stylish way to update a boring item. All you have to do is choose a convenient and affordable method of transferring the drawing to the desired surface.
—Links
-News
-Video
-Music
—Photo album
—Quote book
What can be knitted from leftover yarn with knitting needles Every knitter usually accumulates over time.
Master class - New Year's village! Master class - New Year's village! Lost somewhere.
Oversized kimono cardigan with an interesting cropped collar style.
Puff pastries with cottage cheese - very tender Puff pastries with cottage cheese - very tender.
—Categories
- Here's an idea! (12)
- Author's things. (246)
- designer fabrics (25)
- history of costume (43)
- clothes (14)
- dresses/style/couture (31)
- painting, fabric dyeing (34)
- create crazy-wool, rapan (25)
- create a crazy quilt (21)
- handbags, jewelry, accessories, etc. (45)
- weaving (4)
- Author's dolls (304)
- witches/fairies, etc. (19)
- amigurami (18)
- puppeteers (104)
- create a doll (33)
- Beads, all (147)
- Boho style (115)
- Candy bouquets (66)
- Paper crafts (186)
- books, albums, open (31)
- useful (44)
- packaging (77)
- templates, stencils (23)
- We roll everything (68)
- toys (17)
- Videos (72)
- virtual toys (8)
- clip/cartoon (8)
- various videos (45)
- Various embroidery (145)
- Embroider with ribbons (45)
- Knitting (1640)
- bolero (15)
- mittens, mittens. (14)
- knit+fabric (18)
- kids (130)
- jacquard (42)
- magazines (11)
- umbrellas, napkins (24)
- Irish/Romanian lace (100)
- hook (222)
- coats, warm jackets. (75)
- useful for knitters (145)
- swing/patch/plot (45)
- knitting needles (214)
- bags (25)
- slippers, socks (46)
- crochet patterns (116)
- knitting patterns (80)
- sirloin (36)
- freeform (21)
- flowers, decorations (27)
- shawls, stoles (98)
- hats/berets (75)
- scarves of all kinds (105)
- hats (19)
- skirts (17)
- Wardrobe (140)
- accessories (22)
- Party dresses (6)
- clothing decor (21)
- clothes-like (21)
- stylist tips (28)
- Sage style (12)
- Bags (18)
- scarf, shawl (6)
- Hats (47)
- kokoshniks, crowns (9)
- hats/berets (12)
- hats (20)
- We decorate everything (8)
- Decoupage (38)
- For kids/knitting/sewing (128)
- ballroom, New Year's (20)
- baptismal (5)
- newborns (27)
- clothes (11)
- booties (42)
- hats (19)
- Domovyata and others (54)
- amulets, amulets (32)
- Health (103)
- Toys (185)
- bunnies (18)
- cats (24)
- dolls (27)
- cubs (17)
- other animals (46)
- souvenirs (43)
- stocking (13)
- Interesting, unknown (384)
- library (36)
- ALL together (139)
- online fortune telling (13)
- Interesting personalities (15)
- Parapsychology (81)
- psychotherapy (26)
- journey into a fairy tale (24)
- Baskets (23)
- DIY cosmetics (201)
- for hair (11)
- for arms, legs (9)
- perfume (6)
- masks, creams (53)
- masseur (17)
- soap (51)
- candles, aroma (30)
- Coffee toys (40)
- We sculpt from everything (160)
- sculpt (59)
- molds/cutters (9)
- papier-mâché (21)
- HF recipes, etc. (53)
- Fur, leather (87)
- all over the skin (10)
- fur knitting (15)
- fur knitwear (12)
- fur products (23)
- useful for fur (7)
- bags/fur-leather (5)
- fur flowers (12)
- hats (3)
- My dacha (147)
- useful tips (33)
- plant vegetables (22)
- homemade (10)
- Decorating the site (59)
- flowers on the site (8)
- berries, fruits (6)
- My works (46)
- Our house, interior (220)
- interior (26)
- organizers, etc. (36)
- furniture remodeling (20)
- comfort of home (90)
- busybody (44)
- Pets (clothes, houses) (27)
- Useful for the site (298)
- how to take photos (39)
- for beginners (61)
- programs to help (105)
- frames/pictures (29)
- tips for blogger (20)
- lessons from Lyubasha (25)
- Holidays (202)
- Valentine and March 8 (17)
- NG-Christmas trees (25)
- New Year/general (104)
- Easter (54)
- No-fuss recipe (466)
- drinks (34)
- Jam (12)
- casseroles, omelets, pancakes (9)
- Sauces (3)
- all kinds of sweets (35)
- baked goods with cheese (22)
- prepare dough and from it (37)
- blanks for use (37)
- to note (23)
- pies, pasties, etc. (31)
- miscellaneous (12)
- with chicken (14)
- Wine cellar (34)
- with meat (14)
- with fish (19)
- salads (2)
- cheese factory (11)
- cake, pastries, cookies (94)
- bread (10)
- All kinds of handicrafts (295)
- gifts, stuff (32)
- handicraft tips (117)
- Wedding/everything (255)
- glasses and bottles (15)
- bouquet of brooches (21)
- bridal bouquet/boutonniere (39)
- get inspired (18)
- car decoration (4)
- dresses (40)
- garters (4)
- pads for rings (16)
- rules/scenarios/signs (8)
- hairstyles and jewelry (11)
- wedding dolls (6)
- wedding things (71)
- Witch Power (59)
- Fairytale houses (34)
- Topiary (36)
- coffee tree, etc. (17)
- flower tree of happiness (14)
- Jewelry (201)
- bracelets (32)
- brooch (52)
- beads (13)
- witch (6)
- for hair (21)
- pendants (9)
- various (68)
- earrings (6)
- Floristry (259)
- fresh flowers (40)
- flower shop (29)
- leather/foam flowers (47)
- ribbon flowers (65)
- fabric flowers (81)
- Hobbies, business and PR (111)
- where/how to sell (12)
- necessary for a needlewoman (19)
- we draw up work (35)
- PR (8)
- creative workshop (27)
- pricing (2)
- Arts (120)
- drawing lessons (38)
- photo pro (31)
- Tea house (17)
- Sewing (275)
- corset (9)
- dresses/skirts (54)
- usefulness (74)
- bags (38)
- slippers (15)
- hats, etc. (19)
- we sew everything (50)
- Humor and cat (37)
Subtleties of painting technique
Painting with acrylic on different materials requires the following subtleties:
- Despite the fact that it is possible to dilute the contents of tubes with water, craftsmen often use solvents, since this has a better effect on the adhesive properties of acrylic.
- To protect the treated area of the material, polyethylene or oilcloth is placed under it.
- To make the pattern on the fabric clearer and acrylic to be applied more easily, it is preferable to use brushes with synthetic bristles. In this case, each subsequent layer must be applied when the previous one is completely dry.
- How to pin an image? Artists advise fixing the dye with an iron no earlier than 24 hours after application.
- Light shades are applied first, and each subsequent layer should be darker than the previous one.
How to paint clothes
If you want to not just paint the fabric, but apply some kind of design to the surface, use acrylic paints. It is important to strictly follow the technique of applying acrylic to fabric.
Methods of applying acrylic paints
Batik is hand-painted material using reserve compounds. These compounds act as fixatives on the borders of different colors. There are several batik techniques using acrylic paints:
- Hot batik using melted wax or paraffin. Requires certain knowledge and skills in dyeing techniques. The end result, after removing the wax, is a light or colored pattern on a bright background.
- Cold batik with reserve compounds. As a result of this coloring, a bright color pattern with clear contours is obtained. You can use stencils or your own sketches to create the image.
- Nodular. The dyeing technique involves tying knots directly from fabric or using threads and then dyeing them. After you untie the dyed knots, a characteristic pattern will remain on the material.
- Free. Similar to drawing pictures on canvases, it requires artistic skills.
- Using an airbrush. Helps to spray paint on the material as accurately as possible, unlike aerosol dyes.
Search for a sketch of a drawing
If you want to apply any design or ornament to the fabric, you can prepare a sketch in several ways:
- draw a picture yourself;
- print the image on a printer;
- Buy ready-made stencils at an arts and crafts store.
In any case, always try to prepare a sketch, even if you know how to draw well.
Transferring the sketch to the fabric
To apply a sketch to the material, it is most convenient to use carbon paper. Action plan:
- Place the product on a flat horizontal surface.
- Using pins, attach a carbon copy to the material, and the desired image on top.
- Use the back of a needle or a crochet hook to transfer the outline of the image onto the material.
If the fabric is light and thin enough, the pattern can not be transferred to the surface, but simply placed under the material.
Coloring the thing
To paint a product with high quality, follow the basic rules of the procedure:
- Be sure to place a piece of cardboard or plastic under the wrong side;
- to apply paint, use brushes, cotton sponges and sticks;
- dry the material in a horizontal position away from light and sources of artificial heat.
Subtleties and nuances of acrylic painting
To ensure a satisfying result, follow certain subtleties during the coloring process:
- Do not dilute the paint with water, otherwise the color will quickly fade and lose its brightness. To dilute the dye, use only special solvents.
- If you apply acrylic in layers, be sure to wait until the previous layer has dried before applying a new one.
- It is recommended to immediately apply lighter tones, and then darker ones. This is necessary so that if you apply a careless stroke, you can cover the inaccuracy with darker paint.
- Make sure that after rinsing there is no water left on the brush, which could cause a blot or stain.
- To wash your brushes, use a sippy cup, otherwise you risk staining the product with dirty water if you move your hand carelessly.
How to fix color
To ensure the durability of acrylic paint on the material, after all layers of dye have completely dried, carefully iron the product from the inside out with a warm iron.
If you dyed the material with aniline dye, it is better to rinse in water and vinegar to fix the color.